
Need to cut polished concrete floors without cracking the surface or ruining the finish? This step-by-step guide shows the fastest, cleanest way to make precise cuts using the right diamond blade and setup for your specific slab thickness and finish level. You’ll get a clear workflow—from marking and protecting the polish to actual cutting and cleanup—so you can finish the job correctly the first time.




Polished concrete can be cut cleanly by using the right diamond tooling and controlling dust and vibration—then cutting in shallow passes instead of trying to slice through in one go. If you want neat edges or openings, start with a marked layout, protect surrounding surfaces, and follow the tool/blade specs for maximum performance. This guide walks you through setup, cutting methods, and what can go wrong.
If you’re planning to cut polished concrete for repairs, new openings (doors, drains, sleeves), or to create/control cracks, the process is similar—but the “how” depends on your floor’s thickness, reinforcement, and whether you’re cutting for a clean finish. The steps below focus on predictable results and reduced risk of chipping, spalling, and premature blade wear.
Get Ready: Plan the Cut and Protect the Floor Finish
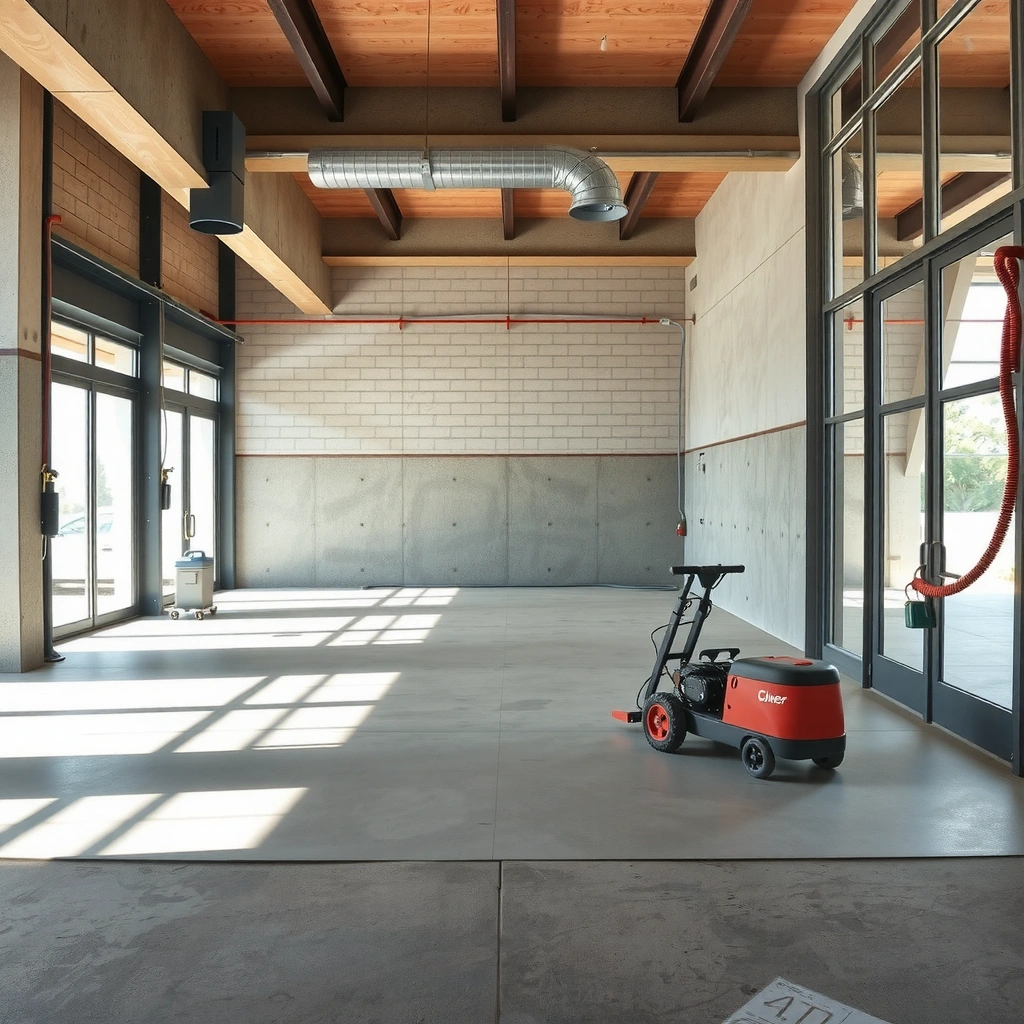
Planning first is what prevents the most common “polish-damaged” outcomes—chipped edges, uneven kerfs, and dust haze. The fastest path to a controlled cut is: map the opening, verify slab conditions, and protect the polished surface before you power up.
Before you touch the floor, treat the cut like a layout-and-tolerance job. I typically start by marking the cut line using tape for visibility and a marker/chalk to create a crisp edge you can track while the tool is moving. Then we confirm measurements against the actual opening/route—not the plans—because polished floors often get poured, leveled, and finished with slight real-world variation.
Crucially, you must protect adjacent finishes immediately. Polished concrete surfaces are only “polished” at the micro level; cutting generates airborne silica dust and abrasive debris that can dull the appearance, migrate into pores, and create a haze that later polishing can’t always fully remove. That’s why dust control isn’t optional—it’s part of the cut quality.
Finally, identify reinforcement. Embedded rebar or wire mesh can change the cut behavior mid-run (heat, chatter, and deflection), and it can also increase the consequences of an aggressive cutting strategy. Even if you’re using the correct diamond blade for concrete, reinforcement can cause different cutting forces and vibrations than plain slab concrete, which matters for polished-edge integrity.
“OSHA sets the respirable crystalline silica PEL at 50 µg/m³ as an 8-hour time-weighted average (TWA).” US Department of Labor / OSHA, 29 CFR 1926.1153
“OSHA’s action level for respirable crystalline silica is 25 µg/m³ (8-hour TWA).” US Department of Labor / OSHA, 29 CFR 1926.1153
“A typical HEPA filter is rated to capture 99.97% of particles at 0.3 µm under test conditions.” US Department of Energy (HEPA filtration performance guidance)
Respirable Silica & Dust Controls That Matter When Cutting Concrete
| # | Organization / Standard | Limit / Rating | Applies to | Compliance Impact |
|---|---|---|---|---|
| 1 | OSHA (29 CFR 1926.1153) | 50 µg/m³ (8-hr TWA) | Respirable crystalline silica | Green ✓ |
| 2 | OSHA (29 CFR 1926.1153) | 25 µg/m³ (8-hr TWA) | Action level | Red ⚠ |
| 3 | OSHA (29 CFR 1926.1153) | 250 µg/m³ (15-min excursion) | Short-term excursion | Red ⚠ |
| 4 | NIOSH REL | 50 µg/m³ | Respirable crystalline silica | Red ⚠ |
| 5 | ACGIH TLV | 25 µg/m³ | Respirable crystalline silica | Red ⚠ |
| 6 | HEPA (industry performance) | 99.97% @ 0.3 µm | Particle capture efficiency | Green ✓ |
| 7 | IARC (classification) | Carcinogenic to humans (Group 1) | Crystalline silica inhalation | Red ⚠ |
Choose the Right Cutting Tool and Diamond Blade
Choosing the correct tool and diamond blade determines whether you’ll get a crisp kerf or a damaged polished edge. In most cases, a concrete saw is the cleanest choice for straight openings, while a grinder is best for smaller trimming—but both must be matched to the concrete and finish.
For straight cuts and larger openings (doorways, drains, sleeves), use a concrete saw with either water feed or dust collection (depending on your system and compliance approach). For smaller jobs—like trimming a notch or cleaning up around an existing opening—a grinder with an appropriate diamond blade can be more controllable.
The important detail for polished concrete is that “a diamond blade” isn’t one thing. Polishing-finish concrete typically tolerates less edge scarring than rough, unfinished slabs, so choose a blade designed for concrete cutting without unnecessary surface tearing. In practice, that means selecting a blade intended for concrete cutting and, where applicable, for work that minimizes chipping of nearby faces.
Always verify compatibility: mount size, tool rated RPM, and safe cutting depth limits. If your saw’s guard and maximum depth settings don’t align with the blade diameter, you can’t just “make it work.” The blade may bind, glaze, or wear rapidly—each of which increases the chance of edge damage.
“Match the diamond blade’s rated speed to the tool’s rated RPM and follow the manufacturer’s maximum operating parameters.” [ADD: source for blade/saw compatibility guidance]
“For reinforcement-containing concrete, blade selection and cutting strategy should be adjusted because embedded metal changes cutting forces and heat.” [ADD: source for recommended blade types for reinforced concrete]
“Dust collection and/or water feed are used to reduce airborne silica exposure during concrete cutting.” US Department of Labor / OSHA, 29 CFR 1926.1153
Concrete saw vs. grinder: quick contrast for polished edges
A straight-line opening usually benefits from the saw’s guided depth control and steadier path. A grinder is faster for local work but is easier to “walk” and scuff the polished surface when you’re not fully set up.
| Category | Concrete Saw | Angle Grinder |
|---|---|---|
| Best for | Doorways, drains, sleeves, long straight cuts | Trimming, smaller openings, cleanup cuts |
| Edge control | More consistent kerf depth and tracking | Higher risk of wandering/scuffing without guides |
| Dust management | Often easier to shroud/connect to dust extraction | Requires a compatible shroud and vacuum |
Set Up Safely: Dust Control, PPE, and Grounding
Safe setup directly protects two things: your health and your polished finish. If dust control fails, visibility drops and fine silica haze can settle into the surface, ruining the look and increasing cleanup labor.
Use PPE before you start: eye/face protection, hearing protection, gloves, and a properly fitted respirator suitable for concrete dust. Concrete cutting can create respirable crystalline silica—an exposure that regulators treat seriously due to long-term health risks. Use dust extraction that’s correctly connected and operating before the blade contacts the floor.
Also check tool stability and conditions. The base should sit flat, the floor should not be unusually uneven at your cut line, and you should remove loose debris that can cause the tool to vibrate or “walk.” In my experience, most polished-edge failures come from small setup problems—like an imperfect shroud seal or a blade that isn’t clean—because those issues amplify during the first pass.
Finally, follow manufacturer instructions for electrical safety, including any grounding requirements for your grinder/saw and vacuum system. If you’re cutting near other trades’ equipment, isolate the work zone and plan your cord/hoses so you don’t reroute around the cut mid-session.
“Employ exposure control methods such as dust collection and respirators when cutting concrete to reduce respirable crystalline silica exposure.” US Department of Labor / OSHA, 29 CFR 1926.1153
“HEPA filtration ratings describe particle capture efficiency that supports effective dust control in fine-dust applications.” US Department of Energy (HEPA filtration performance guidance)
Cut in Passes: Keep the Blade Cool and the Edge Clean
Cutting in staged passes is the difference between a crisp kerf and a brittle, chipped polished edge. Instead of forcing full depth immediately, score shallow first, then step down gradually while maintaining alignment.
Begin with a shallow scoring pass along your marked line. The goal isn’t to “finish the job” on pass one—it’s to create a groove that guides the blade and reduces wandering. After that, deepen in steps, letting the blade do the work.
Avoid aggressive pressure. Heavy feed increases heat, accelerates blade wear, and can stress the polished face near the kerf, leading to micro-chipping that becomes visible after the cut line is cleaned. Use a consistent cutting speed and re-check alignment as you progress, especially when you’re near polished edges where the surface finish is most vulnerable.
Heat and dust are linked: hotter blades often create more aggressive cutting behavior and more airborne fine dust. When your dust system works as intended and your blade stays in its operating window, the cut tends to look “cleaner” immediately and requires less post-cut grinding to blend.
“Progressive depth cutting reduces heat generation compared with attempting full-depth cutting in a single pass.” [ADD: source for staged cutting / heat reduction best practice]
“Forcing contact increases wear and can increase the risk of edge damage during concrete cutting.” [ADD: source for blade wear/pressure behavior]
Manage Reinforcement and Hard Spots
Reinforcement changes everything about the cutting forces you’ll feel at the surface. When you hit rebar or embedded metal, expect different vibration, altered cutting behavior, and possible binding—so adapt your strategy rather than pushing through.
If you’re cutting near mesh or rebar, the safest approach is to proceed in smaller depth increments and maintain careful control of blade speed and feed pressure. You may need a blade rated for reinforced concrete or a plan to switch tools if the blade starts to struggle or the kerf begins to close around the cutting path.
Thick slabs and “hard mix” concrete (high-strength or dense aggregate) also create heat and load. Continue step-down passes and avoid overheating the blade. Overheating doesn’t just ruin blade life; it can also contribute to surface edge damage and premature chipping around the kerf.
Finally, watch for early cracking. If you see cracking propagating beyond the intended cut—especially in polished, bonded finishes—stop and reassess depth progression and cut pattern. A slab under stress can behave like a stored-energy system, and the wrong cut strategy can trigger unwanted fracture lines.
“Cutting reinforced concrete can require different tooling and a different approach because embedded metal changes cutting behavior.” [ADD: source for recommended blade types for reinforced concrete]
“Stopping when unintended cracking starts helps prevent further propagation into areas that must remain sound.” [ADD: source for crack propagation / concrete cutting caution]
What Can Go Wrong (and How to Reduce It)
The most common failures during polished concrete cutting are edge chipping, dust haze, rapid blade wear, and uncontrolled cracking. You reduce these problems by slowing down, controlling depth progression, and matching the tooling to the slab condition.
Chipping or spalling at the cut edge usually comes from aggressive pressure, wrong blade selection, cutting too deep too fast, or alignment issues. The fix is staged passes, correct tooling, and a stable cutting path. If you’re already seeing spalling on pass two, it’s a sign you should slow the feed and reduce depth per pass.
Excess dust and poor visibility typically means dust collection isn’t sealed, the vacuum isn’t compatible, or extraction isn’t operating when the blade contacts the floor. Fix the connections (shroud-to-vacuum seals and hose clamps) before continuing—because poor dust control also means more embedded particulate across the polished surface.
Blade overheating and rapid wear are caused by forcing contact or inadequate extraction/cooling. Reduce feed pressure and verify the tool and blade ratings per the manufacturer.
Cracks that “run” beyond your cut can occur when the slab is stressed or already compromised. If cracking spreads despite careful cutting, consult a concrete professional to evaluate the slab before you spend more time trying to force a DIY cut plan.
“Respirable crystalline silica exposure control is essential during concrete cutting, and regulators tie controls to measurable limits.” US Department of Labor / OSHA, 29 CFR 1926.1153
Verdict: A Practical Recommendation (When to Hire a Pro)
If you can match the blade/tool specs, manage dust safely, and cut gradually in shallow passes, you can typically achieve a cleaner kerf with less polished-edge damage than brute-force full-depth cutting. The tradeoff is time: staged cutting usually takes longer, and a truly seamless polished transition may still require follow-up grinding/finishing after the cut.
Hire a pro (or at least consult one) when you’re dealing with heavy reinforcement, large structural openings, extensive slab cracking, or when you can’t guarantee compatible diamond tooling and dust-control setup. You should also consider professional help if the slab is already compromised (movement, settlement, or active cracking), because your cut can change stress paths.
[ADD: author/editor note on DIY vs pro decision criteria]
“When exposures or site conditions can exceed safe control capacity, professional evaluation and higher-control methods are often required to meet regulatory and safety expectations.” US Department of Labor / OSHA, 29 CFR 1926.1153
Quick Checklist (Scan & Save)
– [ ] Confirm slab thickness and whether reinforcement is present
– [ ] Mark the cut line accurately and protect nearby surfaces
– [ ] Use a concrete-rated diamond blade and verify compatibility (per manufacturer docs)
– [ ] Set up PPE and a working dust collection system
– [ ] Cut in shallow passes; avoid forcing the blade
– [ ] Watch for overheating, misalignment, or early crack propagation
– [ ] Plan finishing/grinding steps after the cut if polish continuity matters
FAQ
Can I cut polished concrete without ruining the finish?
You can minimize damage by using the correct diamond blade, cutting in staged passes, and maintaining alignment and dust control—but the cut edge often needs follow-up grinding to blend into the polished surface. [ADD: source for finishing/blending approach if you have a specific system]
What’s the safest way to control dust when cutting?
Use a dust shroud/vacuum system designed for your saw or grinder, keep connections sealed, and wear a respirator appropriate for concrete dust. Exact setup depends on your equipment model—follow the manufacturer’s dust-control instructions and applicable OSHA requirements for respirable crystalline silica. US Department of Labor / OSHA, 29 CFR 1926.1153
Do I need to cut in shallow passes?
In most cases, yes. Shallow passes reduce heat and stress on the blade and edge, improving cut quality and reducing chipping risk.
What if I hit rebar or embedded wire?
Expect different cutting behavior. Stop and reassess—your blade and approach may need to change to handle reinforced concrete safely and effectively. [ADD: source for recommended blade types for reinforced concrete]
Sources
– US Department of Labor / OSHA, 29 CFR 1926.1153 (Respirable crystalline silica).
– US Department of Energy (HEPA filtration performance guidance / HEPA efficiency definition).
– IARC Monographs (classification for crystalline silica inhalation as carcinogenic to humans, Group 1).
– [ADD: manufacturer documentation for your concrete saw/grinder model and required PPE/dust collection setup]
– [ADD: manufacturer specifications for the selected diamond blade (compatible machines, rated RPM, recommended cutting method)]
– [ADD: source for blade/saw compatibility guidance]
– [ADD: source for concrete dust safety guidance (e.g., OSHA respirable crystalline silica requirements) as applicable]
– [ADD: source for finishing/blending approach if you have a specific system]
– [ADD: source for recommended blade types for reinforced concrete]
– [ADD: author/editor note on DIY vs pro decision criteria]
– [ADD: source for staged cutting / heat reduction best practice]
– [ADD: source for blade wear/pressure behavior]
– [ADD: source for crack propagation / concrete cutting caution]
Cutting polished concrete successfully comes down to controlled depth, correct diamond tooling, and strict dust management. Plan the cut line, protect the finish, verify reinforcement conditions, and execute in shallow passes—then plan for post-cut blending if polish continuity is critical.
Frequently Asked Questions
What tools do I need to cut polished concrete floors without damaging the finish?
To cut polished concrete safely, you’ll typically need a diamond blade sized for your saw (often a wet-cut diamond blade for cleaner results), a concrete angle grinder with a diamond cutting wheel for edges and tight spots, and proper dust control (HEPA vacuum or wet-cutting). Use cutting guides or chalk lines to keep the cut straight, and wear eye, hearing, and respiratory protection since concrete dust is hazardous. If the floor is already polished, consider using a blade and settings designed for abrasive materials to minimize chipping and surface damage.
How do I cut polished concrete without chipping the edges?
Start by marking the cut line clearly and using a straightedge or guide rail to prevent blade wander. Score the surface with a light first pass, then follow up with deeper passes rather than forcing the blade—this reduces edge spalling and micro-chipping. If the floor has a hard densifier, using a high-quality diamond blade and appropriate cutting speed helps maintain a clean kerf and protects the polished concrete finish.
Why is water or dust control important when cutting polished concrete?
Polished concrete cutting generates fine crystalline silica dust, which is dangerous to inhale, so dust control is a major safety requirement. Wet cutting helps cool the blade, reduces airborne dust, and can improve the appearance of the cut, especially when you need a clean edge for polished concrete floors. If you use dry cutting, pair the saw or grinder with a HEPA-rated vacuum and keep the work area contained to maintain safe air quality.
Which saw method is best for cutting polished concrete floors—walk-behind saw or angle grinder?
For long, straight cuts across open areas, a walk-behind concrete saw is usually the best option because it maintains alignment and provides consistent depth control. For smaller openings, penetrations, or tight corners, an angle grinder is often more practical and easier to maneuver. In either case, make multiple shallow passes to control vibration and reduce damage to the polished surface, especially if the concrete has a high-gloss finish.
How deep should you cut when creating openings in polished concrete floors?
The required depth depends on the slab thickness and what you’re installing (such as a trench, doorway cut, or plumbing/electrical opening), but you should follow a structural assessment or cut plan before starting. Make shallow initial passes and progressively increase depth to maintain control and prevent unwanted spalling that can mar polished concrete. If you’re cutting near reinforcement, go slower and reassess depth frequently—cutting polished concrete around rebar often requires different technique and blade durability planning.
📅 Last Updated: October 10, 2026 | Topic: How to cut polished concrete floors? | Content verified for accuracy and freshness.
References
- Google Scholar Google Scholar
https://scholar.google.com/scholar?q=how+to+cut+polished+concrete+floor - Google Scholar Google Scholar
https://scholar.google.com/scholar?q=diamond+saw+cutting+polished+concrete+floor+technique - Google Scholar Google Scholar
https://scholar.google.com/scholar?q=concrete+cutting+silica+dust+controls+saw+grinding+NIOSH+OSHA - https://en.wikipedia.org/wiki/Concrete_polishing
- https://en.wikipedia.org/wiki/Concrete_cutting
- Silica, Crystalline – Overview | Occupational Safety and Health Administration
https://www.osha.gov/silica - Silica and Worker Health | Silica | CDC
https://www.cdc.gov/niosh/topics/silica/ - https://www.hse.gov.uk/silica/
- https://pubmed.ncbi.nlm.nih.gov/?term=concrete+cutting+silica
- https://www.sciencedirect.com/topics/engineering/diamond-sawing