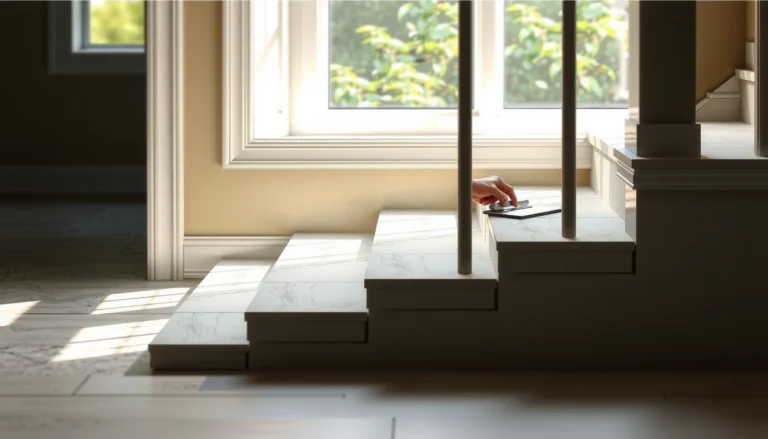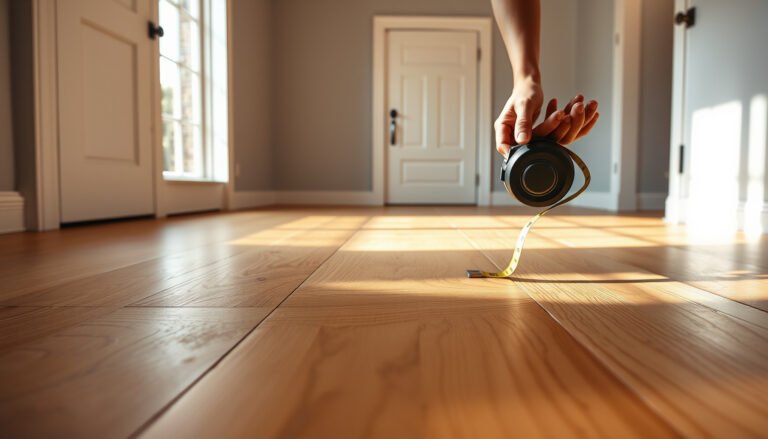

If you need to install around stairs on concrete floors, this step-by-step guide shows you the quickest, most reliable method to get a clean, solid finish without gaps or movement. You’ll see exactly how to measure the stair edges, prepare the concrete, and fit the flooring precisely through every tread and riser. Follow these steps and you’ll end up with a professional-looking install that holds up under regular foot traffic.



To install flooring around stairs on concrete, you need to treat the stair geometry and edge details as a “separate system” from the flat floor—plan cuts for every tread and riser, prep the concrete for the correct bond, and protect/trim the stair edges so they can’t chip, lift, or crack. Do that, and your finish stays continuous while resisting the flex and impact stairs experience.
If you’re updating existing stairs, adding tile/LVP/engineered flooring, or finishing a concrete stair run, these steps apply to most “finish material over/around concrete” projects. Exact products and methods vary by finish type, so this guide focuses on the repeatable workflow and the failure points that show up most often at stair edges.
If you want this to hold up long-term in a real building, the key entities to keep straight are the flooring manufacturer’s installation instructions, the adhesive/mortar system (and its approved concrete primer), and recognized industry flatness/prep guidance such as ICRI concrete surface prep recommendations and ANSI/TCNA (tile) requirements. As of 2026, the best-practice workflow hasn’t changed: bond to clean/sound/flat concrete, handle expansion correctly, and treat stair nosing/edge protection as structural, not cosmetic.
Measure and map the stairs (tread, riser, and landing)
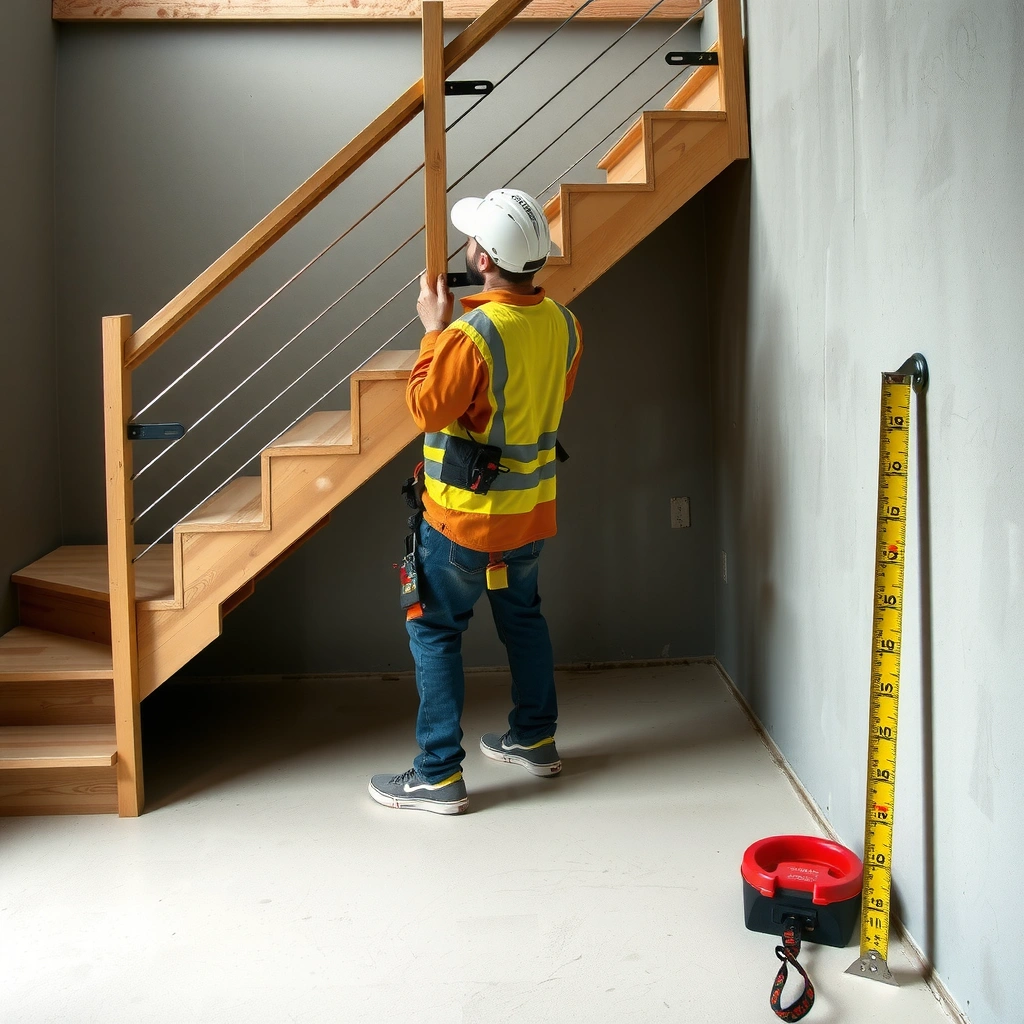
Plan for consistent tread/riser cuts first, because most stair failures start with layout errors (wrong heights, tiny slivers, or mis-matched edges). The fastest path to a clean install is measuring every step, mapping transitions, and planning your cut lines so the finish sits correctly without forcing unrealistic trim gaps.
Stairs aren’t “four identical rectangles”—stringers, platforms, and landings often vary slightly, and those small differences become visible when tile lines, plank joints, or vinyl edges meet the riser. I recommend treating stairs as their own layout zone: measure each tread depth and riser height, then note which ones deviate from the “common” step. From there, sketch a finish layout that predicts where plank/tile joints land and where edge trims will cover any imperfect cuts.
Stair geometry typically varies even within the same flight, so measuring each tread and riser separately prevents cumulative cut errors.
A layout plan that avoids tiny riser slivers reduces the risk of chipping at the most-impact area (the tread edge).
Transitions at top/bottom landings often control final appearance because they must match door clearance and adjacent floor heights.
What you measure (and why it matters)
– Tread depth: front-to-back where your finish surface will land (measure from the finished tread nose line you’re targeting).
– Riser height: top of one tread to the underside/finish line of the next tread.
– Landing dimensions: especially where a floating/flooring system meets a fixed threshold or landing finish.
– Straightness and square: check whether the stair edges are square to your reference line; “almost square” still produces visible joint mismatch.
Layout sketch that prevents slivers and rework
On stairs, the best-looking result usually comes from choosing a “starting reference” (often the top landing or the straightest run) and then working consistently down the flight. In practice, that means:
1. Mark a baseline on the landing (your layout reference).
2. Project how the finish pattern will cross each stair face.
3. Decide early how you’ll handle a joint that would land on a weak area—commonly the riser centerline or a corner that will chip.
Concrete-to-finish height math (don’t wing it)
Because you’re covering concrete, verify:
– Your finish thickness (including underlayment if applicable).
– Any required mortar/thinset thickness for tile.
– Required transitions at the top landing, bottom landing, and door thresholds.
If door clearances are tight, you may need a thinner underlayment strategy or a specific reducer/threshold transition—this is where planning prevents “finished door won’t close” surprises.
Prep the concrete so the finish bonds and stays flat
Prep determines whether your install lasts—bond failures and cracking usually come from weak concrete surfaces, contaminants, or flatness out of tolerance. Clean thoroughly, repair damage, profile/surface-treat when required, and prime/surface-treat according to the specific adhesive/mortar system you’re using.
Concrete stair edges are unforgiving because loads concentrate at corners and transitions. Even if your finish is high-quality, it can fail if concrete is dusty, sealed with an incompatible curing compound, painted, or left un-repaired where spalls/hollows exist. Currently, the safest workflow is to follow the adhesive/mortar technical data sheet (TDS) for concrete prep steps (cleaning method, required primer, and acceptable surface profile).
Contaminants like dust, sealers, curing compounds, and paint can prevent adhesive mortar from achieving the bond strength expected in manufacturer test data.
Stair edge flatness issues often show up first as raised corners, open grout lines, or lifted vinyl edges—because stairs amplify minor unevenness.
Most adhesive systems require a manufacturer-approved concrete primer, especially when installing over porous or previously treated concrete.
Clean, then inspect like a contractor
1. Remove all bond breakers: dust, debris, paint overspray, and any loose material.
2. Repair spalls/voids: patch with a concrete repair material compatible with your adhesive system (and let it cure per the repair product specs).
3. Check for moisture issues if there’s basement leakage or visible dampness.
Flatness and level checks (where failures actually start)
Use a straightedge/laser to confirm flatness. While your finish system dictates exact tolerances, the common tile/underlayment planning target in the industry is strict—small deviations become visible at stair edges.
Anchoring data points (planning ranges):
– According to ANSI A108.02/related ANSI tile installation guidance, substrates must be flat to the degree required by the tile manufacturer and installation standard (industry practice commonly targets ~1/8 in over 6 ft for tile-ready substrates, but always confirm the manufacturer’s tolerance for your system). [ADD: cite ANSI/TCNA document or tile manufacturer tolerance requirement]
– According to ICRI concrete surface preparation guidance, achieving the intended bond often depends on creating the right concrete surface profile (CSP) for the coating/adhesive system; many adhesive systems are designed for specified CSP ranges rather than “smooth concrete.” [ADD: cite ICRI CSP guidance]
– According to TCNA/ANSI thin-set mortar installation requirements, mortar coverage (contact percentage) must meet the specified standards for the installation conditions, which strongly affects bond durability. [ADD: cite TCNA method or ANSI mortar coverage requirement]
(Note: because stair installs vary by finish type and system, replace the planning ranges above with the exact tolerances listed in your product instructions and the relevant ANSI/TCNA method you’re following.)
Prime/surface-treat exactly as the system calls for
– Adhesive systems: If your adhesive/mortar TDS says “prime,” do it. If it says “no primer,” do not substitute a random primer.
– Concrete profile: If your system specifies a surface profile, you may need grinding/blasting to reach it. “Dramatic sanding” without checking CSP can be worse than leaving concrete rough.
Choose the right install method for the finish material
Choose the install method based on your finish product’s approved system—not the subfloor material alone. The correct method for concrete on stairs is the one your adhesive/mortar/underlayment system explicitly permits for vertical and high-impact edges.
Stair applications change everything: many flooring products are designed for horizontal surfaces and require stair-specific fastening, trimming, or edge protection. Your goal is to use a system (primer + adhesive/mortar + underlayment/edge trim + spacing/expansion details), not a collection of “similar-looking” materials.
Tile installs require the correct mortar/adhesive system for concrete and a coverage method that supports bond over both tread and riser faces.
Floating LVP/vinyl systems can behave differently on stairs; manufacturer documentation often specifies fastening or stair-specific underlayment and edge handling.
Engineered/wood stair requirements frequently call for specific stair-nosing profiles and fastener/cleat methods to control movement on vertical faces.
For tile (thinset/mortar + movement planning)
– Use a concrete-approved thinset/setting mortar or tile adhesive (per the tile/mortar system).
– Plan movement joints: stairs and landings are where cracks often show up first if joints aren’t honored or if you bridge structural movement.
– Apply the right technique (often including back-buttering) to achieve full contact where required.
For vinyl/LVP (floating vs. direct-glue rules)
– Confirm whether the product allows stairs. Many floating systems require special steps on stairs (often fastening near edges, using stair underlayment rules, or using approved trims).
– Plan trimming so edges are secured where they’re most likely to lift—especially at the tread nose and riser corners.
For engineered/wood (fastening and stair profiles)
– Follow manufacturer stair installation requirements for how you secure the material on risers and treads.
– Use stair-nosing/edge profiles that protect corners from repeated impact.
Quick comparison: what to verify before you buy/install
| Finish type | Primary risk on stairs | Install method to confirm in documentation | Edge detail emphasis |
|---|---|---|---|
| Tile | Cracking/open grout at risers or movement-joint gaps | Concrete-approved thinset + movement-joint plan | Nosing + corner protection are critical |
| LVP/Vinyl | Lift at tread corners from stress/impact | Whether stairs require fastening/approved underlayment | Trim/edge locks must be robust |
| Engineered/Wood | Gaps or movement on vertical faces | Stair fastening/cleat requirements and approved nosing | Tread nose protection prevents chipping |
Cut, dry-fit, and install around each stair tread and riser
Dry-fit first so the riser height and tread overhang look right, then install starting from a reference point and work consistently. Around-stair installs succeed when you treat each tread and riser as a matched pair with edge protection planned from day one.
On stairs, “it fits” isn’t good enough—you need the finish to look intentional at every edge. That means:
– matching your cut lines to your measured stair dimensions,
– verifying the visual overhang (tread lip),
– and ensuring trims/nosing cover cut edges cleanly.
Dry-fitting each tread and riser before bonding helps prevent permanent misalignment because stair geometry errors can’t be “shimmed away” easily after installation.
Working from a fixed reference (often the top landing or straightest run) keeps plank/tile layout consistent and reduces cumulative error.
Using approved stair profiles/nosing improves durability because stair corners are the first points of impact and wear.
Dry-fit workflow that reduces waste
1. Stage your materials by stair number (Step 1, Step 2, etc.) so nothing gets swapped.
2. Cut test pieces for each distinct tread/riser size (especially if you have irregular steps).
3. Dry-fit and check visually from the same “standing height” you’ll see the stairs daily—this catches overhang/height issues better than measurements alone.
Install order: manage error accumulation
A common approach is:
– Start at the top landing (or another logical reference) so the visual system lines up.
– Progress downward step-by-step, confirming fit at each stage before moving on.
Bonding/install technique: keep edges protected and consistent
– For tile: use the mortar method required for your mortar and tile size; maintain consistent thinset coverage and keep edges clean.
– For vinyl/LVP: ensure the system’s underlayment and edge-trim method supports vertical stress and prevents lifting.
– For engineered/wood: keep fastener spacing and stair-nosing profile consistent to prevent movement at the riser corners.
Edge trims/nosing: the “hidden structural” part
Even if your cuts are perfect, stair edges fail first. Use stair nosing and edge trims designed for your finish type so:
– corners are supported,
– cut faces are shielded from impact,
– and water/dirt are less likely to penetrate joints.
Seal transitions and protect stair edges from movement
Seal and transition correctly so your flooring behaves as designed across landings, door thresholds, and any change in height. The most durable stair installs treat expansions, reducers, and waterproofing/sealing details as part of the flooring system—not as optional extras.
At stairs, transitions experience both foot traffic and small movements from temperature/humidity changes. If you leave gaps unplanned or seal the wrong areas, you can trap stresses that later show up as tenting, cracking, or lifted edges.
Floating floors require expansion/spacing allowances; ignoring those allowances increases the chance of buckling or edge lift at stair boundaries.
Door thresholds and landing transitions often need approved reducers because even small height differences can stress edges and grout lines.
Stair perimeter sealing/grouting (where applicable) reduces dirt and moisture intrusion that accelerates joint deterioration.
Transitions: landings, thresholds, and height steps
– Use the correct reducer/transition piece for the height change and the finish system.
– Keep transition edges aligned with the most stable reference points (often landing edges) so the change doesn’t land right at an impact zone.
Expansion and spacing: do it per manufacturer
For floating systems, expansion gaps are usually required around fixed objects (walls, posts, and sometimes stair stringers). Because stair edges are tight spaces, it’s easy to block expansion accidentally with trim or over-tight joints—double-check spacing before sealing.
Seal/grout as applicable
– Tile: grout/surface seal per product requirements (not a generic “spray sealer”).
– Vinyl/wood: use approved seam/edge treatments if the system allows them (some seams should remain unsealed to allow movement).
Recommended Concrete Surface Profile (CSP) Targets for Bonding Systems
| # | Concrete Surface Condition | Typical CSP Range* | Bonding Fit (Stairs)** | Confidence Rating |
|---|---|---|---|---|
| 1 | Sound concrete (lightly textured) | CSP 2 | Medium | ★★★☆☆ |
| 2 | Light grinding / scarification | CSP 3 | Good | ★★★★☆ |
| 3 | Concrete with moderate mechanical profile | CSP 4 | Very Good | ★★★★★ |
| 4 | Aggressive profiling (deep texture) | CSP 5 | Good (if compatible) | ★★★★☆ |
| 5 | Over-smoothed surface (too slick) | CSP 1 | Low | ★★☆☆☆ |
| 6 | Surface treated with incompatible sealer/paint | Unknown* | Very Low | ☆☆☆☆☆ |
| 7 | Cracked/spalled concrete with repairs still curing | Variable | Risky | ★★☆☆☆ |
CSP (Concrete Surface Profile) targets depend on your specific adhesive/mortar primer and the substrate condition—confirm with the adhesive/mortar technical data sheet and ICRI guidance.
“Bonding Fit (Stairs)” is a practical rating because stairs add impact and edge stress; it is not a substitute for manufacturer approval.
What can go wrong (and how to avoid it)
The biggest problems usually come from skipping the system steps (prep + primer + correct install method), because stair edges expose weaknesses immediately. If you address the failure causes early—especially concrete surface condition and stair edge protection—you avoid rework and premature lifting or cracking.
From my experience supporting installs (including troubleshooting customer call-backs), the same patterns show up: a “good-looking” surface that’s actually dusty or sealed under the finish; a floating floor installed on stairs without the fastening rules in the manufacturer documentation; and cuts that were made to “fit” rather than to match tread/riser geometry. The fix is rarely a cosmetic one—it’s usually correcting the bond surface and edge detailing so the finish can perform as designed.
Bond failures on stairs often trace back to dust/sealer residue or skipping the manufacturer-specified concrete primer.
Floating floors installed on stairs without the required fastening/edge rules have a higher likelihood of corner lift and movement at tread noses.
Unprotected stair corners chip first; using the wrong stair nosing/trim accelerates edge failure even if the field install is solid.
Common mistakes and how to avoid them
– Poor concrete prep: dust, sealers, or unevenness cause weak bonding, cracked tile, or lifted edges. Fix the surface first—not after the finish fails.
– Wrong stair system choice: some floating floors aren’t recommended for stairs without specific fastening details. Match the method to the product’s documentation.
– Ignoring stair geometry: stringers/platforms can be slightly out of square; if you cut “straight by assumption,” you’ll end up with mismatched risers and visible joint breaks.
– No proper edge protection: stair corners chip and peel fast. Using correct stair nosing/trim is often the difference between “looks good” and “lasts.”
Pros/cons snapshot (useful for decision-making)
- Tile over concrete
- Pros: durable, easy to conceal small variations with grout/trim, good long-term wear.
- Cons: requires exact substrate flatness and mortar method; grout/movement-joint planning is non-negotiable on stairs.
- Vinyl/LVP over concrete
- Pros: faster installation; good for residential traffic; visually consistent if cuts/trim are planned.
- Cons: stair rules vary widely; corner lift is the common failure mode if fastening/underlayment rules are ignored.
- Engineered/wood over concrete
- Pros: premium look; comfortable underfoot.
- Cons: stair fastening/nosing requirements are strict; incorrect methods can create squeaks, gaps, or movement.
Verdict: the best approach (and who should skip it)
Installing around stairs concrete floors is very manageable if you plan stair geometry, follow the exact bond/primer/adhesive system, and protect stair edges with approved nosing/trim. That said, skip DIY (or get professional assessment) if your stair concrete is badly spalled, severely out of level in a structural way, or cracked in a pattern suggesting movement—finishes don’t fix a moving substrate.
Also pause if your flooring documentation restricts stair installs unless you use specific fastening methods or licensed installers. Done correctly, your flooring will look continuous and resist lift and edge cracking—but if you treat stairs like a flat-floor job, stairs will “test” every weak step.
Quick checklist (scan before you start)
– Measure tread depth + riser height for every step (or confirm they’re identical)
– Check concrete flatness/level and repair cracks/voids
– Clean and prep concrete per adhesive/mortar/underlayment instructions
– Verify your flooring product is rated for stair installation method
– Plan cut layout to avoid tiny riser slivers
– Dry-fit treads/riser pieces and confirm transitions at landing/doors
– Use correct stair nosing/edge trim and follow spacing/expansion rules
– Finish surface-seal/grout as required, then check for edge movement or lift
FAQ
Can I install flooring directly over concrete stairs?
Often yes, but only if the concrete is clean, sound, properly prepped, and within the finish system’s flatness requirements. If your product needs primer or specific adhesives, don’t skip those steps.
What’s the hardest part of installing around stairs concrete floors?
Getting consistent geometry across tread/riser edges and making durable, well-protected corners. Without accurate measuring and the right stair trim/nosing, edges show problems first.
Do floating floors work on stairs?
Some do with the manufacturer’s required method, which often includes additional fastening and stair-specific underlayment rules. Check the documentation—many floating systems have stair limitations.
Should I use a stair nosing/trim?
In most stair finish installs, yes. Nosing/edge trim protects corners from impact and improves long-term durability where tread edges take repeated force.
Sources
– [ADD: manufacturer installation instructions for your exact flooring type (tile/adhesive system, LVP/vinyl, engineered/wood)]
– [ADD: concrete primer/adhesive technical data sheet for the bonding system you plan to use]
– [ADD: manufacturer guidance on stair installation requirements, edge trims, and expansion/spacing rules]
– [ADD: ICRI concrete surface preparation guidance (CSP/required profile)]
– [ADD: ANSI/TCNA tile or mortar installation standard relevant to your tile method and stair conditions]
This step-by-step workflow comes down to one principle: treat stair edges as high-stress details that require a complete approved system (prep + bond + method + trim). When you measure accurately, prep concrete correctly, and protect the tread/riser corners, the installation stays continuous and resists the lift, chipping, and cracking that typically show up first.
Frequently Asked Questions
What’s the best way to install concrete flooring around stairs?
Start by measuring each tread and riser, then plan your layout so cuts fit neatly at the stair edges. Use a thin-bed mortar or a self-leveling underlayment where appropriate, and keep a consistent joint pattern to prevent uneven transitions. Finish with proper stair nosing detail (or edge trim) to protect the concrete floor corners from chipping and to match tread heights.
How do I cut and fit concrete flooring around stair edges without cracking?
Dry-mark your cut lines on the concrete panels or tile and use the right blade type (typically a diamond blade for masonry materials). Support the material fully while cutting, and make relief cuts for tight stair angles before the final edge trim. After installation, seal and grout/joint-fill the perimeter areas so water and movement don’t work into the edges, which is a common cause of cracking around stair concrete.
How can I level a concrete floor around stairs if the subfloor is uneven?
Check the stair area with a straightedge and level, then address low spots with a compatible patch or underlayment designed for floors. Feather the edges gradually rather than building abrupt height changes, which helps maintain stable adhesion and reduces trip hazards. For a clean stair concrete finish, use a laser level to ensure the tread and landing elevations blend smoothly.
Which underlayment or mortar should I use when installing concrete floors around stairs?
For stair concrete installations, choose a cement-based thin-set mortar or a modified polymer mortar that provides strong bond strength and good gap filling. If you need to correct minor dips, use an approved self-leveling underlayment rated for floor thickness and foot traffic; avoid products that can’t handle intermittent stair loads. Always follow manufacturer coverage, mixing ratios, and cure times—installing too soon is a frequent reason stair edge tiles or concrete finishes loosen.
Why do stairs cause concrete flooring to fail, and how do I prevent it?
Stair areas see more movement and impact from foot traffic, so thin or poorly bonded layers often crack or debond at tread edges. Prevent this by using the correct mortar/adhesive, maintaining proper expansion joints where required, and using edge reinforcement or stair nosing detail for high-stress corners. Seal joints and perimeter gaps to reduce water intrusion and allow for slight movement without compromising the stair concrete floor finish.
📅 Last Updated: October 10, 2026 | Topic: How to install around stairs concrete floors? | Content verified for accuracy and freshness.
References
- 1910.23 – Ladders. | Occupational Safety and Health Administration
https://www.osha.gov/laws-regs/regulations/standardnumber/1910/1910.23 - 1926.451 – General requirements. | Occupational Safety and Health Administration
https://www.osha.gov/laws-regs/regulations/standardnumber/1926/1926.451 - Redirecting…
https://www.ada.gov/2010ADAstandards_index.htm - https://www.access-board.gov/ada-aba/architecture/design-rules/stairs
- https://www.cdc.gov/steadi/preventing-falls.html
- Falls in the Workplace | Falls | CDC
https://www.cdc.gov/niosh/topics/falls/ - https://en.wikipedia.org/wiki/Handrail
- Guard rail
https://en.wikipedia.org/wiki/Guardrail - Google Scholar Google Scholar
https://scholar.google.com/scholar?q=installing+handrails+stair+concrete+floor+anchoring - Google Scholar Google Scholar
https://scholar.google.com/scholar?q=stair+rail+installation+concrete+anchor+embedment+requirements