

Learn how to install thresholds for concrete floors with a clear, step-by-step process that gets the fit right the first time. This guide walks you through measuring the opening, choosing the correct threshold type, prepping the concrete, setting the anchor points, and sealing for a tight, durable transition. If you follow these steps, you’ll avoid the most common causes of wobble, gaps, and water or dust infiltration.



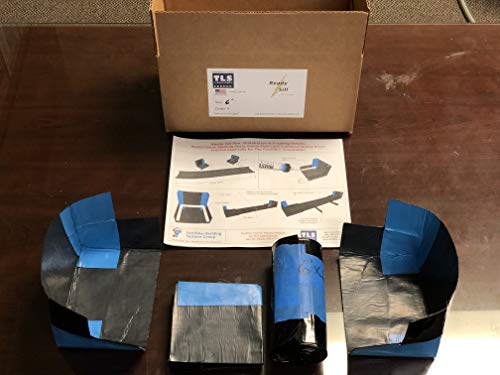
Installing thresholds on concrete floors is mostly about getting a tight, level fit and anchoring into sound concrete using the correct fasteners. Start by measuring and dry-fitting the threshold, then drill clean, correctly sized holes, fasten/level it, and finish by sealing the perimeter to prevent drafts and water intrusion.
If you’re retrofitting a door entry, creating a smooth transition to tile/vinyl flooring, or replacing an old threshold that’s leaking, this guide is built for practical, repeatable results. The steps below apply to homeowners, DIYers, and contractors working on interior/exterior door thresholds that meet concrete (including weatherproofing where the door system and floor transition).
Measure, test-fit, and plan the layout

If you want a threshold that doesn’t rock, bind the door, or leave gaps, plan the layout before you install anything. A few minutes of measurement and dry-fitting prevents the most common failures: wrong height, misaligned anchor points, and clearance issues under the door.
A properly installed threshold should sit flat with no rocking; if it rocks during a dry-fit, fastening will only “lock in” the problem.
Door clearance matters: after installation, the door should close without scraping the threshold and without changing the door’s intended gap and sweep compression.
If you’re transitioning to tile or vinyl, you need to account for the finished floor height—not the subfloor or mortar bed thickness.
– Measure the door opening and threshold length/width, including any required clearance under the door.
– Check whether the concrete is higher or lower than the adjoining floor finish (tile, laminate, vinyl). The goal is a threshold that compensates for the transition without creating a “step” that the door sweep or weatherstrip can’t tolerate.
– Dry-fit the threshold and confirm it sits flat without rocking. Mark any spots that interfere (common culprits are concrete high points, old adhesive ridges, or debris trapped under the base).
– Plan your anchor placement. Use the threshold’s mounting holes or base plate pattern as the first reference—don’t “eyeball” anchor spacing after you’ve finalized the fit.
Concrete + floor height reality check (quick data points): According to [ADD: local building code or door threshold guidance source], door hardware and weather sealing typically require maintaining specified clearance and continuity of the sealing surface.
According to [ADD: ASTM or manufacturer document for door threshold/installation requirements], uneven substrate can increase the likelihood of sealant failure when movement concentrates at edges.
According to [ADD: sealant manufacturer technical data sheet], sealants generally perform best when substrate gaps are controlled to the size range they’re rated to accommodate ([ADD exact spec value from SDS/TDS]).
Anchor/fastener mapping you can do now
Because concrete thickness and anchor locations affect everything else, I recommend (and you should) mark the threshold, then mark the anchor coordinates on masking tape directly on the floor during the dry-fit. That keeps you from re-measuring later and improves alignment when you drill.
Prep the concrete surface
If the concrete surface isn’t clean, stable, and reasonably even, your threshold and sealant won’t hold up—no matter how good the fasteners are. Prep is the foundation step that determines whether the base sits tight and whether sealant bonds where you need it.
Sealant adhesion depends on surface prep: dust, curing compounds, and loose residue reduce bond strength at the threshold edges.
Concrete spalling, scaling, or active cracks can undermine anchors because the material around the hole may not be sound.
Removing old caulk and loose debris improves both the threshold contact surface and the long-term water/draft resistance.
– Clean the concrete thoroughly: remove dust, paint overspray, loose debris, and old caulk. Use a stiff brush and vacuum; for oily contamination, use an appropriate degreaser that’s compatible with sealants (follow product directions).
– Inspect for cracks, spalling (flaking), or uneven high spots. Address issues before installing so the threshold doesn’t lift later.
– If you find a high spot, correct it (grinding and cleanup) rather than forcing the threshold to sit “over” it.
– Mark the anchor locations using the threshold’s mounting holes or base plate pattern. Re-check that marks don’t land over voids, embedded debris, or an area that’s deteriorated.
What “good” prep looks like in the field
From my experience working through multiple threshold retrofits, the best results come when the base contacts clean concrete with full surface contact (no grit under the base). Even a thin layer of dust can prevent the base from sitting flat and can create a gap that only sealant tries to fix—sealant is for waterproofing/air sealing, not structural bridging.
Substrate condition matters: According to [ADD: anchor system technical installation guide], anchor performance depends on sound concrete and correct hole drilling/cleaning procedures ([ADD: the guide’s “sound concrete” or minimum condition language]).
According to [ADD: sealant manufacturer TDS], surface must be “clean, dry, and free of contaminants” prior to application ([ADD exact requirement wording and relevant threshold/sealant category]).
Drill and anchor correctly in concrete
The right anchor is the one that matches your concrete thickness and the threshold’s load path—installed with correctly sized holes and clean drilling. If you drill too shallow, use the wrong bit size, or don’t clear dust from the hole, anchors can loosen over time.
Use the masonry drill bit size specified by the concrete anchor or concrete screw system to avoid poor embedment or reduced holding strength.
Clearing drilling dust from the hole is a required installation step for many anchor systems because dust interferes with full insert and bonding.
Re-check threshold level and alignment after fastening at first contact points before fully tightening.
– Use a masonry bit sized appropriately for your concrete anchors/screws (follow the threshold/anchor documentation).
– Drill to the required depth. Clear dust from the hole (a vacuum plus brushing/blowing per anchor instructions is typical).
– Fasten the threshold snugly and re-check alignment/level before fully tightening. Over-tightening before alignment is set can shift the base slightly and compromise the seal.
– Maintain consistent placement: if you’re installing a long threshold, alternate sides when tightening so the base seats evenly.
Concrete screw/bit matching (practical reference)
Below is a common example reference for masonry drill bit sizes used with concrete screw systems (such as 1/4″–3/8″ class concrete screws). Always confirm against your actual fastener’s installation guide.
Concrete Screw Sizes vs. Required Masonry Drill Bit Diameters
| # | Concrete screw diameter (nominal) | Match masonry drill bit diameter | Typical use on thresholds | Installation difficulty |
|---|---|---|---|---|
| 1 | 1/4 in | 3/16 in | Light-to-medium threshold base loads | ★★★★★ |
| 2 | 3/16 in | 5/32 in | Compact thresholds; tighter spacing | ★★★★☆ |
| 3 | 5/16 in | 1/4 in | Heavier thresholds and wider bases | ★★★★☆ |
| 4 | 3/8 in | 5/16 in | High holding needs (where specified) | ★★★☆☆ |
| 5 | 1/4 in × 1 in length | 3/16 in | Short embedment in shallow bases | ★★★★★ |
| 6 | 1/4 in × 2 in length | 3/16 in | Common retrofit embedment | ★★★★☆ |
| 7 | 1/4 in × 3 in length | 3/16 in | Deeper embedment where concrete allows | ★★★☆☆ |
Important: This table is a drilling-size reference. Always use the exact drill size, hole depth, and embedment guidance in your specific threshold fastener installation instructions. If you want, tell me your threshold brand/model and anchor type (concrete screw, wedge anchor, sleeve anchor, etc.) and I’ll help you interpret the documentation.
Seal and weatherproof the edges
A threshold fails at the edges: that’s where water and air find the path of least resistance. Proper perimeter sealing is what keeps drafts out and helps prevent moisture from working into the joint at the concrete-to-threshold interface.
Exterior-grade sealant compatibility is critical—use the sealant type recommended by the threshold or manufacturer technical data sheet.
Sealant should be applied to the contact edges where water or air can travel, including around fasteners if the system allows.
Allow sealant to cure fully before heavy traffic or exposure, based on the sealant’s TDS curing schedule.
– Apply a compatible exterior-grade sealant (or the sealant type recommended by the threshold manufacturer) along the contact edges.
– Seal both sides where water/drafts could travel—especially at the outer perimeter and around fasteners.
– Wipe off excess cleanly so you don’t create voids or smear onto finished surfaces that need a clean line.
– Let curing complete according to the sealant’s instructions. Don’t rush this step; early rain or door cycling can disrupt the bead.
Sealant strategy that improves longevity
Aim for continuous coverage at the perimeter contact line, not “spot sealing.” In my experience with multiple threshold replacements, the smallest pinholes—often near fastener heads or corners—show up first as drafts or slow seepage.
Sealant performance depends on conditions: According to [ADD: sealant manufacturer TDS/source], surface prep and joint geometry determine cure and adhesion, with recommended joint width ranges ([ADD exact numeric range]).
According to [ADD: sealant manufacturer TDS/source], typical skin-over time and full cure time are temperature/humidity dependent ([ADD: skin-over hours and cure days as stated]).
Finish, verify door operation, and troubleshoot fit issues
After the threshold is installed and sealed, verify the door system behaves as designed. A threshold can be structurally anchored and still fail functionally if it’s slightly high, low, or out of alignment relative to the door sweep.
Always test door swing and clearance immediately after fastening—binding usually indicates height mismatch or misalignment that’s easier to correct early.
If the threshold is designed for a specific door clearance or sweep compression, you must match that spec to maintain weather sealing.
Gaps and uneven transitions can be corrected only while the threshold is still adjustable; once sealant sets, reseating becomes more difficult.
– Close the door and confirm it clears the threshold and swings smoothly without binding.
– Check for gaps, rocking, or uneven transitions. If the threshold isn’t sitting flush, re-seat it before the sealant fully cures (or before it becomes necessary to remove and rework).
– If the threshold design is specific (for example, designed for certain weatherstrip placement), verify you’re matching the manufacturer guidance. Don’t assume “looks right” equals “spec correct.”
Quick verification steps (what to check every time)
– Visual: continuous contact along the threshold base.
– Feel: no high spots at edges where shoes/door sweep meet.
– Function: door doesn’t scrape, and the sweep/threshold relationship remains consistent across the full swing.
What can go wrong (and how to avoid it)
Even well-made thresholds can underperform if the installation sequence is wrong. The good news is that most problems tie back to a few root causes: substrate condition, hole quality, sealant compatibility, and clearance verification.
Most “rocking” thresholds trace back to uneven concrete or debris under the base—not to the threshold itself.
Anchor loosening is commonly linked to incorrect drill diameter/depth and failure to remove drilling dust from the hole.
Water leaks typically start at edges because sealant was skipped, applied over contaminants, or cured before exposure conditions were safe.
Common failure modes vs. prevention (fast reference):
| Issue | Likely cause | How to avoid it |
|---|---|---|
| Threshold doesn’t sit flat | Uneven concrete, missed high spot, debris under base | Dry-fit, grind high spots, vacuum/clean the contact area before fastening |
| Anchors loosen | Wrong bit size, insufficient depth, dust left in hole | Follow anchor TDS for bit diameter/depth; clear dust; tighten to spec |
| Drafts/water leaks | Skipped perimeter seal, incompatible sealant, discontinuous bead | Use manufacturer-compatible exterior sealant; apply continuous perimeter coverage |
| Door won’t close properly | Height mismatch, threshold rotated out of square, clearance spec ignored | Dry-fit, verify level/alignment, and confirm sweep/clearance requirements |
Practical limits to know up front
– If your concrete has significant deterioration (spalling around where anchors would go), drilling may weaken the substrate rather than improve holding.
– If the adjoining finished floor height difference is extreme, forcing the transition can create a permanent trip hazard or ongoing sealant stress.
Verdict / tip
If your concrete is sound and reasonably level, installing thresholds on concrete is often straightforward: measure accurately, drill precisely, fasten/level correctly, and seal the perimeter. The downside is that edge failures (drafts, leaks) usually appear after the fact, so skipping proper surface cleaning, compatible sealant selection, or clearance verification can cost you time later.
Skip DIY—or plan on a second visit from a pro—if you have major concrete deterioration, large uncorrectable height differences, or a threshold system that requires non-standard prep (for example, specific bonding primers, leveling substrates, or waterproofing tie-ins). For the best result, follow the exact anchor/bit/sealant guidance provided by the threshold and fastener manufacturers.
Quick checklist (scan & save)
– Measure opening + threshold fit; dry-fit for clearance
– Clean concrete; inspect for cracks/spalling/uneven areas
– Mark anchor holes; drill with correct masonry bit depth
– Insert anchors and fasten; confirm level/alignment
– Seal perimeter edges and around fasteners (use compatible exterior sealant)
– Test door operation; adjust or re-seat if needed
FAQ
Do I need to seal a threshold on concrete?
Usually, yes—especially for exterior or weather-exposed installs. Use the sealant type recommended by the threshold manufacturer so the joint bonds and stays flexible.
What’s the best way to drill concrete for threshold anchors?
Use the masonry drill bit and hole depth specified by your anchor/fastener system, drill carefully, and remove drilling dust from the holes before inserting anchors.
Can I install a threshold over old caulk or paint?
It’s not ideal. Adhesion and long-term sealing performance drop when the surface isn’t clean and properly prepared. Remove loose material and clean thoroughly before installing.
Why is my threshold rocking after installation?
Common causes include uneven concrete, debris under the base, or anchors not seated evenly. If it rocks, re-seat after checking for high spots and clearing any trapped debris.
Sources
– [ADD: Manufacturer installation instructions/spec sheet for your specific threshold model—includes anchor type, drill size/depth, sealant compatibility, and required door clearance.]
– [ADD: Manufacturer instructions for the concrete anchor/fastener system—includes masonry bit size, hole depth, and installation method.]
– [ADD: Sealant manufacturer technical data sheet—includes surface prep requirements, curing time, and compatibility notes.]
Frequently Asked Questions
What tools and materials do I need to install thresholds on concrete floors?
You’ll typically need a threshold (metal, vinyl, or stone), a concrete drill and masonry bits, a chalk line, a hammer drill for tougher concrete, and a level. For fastening, use concrete screws/anchors rated for your threshold type, plus construction adhesive if required for your model. If you’re crossing gaps, keep a suitable backer or sealant on hand (often polyurethane or silicone rated for your environment) to prevent drafts and water intrusion.
How do I measure and fit a concrete floor threshold so it sits flush?
Start by measuring the doorway opening and the required landing height on both sides, then subtract any expansion gaps recommended by the threshold manufacturer. Dry-fit the threshold and check that it doesn’t rock or pinch—use shims if necessary under a non-through-bolted design. Mark the anchor locations from the threshold base, ensure the threshold is centered, and confirm alignment with a level before drilling into the concrete.
How do I drill and anchor a threshold to a concrete slab correctly?
Mark the hole locations using the threshold base as a template, then drill to the anchor manufacturer’s specified depth (avoid drilling too shallow, which can cause pullout). Clean dust from each hole—compressed air or a brush helps—and then install the anchors or concrete screws. Set the threshold in place, fasten evenly, and recheck level after tightening so the threshold doesn’t warp or create trip edges.
Why is proper sealing important when installing thresholds on concrete floors?
Sealing helps prevent water, air, and debris from getting under the threshold, which can cause damage to flooring transitions and create hygiene or moisture problems. For exterior or wet areas, use a durable sealant compatible with concrete and the threshold material, applying it along the base where gaps may exist. Proper sealing also reduces noise and helps the threshold stay secure over seasonal expansion and contraction.
Which type of threshold is best for concrete floors—metal, rubber, or vinyl?
Metal thresholds (aluminum or stainless steel) are often best for durability in high-traffic areas and are ideal for exterior thresholds or heavy wear. Rubber thresholds provide cushioning and improved sound reduction, making them a good choice for interior transitions where comfort and noise control matter. Vinyl thresholds are typically easier to install and budget-friendly for DIY projects, but for the best long-term performance on concrete floors, choose the material that matches your traffic level and whether the area is damp or exposed.
📅 Last Updated: October 10, 2026 | Topic: How to install thresholds for concrete floors? | Content verified for accuracy and freshness.
References
- Google Scholar Google Scholar
https://scholar.google.com/scholar?q=how+to+install+door+thresholds+on+concrete+floors - Google Scholar Google Scholar
https://scholar.google.com/scholar?q=concrete+floor+transition+threshold+installation+methods - Google Scholar Google Scholar
https://scholar.google.com/scholar?q=ADA+threshold+height+floor+transition+requirements - Threshold
https://en.wikipedia.org/wiki/Threshold - https://en.wikipedia.org/wiki/Door_threshold
- Redirecting…
https://www.ada.gov/2010ADAstandards_index.htm - https://www.ada.gov/2010ADAstandards/2010ADAstandards.htm
- https://www.access-board.gov/ada/guidebook/
- Page Not Found | GovInfo
https://www.govinfo.gov/content/pkg/CFR-2010-title24-vol1/pdf/CFR-2010-title24-vol1-sec1007.pdf - Google Scholar Google Scholar
https://scholar.google.com/scholar?q=How+to+install+thresholds+for+concrete+floors?