
Want to waterproof terracotta floors effectively? Follow this step-by-step guide to seal terracotta so it resists water, stains, and damage from everyday spills. You’ll get the right surface prep, the best sealing approach for maximum protection, and clear application steps to deliver a durable, long-lasting finish.
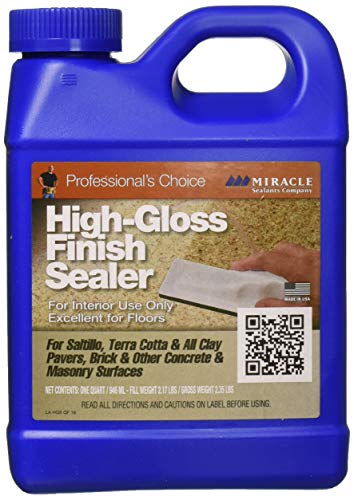



Waterproofing terracotta floors is really about reducing water absorption with the right penetrating sealer, then adding extra top protection only in true wet-risk areas (and only with compatible products). Do a deep clean, apply sealer in thin, even coats, and let it cure fully before the floor sees water or heavy traffic—most failures happen when prep is incomplete or cure time is skipped.
If your terracotta floor is in a kitchen, bathroom, entryway, or outdoor covered area, this guide is for you—especially if you’re trying to prevent staining, dampness, or darkening from spills. It’s also useful if you’ve noticed patchy water spots or uneven protection after a previous sealing attempt.
What “waterproof” actually means for terracotta

– Terracotta is porous, so most products improve water resistance rather than making the tile completely waterproof like glazed ceramic.
– Waterproofing results depend on the sealer chemistry, tile porosity, and whether moisture is coming from above (spills) or below (rising damp/subfloor moisture).
“Waterproof” for terracotta usually means dramatically slowing water uptake, not stopping all moisture under every condition. The floor becomes more stain-resistant and less likely to darken from surface exposure, but it still breathes—and if moisture is coming from beneath the tile, sealing alone won’t solve it.
Terracotta’s porosity is the key constraint: unlike glazed tile, the body of the material contains microscopic pores that can transport water (and dissolved contaminants) into the tile. That’s why the most effective “waterproofing” strategy starts with a penetrating sealer that reduces absorption.
Terracotta is porous, so penetrating sealers primarily reduce water absorption rather than creating a completely impermeable barrier like glazed ceramic.
If moisture is migrating from below (rising damp or subfloor moisture), sealing the top surface can’t correct the source of water.
Tile water absorption is commonly evaluated using standardized laboratory methods that measure mass or volume changes after immersion.
To anchor the concept in measurable terms: according to ISO 10545-3 (tile testing for water absorption), water absorption testing is performed by immersing specimens and calculating absorption from the resulting mass change. [ADD: ISO 10545-3 standard document] (The exact procedure steps and conditions are defined in the standard.) This is the same physics your sealer attempts to change—how easily water can enter the tile network.
From a practical, business-style planning perspective, “success” usually shows up as:
– fewer dark rings after spills,
– less spotting from wet footprints,
– improved cleanability,
– reduced grout-edge staining (especially if grout was sealed).
Choose the right sealer for the job
– For natural-looking protection, look for a penetrating sealer designed for unglazed terracotta (the goal is to reduce water absorption).
– For higher-risk wet areas, you may need a system (penetrating product plus a compatible top coat) to increase surface protection—always verify compatibility on the label or manufacturer guidance.
The best waterproofing outcome comes from matching the sealer system to your exposure level. For most terracotta floors, that means a penetrating sealer first; for bathrooms or splash-prone zones, you may add a compatible top sealer designed to handle heavier wet conditions.
Start by identifying your risk profile:
– Spills / kitchens / entryways: Typically seal with a penetrating sealer rated for unglazed terracotta.
– Bathrooms / showers-adjacent / floors with frequent wet mopping: Consider a manufacturer-supported multi-product system that includes surface protection (topcoat) if the label allows it.
– Outdoor covered areas: Choose a sealer that specifically addresses UV/temperature cycling and water exposure.
For unglazed terracotta, a penetrating sealer is intended to reduce absorption by traveling into the pores rather than relying on a surface film alone.
Wet-area claims should be verified on the product label because penetrating-only systems may not provide sufficient surface resistance where water is repeatedly present.
Compatibility matters: topcoats must be chemically compatible with the penetrating sealer layer to avoid adhesion or hazing issues.
Penetrating vs. film-forming (what it means in the field)
Penetrating sealers aim to modify the tile’s ability to take in water. They usually remain relatively invisible and preserve the natural matte look—though terracotta can still darken slightly (“wet look”) depending on the chemistry and number of coats.
Film-forming sealers create a surface layer. In wet areas, that extra surface resistance can help, but it can also increase maintenance complexity (cleaners, recoat schedules, and slip considerations).
A quick comparison (how to choose fast)
| Sealer approach | Best for | Main tradeoff |
|---|---|---|
| Penetrating (unsealed terracotta compatible) | Spills, general staining resistance, natural look | Not a substitute for addressing standing water risk |
| Penetrating + compatible topcoat (wet areas) | Frequent wet cleaning, splash-prone rooms | May affect sheen and slip resistance |
Prep the floor properly (this is where failures start)
– Remove dirt, wax, grout haze, and any residues using a cleaner recommended for unglazed stone/tile; rinse thoroughly and let the floor dry completely.
– Do a spot test in an inconspicuous area to confirm the finish (matte vs slightly darker) and ensure the sealer doesn’t react badly with existing coatings.
If your floor isn’t clean and dry enough, even the best penetrating sealer can fail—usually in the form of spotting, patchiness, or weak adhesion. Prep is where you “lock in” performance, because sealer must contact the tile surface and pores without being blocked by residues.
A reliable prep sequence looks like this:
1. Remove surface contaminants (dust, tracked grit, cooking residue, soap scum).
2. Strip incompatible coatings (some waxes and floor polishes can repel or interfere with sealer bonding).
3. Remove grout haze if new grout was recently installed.
4. Rinse thoroughly and allow complete drying before sealing.
Because terracotta is porous, residues can hide in microvoids and later reappear as interference stains or uneven sealer uptake. That’s why you want rinse water to be clean and why you should avoid leaving puddles during cleaning.
Also plan for a dry verification step: don’t just “wait overnight.” Use the label’s guidance for surface dryness and—if available—follow a moisture test method recommended by the sealer manufacturer. If you skip that, you’re effectively choosing between “success” and “patchy failure.”
Most sealing failures trace back to residues (wax, polish, grout haze, or cleaners) or sealing before the floor is fully dry.
Terracotta absorbs liquids into pores, so contaminants left from cleaning can interfere with sealer penetration and create streaks.
A spot test is a fast way to confirm aesthetic changes and to detect compatibility problems with existing coatings.
Spot testing: what to look for
Your spot test should confirm three things:
– Color shift: many sealers slightly darken terracotta after application; test your desired “level” of change.
– Sheen: matte vs satin is often noticeable on foot traffic and under lighting.
– Uniformity: even application in a small area reveals whether your floor is clean enough.
> If your tiles already have an unknown coating, the manufacturer may require specific removal steps. Use the sealer’s label instructions—don’t guess.
Apply sealer correctly (penetration + even coverage)
– Apply evenly with the right method (brush, roller, or sprayer depending on the product) and work the product into the surface without pooling.
– Respect the full cure time before exposure; if the label says multiple coats, apply them within the stated recoat window for best bonding.
Application technique controls the difference between a consistent protective layer and a mottled surface. The goal is to apply enough sealer to achieve penetration and uniform coverage—without over-applying so much that it sits on top, dries unevenly, or creates gloss spots.
Step-by-step application workflow
1. Plan the work area: close doors, protect vents, and avoid drafts if your sealer label warns about curing conditions.
2. Use the method the label specifies: brush/roller/sprayer choices are not interchangeable; they influence thickness distribution and penetration.
3. Apply in thin, even coats: keep moving and “work” the sealer into the surface.
4. Avoid pooling at edges: cut-ins around baseboards and corners often get heavier—watch these areas.
5. Recoat only in the label’s window: if multiple coats are recommended, use the stated recoat timing for best bonding.
6. Allow full cure: do not treat “touch-dry” as “ready for water.”
In terms of planning for curing and exposure, standardized testing and manufacturer protocols are the guiding sources—so the only safe rule is to follow the sealer’s published cure and exposure times. [ADD: manufacturer installation/sealing instructions for your specific terracotta sealer]
Thin, even coats help penetrating sealers distribute uniformly and reduce the risk of surface pooling that can cause streaking.
Cure time must follow the product label—“dry to the touch” is not necessarily “ready for wet exposure.”
When multiple coats are recommended, applying within the specified recoat window supports proper layer-to-layer bonding.
Mandatory reference table: standardized water-absorption testing (what you’re trying to change)
Common tile water-absorption test parameters (used to quantify porosity)
| # | Method (standard) | Primary metric | Condition detail | Typical direction of effect |
|---|---|---|---|---|
| 1 | ISO 10545-3 | Water absorption (%) via mass change | Immersion procedure (per standard) | Lower is better |
| 2 | ASTM C373 | Water absorption (%) + apparent porosity | Boil/soak-based approach (per standard) | Lower is better |
| 3 | ASTM C499 | Physical property index (absorption/porosity context) | Material-specific procedure | Reduced uptake improves resistance |
| 4 | ISO 13006 | Porcelain tile water absorption classification | Porcelain: ≤ 0.5% absorption (limit) | Lower is better |
| 5 | EN 14411 | Tile classification including water absorption | Uses absorption criteria to group tile types | Lower is better |
| 6 | ASTM C1026 | Freeze-thaw durability context (moisture sensitivity) | Moisture + temperature cycling testing | Lower uptake reduces damage risk |
| 7 | ASTM C457 | Unit weight & volume-related property basis | Supports density/porosity context | Improved barrier reduces water ingress |
Note: This table summarizes widely used standards and what they measure; your sealer’s performance claims should be evaluated against the manufacturer’s own test conditions. [ADD: official ISO/ASTM/EN documentation for the listed methods]
What can go wrong (and how to prevent it)
– Sealer failure often comes from sealing over moisture, leftover cleaners, or an unclean surface—drying and residue removal matter as much as the product choice.
– Patchiness can happen if you apply too much in one area, miss tiles/edges, or don’t maintain a consistent wet edge during application.
– Some products can change slip resistance; test in your specific area and avoid overly glossy finishes on floors that get wet.
Even when you buy the right sealer, terracotta can still disappoint if the workflow breaks. Most issues are predictable: they correlate with surface cleanliness, moisture content, application thickness, and cure conditions.
Common failure points (with prevention)
1) Sealing over moisture
– Symptom: hazing, spotty darkening that keeps returning, weak uniform protection.
– Prevent: confirm the floor is dry enough per label guidance; don’t “rush the cure.”
2) Residue-blocked penetration
– Symptom: uneven color change and water beads only in some areas.
– Prevent: use cleaners formulated for natural stone/unglazed tile and rinse thoroughly. Avoid leaving grout haze or wax remnants.
3) Over-application
– Symptom: streaks, uneven sheen, slippery or glossy patches.
– Prevent: apply thin coats and remove/avoid pooling at edges and grout lines unless the label says otherwise.
4) Missed grout edges and corners
– Symptom: water tracking along seams.
– Prevent: cut-in carefully; consider whether grout needs sealing as a separate step.
5) Slip resistance changes
– Symptom: area feels more slippery than before.
– Prevent: test in a small section that gets similar wetting/traffic, and avoid finishes that increase gloss if safety is a concern.
Patchiness commonly results from uneven surface cleanliness or over-application that prevents consistent penetration into tile pores.
Moisture-driven failures are often not fixable with surface sealers because water migration originates below the tile.
A sealer can affect slip resistance, so you should verify performance under your real wet conditions.
Pros/cons reality check (quick decision framing)
| Approach | Pros | Cons |
|---|---|---|
| Penetrating sealer only | Preserves natural look; reduces staining and absorption | Less protection against repeated standing water |
| Penetrating + compatible topcoat | Better wet-area surface resistance | Compatibility and slip/gloss management are critical |
Verdict: best-practice approach and who should skip DIY
A practical, reliable path is: deep clean → dry fully → penetrating sealer first → add an additional layer only if the manufacturer supports a multi-coat/wet-area system. Skip DIY (or get professional guidance) if you suspect ongoing moisture from beneath the slab, have efflorescence, or you’re trying to correct severe installation issues—sealers can’t solve structural moisture problems. Downsides to expect: the floor may darken slightly after sealing, and you’ll need periodic re-sealing based on wear and exposure.
If you’re in 2026 and you’re comparing options, the most “future-proof” plan is simply adherence to documentation: choose sealers intended for unfilled/unglazed terracotta, follow the label’s cure time and recoat window, and use only manufacturer-compatible layers when you need extra wet-area protection.
Sealers improve water and stain resistance, but they do not correct subfloor moisture problems or rising damp.
Follow manufacturer cure and recoat timing to avoid weak bonding that shows up as patchiness or early breakdown.
Terracotta’s porosity means maintenance re-sealing is typically part of long-term floor care.
When you should not DIY
Don’t treat sealing as a fix if you see:
– Efflorescence (white salts), damp substrate areas, or recurring musty odors.
– Moisture coming from beneath (cracks, basement condensation patterns, exterior grade issues).
– Visible installation problems (improper mortar setting, failed membranes in wet-room builds).
What to expect after sealing
– Color change: modest darkening is common even with penetrating sealers.
– Time: floors need real cure time before water exposure.
– Maintenance: even the best sealer gradually loses performance under abrasion and chemical cleaning.
Quick checklist (save this)
– [ ] Confirm product is intended for unglazed terracotta/terracotta floors
– [ ] Remove wax, coatings, and grout haze; rinse thoroughly
– [ ] Let the floor dry completely before sealing
– [ ] Spot test in an inconspicuous area
– [ ] Apply in thin, even coats; avoid pooling
– [ ] Recoat only within manufacturer’s recommended window
– [ ] Allow full cure time before wet use
FAQ
Can I waterproof terracotta floors in a bathroom?
Yes, but use the right sealer specifically meant for unglazed terracotta and follow the manufacturer’s guidance for wet-area performance and cure times. If moisture is coming from below, you must address that first.
Will sealing make my terracotta waterproof forever?
No. Most sealers improve water resistance and stain resistance, but protection wears down over time. Plan on maintenance re-sealing based on traffic and product instructions ([ADD: typical re-sealing interval from your sealer manufacturer]).
Do I need to seal grout too?
Often, yes—especially if your grout is porous and sits between tiles where water can travel. Check the grout type and follow the guidance for that specific material.
Why does my sealed terracotta look patchy or streaky?
Patchiness usually points to uneven surface cleaning/drying, missed areas, pooling, or applying too heavily. Re-cleaning and re-sealing after fully drying is typically the fix ([ADD: likely cause based on your product’s label troubleshooting]).
Should I use wax or regular floor polish on sealed terracotta?
Generally avoid it unless the product is explicitly compatible with stone sealers; wax/polish can interfere with sealer performance. If you already applied something, plan for proper removal before resealing.
Sources
– [ADD: manufacturer installation/sealing instructions for the specific terracotta sealer you plan to use] (especially: compatibility, recoat window, cure time, and wet-area claims)
– [ADD: manufacturer documentation for terracotta or unglazed tile cleaning/prep products] (recommended cleaners and rinsing/drying requirements)
– [ADD: datasheet/technical guide for the sealer’s intended use on porous natural stone/ceramic terracotta] (penetrating vs film-forming details)
– ISO 10545-3 (tile water absorption test method)
– ISO 13006 (tile water absorption classification criteria, including porcelain limit)
Sealing terracotta floors the right way means you’re managing porosity, not pretending the tile can become like porcelain. Clean thoroughly, use a penetrating sealer made for unglazed terracotta, and only build a wet-area “system” with compatible layers if the label supports it—then respect cure time. If moisture is coming from beneath, stop and fix the source; no sealer can waterproof a structural problem.
Frequently Asked Questions
How do I waterproof terracotta floors without changing their natural look?
Use a penetrating waterproofing sealer made for terracotta that bonds into the porous clay rather than forming a heavy surface film. Clean the tiles thoroughly, let them dry completely, and apply two to three coats with a roller or sprayer as directed. After curing, you’ll typically get water resistance while still preserving the breathable, natural appearance of terracotta. If you want extra protection near wet areas, pair the sealer with a grout and caulk system made for damp environments.
What is the best way to waterproof terracotta floors before installing radiant heat or in bathrooms?
Start with a proper subfloor preparation and a compatible waterproofing membrane or system if you’re installing over a shower, wet room, or radiant heat where movement is expected. Seal the terracotta after installation and grout curing with a penetrating, breathable terracotta sealer designed for floors. For bathrooms, also waterproof grout lines and transitions using appropriate sealants or waterproofing membranes so water can’t migrate under tiles. This layered approach is key to preventing moisture-related staining and grout deterioration.
Which terracotta waterproofing products work best for sealing porous, unglazed tiles?
Look for penetrating sealers labeled for “terracotta,” “clay tile,” or “unpolished ceramic,” ideally ones that provide water repellency and stain resistance. Silane/siloxane or penetrating mineral-based sealers are often effective because they reduce water absorption while maintaining vapor permeability. Avoid coatings that are not designed for terracotta, as some can trap moisture in the tile or create patchy discoloration over time. Check the product’s coverage rate, cure time, and whether it’s suitable for interior floors and wet areas.
Why does terracotta still stain or absorb water even after sealing, and how can I fix it?
Terracotta can still absorb water if the surface was not fully clean and dry before sealing, if the sealer was applied too thin, or if grout lines and cracks weren’t treated. In high-moisture areas, water can also reach the tile through joints, uneven substrates, or hairline movement. To fix it, strip or thoroughly clean the failed coating or residue (if necessary), dry the floor, and reapply the correct terracotta waterproofing sealer in the recommended number of coats. For ongoing issues, inspect grout, caulk at edges, and any movement joints, and consider targeted joint waterproofing.
How do I waterproof terracotta floors in kitchens or entryways where spills and frequent cleaning happen?
Seal terracotta with a floor-appropriate penetrating waterproofing sealer, then use a stone/terracotta-safe cleaner to maintain the protective layer. Apply multiple coats to improve water and stain resistance, paying extra attention to porous or worn tiles and grout lines. Protect high-traffic areas with mats and wipe up spills quickly to reduce the chance of water ingress and mineral staining. Re-seal on a routine schedule based on wear (often every 1–3 years for heavy-use areas) to keep terracotta waterproofing effective.
📅 Last Updated: October 10, 2026 | Topic: How to waterproof terracotta floors? | Content verified for accuracy and freshness.
References
- Google Scholar Google Scholar
https://scholar.google.com/scholar?q=waterproofing+terracotta+floor+sealing - Google Scholar Google Scholar
https://scholar.google.com/scholar?q=terracotta+tile+sealer+water+repellent+penetrating+impregnation - Google Scholar Google Scholar
https://scholar.google.com/scholar?q=silane+siloxane+water+repellent+terracotta+tiles - https://pubmed.ncbi.nlm.nih.gov/?term=terracotta+tile+waterproofing+coating
- https://pubmed.ncbi.nlm.nih.gov/?term=water-repellent+coating+ceramic+tile+silanes+siloxanes
- https://www.sciencedirect.com/search?qs=terracotta+waterproofing+coating
- https://www.sciencedirect.com/search?qs=silane+siloxane+masonry+water+repellent+terracotta
- Terracotta
https://en.wikipedia.org/wiki/Terracotta - Waterproofing
https://en.wikipedia.org/wiki/Waterproofing - https://www.britannica.com/art/terracotta