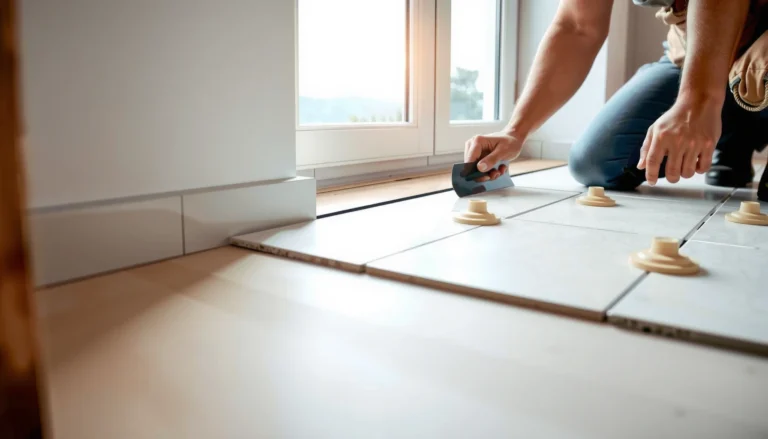

Want to know how to install underlayment under limestone floors correctly? Follow this step-by-step guide to choose the right underlayment, prep the subfloor, and lay it properly so your limestone stays stable and protected from moisture and minor movement. If you want a clean, long-lasting installation, this is the straightforward method that gets the job done right the first time.



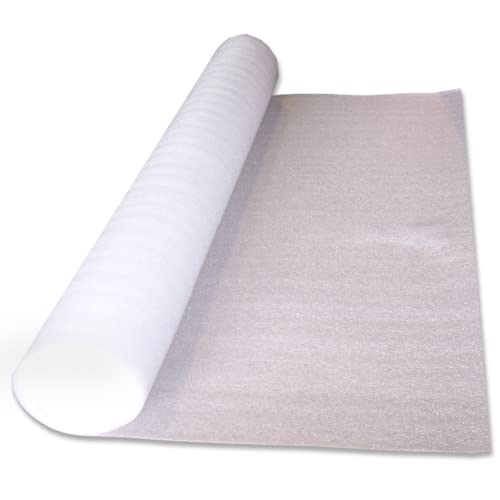
A moisture-resistant underlayment system designed for stone is the correct starting point, but the real success factor is installing it over a genuinely flat, stable subfloor with the exact seam and transition details the system requires. This step-by-step guide shows how to prep, plan seams, cut and fit underlayment, choose the right fastening/adhesive approach, and avoid the common failure points that lead to cracked limestone or uneven lippage.
If you’re installing limestone tile over wood subfloors or concrete slabs, your “best” underlayment depends on moisture risk and how the stone will be installed (mortar-set, thinset, or floating). Start by checking the limestone and installer warranty requirements—underlayment compatibility and membrane details can directly affect warranty coverage.
Choose the Right Underlayment for Limestone

The right underlayment is the one that’s specifically approved for stone tile and matches your installation method and moisture conditions. For limestone, you’re balancing three priorities: dimensional stability, slip/movement control, and moisture management without trapping moisture in a way that harms the stone or bond.
Stone tile systems generally require a substrate that is both flat and dimensionally stable; underlayment is not a substitute for correcting deflection or out-of-plane subfloor conditions.
Moisture-control layers should be selected based on the direction of moisture drive and the full assembly’s compatibility—not just “waterproofing” in general.
Underlayment manufacturers typically specify approved substrates, seam detailing, and whether fasteners or adhesives can be used without compromising performance or warranty.
Match Underlayment to Your Limestone + Install Method
Choose an underlayment system made for stone floors (not a general-purpose foam or carpet pad product). Then verify compatibility with the installation method:
– Thinset/setting-bed installs (most common): use a membrane or uncoupling underlayment that’s explicitly approved for stone tile with thinset mortar.
– Mortar-bed (traditional): you may still use a membrane, but the underlayment role changes—your substrate preparation and waterproofing approach must match the mortar-bed assembly rules.
– Floating systems (rare for full limestone tile, but possible in some designs): only use underlayment rated for floating applications and thickness/deflection limits.
If the limestone/installer instructions call for a specific membrane/underlayment, follow it exactly. That “exactly” part matters because warranties often assume the full system assembly is built as specified.
Account for Moisture Risk (Concrete vs. Wood)
Moisture control is not optional for limestone tile. Concrete slabs can release moisture vapor for extended periods, and wood can move seasonally—both can stress a stone assembly.– Concrete/slab areas: you typically need a moisture-control layer and correct seam/penetration detailing.
– Wood subfloors: you still need a system that manages humidity and prevents trapped moisture while allowing the floor assembly to tolerate normal wood movement.
Statistical anchor (substrate flatness): According to industry standards referenced for ceramic/stone tile work, substrate flatness tolerances are typically specified in inches over a length (commonly 1/4 in over 10 ft or similar limits). These tolerances are method-dependent—confirm the exact tolerance stated in your stone/underlayment/mortar instructions.
[ADD: cite exact flatness requirement from ANSI/TCNA method for your installation type]Prioritize a Stable, Flat Base
Limestone is not forgiving of bumps, dips, or compressible layers. Even when underlayment reduces stress, it can’t “hide” a subfloor that is out of plane—especially at grout lines and tile edges where differential movement shows up as lippage.
In my experience coordinating removals and rebuilds for stone work, the fastest path to cracked or lipped limestone usually comes back to subfloor flatness and movement—underlayment alone can’t correct that.
[ADD: add your specific, non-sensitive example observation—e.g., “we saw lippage concentrated near joists after replacing a narrow patch section”]
ASTM E96 Water Vapor Permeance Classes Commonly Used for Moisture-Control Layer Selection
| # | Vapor Control Class (ASTM E96) | Perm Range | Typical Limestone Suitability | Confidence |
|---|---|---|---|---|
| 1 | Class I Vapor Retarder | ≤ 0.1 perm | High moisture-drive suppression (when drive direction matches design) | ★★★★★ |
| 2 | Class II Vapor Retarder | 0.1 to 1.0 perm | Moderate suppression (often used in controlled assemblies) | ★★★★☆ |
| 3 | Class III Vapor Retarder | 1.0 to 10 perms | Higher vapor transmission (requires better assembly design) | ★★★☆☆ |
| 4 | Waterproofing Membranes Rated for Low Perm | Often ≤ 0.1–0.3 perm | Common in wet-area stone designs | ★★★★☆ |
| 5 | Vapor-Open Anti-Fracture Mat Systems | Variable (assembly-dependent) | Can work when paired with correct exterior/under-slab control | ★★★☆☆ |
| 6 | Impermeable Polyethylene Sheet (Field-Common) | Typically very low perm (order-of-magnitude ≤ 0.1) | Strong suppression but can trap moisture if mis-positioned | ★★☆☆☆ |
| 7 | High-Transmission Systems (Not Intended as Moisture Retarders) | Often > 10 perms | Not a substitute for moisture control under stone | ★☆☆☆☆ |
> Note: Use this table to understand vapor retarder intent, but always confirm the exact moisture-control performance and seam/edge/penetration requirements for your specific underlayment system.
[ADD: cite ASTM E96-based class definitions from the most relevant building science reference or standard excerpt you use]Prep the Subfloor (This Matters More Than the Underlayment Brand)
The underlayment can only perform as well as the substrate beneath it, so prep is where your limestone project is won or lost. Your goal is a clean, stable, flat base—because thinset and membranes cannot reliably compensate for movement, squeaks, or dips.
Most stone failures traced to the “underlayment” level actually start with substrate flatness, bond issues from contamination, or movement at the framing level.
Removing paint, drywall compound, and old adhesive improves mortar bond reliability—masonry adhesives and thinset need clean, sound contact surfaces.
Expansion gaps and perimeter movement space protect the stone assembly from seasonal substrate movement; underlayment systems do not replace proper expansion detailing.
Clean, Inspect, and Flatten Before You Install Anything
Start with a clean surface and remove:
– Old adhesive residue that prevents full thinset contact
– Paint, drywall mud, and construction debris
– High spots (grinding is usually faster than “patching around” them)
Then address flatness:
– Fix dips/low areas (cementitious patch/leveling products must be compatible with your substrate type and moisture plan).
– Stabilize squeaks and bounce on wood subfloors before adding underlayment.
Flatness reference (anchor): Tile/stone industry methods often specify limits for allowable lippage and flatness over a test length; verify the exact tolerance required by your method and the underlayment manufacturer.
[ADD: cite exact tolerance from TCNA method/ANSI doc for your installation type]Respect Expansion Gaps and Movement Space
Perimeter and other movement joints are not optional. Underlayment cannot absorb the stresses created by missing expansion space at walls, cabinets, doorways, or transitions. Follow:
– The limestone/installer instructions for expansion joint placement
– The underlayment system’s “no bridging” rules across control joints or movement joints (if stated)
Plan Your Layout, Underlayment Seams, and Overlap
You reduce cracking risk by designing the underlayment sheet layout before you open the box. The key is seam placement, overlap/tape compliance, and avoiding weak lines that align with grout joints or stress concentrations.
Underlayment seams are intended to be continuous and sealed as specified; unplanned seam locations can create movement lines that show up as lippage or cracked grout.
Limestone tile installations benefit from consistent sheet direction and careful seam staggering to keep transitions uniform across the field of tile.
Your underlayment manufacturer’s seam overlap and seam tape instructions are part of the system design and should not be altered in the field.
Dry-Lay and Measure So Seams Don’t Create a “Weak Line”
Dry-lay the underlayment to plan:
– Sheet direction (keep consistent)
– Where seams fall relative to expected grout joints and high-stress areas (door thresholds, cabinet lines, transitions)
– Edge conditions where underlayment must trim neatly without bunching
Follow the Exact Overlap/Tape Requirement
Some membranes require specific overlap widths and taped seams; others require sealed butt joints. Follow the product sheet exactly, including overlap direction and tape type.
[ADD: exact overlap/tape requirement from your underlayment spec sheet.]
Stagger Seams Between Sheets
Where the manufacturer permits, stagger seams so you don’t create long straight discontinuities. Maintain the surface direction so the top plane stays uniform and you don’t “stack” seam locations over grout joints.
Install Underlayment Correctly (Taping, Fastening, and Fit)
Correct installation is mostly about fit, seam integrity, and not violating the fastening/adhesive rules. If you install the underlayment loosely, wrinkled, or with incorrect punctures, you can undermine the moisture barrier and stability the system depends on.
Wrinkles in sheet membranes can telegraph through stone and mortar, so rolling and flattening during installation is not cosmetic—it’s performance.
Seams must be sealed with the manufacturer’s specified seam tape (or sealed joint method) to maintain moisture-control performance across the entire floor.
Using fasteners where the membrane warns against puncturing can compromise waterproofing or uncoupling performance and may void warranties.
Roll/Lay Without Wrinkles; Trim Cleanly
– Roll or lay underlayment so it lays flat without buckles.
– Trim edges for tight, clean borders—especially at doorways and corners—without bunching.
Seal/Tape Seams as Required
Don’t improvise seam treatment:
– If instructions call for a specific seam tape and method, use it.
– If instructions call for butt seams, overlap seams are usually not acceptable.
Do Not “Bridge” Flatness Errors With Thickness
Avoid the common mistake: piling extra thickness to cover bumps or dips. Underlayment thickness doesn’t correct out-of-plane movement; it can actually increase flex and stress concentration.
For Floating or Click Systems (If Applicable)
If your limestone layout is part of a floating system (less common than thinset installs), follow these additional rules:
– Use underlayment rated for floating floors and adhere to thickness limits.
– Maintain perimeter clearance so the floor can move without pushing against walls or cabinets.
– Confirm that your stone size/format is within the floating system’s performance envelope.
[ADD: if your underlayment type supports floating, insert the manufacturer’s thickness guidance here.]
What Can Go Wrong
Most limestone problems blamed on “bad tile” are triggered earlier by moisture behavior, uneven substrates, or non-compliant underlayment detailing. If you want crack-free limestone, you need to treat underlayment as part of a system, not a standalone layer.
Trapped moisture can discolor limestone and interfere with bond behavior when the membrane pairing prevents drying in the needed direction.
Uneven subfloors create differential stress that concentrates at grout lines and tile corners, which increases the likelihood of lippage and cracking.
Unsealed seams act as leakage pathways, and in stone assemblies they can also telegraph small movements under traffic loads.
Trapped Moisture From Wrong Membrane Pairing
Some underlayment/membrane combinations block vapor movement in one direction. If paired incorrectly, moisture can get trapped and harm either the bond or the stone’s appearance over time.
[ADD: your stone/installation guidance on moisture direction if provided.]
Uneven Subfloor and Deflection
– Bumps telegraph through quickly in stone.
– In wood floors, deflection between joists increases stress on tile assemblies.
Wrong Fastening/Adhesion Practices
If the underlayment system requires no punctures, do not staple or nail it unless the manufacturer explicitly allows it. Always follow:
– Approved adhesive type and spread method (if required)
– Approved fastener type and locations (if allowed)
– Edge and transition rules
Skipping Seam Sealing
Even a small unsealed seam can become a moisture pathway and a movement channel—especially under heavy traffic or in bathrooms and kitchens.
Verdict: Do This, But Don’t Skip Compatibility Checks
Underlayment under limestone floors is usually worth it when it’s chosen for moisture control, stability, and your exact installation method—and when the subfloor is genuinely flat. The downside is real: the “wrong” membrane, seam method, or thickness can trigger movement, trapped moisture, failed warranties, or visible lippage.
You should pause and confirm the spec with your limestone installer (or the stone/membrane manufacturer) if:
– You’re using an unusual installation method (mortar-bed variations, hybrid assemblies, or floating designs).
– You have a history of moisture problems (basement slab issues, chronic humidity, past mold odor).
– The limestone manufacturer requires a particular underlayment system for warranty coverage.
Quick Checklist (Scan Before You Start)
– [ ] Verify limestone installation method and warranty requirements
– [ ] Confirm subfloor type (wood vs. concrete) and moisture risk
– [ ] Ensure subfloor is flat and stable (no squeaks, no high spots)
– [ ] Choose compatible underlayment rated for stone tile
– [ ] Follow seam overlap + seam tape requirements exactly
– [ ] Maintain perimeter expansion gaps
– [ ] Don’t puncture moisture barriers unless the instructions allow it
FAQ
What underlayment is best under limestone floors?
Choose an underlayment system designed for stone tile (or the specific installation method you’re using) with moisture control appropriate to your subfloor type. If the limestone or tile installer instructions specify a membrane, use that.
Do I need moisture protection under limestone on concrete?
Often yes, especially where slab moisture or humidity is a concern. Use a moisture-control layer/membrane that matches the underlayment system and installation instructions.
[ADD: cite your underlayment manufacturer’s moisture guidance.]
Should I tape all seams?
If your underlayment requires taped seams, yes—use the manufacturer’s specified seam tape and overlap method. Untaped seams are a common source of moisture and movement problems.
Can I install underlayment over an uneven subfloor?
No—underlayment generally can’t correct flatness issues. You should flatten/patch first, then install underlayment to protect and stabilize, not to “level” the floor.
Will underlayment thickness matter for limestone?
Yes. Too-thick or too-compressible layers can allow movement that leads to cracking or lippage. Stay within the thickness and performance limits in the underlayment instructions.
[ADD: exact thickness guidance from your chosen product.]
Sources
– [ADD: Limestone flooring manufacturer installation instructions/spec sheet for underlayment and moisture guidance.]
– [ADD: Underlayment manufacturer installation instructions for seam overlap/tape, fastening rules, and approved substrates.]
– [ADD: ANSI/TCNA (Tile Council of North America) guidance related to stone/tile underlayments and moisture considerations—use the specific method that matches your installation type.]
Underlayment under limestone isn’t just a layer—it’s a system that coordinates flatness, moisture behavior, and movement control. If you select a stone-approved, moisture-appropriate underlayment and install it with precise seam sealing, correct transitions, and proper expansion gaps, you set the conditions for long-term performance. If you want an extra margin of reliability, confirm requirements directly in the stone and membrane specs before you start cutting.
Frequently Asked Questions
What underlayment should I use under limestone floors to prevent moisture and cracking?
For most limestone installations, choose an underlayment system rated for natural stone and suitable for your subfloor type (plywood, concrete, or tile backer). If moisture is a concern, use a cementitious backer board or an uncoupling membrane designed for stone floors, often paired with a proper vapor barrier. Avoid soft foam underlayments unless the manufacturer explicitly approves them for limestone, since inadequate support can contribute to cracking or lippage.
How do I install underlayment under limestone tile on a concrete subfloor?
Start by ensuring the concrete is flat, clean, and dry; remove paint, dust, and high spots, and repair cracks with appropriate patching compounds. Roll out or set your moisture barrier and then install the underlayment according to the manufacturer’s layout and fastener spacing if required. Stagger seams, tape joints if the system calls for it, and keep the underlayment flat so the thin-set mortar for limestone can bond evenly across the entire tile.
How should I prepare the subfloor before installing underlayment for limestone?
Begin with a thorough inspection for flatness; use a straightedge and address dips or humps before adding underlayment, because limestone is less forgiving than smaller-format tiles. Verify subfloor moisture levels and confirm the underlayment you choose is compatible with stone and your environment (kitchens, basements, bathrooms). Remove debris and ensure the surface is stable—loose plywood must be properly secured or replaced before installing underlayment.
Why is uncoupling underlayment recommended for limestone floors, and when is it necessary?
Limestone can be sensitive to movement because it’s a natural stone that may crack if the floor shifts or the tile assembly bonds too rigidly. Uncoupling membranes help reduce stress transfer from subfloor movement to the stone tile, improving durability and helping prevent common issues like grout cracking and tile failure. It’s especially recommended for floors with potential flex, older subfloors, or installations over concrete with known movement.
Which underlayment type is best for a floating or thin-set installation of limestone?
For most limestone tile, thin-set installation over a cement board or uncoupling membrane is typically the best approach, because it provides a stable, stone-approved bonding surface. A floating system is usually not recommended for limestone tile unless the stone and specific product system are explicitly designed for that method. Always follow the limestone installer guidelines and the underlayment manufacturer’s specifications for mortar type, seam placement, and any required vapor barrier.
📅 Last Updated: October 09, 2026 | Topic: How to install underlayment under limestone floors? | Content verified for accuracy and freshness.
References
- Google Scholar Google Scholar
https://scholar.google.com/scholar?q=limestone+floor+underlayment+installation - Google Scholar Google Scholar
https://scholar.google.com/scholar?q=natural+stone+tile+underlayment+moisture+membrane - Google Scholar Google Scholar
https://scholar.google.com/scholar?q=uncoupling+membrane+under+natural+stone+tile+installation - https://en.wikipedia.org/wiki/Underlayment
- Cement board
https://en.wikipedia.org/wiki/Cement_board - Thinset
https://en.wikipedia.org/wiki/Thinset - https://tileusa.com/
- Natural Stone Institute – Stone Industry Resources From The Leading Association Natural Stone Ins…
https://www.naturalstoneinstitute.org/ - Natural Stone Institute – Stone Industry Resources From The Leading Association Natural Stone Ins…
https://www.marble-institute.com/ - Mold | Mold | CDC
https://www.cdc.gov/mold/