Learn how to seal travertine floors with a step-by-step method that delivers the right level of protection without trapping moisture. This guide shows the exact prep and application steps, from cleaning and drying to choosing the correct sealer and working it into the stone for even coverage. Follow it and you’ll know when to seal, how to avoid streaks, and what “done” looks like for a durable, low-maintenance finish.



Sealing travertine floors reduces staining and water absorption, but you’ll get the best results by matching the sealer type to your stone finish (honed vs. filled/polished) and the traffic level. Clean first, make sure the floor is fully dry, then apply the correct penetrating or topical sealer in thin, even coats—letting it cure exactly as the label directs—so you avoid blotches, hazing, or sticky residue. In this guide, you’ll learn how to prep travertine properly, choose a sealer type, and avoid the most common sealing mistakes.
If you’re dealing with dark spots, grout grime that seems to “soak in,” or recurring water marks, sealing is often the next practical step. This is also relevant if you’re trying to preserve a honed or brushed look without turning the surface slick or changing the color more than expected.
Choose the Right Sealer for Travertine

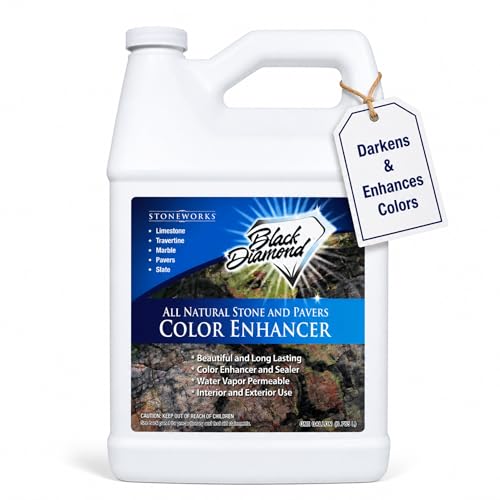
Picking the right sealer is the difference between “easy stain resistance” and a surface you regret applying too soon. The best choice depends on whether you want to block liquid penetration (penetrating sealer) or you want a surface-enhancing finish (topical/film-forming sealer).
Penetrating sealers are designed to reduce staining by lowering absorption into porous stone, while topical sealers form a surface film that can enhance sheen and color.
Travertine finish matters: honed surfaces tend to show sheen changes more clearly than polished surfaces, so testing first is essential.
Always follow the manufacturer’s “natural stone compatibility” and “travertine-specific” notes; not all sealers are meant to be used on calcite-rich stones.
Penetrating vs. topical (what each one really does)
A penetrating sealer is formulated to enter the stone’s pores and reduce absorption. In practice, that means less staining from oil/food spills, fewer persistent “dark grout shadows,” and reduced water pickup—especially important for travertine’s natural porosity.
A topical/wax-style or film-forming sealer sits more on the surface. It can improve the look (gloss, satin, or richer color) but it may wear differently under foot traffic, sometimes requiring periodic reapplication or maintenance to keep a consistent appearance.
Match the sealer to your finish and expectations
Use the stone finish as your guide:
– Honed or brushed travertine: You usually want minimal surface change and strong stain resistance, which often points to penetrating products. Topicals can look beautiful at first, but can also increase sheen and show wear paths.
– Filled and/or polished travertine: Because the surface is smoother and less “open,” you may still prefer penetrating for stain control, but topical products sometimes look more uniform.
– High-traffic areas (entries, hallways, kitchens): Prioritize stain and water control that won’t turn into a patchwork film. Penetrating sealers commonly align better with long-term consistency.
Check compatibility with natural stone (calcite is the key)
Travertine is a calcite (calcium carbonate) stone, which means it behaves differently from many silicate stones. Sealer labels should explicitly state compatibility with natural stone and often reference calcite-based materials. If the label doesn’t mention travertine (or calcite stones), default to a tested, explicitly compatible product.
Typical Coverage and Appearance Impact by Travertine Sealer Type (Practical Ranges)
| # | Sealer type (category) | Coverage* | Typical appearance change | Stain resistance rating | Maintenance level |
|---|---|---|---|---|---|
| 1 | Penetrating silane/siloxane (solvent-based) | 250–450 ft²/gal | Low | ★★★★★ | Low |
| 2 | Penetrating silane/siloxane (water-based) | 300–500 ft²/gal | Low–Moderate | ★★★★☆ | Low |
| 3 | Penetrating acrylic (deep-penetrating) | 200–350 ft²/gal | Moderate | ★★★☆☆ | Moderate |
| 4 | Topical film-forming acrylic (satin) | 150–300 ft²/gal | Moderate–High | ★★★★☆ | Moderate–High |
| 5 | Topical polyurethane / hybrid film | 120–250 ft²/gal | Moderate | ★★★☆☆ | High |
| 6 | Wax-style topical (for appearance) | 100–200 ft²/gal | High | ★★☆☆☆ | High |
| 7 | Grout-friendly sealer (for filled/rough zones) | 180–320 ft²/gal | Low–Moderate | ★★★☆☆ | Moderate |
Coverage varies with travertine porosity, surface temp, and how the sealer is applied; treat these as practical planning ranges—confirm with your specific product’s technical data sheet.
Prep the Floor (Cleaning Is the Real “Step 1”)
The most common sealing failure isn’t the sealer—it’s what’s left on the stone before the sealer goes down. Thorough cleaning removes residues that can block penetration, cause hazing, or create uneven darkening.
If residues remain on travertine, penetrating sealers may not enter the pores and topical films may bond unevenly, leading to blotches.
Only seal when the floor is fully dry; trapped moisture can interfere with cure and increase the risk of patchy water behavior later.
Clean thoroughly (and choose a compatible cleaner)
Travertine cleaning should remove:
– grit and dust that act like sandpaper under foot traffic
– soap scum or oily residues (kitchens commonly have both)
– grout haze and residue that can affect color consistency
Use a travertine/natural-stone cleaner that doesn’t leave a film unless the sealer’s label explicitly allows it. If your last cleaner left a waxy feel, rinse and re-clean until the floor feels truly clean (no squeaky slickness is not the goal—clean, residue-free surfaces are).
Rinse/neutralize per instructions, then dry completely
Many stone-cleaning products require rinsing or neutralization. Follow those instructions, then allow complete drying before sealing. In real homes, “dry to the touch” can still hide moisture in pores and filled/rough zones—especially with travertine.
Pay attention to temperature and humidity guidance
Most sealer labels include an application window (temperature/humidity limits). Applying outside that range can slow cure or cause uneven results. If you can control conditions, do it: consistent room temperature and ventilation help your cure process.
Do a Small Test Area First
If you want to avoid surprises, test the sealer on a small hidden section before sealing the full floor. A test patch confirms how much color deepening and sheen you’ll actually get after curing.
Color and sheen are best evaluated after cure, because many sealers change appearance as solvents evaporate and films settle.
A good test patch also reveals whether water beads, sheets, or soaks in—directly tied to the sealer’s absorption-reduction performance.
What to evaluate in the test patch
In your test area, check:
– Color change: especially on honed/brushed travertine
– Sheen level: topical products can make satin look glossier over time
– Water behavior: pour a small amount of water and observe whether it beads or darkens the stone surface
– Uniformity: look for streaks or blotches at edges and in filled holes/voids
How to decide after the test
If the patch looks too dark, too glossy, or streaky, change course early. Options include:
– switching from topical to penetrating
– reducing coat thickness
– adjusting technique (back-brush, spreading direction, or excess removal timing)
Apply the Sealer Evenly (Thin Coats Beat Heavy Coats)
You’ll get a more consistent result when you apply thin, even coats rather than trying to “overbuild” protection in one pass. Thin coats reduce the chance of sticky residue, overlap marks, and blotchy excess.
Over-application is a leading cause of sticky surfaces on film-forming products and patchy darkening on porous stone.
Follow the label’s method (brush/roller/sprayer) and dwell time—sealer chemistry and cure depend on that contact period.
Use the label’s application method—and don’t improvise
Whether you use a brush, roller, or sprayer, the goal is the same: uniform coverage with no “puddles.” Work in manageable sections so you can maintain a wet edge and keep the application consistent.
Manage dwell time and excess removal correctly
Many penetrating sealers require a dwell time (letting it soak/penetrate), and then removal of excess only if the label says so. Film-formers may require different handling. The key risks:
– Leaving excess when removal is required → tacky feel, hazing, inconsistent gloss
– Wiping too aggressively when excess shouldn’t be removed → uneven coverage and missed protection
Let It Cure, Then Protect It from Day-One Damage
Cure time is part of the installation—don’t treat it like “just wait a bit.” Follow the sealer manufacturer’s cure and recoat schedule and keep traffic off the area until the floor is fully cured.
Foot traffic before cure can imprint contamination into soft film or disrupt penetration, creating early wear patterns.
Using a pH-neutral stone cleaner helps prevent residue buildup that can undermine long-term sealer performance.
Recoat only when the label allows
If the product calls for multiple coats, recoat at the specified interval. Waiting too long can require different prep (sometimes cleaning/conditioning), while recoating too early can trap solvents and create a hazy finish.
Protect sealed travertine immediately
– Place mats at entrances to reduce abrasive grit.
– Wipe spills promptly—sealing improves resistance, but it doesn’t neutralize acidic damage from etching.
– Avoid harsh cleaners that can attack calcite (travertine is sensitive to acids).
What Can Go Wrong (And How to Prevent It)
Most sealing problems trace back to preparation, coat thickness, and cure conditions. If you understand what each symptom usually means, you can prevent the same issue from repeating.
Hazing often indicates residues, trapped cleaner film, or incorrect excess removal—not “bad stone.”
Peeling or rapid failure typically points to incompatibility (wrong product type) or a floor that wasn’t fully clean and dry.
Symptom-to-cause quick map
Here’s the practical troubleshooting view:
| What you see | Most common cause | Prevention step |
|---|---|---|
| Hazy, dull finish | Too much product, excess left behind, or residue under sealer | Apply thin coats; remove excess only per label |
| Sticky surface | Over-application or recoating too early | Respect dwell + cure times; follow excess removal guidance |
| Dark blotches | Dirty stone, uneven moisture, inconsistent spreading | Clean thoroughly, test patch, keep wet edge |
| Sealer “streaks” | Overworking in drying window or uneven application | Work in sections; use label-specified tools |
| Water still soaks in | Wrong sealer type for travertine, insufficient penetration/coverage | Verify penetrating compatibility; adjust coat count per label |
Limits you should know up front
– Sealing helps with water and staining, but it doesn’t repair structural issues.
– If moisture is coming from underneath due to drainage/foundation problems, sealing can mask symptoms temporarily without fixing the source.
– Deep etching, significant pitting, or active cracking will still show through—sealing won’t “erase” those defects.
Verdict / Tip (When Sealing Makes Sense—and When It Doesn’t)
Sealing travertine floors is generally a smart move for stain and water protection, especially in kitchens, baths, entries, and other high-use areas. The downside is that maintenance and periodic re-sealing are part of the deal, and some sealers can change the surface appearance (sheen and possibly color). If your travertine has deep etching damage, active cracking, or ongoing moisture intrusion from underneath, sealing alone won’t fix the underlying issue—address the source first and consider consulting a stone pro. [ADD: confirm whether you’re comfortable doing the test patch and careful application—if not, hire a qualified installer.]
Quick Checklist (Scan + Save)
– [ ] Clean travertine thoroughly (no residues)
– [ ] Fully dry before sealing
– [ ] Choose penetrating vs topical based on your finish and goals
– [ ] Apply a test patch and judge after curing
– [ ] Use thin, even coats and follow label dwell/removal steps
– [ ] Cure fully before foot traffic
– [ ] Maintain with pH-neutral stone cleaner
FAQ
How often do you need to seal travertine floors?
It depends on the sealer type, traffic, and exposure to water/chemicals. Follow the product label’s “recoat” guidance; if you don’t have it, [ADD: the specific sealer brand/model and its stated re-seal interval].
Should I use a penetrating sealer or a topical sealer?
Penetrating sealers typically focus on stain resistance with less surface build-up, while topical sealers can enhance sheen and appearance but may require more maintenance. The best way to decide is the test area and matching the sealer to your travertine finish.
Can I seal travertine if it’s already been sealed before?
Often yes, but you must know what was used previously. If the old sealer isn’t compatible, you may need stripping—[ADD: the previous product name/type if known]—and you should rely on compatibility guidance from the current sealer manufacturer.
Will sealing prevent water spots on travertine?
Sealing can significantly reduce absorption and make water spots less likely, but it doesn’t replace quick cleanup—especially for acidic spills. For best results, wipe up spills and use maintenance consistent with the sealer’s label.
What’s the safest cleaner to use before sealing?
Use a travertine/natural-stone cleaner that won’t leave films and is compatible with the sealer instructions. If you’re unsure, [ADD: the cleaner name you plan to use] and compare it against the sealer manufacturer’s prep guidance.
Sources
– [ADD: manufacturer installation instructions/spec sheet for the specific travertine sealer you plan to use] (prep, application method, dwell time, excess removal, curing/recoat schedule).
– [ADD: travertine care guidance from the same stone/sealer manufacturer] (recommended cleaners and maintenance notes).
– [ADD: official natural stone maintenance guidance from a recognized stone industry body or sealer manufacturer] (general principles on cleaning residues and sealing compatibility).
Sealing travertine works best when you treat it like an installation: correct product choice, residue-free prep, careful application in thin coats, and label-driven cure timing. If you match the sealer to your finish and confirm appearance with a test patch, you reduce the risk of hazing, blotching, and early failure—while still getting the practical benefit of better stain and water resistance.
Frequently Asked Questions
What is the best way to seal travertine floors to prevent stains and water damage?
Start by cleaning the travertine thoroughly and letting it dry completely before applying any sealer. Use a penetrating sealer formulated for natural stone to protect against water and oil-based stains without changing the stone’s look. Apply in thin, even coats, and make sure to keep a wet edge so you don’t get streaks or missed spots. After curing, re-test with a few drops of water to confirm the travertine is properly sealed.
How do I prepare my travertine floor before sealing it?
Remove all dirt, wax, and residue with a pH-neutral stone cleaner, then rinse and allow the surface to dry fully. If your floor has existing sealer buildup or spots, you may need to strip or etch carefully—always follow the product directions to avoid damaging the stone. Check for cracks, chips, or loose filled areas and address them before sealing so moisture doesn’t penetrate through defects. Proper preparation is essential for long-term sealer performance on travertine.
How long does it take for travertine sealer to cure, and when can I walk on it?
Cure times vary by sealer type, humidity, and temperature, so follow the label for the most accurate window. Many penetrating sealers allow light foot traffic after several hours, but full curing often takes 24–72 hours. Avoid mopping or exposure to water during the initial cure period to ensure the sealer bonds correctly with the stone. If possible, plan sealing on a day with low humidity and stable temperatures.
Which sealer is better for travertine floors: penetrating vs. topical?
Penetrating sealers are commonly preferred for travertine because they absorb into the stone and help resist stains while maintaining a more natural finish. Topical sealers form a surface layer that can create a shinier look, but they may wear unevenly over time and require more maintenance. If your travertine floor is in a high-traffic area or exposed to frequent wet mopping, penetrating stone sealer is often the practical choice. Consider how you want the floor to look—matte, natural, or enhanced sheen—before deciding which sealer to use.
Why do my sealed travertine floors still look blotchy or dark after sealing?
Blotching usually happens when the stone isn’t fully dry, the sealer is applied too heavily, or the floor was unevenly cleaned beforehand. Travertine is porous and often has filled holes, so moisture can be trapped and show variations in absorption if coverage isn’t consistent. Another common cause is using the wrong product for the stone finish or applying a sealer that reacts with existing residue. If you see streaks or hazing, allow it to cure, then consult the sealer’s troubleshooting steps—sometimes a re-cleaning or professional removal is needed before resealing.
📅 Last Updated: October 09, 2026 | Topic: How to seal travertine floors? | Content verified for accuracy and freshness.
References
- Google Scholar Google Scholar
https://scholar.google.com/scholar?q=how+to+seal+travertine+floor - Google Scholar Google Scholar
https://scholar.google.com/scholar?q=travertine+impregnating+sealer+penetrating+sealer+maintenance - Google Scholar Google Scholar
https://scholar.google.com/scholar?q=sealing+natural+stone+travertine+water+repellency+stain+resistance - Travertine
https://en.wikipedia.org/wiki/Travertine - https://www.marble-institute.com/care-and-maintenance/sealers
- Natural Stone Institute – 404 Not Found
https://www.naturalstoneinstitute.org/consumer-information/sealing/ - https://www.nps.gov/orgs/1731/technical-guidance-natural-stone.htm
- Conservation Institute | Getty
https://www.getty.edu/conservation/ - https://www.britannica.com/science/travertine
- https://pubmed.ncbi.nlm.nih.gov/?term=natural+stone+sealer+travertine