
Removing adhesive from marble floors is safest and most effective when you use a gentle, pH-neutral approach first—then escalate only if needed. This guide tells you exactly which methods dissolve or lift common adhesives without etching or dulling marble. You’ll learn what to avoid, how to test in a hidden spot, and how to get adhesive residue up cleanly.



If adhesive is still on your marble, the safest removal path is to soften the residue with gentle heat, lift it carefully with a plastic scraper, then clean with a pH-neutral stone cleaner. Avoid harsh solvents and acidic cleaners because marble is calcium carbonate and can etch or dull when the chemistry is wrong—especially on honed finishes and older sealants.
If you have leftover tape glue, sticker residue, or a previous flooring adhesive on marble—particularly on honed or polished surfaces—this guide is designed to minimize risk. It explains how to choose a remover based on how stubborn the residue is, what to test before you treat the whole floor, and how to finish without leaving haze or uneven sheen. As of 2026, pH-neutral, natural-stone-safe workflows remain the most consistently recommended approach by stone-care manufacturers.
Identify the adhesive type (and test a small spot)
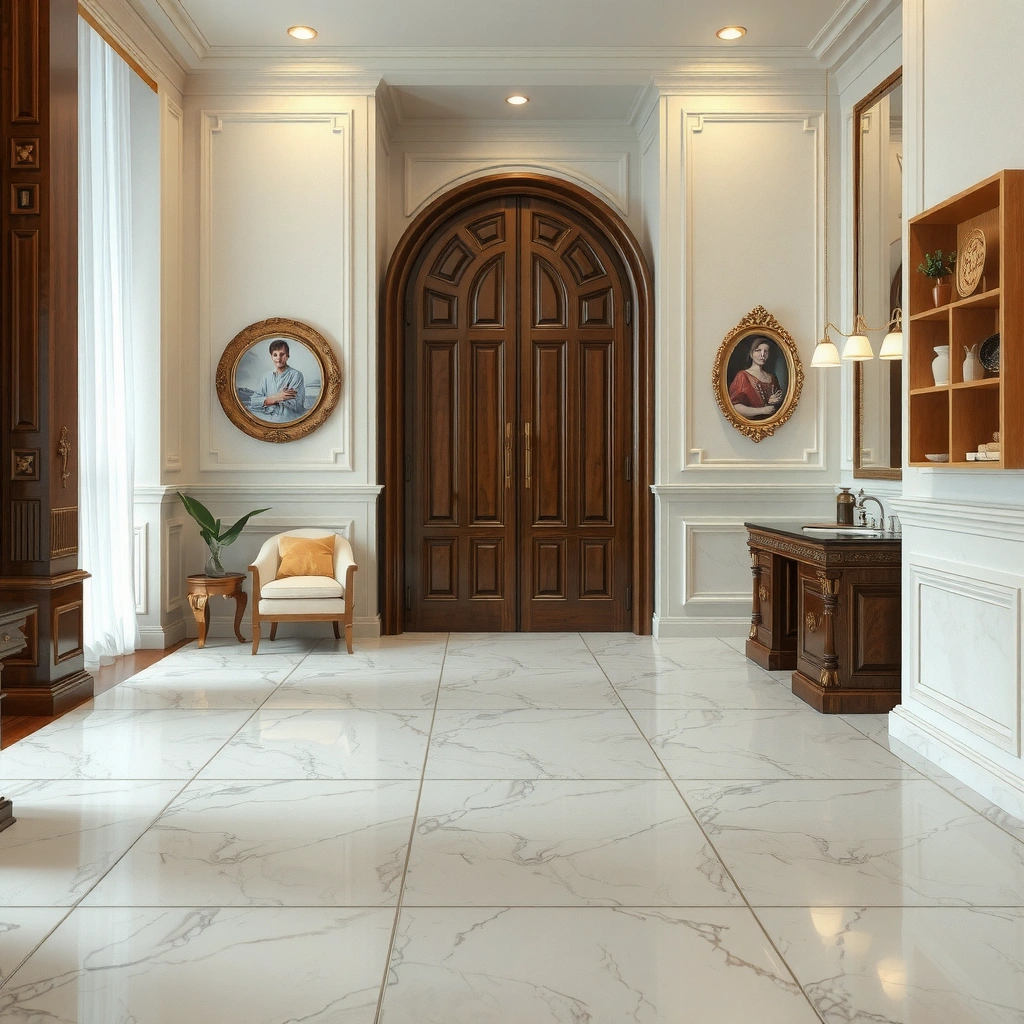
You can’t choose a truly safe remover until you identify whether the residue is tape/sticker glue, pressure-sensitive adhesive, or aged flooring adhesive. Once you know what you’re dealing with, the next best step is a small-spot compatibility test to confirm the marble finish won’t haze.
Start by looking closely at texture and behavior:
– Fresh or tape/sticker residue often looks tacky, glossy, and rubbery.
– Old adhesive can look cloudy, brittle, or layered, and it may smear when warmed.
– Flooring adhesive (for tiles/vinyl/laminate) can be thicker and may include backing residues, binders, or gritty components.
Then check the marble conditions that affect removal success:
– Finish: Polished marble hides fine scratches better than honed marble, but honed surfaces can dull if you apply abrasive pads or leave residue.
– Sealing: Sealed marble can slow chemical penetration; some adhesives can “trap” under/around the sealer, which is why cleanup is as important as stripping.
– Residue film vs. chunk: If you can lift chunks but the surface still looks tacky, you’re dealing with a thin adhesive film that needs cleaning, not just scraping.
A few grounding facts help you make better decisions:
– According to geological and materials references describing marble as primarily calcite (calcium carbonate), acids can react with the stone surface and cause dulling/etching.
[ADD: source describing marble/calcite susceptibility to acids]– Marble hardness is commonly given as Mohs 3 (calcite), which means it can scratch or lose polish when abrasives are used.
– pH-neutral cleaning is widely recommended by natural stone care guidance to reduce chemical risk to calcite-based stone.
[ADD: manufacturer/industry guidance recommending pH-neutral cleaners for marble]Before you treat the full area, do a small test:
1. Pick an inconspicuous spot (near a closet door track works well).
2. Try your safest method first (heat + plastic scraping, then pH-neutral cleaning).
3. Wait for a full dry-down—some etching haze shows up after moisture evaporates.
4. If you see whitening, dull patches, or a visible sheen change, stop and adjust.
Testing a small spot first helps detect haze or sheen changes from the chosen chemistry before you treat the whole marble field.
Marble is largely calcium carbonate (calcite), so acidic chemicals can chemically react and damage the surface.
A residue that smears after warming is often tackier than a brittle, layered adhesive and may require more cleaning cycles after scraping.
Soften and remove with heat + scraping (lowest-risk start)
The lowest-risk removal method starts with softening the adhesive and then lifting it mechanically. If you start with chemicals, you may end up etching the marble—especially on honed finishes—so heat first is typically the safer strategy.
Here’s the workflow that minimizes stone risk:
1. Prepare the area: Clear loose debris so you don’t grind grit into the marble.
2. Set a heat source to gentle warmth: Use a hair dryer or a heat tool on a low setting. The goal is to soften adhesive, not overheat nearby materials.
3. Warm in small sections: Focus on a spot roughly the size of your scraper tip so you can lift while the adhesive is pliable.
4. Lift with a plastic scraper: Use a plastic putty knife or plastic razor-type scraper designed for delicate surfaces.
5. Repeat instead of forcing: If the adhesive won’t lift cleanly, add heat for another short cycle rather than pressing harder.
6. Clean the leftover film: After you remove visible residue, wipe with a damp microfiber cloth and then a pH-neutral stone cleaner.
Practical technique matters:
– Angle the scraper low to reduce gouging and avoid catching the marble surface.
– Avoid metal edges even when you’re tempted—adhesive layers sometimes trap grit that can scratch marble as you scrape.
– Don’t soak with water in a way that risks seepage into grout lines or behind edges; damp wiping is usually enough once adhesive chunks are lifted.
From a “what usually works” standpoint, mechanical softening tends to reduce how much chemical strength you ultimately need. That matters because many adhesives and sealers are complex blends, and chemical removers vary widely in their safety for natural stone.
Gentle heat plus plastic scraping reduces chemical exposure time on calcite-based marble surfaces.
Plastic scrapers lower the risk of scratches compared with metal blades when residue contains embedded grit.
After lifting adhesive chunks, a thin sticky film often remains and requires pH-neutral cleaning rather than more scraping.
Use the right cleaner: pH-neutral first, then carefully escalate
Start with pH-neutral cleaning because it’s designed to be gentle on natural stone. If residue remains, escalate carefully using only products that the manufacturer explicitly states are safe for stone or natural marble.
Your cleaning escalation should look like this:
1. Warm water + pH-neutral stone cleaner
– Use a microfiber cloth, and work the area in overlapping passes.
– Wipe again with a clean damp cloth to remove any loosened film.
2. Follow product directions exactly
– If you use an adhesive remover made for stone, follow the dwell time (how long it sits) and the cleanup method specified on the label.
– Don’t “soak longer” unless the label instructs it—long dwell times increase the chance of haze.
3. Assess after dry-down
– Some residues become less visible once dry; others—like etching haze—appear after moisture leaves.
What “pH-neutral” means in practice:
– Natural stone guidance frequently frames safe cleaners as non-acidic and near neutral pH (commonly around pH 7).
[ADD: source for pH-neutral recommendation for marble from a stone-care manufacturer]– Acidic household products typically fall in the pH range that can harm calcite surfaces.
[ADD: source for typical pH of vinegar/acidic cleaners]To make your choices easier, here’s a quick reference for common cleaner categories and how they generally relate to marble safety.
Typical pH of Common Household Cleaners vs. Marble Compatibility (General)
| # | Cleaner type | Typical pH (range) | Stone risk | Marble compatibility |
|---|---|---|---|---|
| 1 | pH-neutral stone cleaner (natural stone) | ~6.5–8.0 | Low | ★★★☆☆ |
| 2 | Mild dish soap (diluted) | ~7–9 | Low to Moderate | ★★★☆☆ |
| 3 | Alkaline degreasers (diluted) | ~9–12 | Moderate | ★★☆☆☆ |
| 4 | Baking soda paste | ~8–9 | Moderate (residue risk) | ★★☆☆☆ |
| 5 | Vinegar / acetic acid | ~2–3 | High | ★☆☆☆☆ |
| 6 | Bleach (sodium hypochlorite) | ~10–12 | Moderate (material/finish variability) | ★☆☆☆☆ |
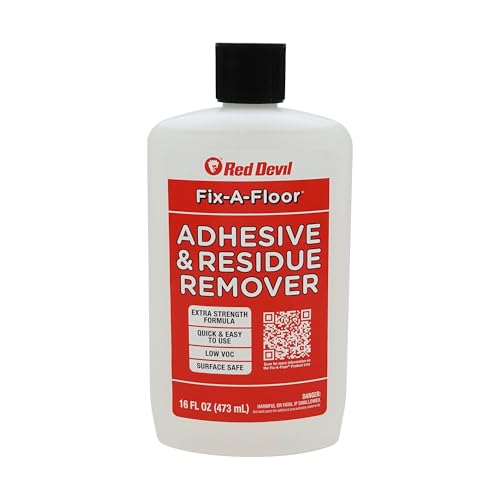
| 7 | Specialty adhesive remover (stone-safe, labeled) | Varies (formulation-dependent) | Low if labeled compatible | ★★★★☆ |
Note: pH values vary by brand and dilution. Use this table as a decision framework and always verify a product’s natural stone compatibility claims on the label/spec sheet.
[ADD: sources for typical pH ranges by cleaner type]pH-neutral cleaners are preferred on marble to reduce the likelihood of calcite etching and dulling.
Escalate only with products that explicitly state compatibility with natural stone, and follow dwell time instructions.
Thin adhesive haze often persists even after visible chunks are removed, so thorough wiping after each step matters.
When adhesive is stubborn: what to try (and what to avoid)
When residue won’t lift after heat and basic cleaning, your goal is to increase effectiveness without damaging the stone. The safest way to do that is to use more cycles (heat → scrape → pH-neutral cleaning), or switch to a stone-compatible adhesive remover as directed.
For thick, old buildup:
– Repeat cycles rather than forcing one harsh treatment.
– Warm the adhesive, scrape gently, then clean again with pH-neutral cleaner.
– Pay attention to whether you’re removing adhesive or just smearing it—smearing usually means the adhesive is still softening and needs more heat control.
What to try next (ordered by typical risk):
1. More heat time in short bursts (not prolonged overheating).
2. Stone-compatible adhesive remover (explicitly labeled for natural stone), used with correct dwell time and complete cleanup.
3. Gentle mechanical assistance only if compatible with marble—always avoid grinding action.
What to avoid (high risk to marble):
– Strong acids like vinegar and acid descalers.
– Bleach and acidic “grout/stain” cleaners.
– Aggressive abrasives and metal scrapers.
– Over-sanding or steel wool, which can create lasting dull patches on honed marble.
Here’s a comparison you can use to decide your escalation path:
| Method | Best for | Pros | Cons / risk |
|---|---|---|---|
| Heat + plastic scraping | Most tape/sticker residue; thin-to-medium adhesive | Low chemical risk; controllable | May take multiple cycles |
| pH-neutral cleaner cycles | Sticky haze after scraping | Improves finish uniformity | Slower than solvents |
| Stone-compatible adhesive remover | Thick/aged flooring adhesive (with label compatibility) | Often more effective on binder residue | Can leave haze if dwell/cleanup is off |
| Acid/bleach “shortcuts” | General grime removal (not adhesive on marble) | Fast on some stains (not recommended here) | High etching/dulling risk |
As of 2026, many stone-care guidance documents emphasize “chemical compatibility first” rather than “strongest chemical wins,” because marble damage is often irreversible without professional honing/polishing.
For stubborn residue, repeating heat → plastic scraping → pH-neutral cleaning cycles is generally safer than a single aggressive chemical step.
Avoid acidic descalers, bleach, and grout cleaners on marble because calcite-based stone can etch when exposed to acids.
Metal and abrasive tools can scratch marble, especially when adhesive layers contain trapped grit.
What can go wrong (common mistakes and edge cases)
The most common problems happen when the chemical is wrong, the tool is too abrasive, or residue cleanup is incomplete. If you avoid those three failure points, you greatly reduce the chance of permanent dull patches.
Here are the issues we see most often in real-world maintenance:
– Etching/whitening: Typically results from acidic cleaners, descalers, or leaving the wrong product on the surface too long.
[ADD: source documenting etching effects of acids on calcite/marble]– Scratches and dull spots: Usually caused by metal scrapers, scouring pads, or sand-like residue being dragged across the stone.
– Sealant confusion: If marble is sealed, some residues can sit at/under the sealer. Over-aggressive removal may change local sheen and make the area look “different.”
– Residue ghosting: Thin adhesive film can remain after chunk removal. That film can attract dirt and make the spot look uneven even if adhesive is “gone.”
– Unknown coating layers: Some floors have previous treatments (wax, topical sealers, coatings). Removing adhesive without recognizing the coating can produce patchy results.
Edge cases to treat with extra caution:
– Polished vs. honed: Honed marble tolerates less “surface grinding,” even if the adhesive itself seems tough.
– Large areas: If you can’t maintain consistent dwell time and wiping coverage, you may create uneven chemical exposure.
– Cracks and chips: Residue can wick into damage. Aggressive chemical use can enlarge appearance differences.
If you’re unsure what’s on the floor (unknown adhesive, possible coating), stop and confirm compatibility before continuing. In those cases, stone-care professionals can test coatings and pick removal chemistry more precisely.
Etching and whitening on marble are commonly linked to acid exposure or incorrect dwell time with non-compatible chemicals.
Incomplete removal leaves a thin adhesive film that causes “ghosting” and uneven sheen, even when visible residue is gone.
Sealed marble can trap adhesive under the sealer, so removal and cleanup must be thorough to avoid patchiness.
Verdict / tip (safe approach, downsides, and who should skip)
The safest overall approach is: heat to soften → plastic scraping → pH-neutral cleaning, and only escalate to a stone-compatible adhesive remover when necessary and per label directions. This method is slower than solvent-based “one-step” hacks, but it’s far more consistent for preventing dulling or etching on calcite marble.
Downsides to be honest about:
– Time: Old flooring adhesives often take multiple cycles. Expect a longer process than solvent-first methods.
– Consistency: You need careful wipe-down and dry-down checks to keep sheen uniform.
– Limits: Some residues bonded with strong binders may still require professional restoration (honing/polishing) if surface appearance changes.
Skip DIY (or stop immediately) if:
– The marble is already damaged/etched and you want a uniform finish.
– The adhesive type and finish compatibility are unknown and you can’t confirm a safe chemistry path.
– You’re dealing with very large areas where uneven removal would be difficult to correct without resurfacing.
As of 2026, if you’re maintaining a commercial property floor and uniform appearance matters (lobbies, galleries, showrooms), a short assessment by a stone-care specialist can prevent expensive rework.
Heat and plastic scraping combined with pH-neutral cleaning minimizes marble etching risk compared with acidic or abrasive DIY methods.
Stone-compatible removers should be used only when the label explicitly supports natural stone and when dwell time and cleanup instructions are followed.
If you need a perfectly uniform finish on already compromised marble, professional stone care is often the safer route.
Quick checklist (scan/save)
– [ ] Test an inconspicuous spot first
– [ ] Soften with gentle heat
– [ ] Lift with a plastic scraper
– [ ] Clean residue with pH-neutral stone cleaner
– [ ] If needed, use a stone-compatible adhesive remover per label
– [ ] Avoid acids, bleach, and metal/abrasive tools
– [ ] Rinse/wipe thoroughly after any remover
FAQ
Will vinegar remove adhesive from marble floors?
Usually no—and it’s risky. Vinegar is acidic and can etch marble (calcium carbonate). If chemical help is necessary, use pH-neutral cleaners first and only use a remover that is explicitly described as safe for natural stone.
Can I use a razor blade or metal scraper on marble?
It’s risky. Metal tools can scratch marble, especially when the adhesive layer contains grit. Use a plastic scraper designed for delicate surfaces instead.
What if the adhesive leaves a sticky haze after scraping?
That thin film often needs repeated gentle cleaning. Try pH-neutral cleaner wipes first, and only move to a stone-compatible adhesive remover if the haze persists—always follow label directions.
Is it safe to use acetone or paint thinner?
Don’t assume it’s safe for marble. Many solvents can affect sealers or leave residues, and compatibility depends on the exact product and stone finish—[ADD: source for compatibility guidance, e.g., remover label compatibility section for natural stone].
Conclusion
Removing adhesive from marble floors safely comes down to sequencing: soften with gentle heat, lift with plastic scraping, then clean using pH-neutral products before escalating to any stone-compatible remover. Avoid acids, bleach, and abrasive tools because marble (calcium carbonate) can etch or dull when chemistry or technique is wrong. If you’re working on already-compromised stone or large areas where finish uniformity is critical, consider pausing DIY and consulting a stone-care professional to protect the long-term look of your floor.
Sources
– Marble chemistry and etching risk from acids: [ADD: source for marble/calcite susceptibility to acids—e.g., a natural stone care handbook or official guidance from a stone-care organization/manufacturer].
– Stone-cleaning guidance recommending pH-neutral cleaners: [ADD: source for manufacturer guidance for pH-neutral cleaners on marble].
– Manufacturer label directions for any adhesive remover used (including compatibility claims for natural stone): [ADD: source for the specific product’s official label/spec sheet].
– Typical pH of common household cleaner categories (for decision guidance): [ADD: source(s) such as SDS/technical data sheets for typical pH ranges].
Frequently Asked Questions
What’s the safest way to remove adhesive from marble floors without damaging the stone?
Start with the least aggressive method: gently soften the adhesive with a commercial adhesive remover labeled safe for natural stone, or use a low-heat hair dryer to warm it slightly so it releases. Avoid acidic cleaners, bleach, or harsh abrasives because marble is porous and can etch or discolor. After lifting the residue, wash the area with a pH-neutral marble cleaner and dry thoroughly to prevent spotting.
How can I remove sticky adhesive residue from marble floors after peeling off a sticker?
Use a microfiber cloth and apply a small amount of isopropyl alcohol (IPA) or a stone-safe citrus-based remover to dissolve the remaining tackiness. Let it sit for a few minutes, then wipe in small sections and repeat as needed rather than scrubbing hard. Finish by rinsing with clean water and drying, since alcohol and removers can leave residue if not cleaned off.
How do I remove old, hardened glue from marble flooring?
Hardened adhesives often require softening before scraping—warm the spot with a hair dryer on low heat and apply a stone-safe adhesive remover per label directions. Once softened, lift the bulk with a plastic scraper to protect the marble surface, then use a gentle solvent or residue remover for the thin film. Always neutralize/clean with a pH-neutral cleaner afterward to keep the marble looking uniform.
Why should I avoid acetone, vinegar, or harsh chemicals on marble when removing adhesive?
Marble (calcium carbonate) can be etched or dulled by acidic products like vinegar, and some solvents can damage finishes or leave uneven marks. Acetone can also penetrate and interact with sealants, increasing the risk of dull patches. To protect your marble floor, choose pH-neutral, stone-safe adhesive removers and avoid abrasive pads that can scratch the surface.
Which is the best method for removing tape residue or adhesive strips from marble—heat or solvent?
For tape residue on marble, heat is often the safest first step because it softens pressure-sensitive adhesives, making them easier to lift with a plastic scraper. If residue remains, follow with a small amount of isopropyl alcohol or a manufacturer-approved stone-safe solvent to dissolve the sticky layer. The best approach depends on the adhesive type, so test in an inconspicuous area first and then clean with a pH-neutral marble cleaner.
📅 Last Updated: October 09, 2026 | Topic: How to remove adhesive from marble floors? | Content verified for accuracy and freshness.
References
- Google Scholar Google Scholar
https://scholar.google.com/scholar?q=removing+adhesive+residue+from+marble+stone - Google Scholar Google Scholar
https://scholar.google.com/scholar?q=stone+cleaning+removal+of+adhesives+conservation+solvents - Google Scholar Google Scholar
https://scholar.google.com/scholar?q=label+tape+residue+removal+from+natural+stone+marble - https://en.wikipedia.org/wiki/Marble
- Adhesive
https://en.wikipedia.org/wiki/Adhesive - https://www.getty.edu/conservation/learning/
- https://www.getty.edu/conservation/resources/
- https://www.nps.gov/subjects/historicpreservation/preservation-briefs.htm
- Conservation physics: Conservation Physics – Index
https://www.conservationphysics.org/ - Google Scholar Google Scholar
https://scholar.google.com/scholar?q=How+to+remove+adhesive+from+marble+floors?