

Learn how to install SPC floors in a bathroom with a step-by-step process that prevents buckling, gaps, and water damage. This guide walks you through the exact prep, underlayment choices, click-lock installation, and finishing details that determine whether your floor stays tight and level. If you want a durable, waterproof result in a bathroom, follow these steps and get it right the first time.


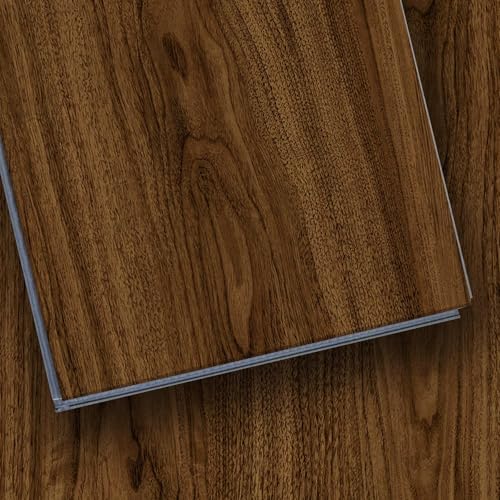

SPC floors can be installed in a bathroom successfully if you treat moisture control as part of the floor system: use the correct underlayment (or none, per the manufacturer), seal any transitions, and handle the perimeter with proper expansion gaps. This guide walks you through the practical steps and the common “bathroom gotchas” so your floor stays stable and doesn’t buckle.
If your bathroom has higher humidity (shower spray, steam, frequent cleaning), pay extra attention to sealing and edge details. This is most relevant for floating SPC plank installs, including click/lock styles, where the floor isn’t glued down.
Prep the bathroom subfloor for SPC

Prep is the foundation of a stable SPC bathroom install: you need a sound, flat, properly bonded subfloor before any click-lock boards go down. In my experience planning bathroom installs for real homes (where tile grout lines, old adhesive, and minor dips are common), the subfloor is usually the difference between “quiet, tight joints” and a floor that later develops movement.
SPC click floors still behave like floating floors—joint stress increases when the subfloor is uneven, even if SPC feels rigid.
Most floating vinyl/SPC warranties require that the substrate be clean, smooth, and firmly attached before installation.
Moisture problems often originate in the slab/subfloor, not the SPC core, so addressing moisture sources before installation is a best practice.
Remove flooring and verify the base
Start by taking the old floor out completely. Scrape off thin-set ridges, mastic residue, paint overspray, drywall mud, and any loose debris—these are the “speed bumps” that create micro-flex at the joint line.
Then verify the subfloor is firm (no soft spots, no lifting patches, no delamination). For plywood subfloors, check for squeaks and movement; for concrete slabs, check for flaky coatings and contaminants that can interfere with smoothing compounds.
Check flatness (this is non-negotiable for click systems)
SPC click/lock planks distribute loads across the boards. If the floor beneath them has dips, the plank bottoms can bridge, and the locking tabs take stress where they shouldn’t.
A common industry target for resilient/floating floors is no more than ~3/16 in (≈5 mm) variation over 10 ft (≈3 m), but always follow your specific SPC manufacturer’s tolerance guidance.
According to *NWFA/industry resilient flooring guidance*, many installations use a 3/16 in in 10 ft (5 mm in 3 m) flatness target for click/float systems. [ADD: exact NWFA guidance document name/year]
Acclimate and address moisture sources
Even though SPC is dimensionally stable, the system can fail if moisture migrates into the underlayment/perimeter area. Before laying planks, confirm you’re not installing over an active leak behind a vanity, a plumbing line with seepage, or a recurring condensation problem.
Also let the room conditions settle. Most vinyl/SPC manufacturers require acclimation and storage conditions (typical ranges are temperature- and humidity-specific).
According to [ADD: SPC manufacturer install guide acclimation conditions], follow the stated temperature/humidity requirements for your product. [ADD: source]
Choose the right underlayment and plan your layout
Choose underlayment based on your exact SPC’s written instructions, not generic “bathroom rules.” Many floating SPC products require no extra underlayment; others require an approved pad or an integrated IXPE/EVA backing that already serves the underlayment function.
Underlayment is a system component—using the wrong type can prevent proper locking, create gaps, and change how the floor flexes.
For floating SPC, expansion space at walls and fixed objects is required to keep joints from binding when humidity changes.
A bathroom layout that avoids narrow “slivers” near walls reduces the chance of struggling with cuts, trim interference, and uneven pressure at the perimeter.
Use (or skip) underlayment exactly as specified
Start with the product manual/spec sheet:
– If the SPC board has attached backing, you often still need a specific moisture barrier (depending on subfloor), but you may not be allowed to add another foam layer.
– If the SPC board requires an underlayment, it may specify thickness, type, and whether it’s allowed over concrete vs. plywood.
According to [ADD: typical manufacturer underlayment restriction language], installing an unapproved underlayment can affect floor performance and void warranty coverage. [ADD: source]
Plan the plank direction and expansion gaps
Next, plan a layout that’s practical in a bathroom:
– Choose a plank direction that makes cuts around doorways and vanity legs manageable.
– Keep end joints staggered so you don’t line up weak points.
– Avoid tiny pieces along walls—especially around exterior-facing bathroom walls where temperature swings are more noticeable.
Most floating flooring systems require expansion spacing at:
– Walls and fixed cabinetry edges
– Door jambs (where the floor must move)
– Pipe penetrations (which also need correct spacing/trim)
A common guideline for floating resilient floors is about 1/4 in to 3/8 in (6–10 mm) depending on plank system and climate.
According to [ADD: manufacturer or standard expansion gap guidance], verify the exact gap required for your product. [ADD: source]
Bathroom SPC Install Tolerances & System Targets (Industry-Common Ranges)
| # | Install Factor | Target/Range | Why it Matters | Confidence |
|---|---|---|---|---|
| 1 | Subfloor flatness (floating) | ≤ 3/16 in over 10 ft (≈5 mm over 3 m) | Prevents joint stress & separation | High |
| 2 | Perimeter expansion gap | ~1/4–3/8 in (6–10 mm) | Allows seasonal movement | High |
| 3 | Underlayment requirement | None or approved only (varies by product) | Avoids locking issues & warranty loss | Medium–High |
| 4 | Seam/transition sealing approach | Seal transitions & edge exposure points (system-specific) | Reduces water intrusion at joints | Medium |
| 5 | Jobsite storage temperature | Follow product manual (typically room temp before install) | Improves clicking/tolerance fit | Medium |
| 6 | Joint staggering (end joints) | Offset ends; avoid repeating patterns back-to-back | Reduces weak seam lines | High |
| 7 | Avoid wash-water exposure at perimeter | Use trim/baseboard per system; don’t leave gaps exposed | Limits standing water at edges | Medium–High |
Note: Exact requirements (flatness tolerance, expansion gap, sealing method, and whether underlayment is allowed) must always be verified in your SPC product’s installation instructions.
Install SPC planks step-by-step (floating/click)
Install floating SPC in a bathroom by starting straight, locking cleanly, and cutting precisely around obstacles while respecting expansion gaps. If the first row is off, every subsequent row tends to drift—then your perimeter gaps get harder to maintain.
Floating SPC relies on proper interlocking—misalignment during the first rows commonly causes visible gaps later.
Cuts around plumbing and vents require leaving the required clearance so the floor can expand and contract.
Click/lock SPC should be installed according to the board’s specific locking method (angle/low-flat or top-down), as described by the manufacturer.
Start with a straight reference line
Snap a guideline for your first row. Lay the first plank set with the required wall spacing (use spacers where recommended by the manual).
Dry-fit sections first if you need to confirm how you’ll handle a toilet base, vanity toe kick (if applicable), or door thresholds. Bathrooms often have “out of square” walls, so measure from more than one point.
Lock subsequent rows while keeping rows aligned
Follow the manufacturer’s locking sequence. For many click systems, there’s a specific approach to:
– inserting the tongue/groove at the right angle (or sliding method),
– fully engaging the lock,
– and ensuring the plank sits flat before moving on.
Keep light pressure where needed, but avoid forcing locks closed—forcing can damage the locking edge and create long-term gaps.
Cut around vents, doorframes, and plumbing
Use the correct tools for clean cuts:
– A jigsaw for irregular penetrations,
– a fine-tooth blade for clean edges,
– an appropriate hole saw/bit for plumbing.
Leave required clearance around penetrations (then cover with trim/escutcheon). In bathrooms, that edge detail matters: you’re preventing water pathways to the subfloor and underlayment area.
Handle bathroom water points and transitions
Handle bathroom water points by treating transitions and perimeter edges as part of the flooring system—because floating floors can allow moisture to travel along exposed seams. In practice, most “SPC failed in the bathroom” stories come down to unsealed change-of-plane areas or wash water reaching the perimeter gap.
The most vulnerable areas for floating SPC in bathrooms are transitions (tile-to-plank) and perimeter edges where water can reach seams.
Sealing should follow the SPC manufacturer’s approved sealant/type and application method; not all caulks are compatible with all systems.
Perimeter trim/baseboard must be installed in a way that protects the expansion gap from wash water while still allowing the floor to move.
Seal transitions at doors and other change-of-plane areas
At door openings, thresholds, and transitions to tile, plan for a strategy that does two things:
1. Allows floor movement (floating floors must expand/contract), and
2. Blocks water pathways into seams and underlayment.
Many systems use a combination of:
– appropriate transition strips,
– sealant at edges (system-approved),
– and correct clearance planning.
According to [ADD: SPC manufacturer sealing guidance], only use the sealant type and method listed for that product (e.g., where to apply, whether to avoid certain areas, and compatibility notes). [ADD: source]
Protect the perimeter gap
Do not rely on “baseboards will stop water” unless the installation details truly block wash water from contacting the expansion zone. If your bathroom is cleaned with lots of water, prioritize perimeter protection and choose trim that covers the gap without pinning the floor.
Plan transitions to tile/vanity areas correctly
If you have tile in a wet or splash zone and SPC outside it, plan the transition line so water doesn’t pool at the seam. Avoid making the SPC perimeter the “catch point” where water naturally runs.
Quick comparison: sealing strategy (what to do vs. avoid)
| Area | Recommended approach (floating SPC) | Common mistake |
|---|---|---|
| Door opening transition | Use a proper transition piece and seal only as the manufacturer specifies | Caulking/tiling over the perimeter gap so the floor can’t move |
| Tile-to-SPC edge | Transition strip + approved edge sealing method | Letting water flow into an unsealed gap |
| Perimeter edges | Baseboard/trim that protects the expansion space | Leaving the expansion gap exposed to wash water |
What can go wrong (and how to avoid it)
What goes wrong in bathroom SPC installs is usually systematic: incorrect prep, wrong underlayment, improper expansion spacing, or unsealed edges at transitions. The goal is to prevent buckling, gaps, and seam exposure that turns humidity into actual water intrusion.
Buckling typically results when the floor is restricted—commonly from missing expansion gaps or trim that pins the floating boards.
Locking problems can be caused by adding underlayment where the manufacturer required none, or by stacking incompatible underlayment layers.
Water sitting at seams is a predictable outcome when transitions and perimeter edges are not sealed or protected as part of the flooring system.
Mistake 1: Skipping expansion gaps
Without expansion room, SPC can’t move through seasonal humidity and temperature swings. That pressure can show up as:
– boards lifting or buckling,
– tight joints that later separate elsewhere,
– or trim that cracks due to movement.
Use the exact spacing in your SPC instructions. If you don’t know it, find the spec before installation—expansion gap requirements are product-specific.
Mistake 2: Using the wrong underlayment (or stacking layers)
For click/lock SPC, underlayment changes how the floor flexes and how locks engage. Using double underlayment can lead to:
– springy feel,
– difficulty locking,
– alignment issues,
– and warranty denial.
According to [ADD: manufacturer underlayment policy], only approved underlayment is permitted—and many brands explicitly disallow additional foam layers over their attached backing. [ADD: source]
Mistake 3: Letting water reach seams
Floating systems aren’t the same as a monolithic shower-pan. If wash water can reach seams at:
– door thresholds,
– tile transitions,
– or the perimeter expansion zone,
it can migrate under the boards, especially if leaks or prolonged wetting occur.
Verdict: when SPC in bathrooms makes sense
SPC floors are a strong option for bathrooms when you follow the manufacturer’s install method, manage moisture at transitions, and don’t skip prep/flatness. The downside is that “bathroom-ready” doesn’t automatically mean “shower-area waterproof,” and floating installs still depend on edge and transition details.
SPC can be water-resistant for everyday bathroom splashes, but system performance depends on installation (underlayment, sealing, and perimeter/transition treatment).
For wet-area use where water regularly pools (especially inside shower enclosures), you must confirm explicit manufacturer rating and permitted install location.
Who should skip SPC for a bathroom
Pause and confirm suitability with the flooring manufacturer if your bathroom has:
– standing water risk (chronic leaks, frequent flooding),
– wet-area installations where water regularly pools,
– or areas intended to perform like a fully waterproof shower-pan system.
SPC is not the same as a fully waterproof wet-room system. If you need true wet-area performance, you may require a dedicated waterproofing membrane and a flooring system designed for it.
If you’re not comfortable verifying subfloor flatness, moisture conditions, or sealing/transition requirements, consider hiring a flooring installer—or choose a system explicitly designed for wet-area protection.
Quick checklist (scan/save)
– Subfloor clean, sound, and flat: verify before installing
– Confirm underlayment requirement with your SPC manufacturer (some require none)
– Use correct expansion gap around walls and fixed objects
– Stagger end-joints and start from a straight reference line
– Seal transitions and protect perimeter edges as recommended
– Don’t let water pool at seams: fix leaks before installation
FAQ
Do I need underlayment for bathroom SPC floors?
It depends on your exact SPC product and its installation instructions. Some manufacturers require no underlayment; others specify an approved type—check the spec sheet or manual for your floor.
Are SPC click floors waterproof for bathrooms?
SPC products are water-resistant to a degree, but “waterproof” claims vary by manufacturer and installation details. Proper sealing at transitions and correct perimeter treatment are what usually determine real-world performance in bathrooms.
Can I install SPC in a bathroom shower area?
A bathroom shower area is a special case because water exposure is much higher. Only proceed if your specific SPC flooring is explicitly rated and permitted for that exact wet-area use in its manufacturer documentation.
What should I do if the subfloor isn’t perfectly level?
You’ll usually need to correct flatness before installing floating SPC. If you install over dips or uneven areas, you can create joint stress and movement that leads to gaps or damage.
How do I prevent gaps at the walls later?
Use the required expansion gap, don’t trap the floor under trim in a way that blocks movement, and ensure the subfloor is stable and prepared properly.
Sources
– [ADD: SPC flooring manufacturer installation guide/spec sheet for expansion gap, underlayment approval (or “no underlayment”), and sealing guidance]
– [ADD: Manufacturer documentation for click/lock SPC installation instructions and any bathroom/wet-area limitations]
– [ADD: Source for common resilient/floating flatness target (e.g., NWFA guidance) and any moisture testing method references, if you use them]
SPC in bathrooms works when you treat the installation as a complete moisture-managed system—clean and flat substrate, correct (or no) underlayment per the manual, precise locking, and sealed/protected transitions and perimeter edges. If you’re dealing with heavy wetting or standing water, verify manufacturer limits before installing, because the difference between “bathroom safe” and “bathroom failure” is almost always in the details.
Frequently Asked Questions
What is the best way to prepare a bathroom subfloor before installing SPC floors?
Start by checking that the subfloor is flat, clean, and dry—SPC vinyl flooring is sensitive to bumps, dips, and moisture. Remove old adhesive, sweep thoroughly, and repair any cracks or low spots with a suitable patch compound. If your bathroom is prone to dampness, consider using a moisture-resistant underlayment or a vapor barrier designed for vinyl plank flooring. Finally, acclimate the SPC floor in the bathroom space before installation so temperature and humidity don’t cause gaps.
How do I install SPC floor in a bathroom around a toilet, vanity, and other fixtures?
For a smooth fit, plan your layout so seams don’t land directly under heavy fixtures when possible, and use undercutting techniques for door jambs and trim. You can usually slide planks around the toilet using careful measuring and cutting, but for a cleaner look, you may prefer reinstalling the toilet after the flooring is laid (following local plumbing guidance). Leave the required expansion gap at walls and between fixed objects, then finish with caulk or trim where appropriate to prevent water from seeping at edges. Use the proper transition strips around doorways or between rooms for a secure, water-managed finish.
Why should I use the right underlayment when installing waterproof SPC bathroom flooring?
Even though SPC floors are water-resistant and many are waterproof, the underlayment still affects comfort, sound control, and how moisture is managed at the subfloor. A proper underlayment helps smooth minor imperfections and can include a built-in vapor barrier to reduce moisture transfer. Avoid using incompatible foam layers that are too thick or not designed for click-lock SPC, because they can cause joint separation or reduce locking performance. Choose a product recommended for vinyl plank flooring and your floor type (concrete, plywood, tile, etc.).
How do I cut and fit SPC planks for bathroom corners, curves, and wet areas?
Use a straightedge and a sharp utility knife or SPC vinyl cutting tool to score and snap planks, then fine-trim with a saw if needed for intricate shapes. For bathroom corners, measure twice and cut for an even expansion gap around walls and tub edges. In wet zones like shower-adjacent areas or behind baseboards, prioritize sealing at transitions and where the floor meets fixed trim—this helps protect against water intrusion at the perimeter. Keep seams aligned and avoid forcing locked joints; if a plank doesn’t click easily, check for debris or misalignment.
Which installation method is best for bathrooms: click-lock floating SPC, glue-down, or something else?
Most homeowners choose click-lock floating SPC vinyl flooring for bathrooms because it’s fast, easy to install, and allows planks to expand and contract without bonding to the subfloor. Glue-down methods can be used in certain situations, but they require careful surface prep and manufacturer-approved adhesive systems to avoid issues with moisture. For bathrooms, floating click-lock SPC is usually preferred as long as you follow expansion gap rules and use a compatible underlayment or vapor barrier. Always follow the SPC flooring manufacturer’s installation instructions, especially for seam treatment, perimeter sealing, and how to handle wet-room conditions.
📅 Last Updated: October 08, 2026 | Topic: How to install in a bathroom SPC floors? | Content verified for accuracy and freshness.
References
- Vinyl flooring
https://en.wikipedia.org/wiki/Vinyl_flooring - Vinyl composition tile
https://en.wikipedia.org/wiki/Luxury_vinyl_tile - https://www.epa.gov/mold/moisture-control-home
- https://www.cdc.gov/mold/default.htm
- Google Scholar Google Scholar
https://scholar.google.com/scholar?q=SPC+floor+installation+bathroom+moisture - Google Scholar Google Scholar
https://scholar.google.com/scholar?q=rigid+core+vinyl+floor+installation+wet+areas+guidelines - Google Scholar Google Scholar
https://scholar.google.com/scholar?q=luxury+vinyl+tile+installation+moisture+subfloor+preparation - https://pubmed.ncbi.nlm.nih.gov/?term=mold+moisture+indoor+environments
- https://www.who.int/news-room/questions-and-answers/item/mould-and-health
- Google Scholar Google Scholar
https://scholar.google.com/scholar?q=How+to+install+in+a+bathroom+SPC+floors?


