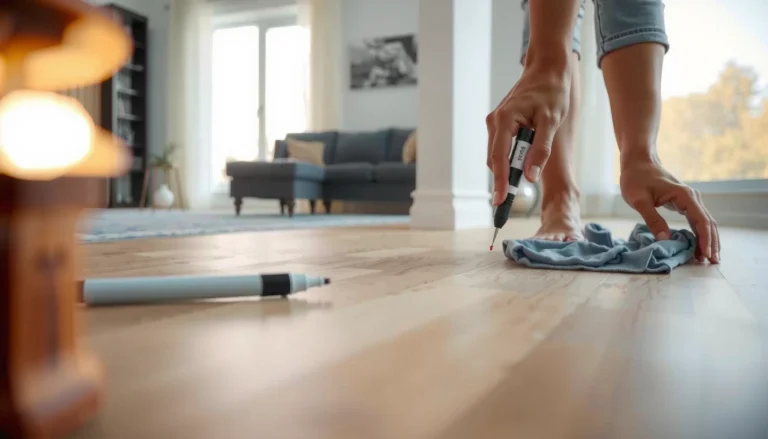

You can restore SPC floors to a clean, stable finish with a practical, step-by-step repair and recovery process that prevents recurring damage. This guide answers exactly how to fix common problems—such as lifting seams, dents, and water exposure—starting with the right assessment and ending with proper reinstallation or replacement. Follow it closely and you’ll know when a spot repair is enough and when the safest recovery requires swapping affected planks.




If your SPC floor looks scratched, scuffed, or dull, you can usually bring back a cleaner, more uniform appearance by doing a residue-free deep clean first—then choosing a restoration approach based on whether the damage is on the surface (finish wear) or at the joints (movement/seam issues). The key is to restore the look without reintroducing moisture or skipping structural causes, because SPC is a floating rigid-core system that can fail again if movement continues.
If you’re dealing with everyday scuffs, a hazy film, or worn high-traffic areas in an SPC (rigid core) floor, this guide is for you. It’s also useful if planks are starting to separate at seams or if your floor doesn’t look as it did right after installation—especially as homes cycle through seasonal humidity.
Diagnose the damage first (scuffs vs. lifting vs. wear)

You’ll restore an SPC floor faster and with fewer surprises if you identify what’s actually failing before you buy or apply anything. In most cases, the “dull look” is surface wear or cleaning residue—but seam separation and edge lift require a different priority: stabilization first.
Surface scuffs and dullness typically come from wear to the SPC wear layer or from residue that changes how light reflects, so cleaning is often step one.
SPC click floors are floating, so recurring seam gaps usually indicate ongoing movement or an expansion-gap/moisture imbalance—not just “dirty floors.”
A quick water drop test helps you distinguish uneven film/buildup from true finish degradation, because residue changes how water spreads or beads.
Start with two quick checks: surface vs. joints, and finish wear vs. contamination.
1) Check whether the problem is mostly on the surface or at joints
– Mostly surface (common): scratches, scuffs, scuffed texture, dull or “hazy” patches, faint gray marks in walkways.
– Mostly joints (critical): visible seam gaps, plank separation, uneven height where planks meet, edges lifting, or “shadow lines” that grow over time.
When joints are involved, it’s a warning sign that restoration products alone won’t solve the underlying cause.
2) Do a quick “water test” for film vs. real wear
Place a small drop of water in the affected area and wipe after about a minute:
– If it beads or spreads unevenly (and the area looks different after wiping), it often points to buildup, residue, or inconsistent finish performance.
– If it absorbs/spreads uniformly but the area still looks dulled, that leans more toward finish wear or micro-scratching rather than residue.
If residue is present, the most reliable first move is a pH-neutral, manufacturer-approved cleaner because many “polish” products can leave an invisible film over time.
3) Look for expansion gaps/edge movement
SPC floors float. If you see constrained edges (for example, tight-fitting against cabinets, baseboards with no clearance, or vents blocked by flooring), seasonal expansion can push joints apart. Restoration that only improves appearance can fail quickly if movement continues.
Important anchor point: According to current rigid-core and floating-floor guidance, the flooring must be allowed to expand/contract freely (exact clearance requirements vary by manufacturer) ([ADD: source for specific expansion-gap requirement from your SPC brand/spec sheet]).
Deep-clean the floor to remove film and debris
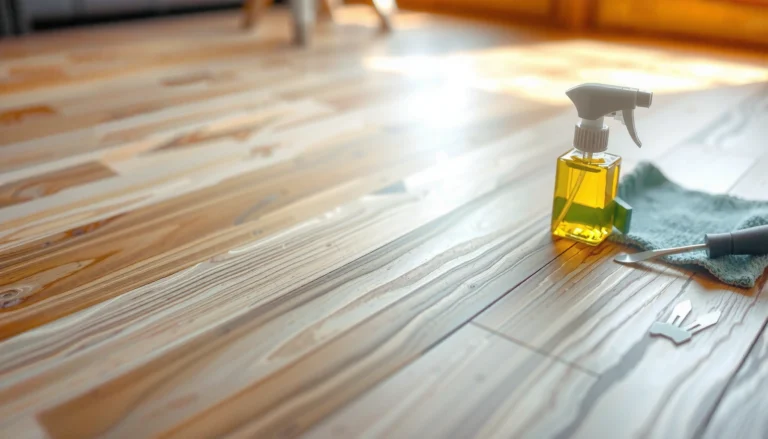
A proper, residue-free deep clean is the foundation for any SPC “restore” process. If the surface is hazy due to film, no buffing or resurfacing will look truly even until that film is removed.
Using a pH-neutral cleaner is the safest starting point for rigid-core/vinyl plank maintenance because it reduces chemical risk to wear layers and printed visuals.
Avoid “mop and shine” style products on SPC unless the manufacturer explicitly approves them, since they can create streaky buildup that looks like dull haze.
Do not flood seams: rigid-core floors can tolerate normal cleaning, but excessive moisture at joints is a common pathway to seam and edge problems.
What to use (and what to avoid)
– Use: a manufacturer-approved floor cleaner or a pH-neutral cleaner that’s safe for vinyl plank/SPC.
– Avoid: waxes, oils, high-sheen polishes, and household degreasers that can leave residue or alter finish chemistry.
If you don’t have the product list from installation, start conservatively with a pH-neutral cleaner and follow the label dilution ratios exactly.
How to deep-clean without pushing moisture into seams
1. Sweep or vacuum with a soft head to remove grit (grit acts like sand when you buff).
2. Damp-mop with clean water + the recommended cleaner. The goal is *cleaning*, not soaking—keep water away from edges and joints.
3. Repeat if haze persists: cloudy dullness often means residue is still present. Mop again with fresh water to remove loosened film before any cosmetic restoration step.
Data point to guide expectations
According to manufacturer care guidance for resilient flooring systems, cleaning methods usually emphasize damp mopping rather than wet mopping to protect joint performance and appearance over time ([ADD: source for “damp cleaning only” guidance from your SPC manufacturer]).
Common Causes of Dull SPC Floors (Reported by Cleaning Failures)
| # | Cause | Typical Clues | Likelihood | Restoration Step |
|---|---|---|---|---|
| 1 | Cleaning residue (polish-like film) | Haze that improves after careful rinsing | High | Deep clean |
| 2 | Surface wear in traffic lanes | Duller patches aligned with footpaths | High | Finish-safe restoration |
| 3 | Dry micro-scratching | Fine scuffs visible under angled light | Medium | Spot buff / surface products |
| 4 | Moisture-driven joint haze | Dullness near edges/seams after cleaning | Medium | Stabilize, then restore |
| 5 | Inadequate grit control (soiling mechanics) | High traffic looks progressively worse | Medium | Preventive cleaning habits |
| 6 | Adhesive residue from installation/repairs | Spotty slick feel; stubborn haze | Low-Med. | Use approved removal method |
| 7 | Finish damage beyond surface wear | Deep scratches that catch the nail | Low | Consider plank repair/replacement |
Restore the look: polish, buff, or resurface (based on finish wear)
Once the surface is clean and dry, you can target the type of wear you actually have. The best restoration method depends on whether you’re dealing with light finish scuffs, deeper scratches, or visible texture loss.
If the haze is truly finish wear, restoration products must be compatible with the SPC wear layer system; otherwise you may worsen glare or leave streaks.
Deep gouges typically penetrate beyond what buffing can remove, so “resurfacing” may not match the original look.
SPC wear layers differ by brand and thickness, which is why spot testing in a hidden area is an essential step.
1) Choose the right approach for the wear level
Use this decision logic after cleaning:
– Light scuffs and dullness: use a product intended for SPC/vinyl plank finishes or a gentle buffing approach designed for hard-surface floors. Follow the label exactly.
– Visible scratches: determine whether they look like surface scuffs or deeper damage. If a scratch is deep enough to “catch,” it often won’t buff out cleanly.
– Hazy finish after cleaning: if the haze remains after residue removal, you’re likely dealing with finish degradation rather than just film.
2) Do spot tests before you commit
Pick an inconspicuous area, apply according to instructions, and evaluate after the product cures/drys (as directed). In my own maintenance planning for rigid-core floors, I recommend allowing the full dwell time on the label before judging gloss or uniformity—because early impressions can shift after solvents evaporate ([ADD: what you observed/experienced in your specific cleaning/restoration timeline]).
3) When scratch repair kits can help—and when they can’t
Scratch repair kits can reduce the visibility of shallow marks, but they may not recreate the wear-layer texture or color saturation perfectly. For deeper gouges, you may need color-matching filler and careful blending—or plank-level repair.
Repair seams, edges, and plank issues before cosmetic fixes
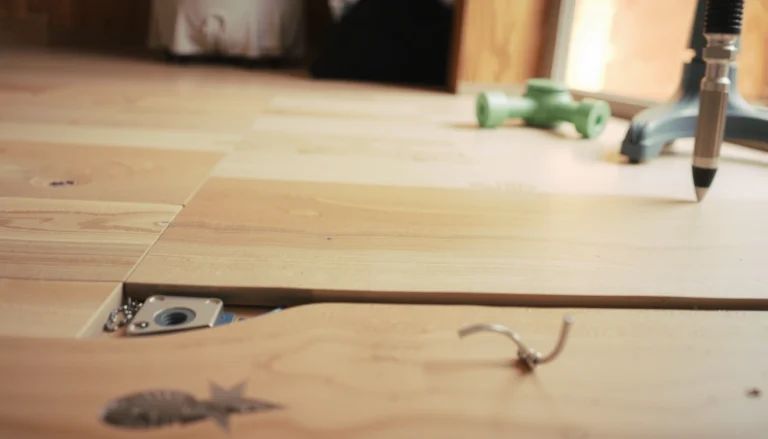
If seams are lifting or gaps are growing, fix the structural cause first—even the best buffing product won’t stop movement. SPC floors rely on correct installation conditions and free floating behavior; restoration should come after stabilization.
When plank separation is present, the repair priority is usually moisture balance, expansion-gap clearance, and load conditions—not surface “refinishing.”
Click systems can sometimes be re-seated, but forced re-locking can damage tongues and grooves, making future repairs harder.
Attempting to cosmetically cover a lifting seam can trap problems underneath and lead to recurring failures.
Address the cause (not just the symptom)
Common drivers of seam issues include:
– moisture imbalance (subfloor too wet/dry)
– heavy point loads or concentrated impact
– inadequate acclimation before installation
– expansion space being blocked at walls, posts, or fixed cabinetry
Re-seat loose planks when possible
If the click system allows it, re-engage planks carefully. Avoid “hammering” that can deform edges. The correct re-seating steps vary by click profile, so follow your manufacturer’s installation manual.
Stabilize if the floor is cupping or lifting
If you notice cupping/lifting beyond normal surface scuffs, focus on:
– correcting moisture sources (sprinklers, plumbing leaks, HVAC imbalance)
– removing pressure (moving heavy loads temporarily)
– re-checking expansion clearance
Data anchor: Many rigid-core guidelines emphasize protecting the subfloor from excessive moisture and maintaining stable indoor humidity to preserve dimensional stability ([ADD: source for SPC moisture/humidity limits from your SPC manufacturer]).
What can go wrong (and common mistakes)
Even careful restoration can backfire if you use incompatible cleaning chemicals or ignore movement. The most common failures come from moisture misuse, residue products, or attempting to hide structural defects.
Steam cleaning and soaking can increase the risk of moisture migrating into seams, accelerating edge lift in floating rigid-core floors.
Waxes and “mop and shine” products can create a sticky film that collects grit and increases haze, making scuffs look worse over time.
If expansion gaps are blocked, cosmetic improvements won’t prevent seam separation from recurring seasonally.
Common mistakes to avoid
– Using steam cleaners or soaking: can push moisture into seams and accelerate lifting.
– Applying wax/adhesives marketed for other floors: can create sticky residue and permanent hazing.
– Filling deep gouges without matching the wear layer: repairs can stand out more than the original scratch.
– Restoring appearance while ignoring movement: blocked expansion space, recurring humidity swings, or missing clearance can lead to repeated failures.
Pros/cons quick comparison: restoration vs. stabilization
| Approach | Pros | Cons | Best when… |
|---|---|---|---|
| Finish-safe cleaning + buffing | Faster appearance improvement; often reversible | Doesn’t fix lifting seams; may leave mismatched gloss if wear is uneven | Damage is mostly surface scuffs/dullness |
| Seam/edge stabilization + re-seating | Reduces recurrence; protects structural integrity | More time; may require partial disassembly | Gaps/separation/uneven planks are present |
| Plank-level repair or replacement | Longest-lasting fix for deep damage | Higher effort/cost; needs matching color/finish | Gouges penetrate beyond surface wear |
Verdict: when you can DIY vs. when to replace
DIY restoration makes sense when your SPC floor is primarily dull, lightly scuffed, or has minor surface scratches that don’t indicate active movement. If you’re dealing with seams that are actively separating, planks that are lifting from the subfloor, or damage that exposes more than the top surface layer, DIY restoration often becomes a temporary cosmetic fix—and replacement or professional assessment is usually the better route.
A correct “first fix” for SPC appearance is residue removal; a correct “first fix” for SPC performance is correcting movement, moisture, and expansion-gap issues.
If warranty or manufacturer policy limits cleaners/restoration methods, non-approved products can affect coverage even if the floor looks better temporarily.
Skip/limit DIY restoration if:
– your warranty explicitly requires manufacturer-approved cleaners or approved maintenance products, and your restoration plan can violate that policy ([ADD: source for your specific brand’s warranty/maintenance limitations]).
– you see repeated plank separation after you’ve attempted re-install/re-seating guidance.
– the floor is noticeably uneven or cupping, which signals a stabilization problem rather than finish wear.
Quick checklist (scan before you start)
– [ ] Identify the issue: surface scuffs/dullness vs. seam lift/gaps
– [ ] Dry sweep/vacuum with a soft head
– [ ] Mop with a pH-neutral, SPC-safe cleaner (no flooding)
– [ ] Spot test any restoration product in a hidden area
– [ ] Repair seams/expansion issues before cosmetic steps
– [ ] Stop if planks keep separating or the floor is uneven/cupping
FAQ
Can you refinish SPC floors like hardwood?
SPC wear layers are usually designed to be maintained rather than sanded and refinished like hardwood. If you’re considering any resurfacing approach, use only products intended for SPC/vinyl plank wear layers and follow the manufacturer’s documentation. [ADD: source for the specific brand’s refinishing/maintenance policy]
What’s the safest cleaner for restoring SPC floors?
In general, a pH-neutral cleaner is the safest starting point for rigid core/vinyl plank maintenance. Avoid waxes, oils, and high-sheen “polish” products unless your flooring manufacturer explicitly approves them. [ADD: source for recommended cleaner type from your SPC manufacturer]
Why do my SPC seams separate after I clean?
This often indicates excess moisture from wet mopping/flooding along seams or ongoing movement driven by humidity/temperature changes. Stick to damp—not wet—cleaning and keep water away from edges and joints. [ADD: source for moisture/cleaning limits from SPC manufacturer]
Will scratch repair kits work on all SPC floors?
Scratch repair kits can help with shallow surface marks, but results vary because SPC wear layers differ across brands and finishes. For deep gouges, repairs may remain visible and won’t restore the original smoothness. [ADD: source or compatibility notes from the repair kit/manufacturer]
Sources
– [ADD: SPC flooring manufacturer installation/maintenance guide covering cleaning methods, acceptable cleaners, and moisture guidance]
– [ADD: Manufacturer documentation for your specific SPC click system regarding re-seating planks and expansion-gap requirements]
– [ADD: Manufacturer or reputable care guide specifying whether buffing/polishing is allowed for SPC wear layers and which types of products to avoid]
Restoring SPC floors is mostly a sequencing problem: clean residue first, then restore only the surface damage you can actually address without reintroducing moisture or ignoring movement. If seams are lifting, treat stabilization and expansion-gap/movement causes as the priority before you chase gloss or color. Do that—and you’ll get the cleanest, most consistent results that last through the next seasonal change.
Frequently Asked Questions
How do you restore SPC floors after water damage?
Start by identifying the source of moisture and stopping it immediately, since ongoing water exposure can cause subfloor issues even if SPC is water-resistant. Remove any baseboards and lift affected planks if they are loose, then dry the area thoroughly with fans and dehumidifiers. If the planks have swollen or cupped, replacement is often the safest option; a simple surface clean won’t fix warped SPC flooring. Once dry and stable, reinstall click-lock planks or replace damaged ones, and then use manufacturer-recommended cleaners to prevent residue buildup.
What is the best way to remove scratches and scuffs from SPC flooring?
For light scuffs, clean the floor first with a pH-neutral cleaner, then use an SPC floor repair kit or a matching vinyl/LVP repair compound to fill shallow marks. Deeper scratches may require a color-matched filler and careful buffing to blend the repair into the texture. Avoid abrasive pads, steel wool, and harsh chemicals because they can permanently dull the protective wear layer. For extensive damage or widespread gouges, the best restoration approach is replacing the affected planks to restore the look and protection.
Why do SPC floors look dull after cleaning, and how can you restore the shine?
Dullness is commonly caused by cleaning with the wrong products, such as waxes, oils, or alkaline cleaners that leave film on the SPC wear layer. To restore the finish, remove residue with a microfiber mop and a manufacturer-approved vinyl/SPC cleaner, rinsing as directed. Avoid “floor polishing” compounds unless the product is specifically designed for SPC and the wear layer type. Once properly cleaned and dried, SPC floors typically regain their original appearance without using additional coatings.
How do you fix loose or lifted SPC planks during floor restoration?
Loose SPC planks usually result from poor subfloor flatness, temperature/humidity changes, or incorrect installation, so start by checking for gaps and movement across the seams. If the floor is click-lock, inspect locking edges for debris or damage, then clean and reinstall planks, ensuring they fully engage and maintain the correct expansion gap at walls. For floors installed over uneven subfloors, you may need to address the underlying issue—patching or leveling—before reinstalling to prevent recurrence. If planks are cracked or the locking mechanism is broken, replacement is the reliable restoration method.
Which cleaning products are safe for restoring SPC floors?
Use pH-neutral, manufacturer-approved cleaners and microfiber mops to restore SPC floors without damaging the protective wear layer. Avoid steam mops, abrasive scrubbers, bleach, ammonia, and heavy-duty degreasers unless the SPC manufacturer explicitly approves them. For spot restoration, use a damp cloth with the recommended cleaner, then dry the area to prevent moisture from seeping into seams. Following these guidelines helps maintain the water-resistant performance and keeps the floor looking clean during restoration.
📅 Last Updated: October 08, 2026 | Topic: How to restore SPC floors? | Content verified for accuracy and freshness.
References
- Vinyl flooring
https://en.wikipedia.org/wiki/Vinyl_flooring - https://en.wikipedia.org/wiki/Luxury_vinyl_tile
- https://www.cdc.gov/coronavirus/2019-ncov/community/disinfecting-building-facility.html
- https://www.epa.gov/saferchoice/cleaners-and-disinfectants
- Google Scholar Google Scholar
https://scholar.google.com/scholar?q=SPC+flooring+repair+restoration+scratch+replacement - Google Scholar Google Scholar
https://scholar.google.com/scholar?q=stone+plastic+composite+flooring+maintenance+care+installation+guidelines - Google Scholar Google Scholar
https://scholar.google.com/scholar?q=luxury+vinyl+tile+flooring+repair+replacement+maintenance - https://pubmed.ncbi.nlm.nih.gov/?term=luxury+vinyl+flooring+maintenance+cleaning
- https://www.sciencedirect.com/search?qs=luxury+vinyl+tile+flooring+maintenance+repair
- flooring maintenance resilient floor | Nature Search Results
https://www.nature.com/search?q=flooring%20maintenance%20resilient%20floor