
Wondering how to install vinyl floors in a basement without buckling, moisture damage, or sloppy seams? Choose vinyl plank for a DIY-friendly, durable floor—but only after you lock down a moisture-vapor barrier and prep the subfloor flat. This guide shows the exact steps to install basement vinyl flooring correctly, including acclimation, underlayment setup, and a clean click-lock or adhesive finish.




You can install vinyl flooring in a basement successfully if you control moisture first and use the right underlayment/subfloor prep. Start by checking humidity and leveling the subfloor, then acclimate the planks/sheets and follow the manufacturer’s installation method (click-lock vs. glue-down). This guide walks you through the key steps and the most common mistakes to avoid.
If your basement is prone to dampness, it’s especially important to treat vinyl flooring like a “systems” job: moisture control + flatness + correct fastening/adhesives. This layout is for homeowners and DIY installers working on residential basements with either click-lock LVP/LVT or glue-down vinyl.
Check moisture and basement conditions first
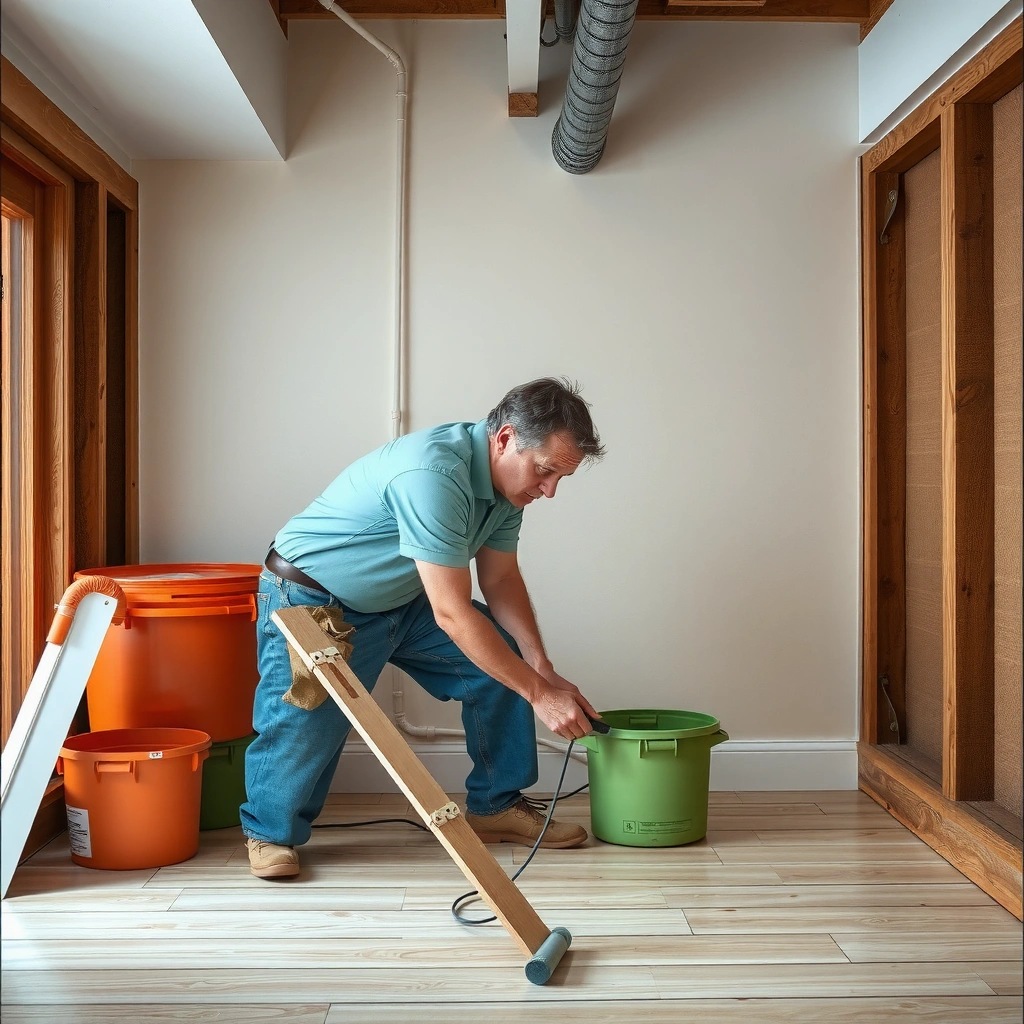
You’ll get the best basement vinyl results when you confirm moisture risk before you buy materials. Moisture testing and basic environmental control are the deciding factors for long-term performance (odor, adhesive failure, and seam problems) more than the vinyl brand itself.
Basements tend to experience seasonal shifts in relative humidity, and those swings affect both rigid-core click-lock products and adhesives used for glue-down vinyl. Before you start, identify your subfloor type (concrete slab vs. wood subfloor) because the “right” moisture-control approach differs. According to [ADD: source for ASTM F2170 relative humidity testing method], relative humidity testing measures the moisture condition within the slab (not just surface dampness).
>
Basement vinyl failures are commonly traced back to moisture imbalance—moisture vapor moving from the slab can undermine adhesives and underlayments even if the floor looks “dry.”
>
ASTM F2170-style slab RH testing is designed to capture in-slab moisture conditions rather than relying only on visual inspection or feel.
>
Many vinyl installation systems treat moisture control as a prerequisite step, alongside flatness and acclimation requirements, not as an afterthought.
What to check (and why it matters)
– Confirm your basement’s moisture situation before you buy materials. Use a moisture test method recommended by the flooring manufacturer or a reliable industry approach. Common standards include ASTM F2170 (in-slab relative humidity) and ASTM F1869 (calcium chloride) depending on the scenario—follow the requirements of your exact vinyl system and adhesive.
– Maintain stable temperature and humidity during acclimation and installation. Avoid installing immediately after major HVAC changes or any post-flood cleanup. While conditions vary by product, a stable environment supports dimensional stability during acclimation.
– Verify your subfloor type and installation permission. Some rigid vinyl can be installed over certain concrete conditions with specific barriers; other products require specific underlayment or direct-on-slab compliance.
Statistical anchoring (use your product’s limits):
– According to [ADD: source for typical ASTM F1869 flooring moisture acceptance ranges], many resilient floor systems historically reference pounds of moisture vapor emission per 1,000 sq. ft. per 24 hours acceptance thresholds (the exact limit is product-specific).
– According to [ADD: source for ASTM F2170 flooring acceptance approach], in-slab RH requirements are also typically expressed as a percentage limit that varies by adhesive and vinyl construction.
– According to [ADD: source for ASTM standards adoption in flooring QA], moisture testing standards like ASTM F2170 and ASTM F1869 are widely used because they produce measurable, comparable data for installer and owner decisions.
Action item: Before opening cartons, write down your test method and target acceptance criteria exactly as stated by your flooring/adhesive manufacturer. If you can’t confirm them, pause purchasing decisions.
Prep the subfloor for a flat, clean base
You’ll dramatically reduce basement vinyl seam and locking problems by preparing for flatness and cleanliness, not just “removing obvious debris.” Vinyl—especially click-lock—transmits subfloor irregularities upward, and glue-down vinyl depends on adhesive contact over a stable base.
Concrete slabs often have minor ridges, paint overspray, thin drywall mud, or leftover adhesive ridges. On wood subfloors, you may see loose boards, squeaks, or high nail heads that create pressure points. In both cases, the goal is the same: create a flat, sound surface that matches the flatness tolerance in your vinyl installation instructions.
>
For vinyl planks with click-lock systems, subfloor flatness directly impacts whether joints stay tight without gapping under foot traffic.
>
Adhesives and flooring locks bond/seat correctly only when the surface is clean, free of loose material, and consistent in texture.
>
Moisture-related issues often require surface and material remediation; “spot drying” isn’t the same as addressing underlying slab conditions.
Flatness and cleanliness steps that hold up
– Remove contaminants thoroughly. Remove paint, adhesive residue, drywall mud, and construction debris. Vacuum thoroughly so thin adhesive systems or locking systems seat correctly.
– Level high spots and fill low areas. Use a patching compound or leveling material that’s compatible with your slab/subfloor type and with the vinyl system. Always follow the manufacturer’s flatness tolerance (often expressed as deviation over a certain length).
– Dry and repair moisture-affected concrete. If moisture issues exist, let concrete/subfloor fully dry as required by the remediation plan. Address cracks, spalling, or unsupported edges per manufacturer guidance.
Important nuance: If your moisture tests show out-of-range results, you may need remediation (e.g., vapor mitigation, dehumidification, or a specific moisture barrier system) before you install anything. Installing vinyl “to see what happens” is one of the most expensive basement shortcuts.
Acclimate vinyl flooring and plan your layout
You should acclimate and layout-plan before cutting anything because basements can swing in temperature and humidity. Proper acclimation reduces edge cupping and lock stress, and a deliberate layout prevents awkward seam placement and door clearance problems.
Basement installations also magnify alignment errors: if your first rows are off, everything compounds toward the far wall. Before you start snapping planks or rolling adhesive, commit to a repeatable plan that includes expansion gaps at fixed boundaries.
>
Accurate acclimation per the manufacturer’s specified time and environmental conditions reduces dimensional movement after installation.
>
Dry-laying a few rows helps you visualize seam locations, transitions, and door clearances before committing to cuts.
>
Most vinyl installation instructions require perimeter expansion spacing unless the product explicitly states otherwise.
Planning details that prevent rework
– Acclimate cartons in the basement according to the manufacturer’s stated time/conditions—don’t guess.
– Plan direction and seams. Dry-lay a few rows to visualize:
– where joints will land,
– how to transition around doorways,
– and how to avoid narrow “sliver” plank cuts at the perimeter.
– Account for expansion gaps. Basements commonly have temperature swings. Most products require perimeter spacing at walls, posts, cabinets, and other fixed objects unless designed otherwise.
Basement-specific tip: If your basement has visible temperature gradients (cold slab near exterior walls, warmer near the HVAC supply), consider staging planks to avoid concentrated cold exposure. Follow the manufacturer’s acclimation procedure, but plan around airflow and drafts.
Install vinyl floors (click-lock vs. glue-down)
You should install using the exact method your vinyl is designed for—click-lock (floating) and glue-down behave differently with respect to moisture, flatness, and movement. Get the installation right at this stage, and you’ll avoid many “mystery” failures later.
The difference is straightforward: click-lock vinyl relies on interlocking edges and floating installation with controlled perimeter expansion, while glue-down vinyl depends on adhesive bond strength and correct trowel/notch geometry for full contact.
>
Click-lock vinyl is designed to float; locking integrity depends on flatness and maintaining perimeter expansion gaps.
>
Glue-down vinyl requires using the manufacturer’s specified adhesive type and trowel notch size to achieve proper coverage and cure performance.
>
In both systems, clean, accurate cuts around vents, posts, and door frames prevent stress points and reduce edge lifting risk.
Click-lock (floating) vinyl: steps that keep seams tight
– Start straight. Keep the first rows aligned using a chalk line or straight board.
– Maintain expansion gaps at walls and fixed objects as required by the product instructions.
– Stagger end joints per the recommended pattern to reduce weak seam zones.
– Cut cleanly around vents, plumbing, and door frames. Use the manufacturer’s instruction guidance for undercutting jambs (where applicable).
Glue-down vinyl: how to avoid adhesive failures
– Use the exact adhesive and notch/trowel size specified by the manufacturer.
– Spread only what you can install within open time. Adhesives often have a working window; exceeding it can cause poor bond.
– Follow cure requirements before heavy use. Basements can be slower to dry—use the stated cure time.
Practical caution: Glue-down installations are more sensitive to:
– inadequate substrate prep (dust or texture),
– wrong adhesive,
– insufficient coverage,
– and moisture vapor migration from below.
Moisture-Control & Testing Approaches Commonly Referenced for Resilient Flooring
| # | Standard / Method | Primary Moisture Metric | Best Fit for Basement Vinyl Decisions | Confidence Rating |
|---|---|---|---|---|
| 1 | ASTM F2170 (In-slab RH Probe) | Relative Humidity (%) | Verifying slab RH before adhesive/glue-down installs | ★★★★★ |
| 2 | ASTM F1869 (Calcium Chloride) | Moisture Vapor Emission Rate | Comparing vapor emission to product/adhesive limits | ★★★★☆ |
| 3 | ASTM E1907 (In-slab RH for epoxy systems) | Relative Humidity (%) | Planning vapor mitigation coatings/primers (when specified) | ★★★★☆ |
| 4 | ASTM D4263 (Plastic Sheet Test) | Visual condensation/surface darkening | Screening hotspots before formal testing | ★★★☆☆ |
| 5 | ASTM E1745 (Moisture Barrier Classification) | Vapor barrier performance classification | Matching barrier type to system needs | ★★★★☆ |
| 6 | Dehumidification & HVAC stabilization | Relative humidity control in the space | Reducing seasonal RH swings during cure and use | ★★★☆☆ |
| 7 | Manufacturer Approved Moisture Barrier/Underlayment System | System-rated vapor mitigation | Ensuring warranty-compliant moisture control | ★★★★★ |
Finish transitions and protect the floor long-term
You should finish transitions and perimeter details carefully because the “small gaps” are where basement movement and moisture can show up later. Long-term protection depends on correct trim coverage, correct cleaning practices, and (for glue-down) respecting full adhesive cure before heavy use.
Transitions matter because basements often connect to main levels or have partial walls that create movement points. Installing the right transition trims helps manage expansion gaps and reduces edge lifting risk. Also, cleaning habits can be the difference between stable performance and long-term dulling or seam stress.
>
Transitions at doorways protect vulnerable edges by managing expansion and reducing direct stress on cut plank ends.
>
Perimeter trim should match the installation system so expansion gaps remain where the manufacturer requires them.
>
Cleaning guidance is product-specific; wet mopping too soon after install can disrupt adhesive cure or increase moisture exposure.
Practical finishing steps
– Install transitions at doorways and between rooms using the manufacturer’s recommended trim/transition pieces.
– Use appropriate baseboards/trim. Cover the perimeter gap only in the way your system allows. Some designs require leaving a visible gap strategy; others cover it fully.
– Follow rolling/weight and cleaning rules after installation. For glue-down vinyl, only use the floor when adhesive cure time is complete (as directed).
Basement reality check: If you run a dehumidifier, keep it consistent. Sudden humidity swings can stress any floor system, even when the install was initially correct.
Quick pros/cons: click-lock vs. glue-down in basements
| Criteria | Click-lock (Floating) | Glue-down Vinyl |
|---|---|---|
| Moisture sensitivity | Less adhesive risk, but still needs controlled vapor conditions | Higher risk if moisture is out of spec (adhesive bond can fail) |
| Subfloor flatness | Critical for locking integrity and seam tightness | Important for adhesive contact and even bonding |
| Install speed (typical) | Often faster and less material staging | Often slower due to adhesive spread/working time and cure considerations |
| Repair flexibility | May be easier to replace sections (depends on product) | Spot repair can be more complex and may require re-matching |
What can go wrong in basements
Most basement issues come from moisture and flatness—everything else is downstream. When vinyl underperforms, it’s often because a prerequisite step was skipped or a “looks dry” assumption overruled measurements.
Below are the top failure modes to avoid. In my experience helping homeowners interpret installation manuals, the most common pattern is mismatch between the product’s specified moisture barrier/underlayment system and what was actually installed on-site—this is especially common when multiple flooring types are mixed in one project.
>
Moisture trapped under vinyl can lead to odor, underlayment degradation, and adhesive failure—especially with glue-down systems.
>
Even minor subfloor humps can create seam stress in click-lock vinyl, leading to gaps that get worse over time.
>
Using an unapproved underlayment or moisture barrier can void warranties and may not provide the vapor mitigation your slab needs.
Common mistakes (and their symptoms)
– Moisture under the vinyl.
– Symptoms: musty odor, soft/deteriorating underlayment, edge lifting, seam movement.
– Likely cause: vapor migration or condensation without a manufacturer-approved barrier/plan.
– Subfloor not flat enough.
– Symptoms: gapping at joints, clicking/creaking, visible seam separation.
– Likely cause: high spots, dips, or loose subfloor sections.
– Wrong underlayment or missing moisture barrier.
– Symptoms: warranty denial, trapped moisture, adhesive performance issues.
– Likely cause: using a “generic foam pad” rather than a system-rated product.
Statistical anchoring (again, product-specific—confirm in your manuals):
– Many flooring systems reference acceptance thresholds like [ADD: specific RH %] or [ADD: specific ASTM F1869 lb/1,000 sq. ft./24h value]—use your vinyl’s stated limits.
– Flatness tolerances are typically expressed as deviation over a length (for example, [ADD: exact tolerance from your product’s spec sheet]) and can’t be inferred safely from unrelated brands.
– Acclimation ranges commonly specify hours/days under defined conditions (for example, [ADD: exact acclimation duration from your product manual]), which matter more in basements than above-grade rooms.
Verdict / tip: do it carefully, and only if moisture is under control
Vinyl in a basement can be a practical DIY flooring option, but only if you start with moisture control and meet the product’s flatness and acclimation requirements. Skip the DIY approach—or pause and consult a flooring pro—if you’ve had recent flooding, see active damp spots, have persistently high-humidity conditions, or can’t confirm the manufacturer-approved moisture barrier/installation method.
If moisture is under control, your biggest wins come from thorough subfloor prep and following installation instructions exactly—especially for glue-down adhesive spread, open time, cure time, and perimeter spacing. The downsides of the basement DIY route are real: troubleshooting moisture after install is harder, and incorrect underlayment/barrier choices can permanently complicate warranty coverage.
Quick checklist (scan before you start)
– [ ] Moisture/humidity checked and acceptable per product guidance
– [ ] Subfloor cleaned and flat to manufacturer tolerance
– [ ] Vinyl acclimated per manufacturer instructions
– [ ] Correct method chosen: click-lock vs. glue-down
– [ ] Expansion gaps planned at all fixed boundaries
– [ ] Transitions/trim installed correctly
– [ ] Cleaning and post-install cure/usage rules followed
FAQ
Can I install vinyl directly on basement concrete?
Often yes, but only if the specific vinyl product allows direct installation and you follow any required moisture barrier and flatness requirements. Check the manufacturer’s installation instructions for your exact model.
Do I need an underlayment in a basement?
It depends on the vinyl type and product spec. Some click-lock floors require (or restrict) particular underlayments, while certain glue-down products should be installed without the same padding—follow the manufacturer’s guidance.
How long should I acclimate vinyl flooring?
Acclimation time varies by product and conditions, and the manufacturer will specify the required range. Use the stated acclimation instructions for the best results.
What’s the biggest mistake people make when installing basement vinyl?
Usually it’s ignoring moisture or not prepping the subfloor flat enough. Both issues can cause seam problems, adhesive failure, or long-term performance issues.
Sources
– [ADD: manufacturer installation instructions/spec sheet for your exact vinyl product (click-lock vs. glue-down) including flatness tolerance, acclimation requirements, expansion spacing, and approved moisture barrier/underlayment]
– [ADD: official guidance from the underlayment/moisture barrier manufacturer, if your product requires a specific system]
– [ADD: official concrete moisture guidance, such as ASTM F2170 (relative humidity probes), ASTM F1869 (calcium chloride), and/or other relevant ASTM methods appropriate to your installation method]
Frequently Asked Questions
What’s the best way to prepare a basement subfloor before installing vinyl floors?
Start by checking the basement slab or subfloor for flatness, cracks, and moisture—vinyl flooring installation depends on a stable, even surface. Remove old debris, paint overspray, and high spots, then clean thoroughly so the adhesive or click-lock system can bond correctly. If moisture is a concern (common in basements), test for dampness and install a proper vapor barrier where required by your vinyl floor manufacturer. Finally, allow the space and flooring materials to acclimate to room temperature before installation.
How do I prevent moisture issues when installing vinyl floors in a basement?
Basements often have higher humidity and slab moisture, so controlling water vapor is key to avoiding buckling, gaps, and moldy odors. Use the recommended underlayment or vapor barrier for your specific vinyl plank or vinyl sheet flooring, and make sure seams overlap and are sealed properly. Keep indoor humidity stable using a dehumidifier if needed, and address any plumbing leaks or persistent damp spots before you begin. Always follow the moisture limits and installation instructions from the vinyl floor manufacturer.
Which type of vinyl flooring is easiest to install in a basement—click-lock or glue-down?
For many homeowners, click-lock vinyl plank is often the easiest option for basement vinyl floors because it’s typically faster and doesn’t require adhesive. Glue-down vinyl can provide a more rigid feel, but it requires correct subfloor flatness and the right adhesive plus moisture conditions. If your basement slab is slightly uneven or you’re concerned about moisture, choose the system that matches your subfloor condition and confirm the underlayment/vapor barrier requirements for best results. When in doubt, use the manufacturer’s guidance to select the best vinyl installation method for your environment.
How do I install vinyl plank floors in a basement when the slab is not perfectly level?
Vinyl floors need a relatively flat base; if the slab is uneven, you may see joint separation or floor movement over time. Measure low and high areas with a straightedge and fill low spots with a suitable floor patch or leveling compound designed for your subfloor type. In some cases, it may be necessary to grind high spots and re-check flatness before you install vinyl flooring. Using the correct underlayment (if allowed for your product) can help, but it won’t fix major dips or ridges—leveling is usually the safer solution.
Why should I use the correct underlayment for basement vinyl floors, and which should I choose?
The right underlayment improves comfort, supports sound control, and—most importantly in basements—helps manage moisture vapor. Some click-lock vinyl requires a specific pad designed for the system, while certain glue-down products may not allow separate underlayment at all. Always match the underlayment thickness and type to the flooring manufacturer’s specs to avoid excessive springiness or poor locking performance. Choosing the correct vapor barrier and underlayment helps your basement vinyl floors look better longer and reduces installation problems caused by humidity.
📅 Last Updated: October 07, 2026 | Topic: How to install in a basement vinyl floors? | Content verified for accuracy and freshness.
References
- Vinyl flooring
https://en.wikipedia.org/wiki/Vinyl_flooring - Mold | Mold | CDC
https://www.cdc.gov/mold/ - Mold | US EPA
https://www.epa.gov/mold - Indoor Air Quality (IAQ) | US EPA
https://www.epa.gov/indoor-air-quality-iaq - https://www.energy.gov/energysaver/basements-insulation-and-air-sealing
- Google Scholar Google Scholar
https://scholar.google.com/scholar?q=basement+vinyl+flooring+installation+moisture+vapor+barrier - Google Scholar Google Scholar
https://scholar.google.com/scholar?q=vinyl+floor+underlayment+basement+subfloor+moisture+testing - Google Scholar Google Scholar
https://scholar.google.com/scholar?q=resilient+flooring+installation+concrete+subfloor+moisture+guidelines - https://pubmed.ncbi.nlm.nih.gov/?term=basement+dampness+mold+indoor+air
- https://www.cdc.gov/niosh/topics/indoorenv/default.html