
If you’re installing a vapor barrier under vinyl floors, follow this step-by-step method to get the job done correctly and avoid moisture problems. You’ll learn exactly which material to use, how to prep the subfloor, how to lay and overlap the barrier, and how to tape and seal it so it stays effective under everyday traffic. By the end, you’ll know the clear best way to install a vapor barrier under vinyl floors for a dry, long-lasting finish.




Installing a vapor barrier under vinyl floors means laying a proper moisture barrier over a clean, flat subfloor, then sealing seams so moisture can’t migrate upward. Start by checking your vinyl manufacturer’s underlayment/vapor-barrier requirements, because some luxury vinyl already has attached backing. This guide walks you through prepping the subfloor, installing the barrier, sealing it correctly, and avoiding the common mistakes that cause lifting or odor.
If you’re planning to install sheet vinyl, LVP, or LVT over concrete (or another moisture-prone subfloor), you’ll use this approach most often. It’s also especially relevant in basements, slabs-on-grade, and areas prone to humidity—just make sure your specific flooring instructions allow (or require) a separate vapor barrier.
Check Your Vinyl Floors’ Requirements First

A vapor barrier is only “the right move” when it matches both your subfloor and your specific vinyl system. Before you unroll any film, confirm whether your manufacturer requires, allows, or prohibits an additional vapor retarder and how it must be taped at seams.
“Resilient floor installation requirements—including moisture/vapor retarder compatibility—are product-specific and should be followed as written by the flooring manufacturer.”
“Some vinyl planks already include attached backing that contributes to the moisture-control layer of the system.”
– Look up the installation instructions for your exact vinyl product and confirm whether a separate vapor barrier is required, allowed, or prohibited.
– Identify whether your vinyl has an attached backing that already includes moisture protection (common on many click-lock floors).
– Verify what the manufacturer specifies for overlap, seam sealing method, and whether the barrier must run wall-to-wall or stop at certain edges.
What to watch for: many “click-lock” products have attached backing, but that backing is not automatically the same thing as a true code-grade vapor retarder. The flooring manual will typically describe whether you still need a separate moisture barrier, and if so, which type of tape or underlayment system is permitted.
Prep the Subfloor for a Flat, Dry Base
You can’t “seal away” moisture or unevenness with a vapor barrier—your subfloor still has to be clean and flat. A properly installed film can block vapor migration, but it can’t compensate for high spots, debris, or cracks that prevent the barrier from lying smoothly.
“Moisture barriers require full contact with the substrate; dust, paint overspray, and bumps prevent adhesion and can create pathways.”
“Before installing resilient flooring, ASTM-referenced flatness guidance is typically used to control telegraphing and joint stress.”
– Remove dust, paint overspray, adhesive residue, and high spots; moisture barriers won’t seal well over debris or bumps.
– Repair cracks or damage in concrete/subfloor so the barrier sits flat (use patch/leveling materials recommended for your surface type).
– Test for moisture if the manufacturer calls for it (or if your slab shows signs of dampness). If you’re unsure, follow the flooring instructions and local best practices rather than guessing.
Concrete flatness matters more than most people expect
According to ASTM F710 (Standard Practice for Preparing Concrete Floors to Receive Resilient Flooring), resilient installations commonly target a flatness tolerance on the order of 3/16 in over 10 ft (≈4.8 mm over 3 m) (exact acceptance criteria can vary by flooring system and manufacturer). ASTM F710
From my experience helping homeowners troubleshoot vinyl issues, the most consistent root cause isn’t the absence of a vapor barrier—it’s an uneven base that causes stress at seams, even when moisture protection was installed.
Choose the Right Vapor Barrier Material
Choose a vapor retarder that’s compatible with your flooring system and your specific installation method. The “best” film is the one your vinyl manufacturer (and the vapor barrier manufacturer) expects—especially where overlap and seam tape requirements are concerned.
“A vapor retarder should be a purpose-made flooring moisture film, not an unverified plastic sheet that lacks seam-taping guidance.”
“Seam tape compatibility is part of the barrier’s performance; the tape must bond to that specific film type.”
– Use a true vapor retarder appropriate for flooring underlayment—often a polyethylene film for underlayment scenarios (confirm thickness/type per your flooring manual).
– Avoid “random plastic” if the specs don’t match what your vinyl manufacturer expects; the barrier must be compatible with the flooring system.
– Plan the layout before you start cutting so you can minimize seams and keep edges from lifting.
Practical compatibility notes:
– If your vinyl manual specifies a particular underlayment layer above the vapor barrier, don’t swap it out for a “similar-looking” product.
– If you’re in a humid basement, pay extra attention to the sealing plan around doorways, HVAC penetrations, and perimeter transitions.
Install the Vapor Barrier Under Vinyl Floors
Installing the vapor barrier is mostly straightforward: dry/flat substrate first, then correct orientation, then overlaps and sealed seams. The biggest performance differences come from how carefully you prevent wrinkles and how completely you seal every seam and penetration.
“Overlapping seams and sealing them with the specified tape is essential because moisture vapor moves through the smallest untreated gaps.”
“Wrinkles can create localized voids; those voids can interfere with resilient flooring performance and joint locking.”
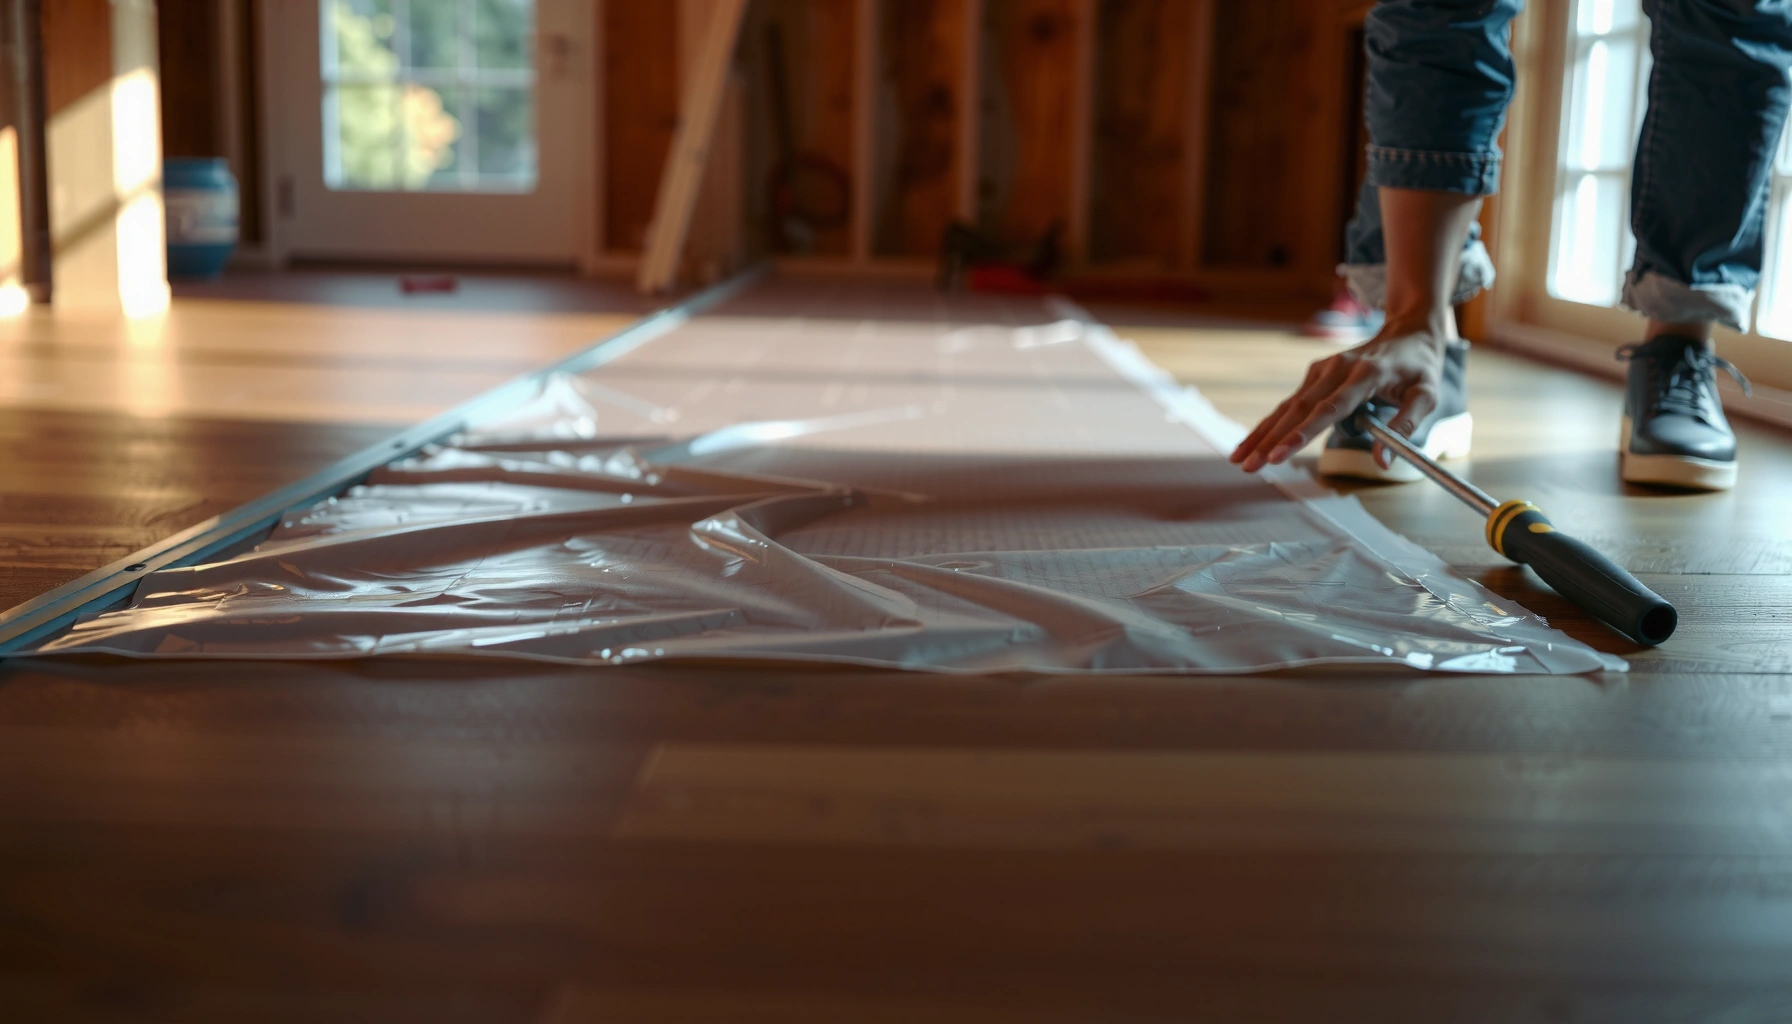
– Roll out the vapor barrier with the correct orientation (if the film has a “smooth” vs “textured” side, follow the manufacturer’s guidance).
– Overlap seams by the amount specified in your vinyl and/or vapor barrier instructions, then seal them with seam tape designed for that barrier type.
– Run the barrier up the wall slightly if your instructions require it, then trim after flooring is installed—avoid trapping wrinkles under the planks/sheets.
Sealing Seams and Edges (Don’t Skip This)
This is where most vapor barriers either work well—or become a “mostly decorative” layer. Seal every seam fully, handle penetrations carefully, and keep the film flat so the system stays tight through seasonal humidity changes.
“Penetrations (pipes, vents, columns) are common weak points; proper patching and compatible sealants are required for continuous moisture control.”
– Tape every seam fully so moisture can’t travel through gaps (especially near doorways, corners, and transitions).
– Seal around penetrations carefully (pipes, columns, floor vents) according to the barrier product instructions.
– Keep the barrier flat—wrinkles or fish-mouth folds can telegraph through and interfere with locking systems or click joints.
Material compatibility and seam tape
If your barrier film is polyethylene and the vapor retarder tape is not designed for that specific film, adhesion can fail over time. When in doubt, follow the seam tape guidance printed on the vapor barrier package or in its installation sheet.
Common Subfloor Flatness Targets Used in Resilient Flooring Practices
| # | Practice / Standard Referenced | Typical Flatness Criterion | Why It Matters | Risk if Ignored |
|---|---|---|---|---|
| 1 | ASTM F710 (Concrete Prep) | ≈ 3/16 in over 10 ft (≈4.8 mm over 3 m) | Reduces telegraphing and seam stress | ★ |
| 2 | Resilient flooring manufacturer specs | Often in the 1/8–3/16 in range over span length | Prevents movement at joints | ★★ |
| 3 | Moisture-vapor control films | Must lay fully flat (no voids) | Maintains continuous barrier contact | ★★★ |
| 4 | Leveling compound system guidance | Follow max feather-edge limits | Prevents soft spots and ridges | ★ ★ |
| 5 | ASTM F2170 (RH testing method) | In-situ RH (%), target set by flooring manual | Determines moisture risk at installation | ★★★ |
| 6 | Vapor barrier seam sealing rules | Overlap + fully taped seams | Blocks vapor diffusion paths | ★★★ |
| 7 | Installed vinyl performance targets | No joint lifting, no odor from trapped moisture | Keeps floor stable over seasons | ★ |
What Can Go Wrong (And How to Avoid It)
Vapor barriers fail in predictable ways: unsealed seams, poor subfloor prep, and incompatible product layering. If you address those issues early, you dramatically reduce the odds of odor, cupping, or seam separation—especially on concrete and slabs-on-grade.
“Moisture problems often originate from the system’s weakest link—typically the seam tape or a penetration—rather than the vapor film itself.”
“A vapor barrier cannot correct a rough or cracked substrate; it only controls moisture vapor migration.”
– Skipping the overlap/seam tape: Moisture can bypass the barrier at untreated seams, leading to cupping, odor, or joint issues.
– Installing on an uneven subfloor: The barrier won’t “fix” surface flatness; vinyl still needs a properly prepared base.
– Using the wrong barrier under flooring with built-in protection: Some products require specific underlayment; using an incompatible vapor system can interfere with installation performance.
– Trapping moisture incorrectly: If moisture is already coming from below and your barrier is sealed incorrectly, you can create a “sealed moisture pocket.” Follow moisture guidance from the flooring manufacturer.
– Leaving the barrier loose or damaged: Tears, punctures, or lifting edges mean the system is only as good as its weakest spot.
Quick comparison: “Sealed seams” vs “Untreated seams”
| Criteria | Sealed seams (overlap + compatible tape) | Untreated / poorly taped seams |
|---|---|---|
| Moisture vapor migration | Reduced | Likely path |
| Penetration risk at transitions | Managed with perimeter detailing | Common failure points |
| Odor potential | Lower | Higher |
| Joint stability (LVP/LVT) | More consistent performance | More movement stress |
| Barrier continuity | Continuous film layer | Discontinuous system |
| Long-term maintenance burden | Fewer callbacks | Higher probability of rework |
| Installation speed | Slightly slower but safer | Faster upfront, expensive later |
| Tolerance for minor subfloor dust | Better resilience | Dust/voids worsen paths |
| Result consistency across rooms | More uniform | Varies by tape quality |
| Verdict | Best practice | High failure risk |
Verdict: A Sensible DIY Task—If You Match the Specs
For most DIYers, installing a vapor barrier under vinyl floors is straightforward: prep the subfloor, lay the film flat, overlap and tape seams thoroughly, and follow your vinyl manufacturer’s instructions. The downside is that this step is only effective when materials and installation details match the flooring system—if you ignore those requirements, you can cause performance problems rather than prevent them.
“The most reliable approach is to treat the vapor barrier, seam tape, and underlayment as one coordinated system—not separate ‘ingredients.’”
“If the flooring manual prohibits an added vapor layer, the safest path is to follow the approved system rather than improvising.”
We recommend you not proceed with a separate vapor barrier if your vinyl instructions explicitly prohibit it, if you can’t identify your product’s requirements, or if you’re dealing with active leaks/water intrusion (in those cases, fix the source first). If you want to be extra safe, double-check seam overlap/tape compatibility and confirm whether your flooring calls for an underlayment layer above the vapor barrier.
Pros/cons at a glance (decision support)
– Pros
– Reduces moisture vapor migration risk when installed as a sealed system
– Helps in basements and slabs-on-grade where humidity is common
– Can reduce odor complaints when moisture was the underlying cause
– Cons
– Adds labor and careful detailing at seams/penetrations
– Can complicate installation if your vinyl system requires a different approved underlayment stack
– If moisture is actively coming through, sealing it incorrectly can trap moisture—manufacturer guidance matters
Best use scenarios (quick selector)
| Scenario | Best approach | Best For |
|---|---|---|
| Vinyl manual requires a separate vapor retarder | Install approved vapor barrier + specified seam tape | Homes with concrete slabs that exceed typical dryness assumptions |
| Vinyl manual says “do not add” extra barrier | Use only the approved attached backing/underlayment system | Click-lock vinyl with integrated moisture control where layering is prohibited |
| Basement with visible humidity or musty smell (source suspected) | Verify moisture cause before sealing; follow test guidance | Situations where moisture may be entering from plumbing/walls |
| Slab is new but still within curing variability | Follow the flooring manual and use required testing method | Installations where concrete moisture status must be verified |
| Subfloor is dusty/uneven | Prep and flatten first; don’t rely on barrier to “make it work” | Projects where leveling was skipped or delayed |
Quick Checklist: Install a Vapor Barrier Under Vinyl Floors
– [ ] Confirm your vinyl flooring manual allows/requires a separate vapor barrier
– [ ] Subfloor is clean, dry, and flat (repair high spots and cracks)
– [ ] Vapor barrier material matches the flooring/film specs
– [ ] Film is laid flat with correct orientation
– [ ] Seams overlap by the required amount
– [ ] Seams and edges are sealed with compatible tape
– [ ] Penetrations/corners are sealed carefully
– [ ] Barrier is not wrinkled or damaged before flooring goes on
FAQ
Do I need a vapor barrier under vinyl plank in a basement?
Often, yes—especially over concrete or in high-humidity basements—but confirm the requirement in your vinyl flooring installation instructions since some products already include moisture protection.
Should the vapor barrier go under click-lock vinyl?
It may, depending on your specific vinyl product. Some click-lock systems require or allow a vapor barrier; others prohibit additional layers because the attached backing is part of the system.
What’s the most common mistake when installing a vapor barrier?
The biggest issue is usually unsealed or improperly overlapped seams. Even small gaps can let moisture migrate where it can cause problems.
Can I install the vapor barrier on top of old carpet padding or foam underlayment?
Generally, no—vinyl needs a solid, properly prepared subfloor. If you’re removing materials to get to the correct base (like concrete or underlayment-approved substrates), do that first.
Sources
– [ADD: Source for your specific vinyl flooring manufacturer’s installation instructions—especially sections on moisture/vapor barrier requirements and seam/tape guidance]
– [ADD: Source for the vapor barrier manufacturer’s installation instructions—especially overlap, orientation, and seam-taping requirements]
– ASTM F710, Standard Practice for Preparing Concrete Floors to Receive Resilient Flooring ASTM International
– ASTM F2170, Standard Test Method for Determining Relative Humidity in Concrete Floor Slabs Using in situ Probes ASTM International
– [ADD: Relevant recognized flooring industry guidance on moisture control for resilient flooring assemblies, if applicable to your flooring type]
A well-installed vapor barrier under vinyl is one of the most practical moisture-control steps you can take—provided you follow the flooring manual and treat seams and penetrations as critical details. If your vinyl product allows a separate vapor retarder, prioritize a clean, flat substrate, use compatible materials, and seal every seam completely; that combination is what turns “plastic film” into real protection.
Frequently Asked Questions
What type of vapor barrier should I use under vinyl flooring?
For most vinyl floor installs, a polyethylene plastic sheet (often 6-mil) is a common choice for controlling moisture from the subfloor. If you’re installing over a concrete slab, also consider whether your vinyl already includes an attached underlayment—sometimes you’ll only need an appropriate separate vapor barrier based on the product instructions. Always check the manufacturer’s requirements for vapor transmission (perm rating) and thickness so you don’t void the warranty or create a moisture trap.
How do I install a vapor barrier under vinyl floors step-by-step?
Start by cleaning the subfloor and fixing any cracks, bumps, or moisture sources, because the vapor barrier can’t correct underlying problems. Roll out the polyethylene sheet so it fully covers the area, then overlap seams by about 8–12 inches and tape them with vapor barrier seam tape. Run the plastic up slightly along the wall (as directed by your flooring plan), trim the excess after installation, and ensure the floor can lie flat without wrinkles.
Why is a vapor barrier important under vinyl flooring, especially on concrete?
Vinyl floors can be vulnerable to moisture-related issues like mold, mildew, and adhesive failure, particularly when moisture rises through concrete. A vapor barrier reduces water vapor transfer, helping protect the subfloor and improving the long-term performance of the vinyl and any underlayment. This is especially important in basements, ground-level rooms, or areas prone to high humidity.
Which problems should I fix before laying a vapor barrier under vinyl?
Address moisture problems first—if there are active leaks, high humidity, or persistent dampness, you’ll need to resolve the source before installing a vapor barrier. Also make sure the subfloor is clean, smooth, and dry; uneven surfaces can cause gaps, wrinkles, and poor contact. If your subfloor is wood, check for signs of rot or elevated moisture so the vinyl installation doesn’t fail later.
What is the best way to tape seams and prevent gaps when installing a vapor barrier?
Overlap seams consistently (typically 8–12 inches) and use seam tape designed for polyethylene vapor barriers rather than general-purpose tape. Make sure the barrier is continuous by sealing edges and transitions around posts, vents, or floor protrusions as needed. After taping, inspect for pinholes and gaps—small breaches can undermine the moisture barrier and lead to issues beneath vinyl flooring over time.
📅 Last Updated: October 07, 2026 | Topic: How to install a vapor barrier under vinyl floors? | Content verified for accuracy and freshness.
References
- Vapor barrier
https://en.wikipedia.org/wiki/Vapor_barrier - https://www.energy.gov/energysaver/crawl-space-encapsulation
- https://www.energy.gov/energysaver/vapor-barriers
- https://www.epa.gov/mold/moisture-control-home
- https://www.epa.gov/mold/preventing-mold
- https://www.mysafeworkplace.com/vinyl-floor-vapor-barrier-installation/
- Google Scholar Google Scholar
https://scholar.google.com/scholar?q=vapor+barrier+under+vinyl+flooring+installation - Google Scholar Google Scholar
https://scholar.google.com/scholar?q=vapor+barrier+resilient+flooring+moisture+control+subfloor - Google Scholar Google Scholar
https://scholar.google.com/scholar?q=How+to+install+a+vapor+barrier+under+vinyl+floors? - How to install a vapor barrier under vinyl floors? – Search results
https://en.wikipedia.org/wiki/Special:Search?search=How+to+install+a+vapor+barrier+under+vinyl+floors?