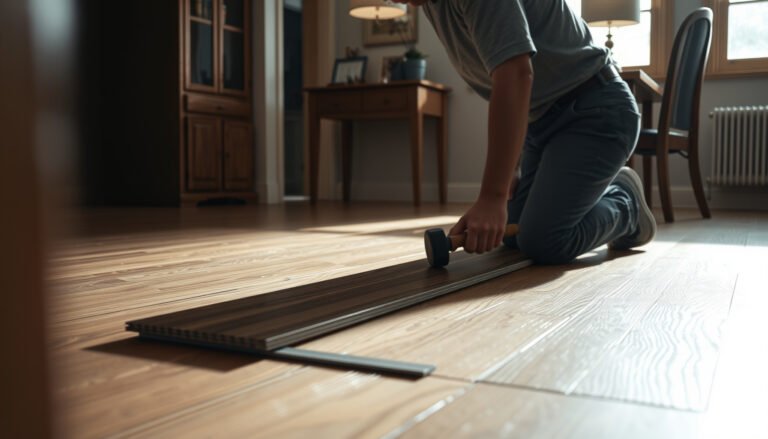

Learn how to trim vinyl floors with clean, straight cuts that won’t split—so you get a crisp edge the first time. This guide lays out the best method for scoring and snapping (or cutting with the right blade) to prevent cracking along the cut line. You’ll also get the quick tricks to measure, support the sheet, and finish the edge for a factory-looking result.




Trimming vinyl floors cleanly comes down to three things: mark precisely, support the plank so it can’t flex while cutting, and use the correct cutting method (score-and-snap vs. a vinyl flooring cutter) with shallow passes. Do it slowly—especially on the last row—so the locking edge seats correctly and the wear layer doesn’t chip or split.
Trimming vinyl plank (LVP) or tile-look vinyl (LVT) is for anyone installing a floating floor—especially click-lock or loose-lay systems—where you must fit around walls, door jambs, or awkward corners. This guide is written for real installation conditions: uneven baseboards, tight spacing, and planks that need to be “shaved” to sit flush without breaking the tongue-and-groove or locking mechanism.
Tools & materials you’ll actually need

The fastest way to trim vinyl without splitting is to have the right sharp tools and a stable cutting setup before you start. When the blade is dull or the plank is unsupported, micro-flexing is what turns a clean score into chips along the edge.
A sharp utility knife with a fresh blade is more likely to produce a crisp cut line than a dulled blade on resilient vinyl flooring.
A straightedge (or guide rail) helps you keep the cut path consistent, reducing “wandering” that can cause edge damage.
– A sharp utility knife (or a vinyl flooring cutter designed for LVP/LVT) plus a straightedge for clean, controlled cuts
– A measuring tape, pencil or chalk, and a spacer/ruler to keep consistent expansion gaps
– A pry bar or pull bar (for tight fits at the end of a run)
– A scrap piece of vinyl for test cuts, especially when you’re learning how your specific plank responds to scoring
Practical note for selecting tools: click-lock vinyl often “rewards” careful trimming because the edge profile must remain intact for the locking seam to engage. That means the goal isn’t just a straight edge—it’s an edge that still behaves like factory geometry.
Quick safety setup (worth doing)
– Cut on a flat surface; don’t hold the plank in midair.
– Use a new blade insert if your cut line looks ragged after the first pass.
– Keep your straightedge clamped or pinned so it can’t drift when you finish the score.
Measure and mark the cut line correctly
If you measure correctly, you usually avoid the second problem—re-cutting because the plank won’t seat. The key is respecting the expansion gap while also trimming from the correct side so the visible wear surface stays clean.
Floating vinyl floors typically require an expansion gap along walls and fixed vertical surfaces so the planks can move with temperature and humidity.
Cutting a little long and shaving down after a dry-fit is a common method to minimize locking-mechanism misalignment in the last row.
– Measure twice: account for the required expansion gap along walls and fixed surfaces (follow your manufacturer’s specified gap)
– Use a “fit then trim” approach for the last row: cut slightly long, dry-fit, then shave down gradually
– Mark from the right side of the plank and keep your line visible—particularly on printed/wear layers where the cut must stay aligned with the visual pattern
Where installers most often go wrong
For floating floors, people often measure the “tight gap” they see at the wall—then forget that the plank must still have room to expand. That single oversight can lead to buckling months later, even if the floor looks perfect on day one.
A simple way to mark without guessing
1. Measure the distance to the wall and subtract the expansion gap the manufacturer requires.
2. Mark the cut line on the plank using a square/straightedge.
3. Dry-fit the plank section.
4. Trim in small increments until the edge sits with the correct clearance.
Real-world measurement anchors
– Many floating-floor installations use expansion gaps in the ~6–10 mm (1/4–3/8 in) range, but your vinyl brand/model may specify a different number—always verify in your installation instructions. [ADD: manufacturer installation guide for your vinyl brand/model—expansion gap requirement]
– Vinyl planks often look “square” until you trim the last row—plan for small adjustments by trimming incrementally (e.g., a few millimeters at a time). [ADD: manufacturer’s trimming/cutting guidance if it specifies approach]
– When marking, precision matters: using a straightedge typically prevents cut-line drift that can create chips when the blade exits the scored path. [ADD: manufacturer or trade guidance on cutting method]
Trim vinyl floors safely (step-by-step)
To avoid splitting, support the plank and cut with light, controlled passes—not one deep “through cut.” Start with shallow scoring, check your edge, then repeat until the piece releases cleanly.
Supporting the plank fully while cutting reduces flex, which helps prevent chipping along the cut edge.
For many vinyl planks, score-and-snap with multiple light scores performs better than attempting to cut completely in a single pass.
After trimming, removing tiny burrs on the edge helps locking seams seat correctly.
– Support the plank fully so it doesn’t flex while you cut; mark your line with a straightedge
– For many vinyl planks, score-and-snap works best with light passes: don’t try to cut completely in one swing
– After the cut, check the edge for rough spots and remove tiny burrs with a sanding block or careful knife cleanup (lightly)
Choose your cutting method
1) Utility knife + straightedge (common for LVP/LVT)
– Best when your planks are thinner and you’re comfortable with controlled scoring.
– You’ll usually score the top surface (and sometimes multiple layers, depending on thickness), then snap along the score.
2) Vinyl flooring cutter (often faster and more repeatable)
– Best when you want a consistent scoring wheel/pressure and straight results across many cuts.
– Use it according to the cutter’s instructions and your flooring manufacturer’s recommendations.
My recommended approach for clean edges
I focus on avoiding blade “chatter” by keeping the straightedge rock-solid and moving the knife in a single, deliberate direction per pass. Where I’ve seen cut-edge damage in the past, it wasn’t from the concept—it was from unsupported flex and “pressing through” too hard on the first attempt. If your first score looks deep or jagged, stop and reset rather than forcing the cut.
Cutting around walls, corners, and obstacles
– Dry-fit the piece in place before the final trim—then adjust in small increments
– For curved or irregular areas, make incremental “tick” cuts and fine-trim rather than one aggressive cut
– Use the required spacing at edges so the floor can move without buckling
Door jambs and tight corners: plan the cut so the locking edge stays intact where possible. If a section must be undercut, do it gradually so you don’t remove more of the locking profile than necessary.
What can go wrong (and how to avoid it)
Most trimming failures happen because the cut was rushed or the floor wasn’t given room to move. Fixing these issues usually means adjusting technique (sharpness + support), not “replacing your whole plan.”
Chipped edges are commonly linked to dull blades, unsupported cutting surfaces, or excessive force during scoring.
Incorrect expansion gaps can cause visible lifting or buckling later, even when the initial installation looks flat.
Common failure modes—and the fix
– Chipped edges: usually caused by a dull blade, cutting without support, or pushing too hard—switch to a sharper blade and take slower passes
– Wrong expansion gap: if you trim too tight against walls or cabinets, the floor may lift or buckle later (always follow your flooring manufacturer’s guidance)
– Misaligned joints: if the cut piece lands short or too long, your locking mechanism may not engage—dry-fit before committing
Comparison: score-and-snap vs. vinyl flooring cutter
| Method | What it’s best at | Main risk to watch | When I’d switch |
|---|---|---|---|
| Utility knife + straightedge | Fine, precise trimming; working around irregular wall lines | Ragged edges if the plank flexes or the blade is dull | When you see repeated chips across multiple planks |
| Vinyl flooring cutter | High repeatability for long straight cuts on many planks | Inconsistent results if the plank isn’t positioned correctly on the bed/guide | When you’re dealing with complex curves that require freehand shaping |
A few constraints you should know
– If your vinyl product instructions specify a particular cutting method or tool, follow that first—brand-level guidance can override general best practices. [ADD: manufacturer installation instructions for your vinyl model]
– Very rigid or thicker formats may behave differently; what works on one LVP may not translate to another without more passes or a cutter wheel adjustment.
Verdict: the “slow and supported” method is safest
If you want the cleanest results with the lowest risk of splitting, use sharp blades, support the plank fully, and trim gradually using test-fits. The tradeoff is time: you may shave multiple millimeters to perfect the last row instead of “getting it in one cut.”
The safest trimming strategy for vinyl is typically shallow scoring with multiple passes while preventing plank flex during the cut.
Dry-fitting before the final trim reduces the chance of locking-mechanism failure in the last row and around doorways.
The “slow and supported” method is ideal for:
– Click-lock LVP/LVT where seam engagement depends on keeping the edge profile true
– Last-row trimming, where measurements and wall irregularities stack up
– Tricky layouts where a miscut wastes premium planks
The downside—and why it matters—is that speed-oriented cutting increases the likelihood of edge chips and joint misalignment. Also, some installations (or some specific brands) may require tools or techniques that aren’t covered by general DIY guidance.
If your installation instructions explicitly require professional tooling for your specific product, or you’re dealing with complex layouts where a miscut would be costly, consider pausing and getting advice from the flooring installer or following the manufacturer’s recommended service approach. [ADD: manufacturer guidance about tooling/professional installation requirements]
Key Vinyl Trimming Parameters (Typical Installer Targets)
| # | Parameter | Typical value | Use during trimming | Impact on split risk |
|---|---|---|---|---|
| 1 | Expansion gap allowance (floating installations) | 6–10 mm (1/4–3/8 in) | Set clearance at walls | Lower |
| 2 | Blade sharpness | Fresh/unused edge recommended | Reduces edge chipping | Lower |
| 3 | Cutting passes for score-and-snap | Multiple light passes | Minimizes deep tearing | Lower |
| 4 | Straightedge guidance | Used on every cut line | Prevents cut-line drift | Lower |
| 5 | Test-fit correction method | Shave gradually after dry-fit | Improves last-row lock | Lower |
| 6 | Edge cleanup after cutting | Light burr removal only | Seats joints smoothly | Lower |
| 7 | Unsupported cutting | Avoid when possible | Prevents flex-driven chips | Higher |
Quick checklist (scan before you cut)
If you want to prevent splits, treat trimming like a process: confirm spacing, confirm tool sharpness, then cut slowly with support. This checklist is designed to be read once before the blade touches the plank.
– [ ] Confirm expansion gap requirements from your vinyl instructions
– [ ] Use a straightedge + sharp blade
– [ ] Mark from the correct side and keep the line visible
– [ ] Support the plank fully while cutting
– [ ] Cut slightly long, dry-fit, then shave down
– [ ] Remove burrs lightly so joints seat correctly
FAQ
Can I trim vinyl floors with a regular utility knife?
Often yes for many vinyl plank styles, especially with a sharp blade and multiple light passes. If your manufacturer specifies a different tool, follow their instruction for your exact product. [ADD: manufacturer guidance for recommended cutting tools]
If the vinyl manufacturer allows utility-knife trimming, multiple shallow scores reduce the chance of tearing and chipping.
Do I need an expansion gap when trimming vinyl near walls?
Usually you do, but the exact gap size depends on the flooring manufacturer and installation method. Check your product’s installation instructions and measure accordingly. [ADD: manufacturer expansion gap requirement]
Floating vinyl typically needs clearance at walls so panels can expand without buckling against fixed surfaces.
What’s the best way to trim the last row?
Cut a little long, install/dry-fit, then trim in small increments until it fits with the correct wall gap. This reduces the chance of locking issues or an uneven finish. [ADD: manufacturer guidance specific to last-row fitting]
Dry-fitting before final trimming is the most reliable way to avoid misalignment at the final seam.
Why does my cut edge look rough or split?
Common causes are a dull blade, cutting on an unsupported surface, and trying to cut too deeply in one pass. Use support, take thinner scores, and clean up lightly afterward. [ADD: manufacturer troubleshooting notes for chipping/rough edges]
Rough edges are often a result of blade dullness and excess force rather than an inherent vinyl defect.
Verdict (final tip)
Trimming vinyl floors cleanly is achievable when you slow down, keep the plank supported, and cut with the method your product expects—especially around walls and the last row. If you’re careful with expansion gaps and take iterative shaves after dry-fitting, you’ll protect the wear layer and help the locking seam seat correctly. When instructions for your specific vinyl brand differ, defer to the manufacturer first—because that’s what keeps your floor flat, stable, and intact over time.
Sources
– [ADD: manufacturer installation instructions for your specific vinyl flooring brand/model—use the section that covers trimming/cutting and expansion gap requirements]
– [ADD: official cutting guidance from the vinyl flooring manufacturer for LVP/LVT (e.g., recommended blade type or cutting method)]
Frequently Asked Questions
How do you trim vinyl flooring around doorways and walls?
Measure the gap along the perimeter and undercut your trim so it fits flat without bowing. For LVP/LVT, use a utility knife and a straightedge to score along the cut line, then finish the edge with a sharp blade for a clean vinyl floor edge. Leave the manufacturer-recommended expansion gap at walls and door thresholds, then use quarter-round or transition strips to cover the trimmed edge.
What is the best way to cut vinyl plank or sheet vinyl without damaging the surface?
For vinyl plank and many vinyl tiles, use a straightedge and score-cut method: score the top with a utility knife, then snap or cut through the backing carefully. For sheet vinyl, use a sharp utility knife with a fresh blade and cut on a firm subfloor, working slowly to avoid ragged edges. If you need a smoother finish, sanding the very edge lightly with fine sandpaper can help, but avoid sanding the top wear layer.
Which tools do you need to trim vinyl floors neatly?
At minimum, you’ll want a measuring tape, a metal straightedge, a utility knife with extra blades, and a pencil/marker. Helpful add-ons include a vinyl flooring scoring tool or snap cutter for planks, tin snips for certain trim pieces, and a flush-mount utility blade for tight spots. For curved areas, a jigsaw with a fine-tooth blade can work, but go slow and keep the blade aligned to minimize chipping.
Why do vinyl floors need an expansion gap when trimming?
Vinyl flooring expands and contracts with temperature and humidity, so trimming too tightly against walls can lead to buckling or gaps. Use the expansion gap specified by the flooring manufacturer—commonly around 1/4 inch for many installations—especially at doorways, cabinets, and along exterior walls. When trimming, keep the cut edge clean and plan to cover small gaps with baseboards or transition strips rather than forcing the flooring to fit rigidly.
Best practices for trimming vinyl flooring edges near laminate transitions or thresholds?
Create accurate transition measurements by dry-fitting planks, then cut the vinyl so it meets the threshold without pinching—especially where heights differ. Use a reducer/transition strip designed for your floor thickness to protect the cut edge and keep the joint neat. When trimming around metal door jambs, you can undercut carefully with a jamb saw or thin oscillating tool blade to maintain a tight, professional finish while still preserving the required expansion gap.
📅 Last Updated: October 07, 2026 | Topic: How to trim vinyl floors? | Content verified for accuracy and freshness.
References
- Vinyl flooring
https://en.wikipedia.org/wiki/Vinyl_flooring - Vinyl composition tile
https://en.wikipedia.org/wiki/Luxury_vinyl_tile - Baseboard
https://en.wikipedia.org/wiki/Baseboard - Google Scholar Google Scholar
https://scholar.google.com/scholar?q=how+to+trim+vinyl+flooring+around+walls - Google Scholar Google Scholar
https://scholar.google.com/scholar?q=how+to+cut+and+fit+luxury+vinyl+plank+under+door+jambs+trim - Google Scholar Google Scholar
https://scholar.google.com/scholar?q=vinyl+flooring+trimming+quarter+round+baseboard+installation - https://www.britannica.com/technology/flooring
- https://www.armstrongflooring.com/inspiration-and-education/resilient-flooring/how-to-install-luxury-vinyl-tile.html
- https://www.modernliving.com/how-to-cut-luxury-vinyl-plank/
- Google Scholar Google Scholar
https://scholar.google.com/scholar?q=How+to+trim+vinyl+floors?