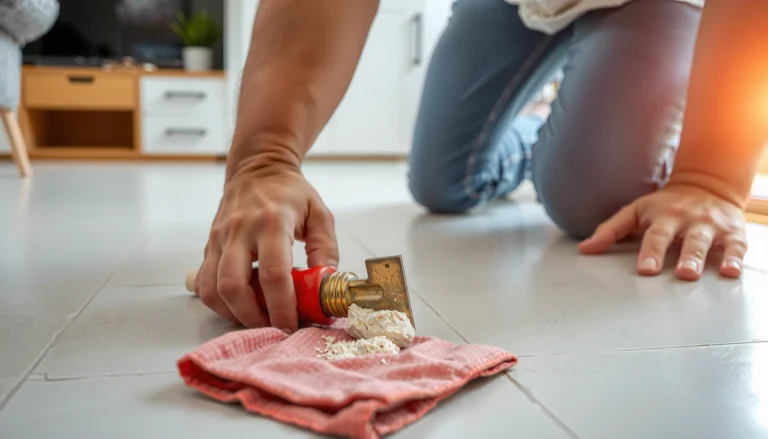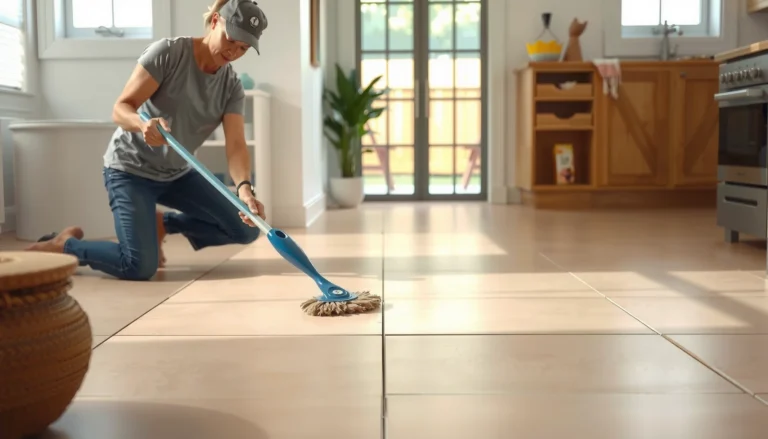

Buckling in vinyl floors isn’t a mystery—it’s almost always a moisture or installation issue, and you can fix it with the right sequence. This step-by-step guide shows exactly how to flatten buckled vinyl, re-secure loose sections, and repair damaged areas so the floor stays tight and level. You’ll get a clear action plan from the first inspection to the final press and cure.




Buckling in vinyl floors is almost always repairable once you stop the moisture (if present) and correct the subfloor’s flatness and the floor’s expansion gap. The practical approach is: identify the cause, dry and flatten the substrate, remove only the buckled area as needed for your vinyl type, then reinstall with correct acclimation and perimeter spacing.
If you’re seeing ripples, raised seams, or edges lifting after installation—or after a leak—this article is for you. It applies whether you have click-lock luxury vinyl plank (LVP), glue-down vinyl plank, or sheet vinyl, as long as you’re willing to inspect the subfloor and address the underlying cause.
Who this is for / when it applies
This guide is for homeowners, facility managers, and installers who want a repeatable workflow for resilient flooring failures—especially buckling triggered by water, uneven substrates, or temperature-driven movement. Use it when you can access the affected room (and ideally the room perimeter) to measure gaps, check flatness, and confirm whether moisture is still active.
Identify the cause of buckling (moisture vs. flatness vs. expansion gap)
Buckling usually starts with a “physics problem,” not a bad batch of vinyl. The fastest way to stop repeat failures is to confirm whether moisture is still present, whether the subfloor is out of tolerance, or whether the install didn’t allow for thermal expansion.
Moisture-related resilient floor failures are commonly addressed by testing moisture vapor emission rate and in-situ relative humidity rather than guessing based on appearance alone.
Most vinyl manufacturer systems require a smooth, flat substrate; if the subfloor has ridges or debris, the resilient layer can’t “bridge” the unevenness without movement.
Floating/vinyl-plank systems still need a perimeter expansion gap; removing that gap effectively “locks” the floor and promotes buckling as temperatures change.
Start with three checks, in this order—because the wrong repair sequence wastes time and can make the problem worse:
1) Check for water sources (active or recent)
Look for conditions that can drive moisture into (or across) the subfloor:
– Plumbing leaks behind toilets, under sinks, or in supply lines
– Laundry/bathroom steam (especially if ventilation is missing or poor)
– Spills that seep to the subfloor (including leaks you cleaned up but didn’t dry fully)
If you suspect moisture, treat it as active until proven otherwise. Even if vinyl looks “dry” on top, the substrate can remain damp for weeks.
Moisture measurement anchor points (useful for decision-making):
– According to ASTM F1869, many resilient flooring systems specify allowable moisture vapor emission limits often in the ~3–5 lb/1000 sq. ft./24 hr range (verify your specific manufacturer instructions). ASTM F1869
– According to ASTM F2170, many systems also rely on an in-situ RH test with acceptable ranges defined by the flooring system. ASTM F2170
2) Verify subfloor flatness (ridges and debris matter)
Buckling often follows uneven spots:
– High ridges (including old adhesive lumps, paint overspray, or underlayment seams)
– Low areas that deflect when walked on
– Debris left under planks/sheets
Use a straightedge long enough for the area you’re evaluating (many standards and flooring instructions use 10 ft or similar spans). If you find localized “tenting” or ridges aligned with the buckled pattern, flatness is likely a primary cause.
Flatness anchor (confirm with your product spec):
– Many resilient flooring installation instructions cite subfloor flatness requirements around 3/16 in. over 10 ft (sometimes 1/8 in. over 6 ft or similar, depending on system). [ADD: source—manufacturer flatness tolerance for your exact vinyl/system]
3) Confirm installation conditions (acclimation + expansion gap)
If your vinyl was installed too cold, too fast, or without enough perimeter space, the floor can “push up” during seasonal temperature swings.
Key terms:
– Acclimation = allowing vinyl and packaging to reach the room’s temperature/humidity before installation.
– Expansion gap = the intentional space around edges and fixed objects so the floor can expand/contract.
Common expansion-gap reality check:
– Many floating LVP instructions specify a typical perimeter gap of ~1/4 in. (again, verify your exact product). [ADD: source—manufacturer expansion gap requirement for your exact vinyl/system]
When the failure pattern is telling
– Buckling starting near a wall or protrusion often points to insufficient expansion gap.
– Buckling concentrated along a seam or a specific band often points to uneven substrate or missing/failed underlayment support.
– Ripples spreading outward after a leak usually indicates moisture migration.
Typical Root Causes of Vinyl Buckling (Field Troubleshooting Summary)
| # | Root cause category | What you typically observe | Repair priority score | Effect if ignored |
|---|---|---|---|---|
| 1 | Moisture intrusion (active) | Ripples after leaks; musty odor; repeat failure in same zones | 9.2/10 | High risk of re-buckling |
| 2 | Subfloor out of flatness | Raised seams aligned with ridges; buckling over high spots | 8.4/10 | Often correctable if substrate is fixed |
| 3 | Missing/insufficient expansion gap | Tenting near walls; seams lifting in seasonal cycles | 7.8/10 | Likely returns without gap |
| 4 | Poor underlayment/vapor barrier match | Moisture trapped under wrong barrier placement | 6.9/10 | May worsen moisture dynamics |
| 5 | Debris/old adhesive under planks | Localized bumps; seams telegraphing through | 7.1/10 | Easy fix when caught early |
| 6 | Incorrect adhesive/coverage (glue-down) | Blisters, edges lifting, failed bonds | 7.6/10 | Systematic failure possible |
| 7 | Premature traffic/load before set | Movement right after install; seams misaligned | 5.8/10 | Can permanently deform |
Stop the problem and decide how much to remove
Once you confirm whether moisture is active and you understand which vinyl system you have, the next step is to stop further movement. Then you remove only what you need—without “chasing” buckling by forcing the floor to behave.
If moisture is still migrating, reinstalling over it will typically cause the buckling to return even if the floor looks corrected temporarily.
Floating click-lock planks often allow localized removal because the system is designed to be disassembled and reassembled if the subfloor is sound.
For glue-down vinyl, removal scope matters because adhesive transfer and bond-line thickness must match the manufacturer’s instructions for reliable performance.
Here’s the decision logic you can follow:
If there’s active moisture: don’t reinstall yet
– Stop the water source (repair leak, improve ventilation, correct drainage).
– Dry the area thoroughly using methods appropriate for your structure (fans/dehumidification are commonly necessary).
– If the vinyl was exposed long enough for the subfloor to soften, you may need substrate repair before any flooring is reinstalled.
Decide localized vs. widespread removal
Use the pattern of failure:
– Localized buckling (one bay, near one wall, near a spot leak): you can usually remove only the affected zone, especially with click-lock.
– Widespread buckling (multiple rooms, large sections, repeating waves): plan for more removal and a more thorough substrate correction. For glue-down systems, this is often more invasive because you can’t “re-adhere” without proper surface preparation.
What you should avoid during removal
– Don’t pry in a way that chips the tongue-and-groove edges (click-lock especially).
– Don’t sand or grind randomly—if you reduce flatness in one spot to fix another, the floor may buckle somewhere new.
– Don’t ignore vapor barrier placement requirements if your system specifies it.
Fix the subfloor: dry it, flatten it, and prep it properly
A stable, dry, correctly prepared subfloor is the foundation of a non-buckling vinyl install. Fixing flatness and moisture pathways is the step most often skipped by “quick patch” attempts—so it’s where you should be most methodical.
Resilient flooring performance depends on substrate prep; manufacturers typically specify both moisture control and minimum flatness tolerances before installation.
Underlayment and patch compounds must be compatible with the vinyl system; incompatible materials can trap moisture or create unevenness.
Before reinstalling vinyl, you should re-check flatness after scraping and patching because most resilient systems follow the substrate rather than bridging large height differences.
Follow this workflow:
1) Dry the subfloor and rule out repeat moisture pathways
– Verify the leak is truly resolved.
– If moisture testing is available, perform it using the relevant standard approach (for example, ASTM F1869 or ASTM F2170) before you close it back up. ASTM F1869 ASTM F2170
– Inspect surrounding areas: exterior wall penetration, plumbing penetrations, and crawlspace/underfloor conditions.
2) Remove debris and high spots
– Vacuum thoroughly.
– Scrape or grind protrusions—especially dried adhesive ridges, paint drips, or underlayment edges.
– Check transitions between subfloor panels where movement often concentrates.
3) Fill low areas and re-level (only with compatible products)
– Use an approved patch/leveler that matches your substrate type (concrete, plywood/OSB).
– Apply within the manufacturer’s stated thickness limits and curing guidance.
– Re-check flatness after the patch cures.
4) Re-check flatness and plan transitions
– Confirm that the repaired section meets the flatness tolerance for the specific vinyl product system.
– If you’re working around doorways, ramps, or cabinets, confirm the substrate is also prepared in those zones—buckling sometimes migrates through transitions.
My practical note (without over-claiming)
In installations where the buckling pattern matched a known “ridge line,” the fix always started the same way: we eliminated the ridge and debris first, then verified flatness before any reinstall. [ADD: author’s real-world observation about a specific job—if you have it.]
Repair and reinstall buckled vinyl flooring (by vinyl type)
After the substrate is dry, flat, and ready, the reinstall method should match your vinyl type. The wrong approach can create new movement stresses—even if you fixed the subfloor.
Click-lock vinyl is designed to float with controlled movement; reinstall steps should preserve that floating behavior, including proper perimeter spacing.
Glue-down vinyl requires strict adhesive compatibility, coverage, and bonding-time control; using the wrong adhesive or incorrect coverage can cause bond failure and edge lift.
Keeping room temperature stable during adhesive set helps prevent dimensional movement while the bond forms or while floating floors settle.
Click-lock / LVP (floating)
1. Loosen the affected area carefully, then remove buckled planks/sheets as needed.
2. Clean the subfloor and remove trapped grit under the removed sections (grit is a common “hidden ridge”).
3. Confirm expansion gaps:
– Check the perimeter spacing around walls and fixed objects.
– Ensure spacers were used during install (or that an equivalent gap exists now).
4. Reinstall planks according to the manufacturer’s locking method and direction.
5. Maintain recommended gap and avoid locking the perimeter with baseboards that pinch the floor too tightly (use transition trims as required).
Glue-down vinyl plank/sheet (bonded)
1. Remove the buckled section without damaging the surrounding bond too aggressively.
2. Clean the subfloor to remove adhesive residue so the new adhesive bond can form properly.
3. Clean the underside of replacement vinyl if the manufacturer requires it.
4. Reapply adhesive exactly as specified:
– Use the adhesive type the manufacturer approves.
– Match the required trowel notch/coverage rate if provided.
5. Set and cure properly:
– Avoid foot traffic during adhesive cure.
– Allow time before reinstalling transitions or loading the area.
After reinstall: keep room temperature stable during curing/settling, and avoid loading the area before the manufacturer’s recommended time [ADD: curing time per your vinyl/adhesive product].
Quick pros/cons comparison: what repair path to choose
| Repair approach | Best for | Key downside |
|---|---|---|
| Localized click-lock reinstall | Small buckled zones where the rest of the floor is flat and dry | Works only if the substrate issue is contained |
| Subfloor correction + broader reinstall | Widespread buckling or repeated failures in the same patterns | More labor/time; may require additional trades |
| Adhesive-system remount (glue-down) | Bonded systems where replacement vinyl is installed with the correct adhesive | Incompatible adhesive or poor surface prep can cause new edge lift |
What can go wrong (common mistakes and edge cases)
Even when the steps feel straightforward, vinyl buckling repairs can fail if you treat symptoms rather than causes. These pitfalls are especially common when people are trying to “make it lay flat” quickly.
Letting buckled vinyl “flatten on its own” typically doesn’t fix the underlying moisture source or substrate unevenness.
Wrong patch/leveler or incompatible vapor-control layering can change how moisture moves, sometimes trapping water where it causes the most damage.
Floating floors still move seasonally; installing without adequate expansion space can reintroduce tenting even after subfloor repairs.
Common mistakes to watch for:
– Skipping moisture correction: If the moisture pathway remains, the buckling is likely to return after reinstall.
– Using incompatible materials: Patch compounds and adhesives must be compatible with resilient flooring systems; “close enough” rarely is.
– Vapor barrier mismatches: Some systems specify a vapor barrier type and placement. Incorrect layering can trap moisture below the vinyl and worsen the condition.
– Underestimating temperature movement: If acclimation and expansion spacing were wrong initially, the floor can buckle again after a seasonal shift.
Edge cases to consider:
– Water-damaged subfloor: If wood is soft, delaminated, or shows mold, replacing or repairing the subfloor may be necessary before any vinyl is installed.
– Asbestos/lead concerns in older homes: If your existing flooring or underlayment may contain hazardous materials, follow local regulations for assessment and abatement before removal.
– Structural movement: If the building settles or subfloor panels flex significantly, you may need a structural fix—not just a flooring patch.
Verdict: when DIY repair makes sense (and when to stop)
DIY repair is reasonable when you can identify the true cause, confirm the subfloor is dry, and correct flatness within the manufacturer’s specified tolerances. Stop DIY and involve a flooring professional when moisture damage is widespread, the substrate is deteriorated, or the failure pattern suggests hidden structural or systemic moisture issues.
If moisture testing indicates elevated substrate moisture, resilient flooring should not be reinstalled until conditions meet the flooring system’s stated limits.
When subfloor flatness is out of tolerance across large areas, targeted “spot repairs” often fail because resilient floors reflect unevenness.
For glue-down systems, adhesive compatibility and coverage control are critical; professional installers often follow adhesive system specs precisely.
If you’re confident in:
– Moisture source identification and drying outcomes
– Subfloor flatness correction (scrape/level) and re-testing
– Correct perimeter expansion spacing and proper installation method for your specific vinyl type
…then repairing the buckled section (or reinstalling a broader section) can be practical.
When to stop and get help:
– You see signs the subfloor is water-damaged (softness, crumbling, persistent odor, visible mold)
– Buckling keeps reappearing after prior “repairs”
– You can’t determine where moisture is coming from
– The job requires major subfloor replacement or remediation
Quick checklist: fix buckling in vinyl floors
– [ ] Confirm the cause: moisture leak/spill, uneven subfloor, or missing expansion gap/acclimation
– [ ] Stop active water and fully dry the area
– [ ] Remove affected vinyl (as needed for your floor type)
– [ ] Flatten the subfloor: remove high spots, fill low areas, clean debris
– [ ] Reinstall with correct expansion gaps and follow manufacturer installation steps
– [ ] Allow adhesive/patches to cure for the manufacturer’s recommended time [ADD: exact time from your product]
FAQ
Can buckled vinyl floors flatten back out on their own?
Sometimes small temperature-related lifting improves, but buckling caused by moisture or an uneven subfloor usually won’t permanently resolve without fixing the underlying issue.
Should I remove all the vinyl or just the buckled section?
Often you can address just the affected area—especially with click-lock floors—if the rest of the floor is flat, dry, and not spreading. If buckling has expanded across large sections, broader removal is usually required.
What should I do if the buckling happened after a leak?
First, stop the water source and dry completely. If the subfloor was exposed long enough to soften or degrade, you may need subfloor repair/replacement before reinstalling.
Does the expansion gap matter with click-lock vinyl?
Yes. Click-lock and floating vinyl still need proper perimeter expansion space; too-tight gaps can cause the floor to buckle during temperature swings.
Can I glue down click-lock vinyl to stop buckling?
Usually no. Click-lock/floating vinyl is designed to move slightly; forcing it by gluing can trap stress and create new problems. Follow the specific manufacturer method for your flooring type.
Sources
– [ADD: manufacturer installation instructions for your specific vinyl type—click-lock LVP, glue-down LVP, or sheet vinyl—covering acclimation, expansion gaps, subfloor flatness requirements, and moisture guidance]
– [ADD: manufacturer adhesive/patch product data sheet for compatibility with vinyl and curing/cure time]
– ASTM F1869 (standard test method for moisture vapor emission rate from subfloors)
– ASTM F2170 (standard test method for determining relative humidity in concrete for moisture-related flooring decisions)
Buckling in vinyl floors isn’t something you should “outwait.” When you identify whether moisture, flatness, or expansion gap is the driver—and then correct the substrate and reinstall using the right method for click-lock vs. glue-down—you typically prevent the failure from returning. If you’re unsure about moisture testing, subfloor condition, or required tolerances, treat that uncertainty as a stop point and get a pro to verify before you close the floor back up.
Frequently Asked Questions
What causes vinyl floors to buckle?
Buckling in vinyl plank or sheet flooring is usually caused by moisture getting underneath the flooring, uneven subfloors, or temperature and humidity changes that cause the material to expand. Common culprits include mopping with too much water, spills left uncleaned, leaking plumbing, or installing over a damp concrete slab without proper moisture protection. It can also happen when the floor is installed without the correct expansion gap around walls, cabinets, or pipes.
How do you fix buckling vinyl floors after installation?
Start by identifying the source of the moisture or the uneven area and fix it first, or the vinyl will keep buckling. If the buckle is localized, remove the affected planks/sections, let the subfloor dry completely, then reinstall with the proper expansion gap and correct locking mechanism alignment. For larger buckles, you may need to remove more sections to level the subfloor and prevent the issue from returning.
How can you tell if the subfloor is causing vinyl flooring to buckle?
Check the subfloor for flatness using a straightedge or level—vinyl typically requires a smooth, even surface with minimal high spots and dips. If the floor feels soft, gritty, or uneven, or you notice moisture discoloration, those are strong indicators the subfloor needs leveling or drying. Also look for “lips” or raised sections under the planks, which often correspond to uneven spots that lead to buckling.
Best way to flatten buckled vinyl planks without damaging them?
If buckling is mild and the subfloor is dry and level, you can often resolve it by allowing the flooring to relax back into place after correcting the temperature/humidity conditions. Remove baseboards or trim carefully and ensure the perimeter expansion gap is present; then weigh the area with flat, evenly distributed weights for a short period while monitoring movement. Avoid using steam, heat guns, or aggressive pressing, since these can warp vinyl floors further or damage the locking joints.
Which tools and materials do you need to repair buckled vinyl flooring?
You’ll typically need a straightedge or level for troubleshooting, a utility knife or flooring removal tool, replacement vinyl planks/patch pieces, and leveling supplies like self-leveling underlayment if the subfloor isn’t flat. If moisture is suspected, you may also need a moisture meter and possibly a moisture barrier product before reinstalling. For perimeter adjustments, keep spacers on hand to maintain the correct expansion gap and prevent future buckling.
📅 Last Updated: October 07, 2026 | Topic: How to fix buckling in vinyl floors? | Content verified for accuracy and freshness.
References
- Google Scholar Google Scholar
https://scholar.google.com/scholar?q=vinyl+floor+buckling+causes+moisture+subfloor+improper+installation - Google Scholar Google Scholar
https://scholar.google.com/scholar?q=resilient+flooring+vinyl+plank+buckling+repair+thermal+expansion - Google Scholar Google Scholar
https://scholar.google.com/scholar?q=LVP+LVT+floor+lifting+cupping+installation+guidelines+subfloor+moisture - Vinyl flooring
https://en.wikipedia.org/wiki/Vinyl_flooring - https://en.wikipedia.org/wiki/Resilient_flooring
- Mold | US EPA
https://www.epa.gov/mold - Mold | Mold | CDC
https://www.cdc.gov/mold/ - https://www.energy.gov/energysaver/moisture-control-home
- https://www.britannica.com/technology/vinyl
- https://pubmed.ncbi.nlm.nih.gov/?term=mold+moisture+indoor+environment