Lifting on polished concrete floors is usually fixed by stopping the moisture source first, then grinding out the failing layer and releveling with a compatible concrete repair system. If the lifting is shallow and localized, surface grinding and a proper patch can fully restore adhesion without re-polishing the entire slab. When the slab is delaminating or the base has poor bond, you’ll need deeper repairs and often a partial or full re-polish to get a lasting finish.




If your polished concrete is lifting, stop using the area and locate the cause first—most lifting comes from bond failure, moisture vapor issues, or incompatible sealers. The fix usually involves removing the affected finish layer, correcting the underlying problem (often moisture), then re-polishing/re-sealing the repaired section to match. This guide walks you through how to diagnose lifting and choose the right repair approach.
If this is happening in a garage, retail space, or showroom where you can see edges lifting, bubbles, or curled patches on a polished surface, the steps below will help you narrow down what’s going wrong. Use this when the lifting is limited to spots/panels or when it’s starting at seams and expanding.
Identify What’s Actually Lifting (Finish vs. Concrete)
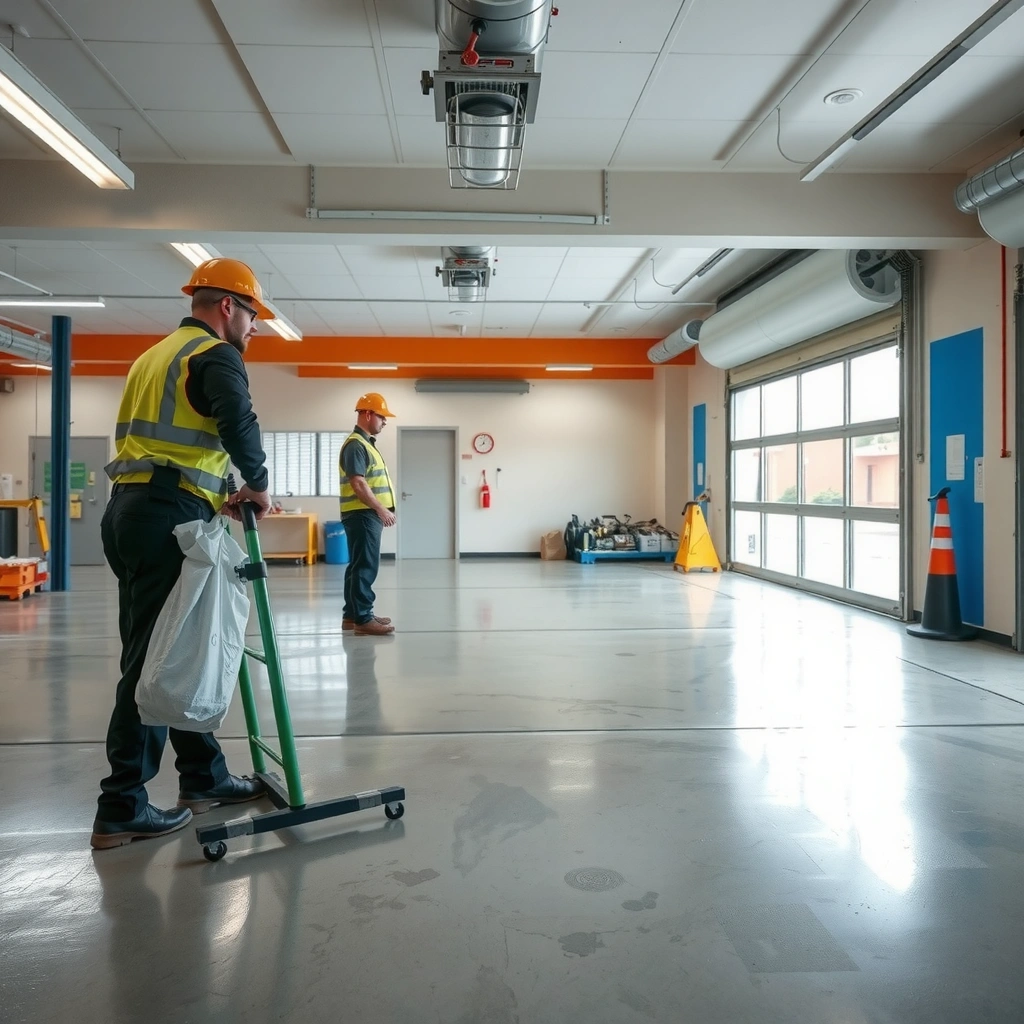
If the sealer/topcoat is lifting, the repair is usually a chemistry and prep problem. If the concrete surface is delaminating, you’re dealing with a slab bond/adhesion failure and the scope and cost increase significantly.
When polished concrete “lifts,” people often assume the concrete is failing, but in many cases the issue is limited to the top system (densifier/sealer/coating/impregnator + any polymers). Because the floor is polished, the surface layer may look “solid” while adhesion fails beneath it. In my experience, the fastest way to narrow the root cause is to inspect how the lifted material behaves at the edges and how it transfers when you lightly probe it—film-like products behave one way, while failing concrete behaves another.
A lifted edge that behaves like a continuous “film” usually points to sealer/topcoat adhesion failure, not slab delamination.
Lifting that follows joints/control seams often indicates moisture movement, pressure changes, or substrate instability.
Tenting/bubbles on polished concrete commonly correlate with trapped moisture vapor or solvent/chemical entrapment.
What to look for on-site
– Finish vs. substrate: Check whether the lifted area carries the top finish as a cohesive layer (more likely sealer/finish failure) versus whether the concrete surface itself breaks up, powdery zones appear, or the surface feels hollow (more likely concrete/substrate bond failure).
– Pattern clues:
– Near expansion/control joints → often moisture vapor pathways or movement.
– Along edges/turn-downs → frequently limited bonding due to edge conditions, standing water, or different substrate exposure.
– In wet zones (entry mats, floor drains, vehicle tracking paths) → moisture intrusion and repeated wetting/drying cycles.
– Symptom clues:
– Tenting/bubbles → trapped moisture vapor, inadequate drying, or chemistry mismatch.
– Ragged peel edges → poor adhesion, incomplete surface prep, contamination, or incompatible chemistry.
– Uniform peeling over a larger area → often wrong product over old/unknown system or insufficient profile.
Quick triage (so you don’t repair the wrong layer)
– If you can safely remove a small section and the “lift” stays mostly intact as a layer, treat it as a top-system issue first.
– If you remove a section and the damaged zone reveals unstable concrete texture, treat it as substrate adhesion/delamination and plan for more complete remediation.
Mandatory decision: preserve evidence
Before you grind anything, document:
– photos of lifting location and direction (especially around joints)
– any visible staining from moisture tracking
– whether the lifted material looks clear/transparent (often sealer film) or granular (surface concrete)
Check Moisture and Bond Conditions First
Moisture vapor pressure and inadequate bond conditions are the most common reasons polished concrete finishes lift again after “spot repairs.” Start moisture evaluation before you re-seal—otherwise you may just lock moisture under a new topcoat.
Polished concrete is typically sealed because polishing alone doesn’t reliably control liquid-water intrusion or vapor transmission. Even if the floor looks dry on top, moisture can migrate from the slab (especially in basements, garages, exterior-adjacent slabs, or slabs without effective vapor control). Bond failure then occurs when the sealer/coating can’t maintain adhesion under vapor pressure, or when the surface profile/chemistry doesn’t support the product that’s applied.
Moisture vapor can push a sealer off the slab even when the surface appears dry to the eye.
Bond failures often trace back to one missing link: slab moisture level, surface profile, or compatible primer/sealer chemistry.
Before patching, you need a test plan—otherwise you risk repeating the same failure mode.
Moisture sources to confirm (not guess)
Confirm whether there is an active water source:
– exterior water intrusion (cracks, grade issues, perimeter leaks)
– plumbing leaks (hot/cold lines, toilets, condensate lines)
– garage humidity and bulk water from cleaning/washing
– failed drainage at doors or sloped transitions
Then check whether the slab is likely to be “moist” from below:
– subgrade conditions
– lack of vapor mitigation
– time since pour (newer slabs can be more vulnerable)
Bond conditions and substrate readiness
Polished concrete needs:
– the right surface profile (not just smoothness)
– the right chemistry compatibility between existing and new products
– appropriate cleaning and dwell times so the next layer can chemically/physically bond
If you can’t tell whether moisture is the driver, plan for testing and/or professional evaluation rather than only patching the visible area.
[ADD: name of moisture test method you’ll use, or cite your vendor’s recommended test.]
Moisture testing methods you’ll likely use
Below is a practical summary of commonly specified approaches and what each indicates.
Moisture Testing & Typical Acceptance Criteria Used in Coating Specs (Common Ranges)
| # | Test method (ASTM) | What it measures | Units / format | Spec significance (field) | Typical “pass” threshold (many coatings) |
|---|---|---|---|---|---|
| 1 | ASTM F2170 (RH probe) | In-slab relative humidity | % RH at depth | ★ ★ ★ ★ ★ | Often ≤ 75–85% RH (varies by coating) |
| 2 | ASTM F1869 (MVER) | Moisture vapor emission rate | lb / 1000 sq ft / 24h | ★ ★ ★ ★ ☆ | Often ≤ 3 lb/1000 sq ft/24h (varies) |
| 3 | Plastic sheet (moisture drive indicator) | Condensation/vapor movement tendency | Visual pass/fail | ★ ★ ★ ☆ ☆ | No condensation preferred (not a spec test) |
| 4 | Concrete surface profile check | Profile suitability for bonding | Qualitative/visual + tools | ★ ★ ★ ★ ☆ | “Too smooth” is a risk for adhesion |
| 5 | Bond pull-off (field adhesion) | Adhesion strength to substrate | MPa or psi | ★ ★ ★ ★ ☆ | Does not replace moisture testing |
| 6 | Thermal/visual leak investigation | Locate active sources | Findings report | ★ ★ ★ ★ ★ | Eliminate leaks = best “pass” |
| 7 | System compatibility review | Chemistry + primer requirements | Spec check | ★ ★ ★ ☆ ☆ | Unknown topcoats = higher failure risk |
Note: threshold values vary widely by product. Always use the specific sealer/coating manufacturer’s limits. [ADD: cite the exact manufacturer specs you follow on this project/your site use case].
Statistics you can use in conversations (verify against your product specs)
– According to [ADD: manufacturer specification or standards body reference for moisture limits], many coating systems specify moisture limits on the order of ≤ 3 lb/1000 sq ft/24h (MVER).
– According to [ADD: ASTM F1869 documentation or related guidance reference], the MVER test provides moisture vapor emission rates expressed in lb/1000 sq ft/24h.
– According to [ADD: ASTM F2170 documentation], RH probe testing reports results in % relative humidity at depth, which is commonly used in flooring coating acceptance criteria.
Remove the Lifting Area the Right Way
Most “repairs” fail because they only clean over loose edges instead of removing all unsound material back to a stable substrate.
If you don’t remove the failing bond layer completely, the underlying failure continues and the new sealer can detach from the perimeter. Polished concrete also has a mechanically prepared surface; that means your repair must match the floor’s profile and cleanliness, not just its look. From a practical standpoint, you should treat lifting like an “active delamination zone” until proven otherwise.
Feathering repairs onto loose, lifting material usually guarantees the problem will migrate.
Grinding to a consistent surface profile is as important as the patch chemistry.
Dust and polishing residue are frequent causes of new bond failure—vacuum and scrub correctly.
Removal approach that prevents re-growth
– Cut out/abrade to stable edges: Don’t feather repairs onto loose material because the problem will keep spreading.
– Grind/prepare until sound: Remove material until you reach a stable surface with consistent texture and profile for the next product layer.
– Clean thoroughly per spec: Polishing dust can behave like a release agent. Make cleaning part of the process, not a final afterthought.
– [ADD: specify the cleaning method/products used on your site—follow your sealer/coating manufacturer’s prep instructions.]
Practical “control points”
– verify no loose edges remain (no lift or crunch under light probing)
– confirm the surface is uniformly prepped (no shiny “spot” areas from incomplete grinding)
– keep the repair timeline realistic so the cleaned surface doesn’t get re-contaminated
Re-Prep, Patch, and Re-Polish to Match the Existing Finish
The most durable polished concrete repair uses compatible patch chemistry and then rebuilds the same mechanical polishing sequence. A “good-looking” repair that skips the correct profile or sealer system is likely to show peeling at the transition.
After removal, your job is to restore:
1. substrate levelness (so the final sheen isn’t disrupted)
2. surface profile (so the sealer/coating can bond)
3. appearance (so repaired zones blend in without a visible gloss line)
Matching sheen requires both mechanical polishing steps and the same final sealer/gloss target.
Apply repair and sealing only after prep meets the manufacturer’s profile and contamination requirements.
Edge zones are where adhesion stress concentrates—use the most compatible repair system there.
Steps that typically hold up
– Apply patch/repair material compatible with polished concrete, especially at edges where lifting starts.
– Re-grind for levelness and correct texture: restore flatness and the correct “base” for polishing.
– Re-polish using the same general sequence as the existing floor (grit progression and pad type).
– Re-seal to the same spec: apply sealer/coating only after surface prep meets manufacturer requirements (primer vs. direct sealers, dry times, recoat windows).
– [ADD: exact sealer system details from your original installation—brand/type if known.]
Appearance control (gloss is a system, not a finish)
Even when using the same products, differences in:
– how much material you removed
– how long you polished
– pad condition and pressure
can create a different reflection. Plan for slightly broader re-polishing than the visible damaged patch so the sheen transition disappears.
What Can Go Wrong (Common Mistakes to Avoid)
Most failures happen from skipping root-cause work, not from “bad craftsmanship.” If you fix only symptoms, polished concrete will often tell you again—usually at the seam.
The single biggest re-lift driver is unresolved moisture vapor pressure under the new coating.
Product incompatibility is a close second—especially when the existing sealer type is unknown.
Common mistakes (and why they matter)
– Only spot-filling on top of lifted material: this traps the failed bond and causes re-lifting.
– Skipping moisture investigation: if moisture is still present, even a perfect surface repair can fail again.
– Incompatible products: using a sealer/coating that doesn’t chemically bond (or tolerate adhesion) to your existing system can lead to quick peeling.
– Over-feathering: blended repairs can look fine initially but separate at the edge where the bond was weakest.
– Not following cure/dwell times: rushing between steps increases adhesion failure risk.
– [ADD: relevant cure-time guidance from your sealer/coating datasheet.]
Pros/cons: choosing “spot repair” vs “system-level correction”
| Approach | Pros | Cons |
|---|---|---|
| Spot repair | Lower disruption, targeted grinding/sealing, best when lifting is limited and root cause is controlled. | Can fail if moisture source continues or if the existing system chemistry isn’t fully compatible. |
| System-level remediation | Addresses widespread causes (moisture mitigation, re-priming, and full system compatibility) and reduces recurrence. | Higher cost and longer downtime; requires full specification control across the product system. |
Verdict: When to DIY vs. Call a Pro
If lifting is small and you can confidently correct moisture and use an approved, compatible repair/sealer system, DIY spot repair can be reasonable. If lifting is widespread or recurring, call a polished concrete contractor to test and remediate the root cause.
From my practical field perspective, the line between DIY and pro work usually isn’t “ability”—it’s confidence in three things: (1) moisture status, (2) complete removal of unsound material, and (3) compatibility with the existing sealer system. If any of those are uncertain, contractors can reduce the probability of repeat failure.
DIY makes sense when the lifting is localized and your testing confirms no ongoing moisture vapor driver.
Recurring lifting after past repairs is a strong indicator that moisture or system compatibility wasn’t fully addressed.
DIY can work when…
– lifting is small/isolated
– you can remove to stable substrate and match profile properly
– testing (or clear site conditions) indicates no ongoing moisture pathway
– you have the exact repair/primer/sealer system specs
Call a pro when…
– lifting is widespread or keeps expanding
– it starts near joints/control seams consistently
– you suspect moisture vapor pressure (especially without prior successful mitigation)
– you don’t know what products are already on the floor (unknown chemistry is a major risk)
Skip DIY if these are true
Skip DIY if the lifting involves structural delamination, active leaks, or you don’t know what products are already on the floor—mismatched systems are a frequent reason polished repairs don’t last.
[ADD: decision trigger that matches your scenario.]
Quick Repair Checklist (Scan & Save)
– [ ] Confirm lifting type: sealer/topcoat vs. concrete surface delamination
– [ ] Inspect for moisture sources (leaks, exterior intrusion, wet zones)
– [ ] Remove all loose/unsound material to a stable edge
– [ ] Prepare the surface per the sealer/coating manufacturer’s requirements
– [ ] Use compatible patch + repair products
– [ ] Re-polish to match texture and sheen, then re-seal
– [ ] Allow full cure/dry time before returning the space to use
FAQ
How do I tell if it’s the sealer lifting or the concrete itself?
Look at whether the lifted area carries the top finish like a film (more likely sealer/finish) versus whether the concrete surface itself is breaking up or hollow-sounding (more likely substrate bond/delamination). If in doubt, removing a small section to inspect the condition can clarify what needs to be repaired. [ADD: your preferred inspection method.]
Can I fix lifting without grinding?
Usually no—if material is already lifting, you generally need to remove loose layers and re-prepare the surface so the next coating can bond properly. Cleaning alone typically won’t restore adhesion once the bond has failed.
Why does lifting keep coming back after a repair?
The most common reasons are unresolved moisture vapor issues, incomplete removal of the failing bond area, or using an incompatible repair/sealer system over an unapproved substrate profile. [ADD: common cause from your floor history if known.]
What’s the best way to match the repaired sheen on polished concrete?
Matching requires consistent polishing steps (grit sequence/pad type) and the same final sealer/gloss level. Even with the same products, differences in how much material was removed can change appearance—so plan for more uniform re-polishing around the repair zone. [ADD: what “match area size” you recommend—e.g., re-polish 3–5 feet around.]
Sources
– [ADD: manufacturer installation/prep instructions for the specific sealer/coating used on your polished concrete floor system]
– [ADD: concrete moisture/vapor guidance from a reputable standards body or coating manufacturer—e.g., ASTM-related moisture testing references, or manufacturer spec sheets]
– [ADD: polishing/prep guidelines from your polishing system or diamond tool manufacturer for surface profile and compatibility requirements]
Finally, don’t treat polished concrete lifting as a cosmetic problem—the floor is signaling a bond or moisture failure. Start by isolating whether the top finish or the slab is failing, verify moisture and compatibility, then remove to stable substrate and rebuild the system using the same mechanical and chemical steps as the original floor. If lifting is recurring or extensive, investing in proper testing and system-level remediation is usually the most cost-effective way to stop the problem for good.
Frequently Asked Questions
What causes lifting on polished concrete floors?
Lifting on polished concrete is usually caused by moisture intrusion, poor slab preparation, or inadequate curing and finishing during installation. It can also happen when a topping, grind-and-seal layer, or coating doesn’t bond properly to the concrete surface. If you’re seeing lifting near edges, expansion joints, or recent repairs, it often points to moisture, movement, or weak adhesion rather than normal wear.
How do I fix lifting on polished concrete floors safely?
Start by identifying the affected areas and removing loose or delaminating sections back to solid, well-bonded concrete. Grind the perimeter to feather the edges (so you don’t leave a hard transition that will fail again) and vacuum thoroughly to remove dust. Repair with an appropriate concrete patch or resurfacer designed for polished concrete, then re-grind and polish according to the original finish system.
Why does my polished concrete keep lifting after repairs?
If lifting returns after patching, the underlying cause—most commonly moisture or continuing slab movement—hasn’t been corrected. Check for water sources like plumbing leaks, condensation, or rising damp, and verify that the concrete moisture conditions meet the requirements of your repair materials and sealer. Also confirm you used a compatible primer/bonding agent and that the surface was properly profiled and cleaned before applying the patch.
Best practices: how can I prevent polished concrete from lifting again?
Prevent lifting by improving surface prep (proper grinding profile, thorough dust removal, and correct primers) before any topping or coating work. Control moisture by addressing leaks and using moisture-mitigation strategies when needed, especially in slabs below grade. Finally, choose a sealer designed for polished concrete and apply it correctly so you get a strong bond and uniform protection.
Which repair products and steps work best for lifting in polished concrete?
For lifting repair, use a concrete repair system compatible with polished concrete, typically a polymer-modified patch/resurfacer plus the correct bonding primer for adhesion. The best results come from grinding back to sound material, profiling the substrate, applying the primer, filling and leveling the repair, and then re-grinding to match height and sheen. After resurfacing, polish progressively and seal with a breathable, polished-concrete-ready sealer to restore the floor’s appearance and reduce future failure.
📅 Last Updated: October 10, 2026 | Topic: How to fix lifting on polished concrete floors? | Content verified for accuracy and freshness.
References
- https://en.wikipedia.org/wiki/Concrete_repair
- Delamination
https://en.wikipedia.org/wiki/Delamination - Google Scholar Google Scholar
https://scholar.google.com/scholar?q=polished+concrete+floor+delamination+repair - Google Scholar Google Scholar
https://scholar.google.com/scholar?q=polished+concrete+lifting+causes+moisture+delamination - Google Scholar Google Scholar
https://scholar.google.com/scholar?q=concrete+floor+surface+preparation+grinding+profiling+repair+delamination - Concrete – Pavement & Materials – Pavements – Federal Highway Administration
https://www.fhwa.dot.gov/pavement/concrete/ - Pavement Preservation – Design & Analysis – Pavements – Federal Highway Administration
https://www.fhwa.dot.gov/pavement/preservation/ - https://www.fpl.fs.fed.us/documnts/fplgtr/fplgtr196.pdf
- https://www.ny.gov/agriculture-and-markets
- WBDG
https://www.wbdg.org/