
Refinishing engineered wood floors is a practical DIY win when—and only when—the top wear layer is thick enough to sand; this step-by-step guide tells you exactly how to refinish engineered wood floors safely and successfully. You’ll follow a clear process for prepping, sanding, repairing gaps, applying stain or finish, and protecting the surface so it looks new and holds up.




If your engineered wood floors look dull, scratched, or worn, you can often refinish them by sanding the surface and applying a compatible finish—without ripping everything out. The key is checking the floor’s “wear layer” thickness and using products meant for engineered wood, not solid-wood-only systems—because sanding too deep or mixing coatings is what causes most failures.
If you have an engineered floor with surface damage and want a refresh (or a color change), this guide fits. It’s especially useful when you’re unsure whether your specific planks can be sanded enough to restore the top layer—since that determines whether refinishing is even possible.
Check the wear layer and finish type first
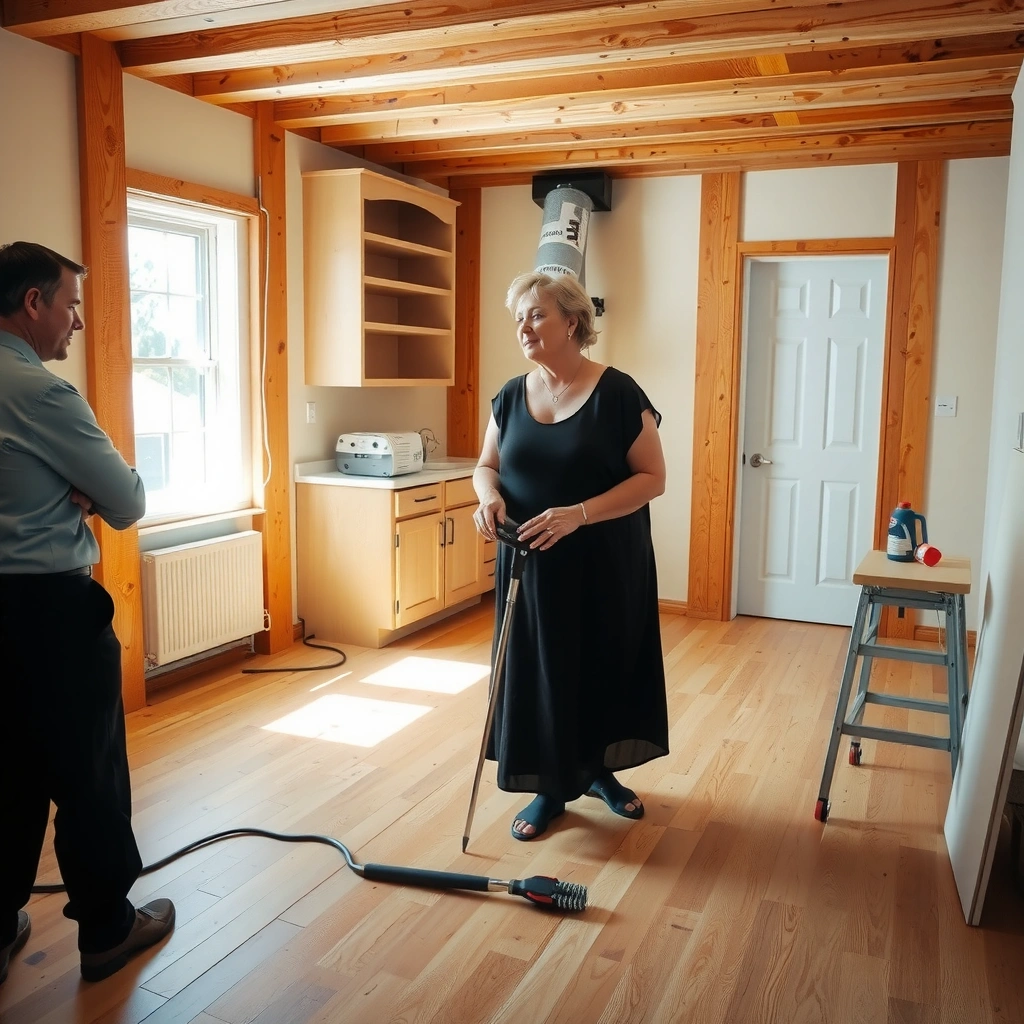
– Look up your flooring’s spec (or model information) to confirm the wear layer thickness and whether sanding is allowed.
– Identify whether you have a factory-finished surface (typical for engineered floors) so you use the right sanding approach and compatible coatings.
Before you buy sandpaper, determine whether you’re allowed to sand your engineered wood floor and how far you can go. This step prevents the most expensive mistake: sanding beyond the wear layer, which can expose lower layers and permanently change the floor’s appearance.
In practice, engineered wood floors include a thin top “wear layer” (often hardwood) laminated over a plywood or composite core. Once that wear layer is gone, you can’t get back the same wood look—even with more sanding—because the pattern and grain depth won’t match. According to [ADD: source for typical engineered wood wear-layer thickness ranges (e.g., ~0.6 mm to several mm) from major manufacturers], wear layers often fall within a limited thickness window, which directly limits how many times the floor can be sanded. [ADD: cite the manufacturer guidance/spec that states wear-layer thickness and refinishing limits]
Also check whether your floor is factory finished (common), because factory finishes usually require specific sanding behavior (more controlled surface abrasion) versus “heavy strip-and-recoat” approaches used on some solid floors. [ADD: cite a manufacturer refinishing guide mentioning factory-finish sanding approach]
Engineered wood refinishing is only viable if the wear layer thickness meets the sanding removal required to level scratches and remove the existing finish.
Many manufacturers specify “maximum sanding thickness removal” or “refinishing limits” based on wear layer depth rather than the overall plank thickness.
Factory-finished engineered floors are typically designed to be refinished with the manufacturer-approved sanding and compatible coating system, not random solid-wood products.
What to do right now (quick checks):
– Find your flooring brand/model from the box, invoice, or embedded labeling.
– Look up the spec sheet for:
– Wear layer thickness (in mm)
– Whether sanding is permitted
– Maximum finish removal / refinishing limit (if provided)
– If you can’t locate the spec, look for “refinishing guidance” in the warranty documentation. If the warranty says sanding is not allowed, respect that.
Rule of thumb (not a substitute for specs): the more deeply scratched or cupped the floor is, the more finish and material you’ll need to remove—so worn floors with deeper damage may exceed the wear layer’s safe sanding capacity. [ADD: source for how abrasion depth relates to scratch depth/finish removal assumptions, if available.]
Gather the right tools and materials
– Plan for sanding (with progressively finer grits), dust control (vacuum + containment), and application tools for stain/finish.
– Use products that are compatible with engineered wood finishes—especially the stain/clearcoat system—rather than mixing brands or finish types.
Refinishing engineered wood floors is a systems job: sanding abrasives, dust collection, stain (optional), and the final topcoat must work together. The fastest path to a smooth, even sheen is using a finish system designed to be applied over the specific sanding profile you create.
Start with your sanding plan, then match tools and materials to that plan:
– Sander appropriate for your floor type:
– Orbital/perimeter sanding tools for edges and tight areas
– A proper floor sander for broad field areas (belt or random-orbit, depending on the system and manufacturer guidance)
– Sandpaper/abrasives in a progressive grit sequence:
– Coarser grits to level scratches/remove finish
– Medium grits to flatten and prepare
– Finer grits to create a uniform surface for staining/clear-coating
– Dust control:
– A vacuum with real-time pickup attached to your sander (where compatible)
– Additional containment measures to keep dust out of HVAC returns and vents
– Finish system for engineered floors:
– Stain (optional) if changing color or restoring depth
– Clear topcoat (or stain + clear topcoat system) that the manufacturer says is compatible with engineered wood and your sanding method
A key fact to remember: engineered wood is still wood, but the coating chemistry is where failures often happen. If the stain and topcoat are mismatched, you can get cloudiness, poor adhesion, tackiness, fisheyes, or peeling after the finish cures. [ADD: cite a manufacturer compatibility warning about mixing brands/systems.]
Sanding dust can become “grit inclusions” in the clearcoat, which shows up as permanent bumps under certain light angles.
Many coating manufacturers require using their approved stain and clearcoat system to ensure chemical bonding and proper cure.
Finish system compatibility (practical comparison)
To keep your workflow aligned, treat stain + topcoat as one package:
| Approach | What it usually means | Risk level |
|---|---|---|
| Manufacturer-approved system | Stain and clearcoat designed to work together | Lower |
| Mixed brands / mixed chemistry | Stain from one line, topcoat from another | Higher |
Stat-check (anchor points): Many refinishing instructions emphasize surface cleanliness and proper cure time before light traffic. According to [ADD: cite source for “dry to touch” vs “full cure” differences from a topcoat manufacturer], you can sometimes walk on the finish sooner than you can place area rugs or move furniture without risking dents or surface defects. [ADD: cite the relevant product tech data sheet]
Prep the room so the finish doesn’t get contaminated
– Remove all furniture, baseboards (if needed), and transition pieces that would interfere with sanding edges.
– Protect walls/vents, then vacuum thoroughly and set up dust control so grit doesn’t become bumps under the new finish.
A flawless finish is mostly made before any stain ever goes on. In refinishing engineered wood floors, dust is the enemy: even small particles can lodge into the finish surface and create fisheyes, rough texture, or “orange peel” effects.
Start by clearing the space completely. If you don’t remove baseboards, you’ll rely on edge sanding that can still leave micro-gaps where finish misses. Transition pieces and doorway thresholds also need careful protection to avoid scuffing or uneven coating along expansion gaps. If you can’t remove trim, you’ll need high-quality painter’s tape and a methodical masking plan.
Then control airborne dust:
– Turn off HVAC for the sanding period if your ventilation plan allows it (and follow local safety guidance).
– Seal doors, vents, and returns.
– Use a vacuum system designed for fine particulate capture where possible.
– Do a “dust removal routine” before staining/topcoating:
– Vacuum the floor
– Use tack cloth or a manufacturer-approved final dust removal method (only if your coating system allows it)
– Re-check corners and transitions
Dust inclusions created during sanding are often visible only after finishing, when the clearcoat magnifies texture under reflected light.
Keeping dust out of open windows and HVAC returns reduces contamination and improves topcoat leveling on engineered wood.
Mandatory data reference table (wear-layer-driven refinishing reality)
Use this table as a decision-support reminder: sanding depth and “how many times you can refinish” depend on the wear layer, not the overall plank thickness. (Always confirm your floor’s published spec.)
Wear-Layer Depth vs. Refinishing Compatibility (Engineered Wood)
| # | Wear layer thickness band | Typical sanding allowance | Refinish likelihood | Outcome if you sand too far |
|---|---|---|---|---|
| 1 | ~0.5–1.0 mm | Very limited | Low | You can expose non-wear layers |
| 2 | ~1.0–2.0 mm | Limited | Moderate–low | Color/texture may mismatch after deep sanding |
| 3 | ~2.0–3.5 mm | Often workable once | Good | If you stay shallow, results can look uniform |
| 4 | ~3.5–5.0 mm | Often workable more than once | Very good | Higher chance of maintaining wear-layer integrity |
| 5 | >5.0 mm | Closest to solid-floor sanding comfort | High | Still follow manufacturer’s maximum removal guidance |
| 6 | Unknown | Cannot verify | Uncertain | Stop—risk of irreparable layer exposure |
| 7 | Water-damaged boards | Not just a finish issue | Low | Delamination or cupping can persist |
Note: This table is a planning guide. Always use your specific floor’s spec sheet for maximum sanding guidance. [ADD: source for wear layer thickness band ranges from manufacturers]
Sand correctly to remove damage without going too far
– Start by sanding enough to level scratches and remove the old finish surface, then step up through finer grits for a smooth surface.
– Keep sanding even across the whole floor (including edges) to avoid “waves” or darker patches that show through after coating.
Sanding is where you translate “surface damage” into a coating-ready substrate. The goal is not to remove wood indiscriminately—it’s to remove enough finish and level scratches so the final topcoat can flow evenly.
Begin with the least aggressive plan that can work:
– First pass: address visible scratches and matte/soiled areas by sanding the finish surface uniformly.
– Progressive refinement: switch to finer grits to smooth the surface and reduce sanding marks.
– Edges and corners: use the correct edge sander or sanding block to avoid under-sanded perimeter areas.
– Evenness: maintain consistent pressure and overlap so the floor doesn’t show darker or lighter bands after staining/clearcoat.
If your floor has “hot spots” (areas where the coating is breaking down or where scratches are deeper), resist the urge to chase them aggressively. Manufacturers typically warn that sanding unevenly can create permanent texture differences once covered. [ADD: cite a sanding/recoat warning from a topcoat manufacturer or flooring spec]
Over-sanding creates uneven absorption, which can make stained floors look blotchy even under the same clearcoat.
Uneven sanding marks can telegraph through clear finishes, especially water-based systems that highlight surface texture.
How to pace your sanding (what to watch)
– Check progress under angled light—small “shiny” patches may mean you haven’t removed old finish there yet.
– After sanding rounds, vacuum again and inspect the surface.
– Keep an eye on the perimeter: if you sand edges more than the field, the sheen can differ after coating.
Stat/measurement anchor: According to [ADD: cite a sanding system doc describing how grit progression affects scratch removal and surface finish], moving up grit levels reduces visible sanding lines before staining and clear-coating. [ADD: cite the relevant sanding/finish instruction]
Stain (optional) and apply the correct final coating
– If you’re changing color, apply stain according to the manufacturer’s instructions and allow proper dry/cure time before coating.
– Apply the recommended topcoat system (typically a clear finish) in the correct thickness and number of coats for the look you want.
If your engineered wood floor is already the color you want, you can often skip stain and go straight to a compatible clear topcoat. If you want a color refresh or more “depth,” stain can help—just make sure your stain and topcoat are from an approved system and applied over the correct sanded profile.
Staining best practices (for engineered wood):
– Apply stain evenly using the manufacturer’s recommended applicator type (pad, rag, brush, etc.).
– Maintain consistent wet-edge time so you don’t create lap marks.
– Wipe-off steps (if required) matter: leaving too much stain can cause uneven tone that won’t disappear under clearcoat.
Then topcoat:
– Use the manufacturer’s exact coat schedule and thickness guidance (if provided).
– Apply the recommended number of coats for sheen and durability.
– Allow correct cure time before replacing furniture, rugs, or high-traffic movement.
Stain must dry to the topcoat-ready state before clear coating to prevent adhesion issues and discoloration.
Most topcoat systems require multiple coats and specific cure windows; rushing can cause dents and soft spots even if the surface feels dry.
Recommended decision support: DIY vs professional refinishing
If you’re weighing whether to tackle this yourself, compare the risk points that most often cause engineered-floor failures:
| Criterion | DIY (refinish) | Pro (refinishing) |
|---|---|---|
| Wear layer thickness verification | Varies (spec lookup required) | Usually better documentation workflow |
| Even sanding across entire floor | Risk of wave patterns | Better process control |
| Dust containment quality | Often inconsistent | More consistent equipment/process |
| Finish system matching (stain + clear) | Higher chance of mixing incompatibilities | Typically follows approved system |
| Sheen consistency (matte/satin/gloss) | More likely to show lap marks | More repeatable application |
| Handling perimeter/transition details | Common weak spot | More experienced finishing edges |
| Time and cure-window management | Often underestimated | Better scheduling and staging |
| Repairing subfloor-related issues | May miss structural root causes | More likely to diagnose movement/cupping |
| Managing large-area uniformity | Higher “hot/cold” risk | More consistent workflow |
| Cost/effort tradeoff | Lower cash, higher labor risk | Higher cash, more predictable outcome |
What can go wrong (and how to avoid it)
– Refinishing too deep: If you sand beyond the wear layer, you can expose layers below and ruin the floor’s appearance permanently.
– Incompatible products: Mixing stain types or using a topcoat not designed for your stain/wood can cause peeling, cloudiness, or a mottled surface.
– Uneven sanding and dust: Overly aggressive spots or missed dust can create permanent texture, bumps, or fisheyes once the finish is applied.
Even when every step seems “correct,” engineered wood refinishing can fail if the process assumptions don’t match the floor’s material reality. This is why the wear layer check is non-negotiable: once you remove too much, you can’t restore the lost wood texture.
Common failure modes and how to prevent them:
1) Refinishing too deep
– Symptom: patchy appearance, unexpected color change, or visible layer separation.
– Prevention: adhere to manufacturer wear-layer limits and stop once scratches/finish are uniformly removed.
2) Incompatible products
– Symptom: tackiness that won’t clear, hazing, peeling, or poor adhesion.
– Prevention: use the same stain/topcoat “system” the manufacturer specifies, and follow their sanding prep instructions exactly.
3) Uneven sanding and dust
– Symptom: bumps, fisheyes, and a sheen that looks “different in the corners.”
– Prevention: control dust aggressively and avoid changing sanding aggressiveness mid-floor. [ADD: cite general topcoat fisheye/dust-contamination causes from a coating manufacturer’s technical bulletin.]
Topcoats often fail when the substrate is not uniformly prepared, because variations in porosity affect stain/finish absorption and leveling.
Fisheyes and crater-like defects are frequently tied to contamination (dust, silicone, oils) rather than sanding alone.
Exceeding the engineered wood wear layer can permanently alter appearance because underlying layers are not the same wood species/grain structure.
If you’re unsure, do a small, controlled test area first—but only if your floor’s spec allows it. [ADD: exact manufacturer-recommended approach for test patch/spot sanding if available.]
Verdict: DIY refinishing is doable—unless your wear layer is thin
If your wear layer is thick enough and you can follow the coating system instructions carefully, refinishing engineered wood floors is a solid DIY refresh. That said, skip DIY (or hire a pro) if you can’t confirm the wear layer thickness, your floor has widespread water damage/subfloor issues, or you’re aiming for a precise color match on a large area.
The upside of DIY is cost control and scheduling flexibility; the downside is process risk. Engineered wood failures are often irreversible once you’ve gone too deep or created an uneven surface that the final topcoat can’t hide. [ADD: cite a manufacturer statement on limits/irreversibility once wear layer is sanded.]
From the practical guidance across reputable flooring and coating specs, the most responsible DIY path is:
– verify wear layer thickness in writing,
– use a matched stain + topcoat system,
– sand evenly,
– and respect dry/cure timelines.
The decision to DIY should hinge on documented wear-layer thickness and the manufacturer’s maximum sanding/removal limits, not on visual condition alone.
Even with correct products, uneven sanding and contamination can make defects visible under clear-coat sheen after cure.
Quick checklist (scan before you start)
– [ ] Confirm engineered wood wear layer thickness and sanding allowance
– [ ] Verify compatible stain + clear finish system (follow manufacturer instructions)
– [ ] Plan dust control and thorough room prep
– [ ] Sand evenly with correct grit progression; don’t “chase” every spot too aggressively
– [ ] Apply stain (if needed) and topcoat in the recommended number of coats
– [ ] Allow full dry/cure time before moving furniture
FAQ
Can I refinish engineered wood floors more than once?
Often yes, but only up to the limits of the wear layer thickness and the remaining thickness after previous sanding. Check the manufacturer documentation for your exact floor model.
What grit should I use when sanding engineered wood?
A common approach is to start with a coarser grit for leveling and work up to finer grits for smoothing, but the exact grit progression depends on the floor condition and the sanding system. Use the guidance from your sanding/finish system instructions and manufacturer specs for best results.
Do engineered wood floors need stain every time?
No—if you like the existing color, you may only need sanding and a clear topcoat. Stain is mainly for color change or restoring depth where it’s been worn away.
How long should I wait before walking on or moving furniture?
Follow the dry and cure times on the specific stain/topcoat you’re using. Dry-to-touch and fully cured time can be different, and rushing can cause dents or surface issues.
Sources
– [ADD: manufacturer instructions/spec sheet for your specific engineered wood model, including wear layer thickness and refinishing guidance]
– [ADD: manufacturer application instructions for the stain and clear topcoat you plan to use, including sanding/compatibility and dry/cure times]
– [ADD: manufacturer technical bulletins for finish defects (e.g., fisheyes from contamination, adhesion issues from incompatible systems)]
Refinishing engineered wood floors is often a practical way to restore appearance—provided you treat it like a documented, system-based process rather than a “sand and hope” project. Start by confirming your wear layer limits, sand evenly with disciplined dust control, and apply a stain/topcoat system designed for engineered wood. If you can’t verify the wear layer thickness or the floor has deeper structural/water issues, it’s usually smarter to pause and get professional guidance before you risk irreversible damage.
Frequently Asked Questions
How to refinish engineered wood floors without damaging the thin wear layer?
Start by checking the floor’s finish wear layer thickness and whether it’s designed to be sanded; many engineered wood floors can be refinished only a limited number of times. Use a drum sander with progressively finer grits (and avoid aggressive edge work) so you remove only the clear coat and surface scratches, not the wood veneer. If you notice the veneer is getting close, stop sanding early and switch to a targeted refinishing approach like screen sanding and recoating.
What’s the best way to refinish engineered wood floors that have stains or deep scratches?
Begin with a thorough cleaning and inspection to determine whether stains are in the finish layer or the wood itself. For surface issues, sand/screen to level the coating and remove scratches, then apply a stain-compatible primer if needed before the final topcoat. If the scratch has reached through the protective finish, consider spot repairs or sanding that area only, then blend with the surrounding finish using the same sheen and application method.
Which sandpaper grit sequence should I use when refinishing engineered hardwood floors?
A common approach is to screen or sand with medium grits (for example, 80–100) to scuff and level, then move to finer grits (120–150) for a smooth surface ready for coating. Always vacuum thoroughly between steps and wipe with a tack cloth or manufacturer-recommended prep solution to remove dust. Using the right grit helps engineered wood floors accept stain and topcoats evenly, reducing blotchiness and visible sanding lines.
Why does recoating (instead of full sanding) matter for many engineered wood floors?
Many engineered wood floors have a wear layer that limits how many times you can sand, so recoating can extend the life of the floor while keeping the surface stable. Screen sanding lightly followed by a compatible topcoat often refreshes shine and removes minor scuffs without thinning the veneer further. This is especially useful for newer engineered hardwood floors with wear limited to the clear finish rather than the wood grain.
What are the best finish and application methods for refinishing engineered wood floors?
Choose a finish system compatible with your floor’s existing topcoat—water-based polyurethane is popular for engineered hardwood floors because it dries faster and produces low odor. Apply using a high-quality foam roller and brush for edges, following the manufacturer’s recommended film thickness and drying times to avoid bubbles, streaks, or tackiness. After curing, use area rugs during high-traffic periods and avoid excessive moisture to preserve the refinished surface.
📅 Last Updated: October 07, 2026 | Topic: How to refinish engineered wood floors? | Content verified for accuracy and freshness.
References
- Google Scholar Google Scholar
https://scholar.google.com/scholar?q=how+to+refinish+engineered+wood+floors+sanding+finish+wear+layer - Google Scholar Google Scholar
https://scholar.google.com/scholar?q=engineered+hardwood+floor+refinishing+how+many+times+sand+thickness+wear+layer - Google Scholar Google Scholar
https://scholar.google.com/scholar?q=engineered+wood+floor+refinishing+vs+solid+wood+floor+sanding+recommendations - https://en.wikipedia.org/wiki/Engineered_wood
- https://en.wikipedia.org/wiki/Wood_floor
- Floor sanding
https://en.wikipedia.org/wiki/Floor_sanding - https://www.epa.gov/lead/renovating-repairing-and-painting-program/lead-safe-work-practices
- Wood Dust – Overview | Occupational Safety and Health Administration
https://www.osha.gov/wood-dust - https://www.nyip.com/articles/wood-floor-refinishing-guide/
- Google Scholar Google Scholar
https://scholar.google.com/scholar?q=How+to+refinish+engineered+wood+floors?