
You can seal hardwood floors the right way with a clear, step-by-step process that delivers a durable, water-resistant finish. This guide walks you through prep, stain (if needed), and sealing so you avoid common problems like streaks, bubbles, and uneven sheen. Follow these steps and you’ll know exactly which products and application method to use for a smooth, long-lasting result.




Sealing hardwood floors protects the wood from water damage, staining, and everyday wear—and if you prep and apply the right system correctly, it also makes future cleaning easier. Follow a disciplined process: identify your current finish condition, prep to the adhesion requirements, choose a sealer matched to foot traffic and room moisture, then apply thin, even coats on the label’s dry/recoat/cure schedule.
Sealing is for homeowners and DIYers working on existing finished hardwood (or bare wood during a refinishing project) who want clear, practical steps and understand what can go wrong. This matters most when your floor is already wearing through, has old peeling finish, or you suspect moisture issues underneath—because in those cases, prep and product compatibility affect the outcome more than the “final coat.”
Gather the Right Tools and Sealant Type
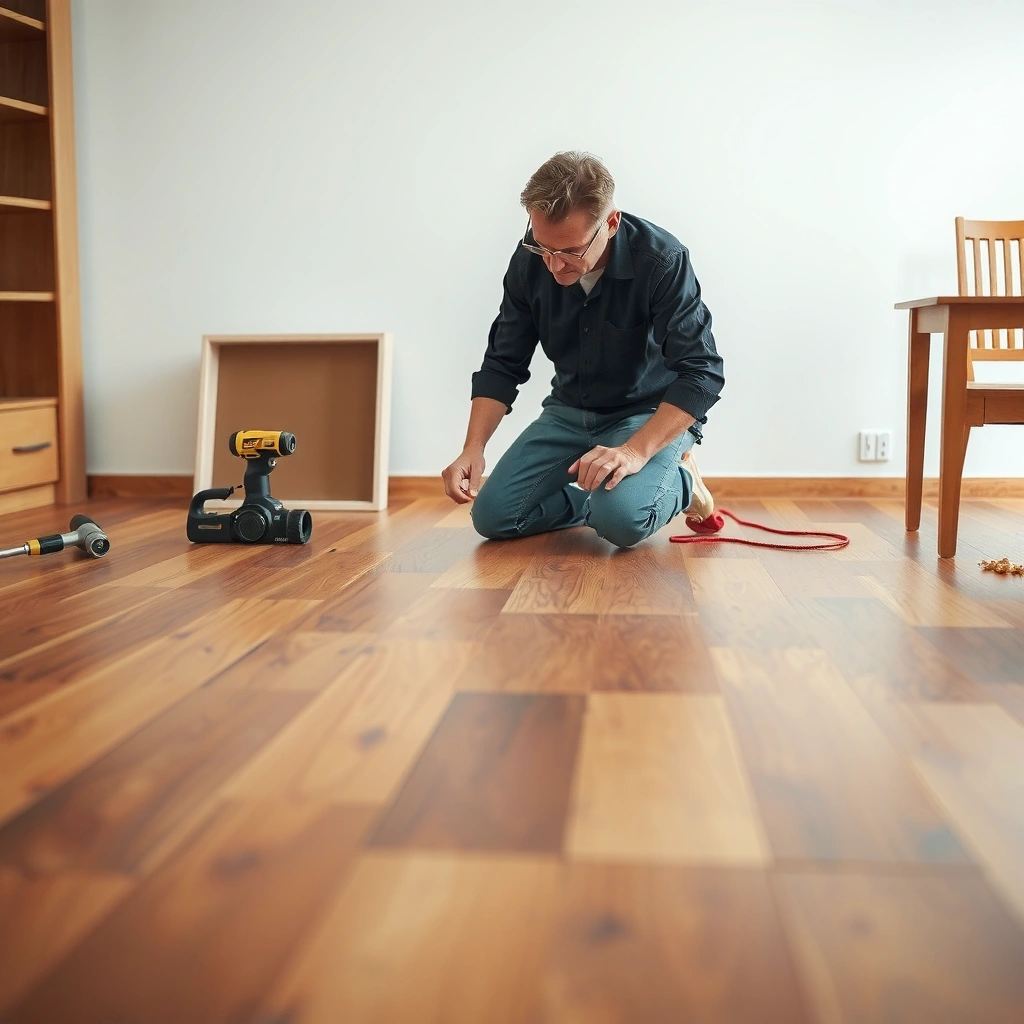
The right sealer starts with picking the correct system type—penetrating vs. film-forming—because they behave differently and require different prep. Here’s a practical way to choose before you open a can.
Penetrating sealers (often oil/resin systems) soak in and rely on wood absorption, so contaminants and moisture behavior still matter even though you “don’t build a thick film.”
Film-forming finishes (urethane/varnish/polyurethane) create a protective layer on top, so adhesion depends heavily on sanding, deglossing, and compatibility with the existing finish.
First, decide what you’re sealing and what you need the floor to resist. For example, kitchens and entryways experience grit and frequent mopping; homes with pets need scuff resistance and durability. For basements or slab-adjacent areas, moisture conditions influence which products and prep methods are appropriate.
Next, assemble a workflow that matches the system. You’ll typically need:
– Applicators: quality brush (trim/edges), foam pad or microfiber applicator (controlled spreading), and/or a short-nap roller (large open areas).
– Surface prep tools: vacuum with a brush head, microfiber tack cloth (if required by your product), painter’s tape, and cleaning supplies compatible with the finish type.
– Sanding supplies (only if needed): abrasive sheets/pads, sanding block, and edge tools. If you’re not removing an old coating, you still may need scuff sanding to promote adhesion.
– Ventilation and safety: fans/airflow, eye protection, gloves, and a respirator if your sealer’s label calls for it. (Always follow the SDS/label requirements.)
Finally, read the product label like a checklist. Recoat windows, thinning instructions, temperature/humidity limits, and whether a primer is required are not optional details—they’re where most adhesion or curing failures begin.
According to the National Wood Flooring Association (NWFA), maintaining indoor conditions within recommended humidity ranges helps wood flooring stay stable during and after finishing ([year needed from source/spec document]). These conditions matter because curing is sensitive to environment.
Mandatory data: how wood species affects sealing priorities
Hardwood species impacts how aggressively you should treat blotching, scratches, and wear—especially with lighter woods and softer species. Below is a durability anchor you can use when planning your sealing approach and sheen level.Janka Hardness of Common Hardwood Species (Durability Context for Sealing)
| # | Wood species (typical flooring) | Janka hardness (lbf) | Surface wear outlook | Sealer durability priority |
|---|---|---|---|---|
| 1 | Hickory | 1820 | ★★★★★ | High |
| 2 | Maple | 1450 | ★★★★☆ | High |
| 3 | White oak | 1360 | ★★★★☆ | Medium-High |
| 4 | Red oak | 1290 | ★★★☆☆ | Medium |
| 5 | Birch | 1260 | ★★★☆☆ | Medium |
| 6 | Walnut | 1010 | ★★☆☆☆ | Medium-Low |
| 7 | Cherry | 950 | ★★☆☆☆ | Low-Medium |
Note: Janka hardness values vary slightly by source and wood grade; validate with your flooring supplier/spec sheet for your exact boards. [ADD: cite for Janka hardness values from a specific recognized reference used by your supplier, if needed].
Prep Hardwood Floors for Sealing (This Is Where Most Results Come From)
Prep determines whether your sealer bonds well—and it’s the step that most often decides between a smooth, durable finish and premature peeling. In practice, you’re aiming for: clean surface, correct profile (if sanding), and stable moisture behavior.
Sealing over dust or grease can cause fisheyes and weak adhesion, even when the product is “the right type.”
If a coating is peeling or lifting, you generally must remove or properly spot-prep it—new finish won’t stay bonded to failing old finish.
Moisture problems under hardwood cannot be cured by sealers; sealers only manage what happens on top of the wood.
Here’s how to think about prep, step-by-step:
1. Deep clean, then re-check
Vacuum thoroughly, then wipe with a cleaner the label allows (or a water-based cleaner if your product system specifies it). The goal is to remove skin oils, polishing residue, wax, and soap film. Even “light dust” can block adhesion and show up as bumps under clear coats.
2. Remove residue and verify sheen
If the floor has an existing finish, determine whether it’s:
– Solid and firmly bonded,
– Dull from wear but still adherent,
– Or failing (peeling, flaking, lifting at edges).
For intact finishes, scuff sanding/deglossing is commonly required to provide mechanical “tooth.” For peeling finishes, you usually need more aggressive removal/spot repair.
3. Sand/spot prep only where the adhesion needs it
If the surface is bare or you’re working through failing finish, sanding creates a consistent surface profile for bond and reduces blotch risk on some woods. Don’t oversimplify: grit choice, sanding direction, and edge feathering affect the final appearance.
4. Address moisture/damage first
If you see cupping, soft spots, persistent squeaks, or evidence of prior water exposure, stop and investigate the cause before sealing. Sealers won’t fix water ingress, and trapping moisture under film-forming finishes can worsen problems.
According to NWFA installation and maintenance guidance, maintaining indoor relative humidity in recommended ranges supports wood stability and reduces seasonal movement risk ([year needed from source/spec document]). If you’re sealing now, you also need your room conditions to stay within the sealer’s labeled temperature/humidity limits.
Pros/cons of skipping prep (based on common failure modes):
– If you skip sanding/adhesion prep: expect poor bond, peeling edges, or trapped contamination that turns into bumps or a rough texture.
– If you skip cleaning: expect fisheyes, cloudy finish, and uneven leveling.
Choose the Correct Finish for Your Room and Foot Traffic
The best sealer is the one matched to your room’s moisture risk and wear demand. For busy spaces, a durable film-forming topcoat system usually offers more scuff resistance; for certain aesthetic goals, penetrating systems may be preferable.
Higher-traffic rooms typically benefit from film-forming finishes because they build a protective layer that resists scuffs from grit and pet traffic.
Sheen choice changes how imperfections read—satin/low-gloss typically hides minor surface waviness better than high gloss.
Penetrating vs. film-forming: what changes in real life?
Penetrating sealers (often oil/resin style) tend to enhance natural wood feel and may require more periodic maintenance. Film-forming finishes (urethane/varnish/polyurethane) create a measurable top layer that can be more forgiving for routine cleaning—provided adhesion is engineered through correct prep.
Below is a direct comparison designed for decision-making.
| Criteria (what you’re really deciding) | Penetrating sealer | Film-forming finish (urethane/varnish) |
|---|---|---|
| Best for | Aesthetic/wood feel, some interior spaces | Busy rooms, higher scuff demand |
| Water resistance mechanism | Absorption/repellency at fiber level | Barrier layer across the surface |
| Sensitivity to contaminants | High—surface must still be clean | High—contamination causes adhesion defects |
| Dry time vs cure | May feel dry sooner; full cure varies | Full cure often takes longer than dry-to-touch |
| Recoat compatibility | System-specific; follow label | System-specific; often needs timed recoat |
| Effect on existing finishes | May not bond over some old coatings | Requires compatibility and adhesion prep |
| Scratch/scuff behavior | Can show wear over time | Often better scuff resistance when fully cured |
| Typical maintenance | Replenish/restain-like cycles | Recoats or screen-and-recoat depending on system |
| Sheen control | Often more natural look, sheen varies by product | Sheen options (matte/satin/gloss) are more predictable |
| Limitations | Not a “hard film” solution for everyone | Traps issues if moisture is present |
| Verdict (best fit) | Choose for certain interior aesthetics and controlled-use rooms | Choose for durability-first sealing in high-traffic areas |
Use compatibility as the deciding factor
If your floor already has an existing finish, your next step is to verify the manufacturer’s compatibility guidance. Some systems require primers, and some don’t adhere well over certain aged coatings, which can result in clouding, soft spots, or peeling.
Also choose sheen strategically:
– Satin/low-gloss often masks minor surface imperfections.
– High gloss reveals micro-scratches and streaking more easily.
Apply the Sealer Correctly (Steps for Even Coverage)
Correct application is mostly about consistency: controlled room conditions, thin coats, and disciplined timing. If you want fewer streaks, the method is simple: avoid overloading, maintain a wet edge, and don’t fight the label’s recoat/cure schedule.
Most streaking and lap marks come from thick coats, drying mid-stroke, and inconsistent “wet edge” control—not from brush choice alone.
Walking too soon can leave dents and tacky footprints because “dry to touch” does not equal “fully cured.”
1. Set room conditions and plan your sections
Apply when temperature and humidity are within the product’s labeled range. Plan to work in sections so you can keep a wet edge and avoid the finish drying before you blend into the next pass.
2. Apply thin, even coats
Use the recommended tool for that sealer system. Thin coats level and cure more predictably; thick coats can trap solvents or dry unevenly, increasing risk of bubbles or wrinkling.
3. Maintain a wet edge to reduce lap marks
Start a manageable section, apply consistently, and overlap slightly while the previous area is still workable. If you have to stop mid-section for a long time, follow the label’s instructions before resuming.
4. Respect label recoat windows and full cure time
Recoat timing affects how well coats chemically bond. Full cure time affects whether the finish resists dents, scuffs, and rug-grip damage. If you need the floor usable quickly, choose a system with faster “ready for light traffic” guidance—then still wait for full cure before heavy loads.
From general finishing practice and manufacturer labeling, cure schedules vary widely by product chemistry, film thickness, and ambient conditions; always follow your specific label. [ADD: exact recoat and cure times from your sealer’s label.]
According to NWFA guidance on climate control for wood flooring, recommended indoor relative humidity typically falls in the 35%–55% range during normal service ([year needed from source]). Keeping within this band also supports more predictable finish curing and long-term stability.
What Can Go Wrong (Common Mistakes and Edge Cases)
Sealing hardwood fails most often due to adhesion problems, compatibility errors, or curing interruptions. If you see early issues—peeling, clouding, tackiness, or texture defects—fix the underlying cause rather than “adding another coat.”
If the existing coating is loose or peeling, sealing over it is likely to repeat the failure, because the new finish bonds to the old failing layer.
Applying too thick or too quickly can trap solvents and create wrinkling, bubbles, or persistent tack.
Common failure modes to watch for:
1. Sealing over loose or peeling finish
If the old coating isn’t bonded well, the new coating can lift along with it. The safer route is to remove failing finish, spot-repair, then prep the remaining edges according to the system’s requirements.
2. Skipping sanding/cleaning—even when it “looks okay”
Visible dirt isn’t the only problem. Oils, wax residues, and micro-dust reduce adhesion. A quick vacuum won’t reliably eliminate adhesion blockers; follow the label’s cleaning method.
3. Applying thick coats to save time
Thick coats increase the chance of uneven drying and surface defects. The fix is usually sanding back and reapplying thin layers (which can be more work than doing it right the first time).
4. Ignoring temperature/humidity swings
Cold rooms slow cure; high humidity can create haze or extended tack time. These effects are product-specific, which is why label limits matter so much.
5. Blotchiness or uneven tone on bare wood
Some woods darken unevenly, especially with certain stain/sealer interactions. If you’re working on bare wood or applying clear systems over new stain, do a test section in the most representative area before committing to the whole floor.
How I recommend you decide if you’re ready to DIY
If the floor is structurally sound and the failure points (if any) are localized, DIY sealing is usually feasible. If you suspect moisture ingress beneath the flooring, the most expensive mistake is sealing over it and trapping the problem—at that point, you should investigate moisture sources first or consult a flooring professional.
[ADD: your specific decision criteria or check you used if you want to include a personal anecdote—e.g., “what you inspected before sealing,” “what label you followed,” etc.]
Verdict: When You Should DIY vs. Hire Help
DIY sealing works best when the floor is stable, the surface prep is manageable, and you can follow the label’s recoat and cure timelines exactly. Hire help if you’re dealing with widespread peeling, significant water exposure, suspected moisture issues under the wood, or you’re unsure what finish is currently on the floor.
If you can’t confidently identify the current finish and adhesion condition, hiring help reduces the risk of compatibility failure (clouding, lifting, or early peeling).
If moisture is present, sealing is not the solution—fixing the moisture source is.
Skip DIY (or get advice) if:
– You have broad peeling or flaking across multiple boards.
– You suspect subfloor moisture or recurring water intrusion.
– Your floor shows cupping, soft spots, or persistent squeaks tied to movement.
– You cannot access manufacturer compatibility guidance for your exact current finish.
[ADD: If you plan to seal “over existing finish,” add the exact current coating type (e.g., water-based polyurethane, oil-modified finish, varnish) or your test results so guidance can be tailored more safely.]
Quick Sealing Checklist (Scan & Save)
– [ ] Identify whether the floor is bare wood, firmly bonded finished wood, or peeling/failing finish
– [ ] Clean thoroughly (no dust, wax, residue, or soap film)
– [ ] Sand/spot prep as needed for adhesion (per product guidance)
– [ ] Choose the right sealer/finish system for your room and compatibility needs
– [ ] Apply thin, even coats; maintain a wet edge
– [ ] Respect label recoat and full-cure times before walking or moving furniture
– [ ] Protect the finish during curing (dust control, no heavy traffic)
FAQ
How many coats of sealer do hardwood floors need?
Most systems require multiple coats, but the exact number depends on the product and whether you’re sealing bare wood vs. adding topcoat protection. Check the specific manufacturer instructions for your product.
Can I seal hardwood floors over an existing finish?
Sometimes, but only if the existing finish is fully bonded and compatible with the sealer system. If there’s peeling, cloudiness, or poor adhesion, you’ll likely need to remove or properly prep the old finish—follow the manufacturer’s compatibility guidance.
What’s the best way to avoid streaks or lap marks?
Use thin coats, apply in sections, keep a wet edge, and use the recommended application tool for the product. Also ensure good room conditions so drying doesn’t happen mid-stroke.
How long should I wait before placing rugs or furniture back?
At minimum, follow the “walkable” time on the product label, but for rugs and heavy furniture you should wait for full cure as specified. [ADD: exact wait time from the sealer label you’re using.]
Do I need to sand every time before sealing?
Not always—if the existing finish is in good shape, scuff-sanding/spot prep may be enough depending on the product. When in doubt, follow the adhesion/prep instructions on the sealer’s label.
Sources
– [ADD: manufacturer installation/application instructions for the specific hardwood floor sealer/finish you’re using—include the prep, compatibility, temperature/humidity limits, recoat window, and full cure time.]
– [ADD: official documentation for any primer/undercoat used as part of the manufacturer’s system.]
– [ADD: official guidance from a reputable hardwood floor finishing body or manufacturer about surface prep and adhesion requirements.]
Sealing hardwood floors comes down to three things: correct product choice, thorough prep, and careful application with the label’s drying/cure timelines. If you prep correctly and apply thin, even coats, you’ll get better protection and a cleaner-looking finish. Before you start, review the sealer’s instructions and—if anything is peeling, loose, or moisture-related—address that first (or get a pro opinion) so the new seal doesn’t fail early.
Frequently Asked Questions
What’s the best way to seal hardwood floors to protect against water and scratches?
Start by cleaning the hardwood thoroughly, removing dust, grease, and any existing waxes or sealers so the new finish can bond properly. Repair gaps or damaged boards, then sand to a smooth, even surface and vacuum well. Use a hardwood floor sealer appropriate for your home—such as polyurethane for strong scratch resistance—and apply thin, even coats in the direction of the grain. Allow full curing time before using the floor heavily to ensure maximum water and wear protection.
How do I seal hardwood floors without bubbles, streaks, or peeling?
The most common causes of bubbles and streaks are applying too much product, working too slowly, or using the wrong application method for the product type. Stir or mix carefully (avoid shaking) and apply a thin coat using a high-quality brush/roller or pad recommended by the sealer manufacturer. Make sure the room has stable temperature and humidity, and let each coat dry fully before lightly sanding between coats if the product system requires it. If you skip prep or topcoats cure inconsistently, peeling can occur—so follow the label instructions closely.
Why does my hardwood floor finish turn cloudy after sealing?
Cloudiness often happens when moisture is trapped under the finish, usually from high humidity, wet mopping before sealing, or applying sealer too soon after sanding or cleaning. It can also occur if condensation forms while coats are drying. To prevent it, dry the floor completely, control indoor humidity, and ensure proper ventilation during curing. If the finish is already cloudy, the fix typically involves diagnosing moisture issues first, then sanding back to a stable clear layer and resealing.
Which type of sealer should I choose for hardwood floors in high-traffic areas?
For high-traffic areas, opt for a durable hardwood floor sealer like oil-modified or water-based polyurethane, which provides excellent scratch and scuff resistance. If your goal is faster drying and lower odor, many homeowners prefer water-based polyurethane, while oil-modified finishes can offer a warmer, more amber tone. Consider a higher-build option or multiple coats for better protection, and choose the sheen level (matte, satin, semi-gloss) based on how much the room shows dust and footprints. Always verify compatibility with your existing finish if the floor has been previously sealed.
How long should I wait before walking on or moving furniture after sealing hardwood floors?
Drying time and curing time are different, and both matter for a long-lasting seal. You may be able to walk lightly on the floor after the label’s recoat/dry timeframe, but it’s usually still not fully cured—so avoid dragging furniture and wear soft socks or felt pads. Full cure often takes several days to a couple of weeks depending on the sealer type, temperature, and humidity. Check the product directions for the exact hardwood floor sealing cure schedule before moving heavy items or cleaning with water-based solutions.
📅 Last Updated: October 07, 2026 | Topic: How to seal hardwood floors? | Content verified for accuracy and freshness.
References
- Flooring
https://en.wikipedia.org/wiki/Flooring - Wood flooring
https://en.wikipedia.org/wiki/Wood_floor - https://extension.umn.edu/wood-products/sealing-and-finishing-wood-floors
- https://www.fpl.fs.usda.gov/documnts/fplrn/fplrn188.pdf
- https://www.cdc.gov/mold/default.htm
- Mold | US EPA
https://www.epa.gov/mold - https://pubmed.ncbi.nlm.nih.gov/
- Google Scholar Google Scholar
https://scholar.google.com/scholar?q=how+to+seal+hardwood+floors+finishing - Google Scholar Google Scholar
https://scholar.google.com/scholar?q=hardwood+floor+sealer+polyurethane+penetrating+oil+waterproofing - Google Scholar Google Scholar
https://scholar.google.com/scholar?q=best+practices+wood+floor+finishing+sealing+moisture+control