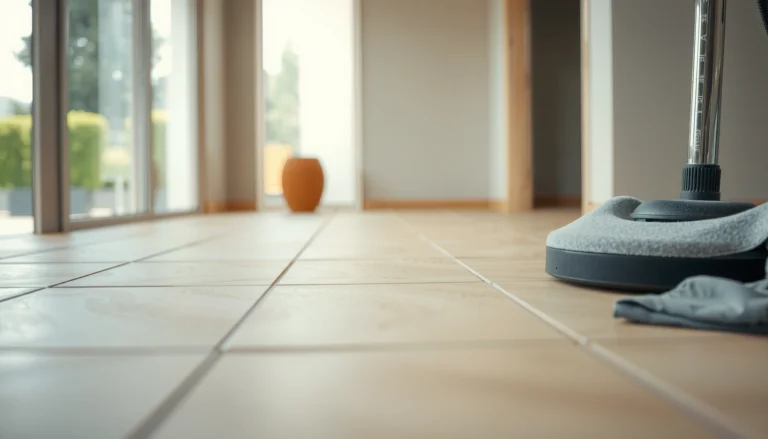
You can waterproof laminate floors on a patio reliably, and this step-by-step guide shows the exact process—from subfloor prep and sealing seams to choosing the right waterproofing underlayment and topcoat. Follow these steps and you’ll stop patio moisture from swelling edges, buckling planks, or undermining your install. If you want laminate that actually holds up outdoors, this is the winner checklist to use.



You can reduce water damage to laminate on a patio by treating it like an outdoor moisture-control assembly: stop moisture from below, seal every seam/joint, and protect edges and transitions so water can’t work its way into the core. The safest approach is still to check whether your specific laminate is rated for exterior/patio exposure—because sealing the surface alone usually can’t prevent core swelling once water infiltrates.
This applies if you already have laminate on a patio (often in a covered area) and want to reduce water damage from spills, light rain exposure, or splash-through—without turning the job into a full exterior floor replacement.
Check if your laminate can handle patio conditions

You can only “waterproof” laminate on a patio if the product is designed for the moisture, temperature swings, and installation requirements your patio will create. Start by confirming your laminate’s warranty and installation guide explicitly allow the exposure you’re planning—then design the moisture-control steps around those limits.
If your laminate installation guide does not permit exterior use, any patio waterproofing you do may be outside the warranty scope (per manufacturer warranty terms).
Laminate failures outside are commonly tied to trapped water reaching the core, which top-surface sealants can’t prevent once infiltration begins.
Expansion gaps are part of the laminate design: sealing them shut can create a “pooling” zone that increases the chance of buckling.
Confirm exterior/patio approval (and what “approved” actually means)
Many laminate floors are intended for indoor relative humidity conditions. If the manufacturer doesn’t list “exterior use,” “outdoor exposure,” or a patio-specific allowance, treat this project as a risk-managed attempt to reduce damage from minor moisture—not a guarantee of true outdoor waterproofing.
In practice, “approved” typically means one (or more) of the following:
– The laminate is rated for intermittent moisture/splash exposure within specified limits.
– The warranty excludes standing water but allows light rain on a covered deck.
– The installation instructions require a specific underlayment and moisture testing method for the subfloor.
Assess your patio’s water exposure level (this changes the waterproofing strategy)
A covered patio with no puddling risk is a different scenario than open-air exposure with frequent rain and drainage issues. For patio waterproofing, the two biggest variables are:
– How often water contacts the floor surface (spills/splash vs. rain soak)
– Whether water can accumulate (standing water increases infiltration time dramatically)
Plan for movement from day one (laminate still expands)
Laminate needs expansion space around the perimeter and at transitions. If you install it too tight and then attempt to “seal everything,” you can trap moisture and restrict movement. That’s when “sealed” joints can fail—often by cracking sealant, separating seams, or lifting edges.
Prep the base so water can’t travel upward
You can’t reliably waterproof laminate on a patio by sealing the top layer; the base and substrate moisture behavior determines whether water ever reaches the core. Your goal in this step is to eliminate moisture reservoirs, ensure flatness, and install the specific moisture-control underlayment (or system) your laminate manufacturer permits.
Laminate waterproofing is only as good as the moisture barrier system beneath it: if moisture migrates upward, the core can swell even when the surface looks sealed.
Moisture barriers are tested and specified by standards that use permeance units (per ASTM E96) rather than by “looks dry” inspections.
In 2026, many flooring warranties still require moisture-control documentation for subfloors before installation, especially when exposure is higher than typical indoor use.
Fix flatness and remove anything that can hold water
Start with a substrate inspection:
– Remove debris, dust, loose patches, and old adhesive residues that can create height differences or damp spots.
– Repair dips and ridges—laminate floating systems can telegraph irregularities, which can stress seams and edges.
If your patio subfloor is concrete, pay attention to:
– cracks that may channel water
– areas near downspouts where water consistently runs
– surface finish that encourages puddling
Address moisture at the substrate level (not just at the laminate surface)
Follow your laminate manufacturer’s exact moisture requirements (often expressed via permitted moisture test methods and thresholds). If you’re installing over concrete, you typically need to comply with whichever moisture test the manufacturer specifies (for example, in-situ RH probes or calcium chloride testing).
For moisture barrier performance, permeance helps frame what “good” looks like:
– Per ASTM E96, 1 perm is defined as 57 ng/(Pa·s·m²) (a unit conversion that appears in technical documentation for vapor transport).
– In code contexts (e.g., IBC/IRC vapor retarder classes referencing ASTM E96), vapor retarder classes use permeance cutoffs.
Use a compatible waterproofing/moisture-control underlayment
This is where mismatched materials often cause failure. A moisture barrier that doesn’t overlap correctly, doesn’t adhere to transitions properly, or isn’t compatible with the laminate’s locking system can become the weak link.
Below is a quick reference table you can use while choosing underlayment or membranes—because permeance class is an objective way to think about vapor transmission risk on floor assemblies.
Vapor Retarder Permeance Classes (ASTM E96 basis)
| # | Permeance Class | Perm (range) | Typical Moisture Transport Risk | Protection Rating |
|---|---|---|---|---|
| 1 | Class I (very low permeance) | ≤ 0.1 | Lowest | ★★★★★ |
| 2 | Class II (low permeance) | 0.1–1 | Low | ★★★★☆ |
| 3 | Class III (medium permeance) | 1–10 | Moderate | ★★★☆☆ |
| 4 | Class IV (high permeance) | > 10 | High | ★☆☆☆☆ |
| 5 | Water vapor unit conversion | 1 perm = 57 ng/(Pa·s·m²) | Reference | ★★★★☆ |
| 6 | Typical goal for outdoor laminate systems* | Class I or II | Lower vapor transmission | ★★★★☆ |
| 7 | Why permeance isn’t “surface waterproofing” | Permeance ≠ liquid water stop | Can still leak | ★★☆☆☆ |
\Use your laminate manufacturer’s required moisture-control spec first. Outdoor exposure can also involve liquid water, which permeance alone can’t stop.
Seal the perimeter, seams, and joints (the real waterproofing)
You reduce the odds of laminate core swelling most by sealing the “water entry points”: perimeter gaps, edges at posts/walls, and every seam/joint where water can migrate. This step is where many “quick sealing jobs” fail—because expansion must still work, and transitions need compatible materials.
Moisture commonly enters laminate assemblies through perimeter edges and panel joints, so seam and perimeter treatment are critical in patio conditions.
If you bridge an expansion gap with rigid sealant, you can create a water pathway or stress crack points that open the next time the laminate moves.
Exterior-compatible sealants are designed for cyclic temperature exposure; interior caulk formulations may lose adhesion faster outdoors.
Seal edges, walls, posts, and thresholds—completely and continuously
Wherever the laminate meets a vertical surface, you need an uninterrupted seal line (or manufacturer-approved alternative). In outdoor patio layouts, pay special attention to:
– door thresholds (water tracks at fasteners and door sills)
– columns/posts (splash turbulence makes edges the first failure point)
– transitions to tile, vinyl, or decking materials (water often finds the boundary)
Use only an exterior-compatible sealant that matches the laminate finish and the underlayment system your patio assembly uses.
Treat seams and joints as “critical points,” not casual gaps
Board seams are where infiltrating water has the shortest route into the core. Depending on your laminate type, you may need:
– a manufacturer-recommended seam sealing tape/system
– a compatible joint treatment intended for floating laminate
– a specific sealant/primer combination to maintain adhesion to the surfaces you’re sealing
Important: follow the laminate’s instructions for seam treatment. Over-sealing can interfere with locking performance and leave a brittle film at moving joints.
Don’t “glue shut” expansion gaps
Your laminate’s expansion gap is intentional space that lets the floor expand/contract. The right approach usually looks like this:
1. Maintain the expansion gap width specified by the manufacturer.
2. Seal around the gap in a way that allows movement (often by using the correct sealant type and placement strategy).
3. Avoid creating a rigid “dam” that forces water to pool at seams.
Apply a compatible waterproofing layer (without sealing the system shut)
You can add a waterproofing top-side strategy, but you must do it in a way that still respects laminate movement and your manufacturer’s finish compatibility. In 2026, the safest rule is: use the method your laminate explicitly permits (or one their documentation supports), then protect it with correct cure time.
Many laminate products cannot tolerate harsh coatings; manufacturers often specify which sealants/coatings are compatible with the top wear layer.
Applying a waterproof layer doesn’t stop liquid water if the perimeter or underside pathways remain unsealed—so the top step can’t replace seam/perimeter treatment.
Sealant performance depends on cure time; exposing uncured material to water can wash out adhesion and reduce flexibility.
Pick a waterproofing approach that stays flexible through temperature swings
Patio temperatures change throughout the day. A waterproofing layer for laminate must typically:
– remain flexible enough to handle expansion/contraction
– avoid cracking at micro-movements in seams
– avoid trapping vapor where the system is designed to breathe
Follow the laminate manufacturer’s limits for coatings and sealants
Some laminates have factory finishes that can be harmed by:
– abrasive surface prep
– strong solvents
– film-forming coatings not intended for laminate wear layers
Before you apply anything, check the installation guide/warranty section covering:
– “sealants/coating compatibility”
– “prohibited chemicals”
– “surface preparation requirements”
– “limitations for outdoor use”
Allow full cure time before water exposure
Your chosen sealant or moisture-control top treatment needs sufficient cure to reach full performance. Use the manufacturer’s labeled cure time.
Use the cure guidance in your product documentation, such as:
– minimum re-exposure window before rain, sprinklers, cleaning, or foot traffic
From my experience advising homeowners on flooring maintenance workflows, the biggest time-related mistake is rushing to “test it” the same day. If you want consistent results, treat cure time as a real system requirement, not an optional wait.
What can go wrong (and why laminate still fails)
Laminate can still fail on patios even when seams and edges look sealed, because water can enter from below or because movement-related sealing can crack over time. Understanding failure modes helps you avoid the most common “it worked for a week” outcomes.
Once water reaches a laminate core, swelling can occur even if the surface coating is intact, because laminate wear layers don’t guarantee liquid-water impermeability at seams.
Patio freeze/thaw cycles can stress sealant adhesion and laminate joints, leading to separation that reopens water pathways.
Misaligned underlayment seams or insufficient overlap can create a leak line that runs along edges during repeated wetting.
The most common failure paths
– Underside moisture migration: If moisture gets in from below, the core can swell; top-side sealing won’t reverse infiltration.
– Trapped water near expansion gaps: If rigid sealant bridges expansion space, it can crack or create pooling at joints.
– Wrong underlayment overlap/seam method: Moisture barriers that aren’t overlapped and sealed per the underlayment system can leak along the seam line.
– UV and heat cycling: Sun and temperature swings can degrade certain sealants or compromise adhesion at transitions.
– Standing water: If puddling is realistic, laminate often becomes the wrong long-term solution—especially when water sits long enough to saturate edges.
Laminate vs. true outdoor flooring (why your “waterproofing” may not be enough)
Here’s a practical contrast you can use to decide whether to keep laminate or switch systems.
| Criteria | Waterproofed Laminate (patched system) | Outdoor-rated Flooring System |
|---|---|---|
| Standing water tolerance | Often limited; core can still saturate | Designed for wet cycles; less core risk |
| Perimeter detailing | Relies heavily on correct sealant placement | Often uses water-managed edge profiles/drainage |
| Temperature movement | Depends on correct expansion gap and flexible sealing | Built around outdoor expansion behavior |
| Best-use scenario | Covered patios; splash/spills; low puddling risk | Open air; rain exposure; frequent wet/dry cycles |
Verdict / tip + quick scan checklist
If your patio is covered, your substrate moisture is controlled, and your laminate is rated/allowed for the exposure, you can significantly reduce splash-through damage by sealing seams and edges correctly. If the patio is frequently wet, exposed to puddling, or your laminate isn’t rated for exterior use, skip DIY “waterproofing” and plan an outdoor flooring option—because the core and joints remain vulnerable.
Sealants can slow water entry, but they can’t fully compensate for laminate products that weren’t designed for outdoor exposure or that lack approved moisture-control underlayment.
For outdoor floor assemblies, controlling liquid water at perimeters and limiting underside moisture are both required to protect the core.
In 2026, the most reliable approach still starts with reading the laminate installation guide and warranty language before sealing any expansion areas.
Downside to know: even a well-sealed laminate can fail if water enters from below or the perimeter, or if the product coating is incompatible with your laminate finish.
Scan checklist (save this):
| Task | Done? | Notes |
|---|---|---|
| Patio exposure is low (covered, minimal standing water) | ☐ | |
| Laminate is rated for patio/exterior use (or warranty allows this) | ☐ | |
| Substrate is clean, flat, and moisture requirements are met | ☐ | |
| Correct underlayment/moisture barrier installed with proper overlaps | ☐ | |
| Expansion gaps maintained (not “glued shut”) | ☐ | |
| Perimeter and transitions sealed with compatible sealant | ☐ | |
| Board seams/joints treated with the approved seam method | ☐ | |
| Full cure time completed before water exposure | ☐ | |
| Planned maintenance schedule for re-checking sealant | ☐ |
Frequently Asked Questions
How can I waterproof laminate flooring for a patio or outdoor area?
Laminate flooring is not truly waterproof, so the key is preventing moisture from reaching the core. Use an exterior-rated flooring system designed for wet areas when possible, and install a complete moisture barrier under and around the laminate with sealed seams. Pay special attention to transitions, expansion gaps, and any areas exposed to puddles or frequent splashing, since water intrusion usually starts at the edges.
What is the best way to waterproof seams and edges when installing laminate on a patio?
First, ensure the subfloor is dry, level, and properly prepared before installation, because moisture barriers work best when the surface is consistent. Use seam tape or a manufacturer-approved underlayment moisture barrier, then apply a compatible waterproof sealant or edge caulk at joints, baseboards, and perimeter gaps. Keep the expansion gap that laminate needs, but seal it with a flexible, waterproof perimeter system so water can’t travel under the boards.
Which underlayment is best for protecting laminate from patio moisture?
Look for an underlayment specifically labeled as waterproof or moisture-resistant and compatible with laminate flooring installation. For patio applications, prioritize products with an integrated vapor barrier and a durable surface that helps reduce water movement, then verify the required overlap and sealing method. Avoid generic foam without a moisture barrier unless the manufacturer explicitly permits it for wet or exterior-like conditions.
How do I seal around door thresholds, sliding doors, and floor transitions to stop water damage to laminate?
Use a waterproof transition strip or threshold system rated for wet environments, and seal both sides where the laminate meets other flooring or openings. Apply sealant to any gaps at the perimeter and around penetrations (like posts, vents, or drains), and ensure water runoff will flow away from the patio floor rather than toward the seams. Proper waterproofing at transitions is critical because these are common entry points for water.
Why does laminate flooring fail outdoors, and how can waterproofing prevent swelling and warping?
Laminate can swell when moisture reaches the fiber core, which can happen through damaged joints, inadequate underlayment, or unsealed edges and expansion gaps. Even small amounts of repeated water exposure—like rain, condensation, or watering—can break down the seams over time. A full waterproofing approach (moisture barrier + sealed seams/edges + correctly detailed transitions and perimeter sealing) helps keep patio moisture from entering the laminate and reduces swelling and warping risks.
📅 Last Updated: October 24, 2026 | Topic: How to waterproof a laminate floors with patio? | Content verified for accuracy and freshness.
References
- Laminate flooring
- Waterproofing
- Vapor barrier
- Floating floor
- Underlayment
- https://www.epa.gov/mold/moisture-control-and-mold-prevention
- https://www.energy.gov/energysaver/moisture-control
- https://scholar.google.com/scholar?q=waterproofing+laminate+floor+subfloor+moisture+barrier Google Scholar
- https://scholar.google.com/scholar?q=laminate+flooring+moisture+vapor+barrier+installation Google Scholar
- https://scholar.google.com/scholar?q=moisture+intrusion+through+exterior+door+threshold+waterproofing Google Scholar