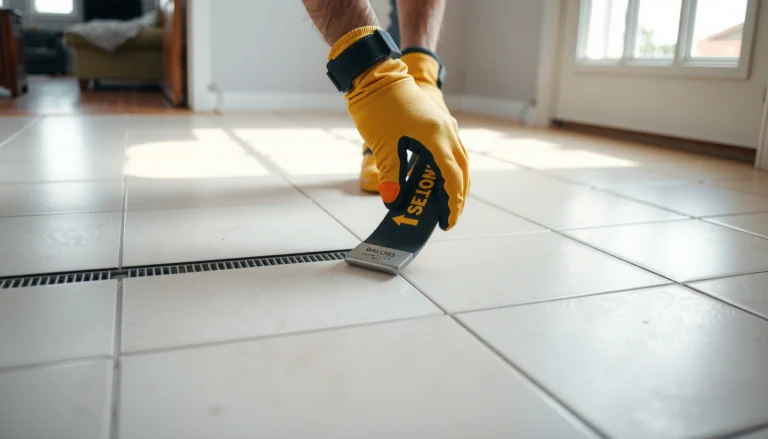

Need to repair kitchen floors without guessing? This step-by-step guide tells you exactly how to fix the most common damage—scratches, squeaks, peeling, and loose boards—with the right materials and prep for a lasting result. You’ll follow clear instructions from assessment to final finish so the floor holds up to spills, heat, and daily traffic.




Kitchen floor repairs usually come down to identifying the floor type and then removing only the damaged section before you reinstall with the manufacturer’s system. Start by confirming what the damage is telling you (cracks, lifting, soft spots, missing grout, or water bubbles), then follow the correct substrate-prep and bonding steps so the repair doesn’t fail again in a few months.
Kitchen floors are hit with rolling loads, spills, and frequent wet/dry cycles—so “spot repairs” are common, but durability depends on moisture control and correct material compatibility. The steps below are designed to help you make good decisions up front, not just patch the surface. This guide focuses on practical workflows for tile, wood, laminate, vinyl/LVP, and concrete, and it flags the situations where you should stop and get a flooring pro involved.
This is for homeowners and DIYers who have spot damage in a kitchen floor—like a crack in tile, warped planks, loose vinyl, or small wood surface issues—and want to know what to do first before committing to a full replacement. If your floor has widespread failure, active leaks, or structural movement, we’ll also flag when to stop and call a pro.
Identify the kitchen floor type and the damage
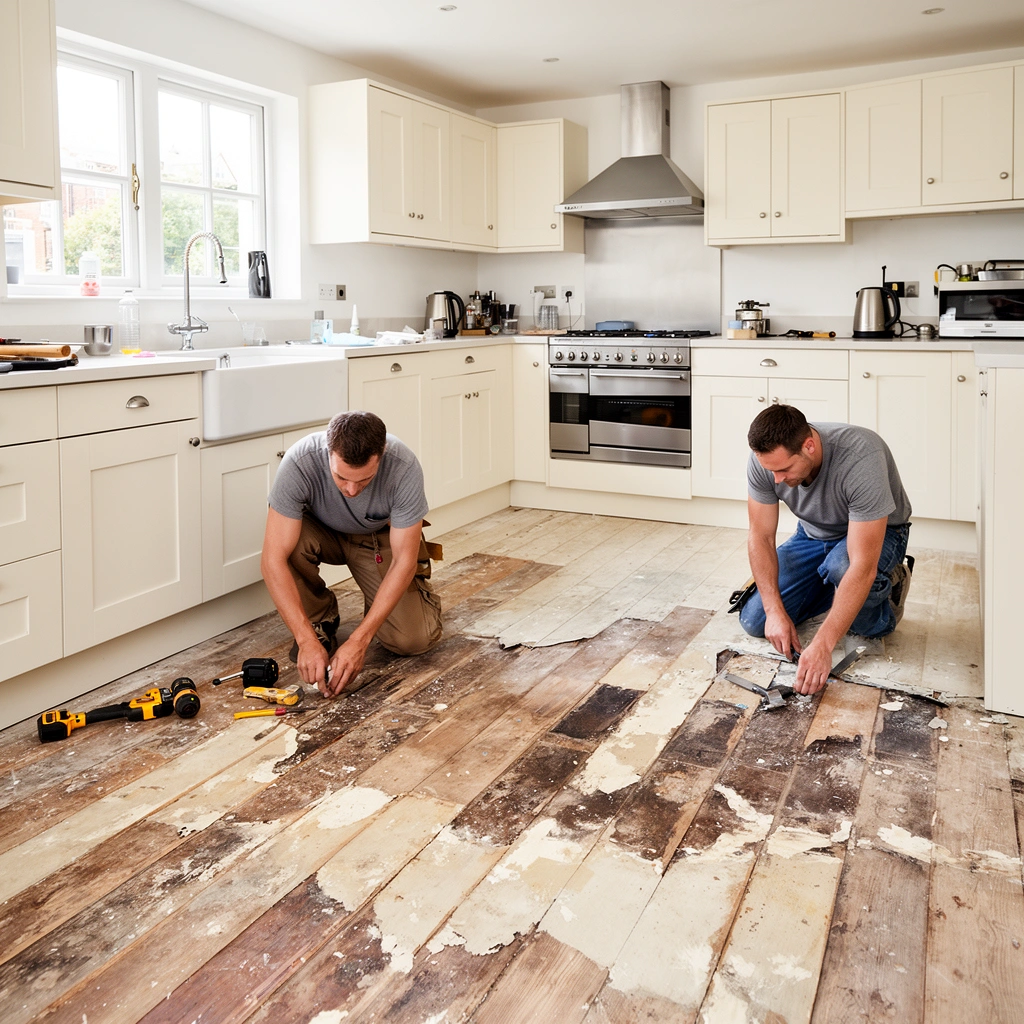
The right first step is to identify the floor type (tile, hardwood/engineered wood, laminate, vinyl/LVP, or concrete). Then match the symptom to the likely failure mechanism, because the repair products and bonding method change completely by material system.
For example, a tile crack often points to loose subfloor support, improper thinset coverage, or grout loss—while cupping, swelling, or bubbles usually indicate moisture intrusion. In my work advising homeowners on these repairs, the most successful outcomes come from treating the floor as a system (surface + setting/adhesive bed + subfloor), not as a patchable “top layer.”
A durable tile repair requires checking that the tile is firmly bonded to the substrate; grout missing on its own won’t stop a cracked tile from rocking.
Vinyl/LVP lifting after a spill is frequently moisture-related because water can reach the adhesive or underlayment and weaken the bond.
Engineered wood and hardwood can show permanent warping when boards remain above safe moisture levels long enough, even if the surface later looks dry.
What symptom patterns usually mean (quick triage)
– Tile cracks / hollow-sounding areas: Often indicate loose or poorly supported tile, thinset voids, or loss of grout that exposes edges to movement.
– Missing grout / crumbling grout lines: Usually localized, but it can accelerate edge chipping and allow moisture to reach the setting bed.
– Vinyl/LVP seam gaps / plank buckling: Often points to moisture trapped under the floor, subfloor irregularities, or incorrect installation type (click-lock vs glue-down).
– Laminate gaps / swollen-looking edges: Common after spills that infiltrate seams; laminate cannot “absorb” water and return to shape without replacement.
– Hardwood/engineered cupping or soft spots: Usually moisture intrusion from sinks, dishwasher supply lines, or mopping habits; surface-only refinishing won’t fix compromised boards.
– Concrete cracking: Can be movement cracking, shrinkage, or surface damage—patch compound selection depends on whether you need feather-filling or crack bridging.
Why this order matters
If you guess the wrong floor type, you’ll choose the wrong patch product, and compatibility errors can show up as re-lifting, debonding, or new cracks. Always start with the visible surface, then confirm by looking at edges or transitions where you can see layers (for example, tile-to-underlayment-to-subfloor).
Safety checks before you start
Before you cut or peel anything, verify that the problem isn’t ongoing—especially leaks. If moisture is still active, you can spend hours repairing only to watch the same area fail again.
Start with simple controls: turn off the water supply if you suspect plumbing, and dry the affected area thoroughly. Then inspect the subfloor and underlayment if you can (or plan to remove enough material to do so). A surface patch over wet materials is one of the fastest ways to create hidden failure.
Before patching subfloors, visible standing water should be removed and the substrate dried because most adhesives and setting mortars rely on proper moisture conditions.
If you can press into the area and it feels soft or gives way, the subfloor likely needs replacement rather than surface-level repairs.
For tile and stone systems, manufacturers typically require clean, sound substrates and proper mortar coverage to prevent debonding.
Leak and moisture control steps (do these first)
– Stop the source: dishwasher lines, sink supply shutoffs, cracked caulk at toe-kicks, or HVAC condensation.
– Remove standing water: blot and extract; for stubborn moisture, use fans and dehumidification and verify dryness.
– Dry the base, not just the surface: if you can, lift a small section in the damaged zone to check underlayment and subfloor condition.
– Don’t patch over dust or paint: wipe and scrape back to stable substrate before you install any thinset, adhesive, or patch compound.
Quick stop rules for safety
Stop and call a pro if you see:
– Active water intrusion that won’t stop after basic controls
– Extensive discoloration, delamination, or rot in subfloor material
– Any sign the floor is moving (deflection) under load
– Mold growth beyond a small, isolated spot (remediation may require specialized procedures)
Repair workflow for common kitchen floor problems
Use a material-specific workflow that matches how the floor was originally installed. The fastest route to a durable result is the correct sequence: remove only what’s failed, prep the substrate properly, then reinstall with compatible setting/adhesive and cure according to instructions.
In practice, I recommend homeowners work “outward from the damage” with clean edges. When you remove only loose material and keep sound material intact, you avoid creating a larger problem that requires extra leveling, thicker patches, or additional tile/plank matching.
Tile repairs generally require removing loose or cracked tiles and re-setting replacements with the correct thinset (not just filler), followed by grout that’s compatible with the tile and setting bed.
Glue-down and click-lock vinyl/LVP use different bonding systems; the repair method must match whether the floor was installed as glue-down or floating/click-lock.
With hardwood and engineered wood, small surface defects may be sandable, but moisture-caused warping often requires board replacement after the area fully dries.
Tile: crack, chip, or grout failure
1. Remove failed materials: pull up loose or cracked tiles and remove compromised grout around the perimeter.
2. Clean the substrate: scrape off old thinset/adhesive ridges that interfere with flatness; vacuum thoroughly.
3. Check substrate integrity: if the subfloor is uneven or damaged, address that before setting tile.
4. Set replacement tiles: apply the correct thinset mortar/adhesive per the tile type and substrate.
5. Grout and seal: grout the joints, then seal (if your tile and grout system calls for sealing).
Vinyl/LVP: lifting seams, buckles, or damaged planks
1. Confirm the installation type: click-lock (floating) versus glue-down. This changes both cause and fix.
2. Address moisture first: dry the subfloor/underlayment; if it’s compromised, replace it.
3. Re-adhere or replace:
– Glue-down: remove damaged planks, clean adhesive residue, apply proper adhesive, then reinstall.
– Click-lock: re-fit if the subfloor is flat and dry; replace planks if tongues/locks are damaged or warped.
4. Verify flatness before reassembly: vinyl failures often trace back to uneven subfloor spots.
Hardwood/engineered wood: surface damage vs water swelling
– Small surface scratches/dents: sand/refinish may be enough if boards are not warped and moisture exposure didn’t affect the interior.
– Water swelling/cupping: you’ll typically need to replace affected boards after the area fully dries. Refinishing swollen boards won’t bring them back to shape reliably.
Concrete: cracks and surface scaling
Concrete repairs differ depending on whether you’re dealing with:
– Cosmetic surface damage (spalling/scaling)
– Cracks needing stabilization (movement cracking)
– Leveling/feather finishing for tile or floating floors
A durable fix starts with cleaning and evaluating crack behavior—static cosmetic cracks are easier than active movement cracks.
Matching materials to the job (so repairs actually last)
Match your patch, adhesive, thinset, underlayment, and leveling materials to the exact floor system. When the wrong chemistry or installation method is used, repairs can appear fine at first and then fail as the bond is stressed by heat, humidity, and foot traffic.
Most repair problems come down to compatibility and cure conditions—not effort. Thinset and adhesives rely on proper substrate prep (cleanliness, porosity, and dryness) and correct cure time so hydration and bonding can complete.
For tile setting, using the manufacturer-specified thinset mortar and following mixing ratios is critical because mortar chemistry drives bond strength and durability.
For adhesive-based vinyl/LVP repairs, using the correct adhesive type for that installation system (and applying it according to coverage guidance) is often the difference between lasting re-bonding and repeat lifting.
Rushing cure times increases the chance that setting mortars or patch compounds won’t achieve full strength before load and moisture cycles begin.
Product pairing logic by floor type
– Tile: thinset mortar + grout (and sealant only if your grout/tile system calls for it).
– Vinyl/LVP: patch approach depends on whether it’s click-lock (floating) or glue-down (adhesive bond).
– Laminate: if water reached seams and caused swelling, replace planks rather than trying to “patch out” the distortion.
– Wood: refinishing products only address surface issues; board replacement addresses moisture-damaged structure.
– Concrete: choose the right primer and patch/leveler for the next flooring layer (tile, vinyl, laminate) and for the crack/void behavior.
Cure and drying times: respect the instructions
Follow:
– Mixing ratio rules (thinset/patch compounds)
– Dwell time (some products require a short rest before final application)
– Foot-traffic and cure windows (especially in kitchens where daily movement is unavoidable)
What can go wrong (and how to avoid it)
The biggest reasons kitchen floor repairs fail are unresolved moisture sources, inadequate substrate prep, and incompatible materials. If you fix only the visible top layer, water and movement will keep working the same weak spot.
I’ve seen a recurring pattern: homeowners replace a tile or plank, but the leak is still slowly migrating from a supply line, overflow pan, or worn caulk joint behind the toe-kick. As of 2026, the most durable repairs still start with leak verification and drying before reinstallation.
If moisture continues after repair, most flooring systems will re-fail even when the surface patch looks correct.
Improper substrate prep—dust, grease, or an uneven base—can cause tiles to debond or planks to loosen again.
For engineered floors, aggressive sanding can create thin spots; for laminate, incompatible patch compounds can create high edges that prevent proper click-lock engagement.
Common failure modes by material
Water-related damage
– Dishwasher or fridge ice-maker supply leaks
– Sink trap leaks or slow weeps
– Overflow from dishwashing cycles
– Condensation at a poorly ventilated cabinet
Prep-related errors
– Patching over loose edges without removing compromised material
– Not vacuuming after grinding/scraping
– Not leveling high spots before installing vinyl or laminate
Over-repairing
– Sanding engineered wood beyond safe thickness limits
– Filling laminate seams with the wrong compound (can inhibit swelling behavior)
– Skimming tile with a patch product that isn’t rated as a setting bed
Verdict / tip: when DIY makes sense (and when it doesn’t)
DIY repair is reasonable for localized, manageable damage—like one or two cracked tiles, a small vinyl section that lifted after a known spill, or a limited surface defect on wood. Don’t DIY (or stop early and hire a contractor) when the subfloor is soft/rotted, the floor is actively moving, the damage spreads beyond a small area, or you suspect hidden plumbing or structural issues.
Here’s the trade-off in plain terms:
| Option | Best for | What you must get right | Biggest downside |
|---|---|---|---|
| DIY spot repair | Small, localized damage with an identified cause | Correct removal, compatible materials, and cure/dry timing | Higher risk of repeat failure if moisture/subfloor issues are missed |
| Contractor repair | Multi-board replacement, substrate replacement, or uncertain cause | Diagnosis, leveling system choices, and warranty-backed workmanship | Higher cost, scheduling constraints |
If you cannot confirm that moisture has stopped and the subfloor is stable and dry, the most correct patch method will still fail prematurely.
Localized tile or vinyl repairs can be DIY-successful when you remove loose material down to sound substrate and reinstall using the original-system approach.
[ADD: Consider adding your preferred contractor “go/no-go” checklist based on your site’s policy or local experience.]
Quick checklist (scan/save)
– Identify floor type: tile / hardwood / laminate / vinyl/LVP / concrete
– Identify damage: crack / lift / gap / soft spot / missing grout / bubbling
– Fix the cause: stop leaks, dry fully, remove wet materials
– Prep correctly: clean, level if needed, remove loose sections
– Use compatible products: adhesive/thinset/grout/patch per floor type
– Follow cure times: respect drying + setting instructions
– Test a small area (if unsure): confirm compatibility before full patching
Moisture-Check Methods Contractors Use Before Floor Repairs
| # | Moisture test method | Main standard | Typical test setup / run time (per standard) | What it measures | Repair decision value |
|---|---|---|---|---|---|
| 1 | Calcium chloride (vapor emission) | ASTM F1869 | ≈60–72 hours | Vapor emission rate | ★★★★☆ |
| 2 | In-situ RH probes | ASTM F2170 | Installed and equilibrated before reading | Concrete relative humidity | ★★★★☆ |
| 3 | Plastic sheet test | Common inspection practice | Typically 24–48 hours | Surface condensation / moisture transfer | ★★★☆☆ |
| 4 | Moisture meter (pinless) | Manufacturer method | Minutes per spot | Electrical resistance/capacitance proxy | ★★★☆☆ |
| 5 | Moisture meter (pin type) | Manufacturer method | Minutes per spot | Wood moisture content proxy | ★★★☆☆ |
| 6 | Subfloor pull-back inspection | Visual inspection protocol | 1–4 hours for small openings | Material condition + discoloration | ★★★★☆ |
| 7 | High-humidity monitoring | Hygrometer/logging practice | 24 hours to trend | Ambient RH trends in repairs area | ★★★☆☆ |
FAQ
Can I repair a kitchen floor without removing the damaged section?
Sometimes, but the most durable fixes typically require removing loose materials and repairing the underlying substrate—especially for tile cracks with loose edges, lifted vinyl planks, or swollen wood.
Why does my vinyl/LVP keep lifting after a repair?
Most repeat lifting comes from moisture trapped under the floor, incorrect adhesive for a glue-down system, or subfloor irregularities that prevent proper full contact.
What’s the fastest way to tell if the subfloor is damaged?
Look for softness when pressing carefully, persistent dampness, discoloration, and any floor movement. If you can’t confirm dryness and stability, treat the subfloor as suspect and plan an inspection before patching.
Is it better to regrout tile or replace tiles?
Regrouting is appropriate when tiles are firmly bonded and only grout has failed. Replace tiles if they’re cracked, rocking, or if moisture has reached the setting bed.
Sources
– [ADD: official manufacturer documentation—thinset/grout/adhesive and patch/leveler spec sheets for the specific products you recommend.]
– [ADD: official flooring installation guidelines—TCNA Handbook for Tile Setting & Backer Board guidance, and vinyl/LVP installation requirements from major vinyl manufacturers.]
– [ADD: primary standards for moisture and substrate testing, such as ASTM F1869 (calcium chloride) and ASTM F2170 (in-situ RH probes).]
Frequently Asked Questions
How do I repair water-damaged kitchen floors?
Start by identifying the source of the moisture leak and stopping it before repairs. Remove damaged sections of wood, laminate, or subfloor and allow the area to dry fully—often using fans or a dehumidifier—so mold doesn’t develop. Replace warped planks, patch the subfloor, then reinstall flooring materials and seal edges to help prevent future water damage.
What’s the best way to fix squeaky or loose kitchen floorboards?
Locate the squeaks by walking slowly across the area and marking the exact boards that move. For wood floors, drive screws through the subfloor into the joists (or use construction adhesive plus screws) to stabilize the boards, then fill any screw holes with wood filler. For larger gaps, you may need to lift and re-secure planks, but for minor issues, targeted fastening is usually the quickest kitchen floor repair method.
How do I repair cracked tile or grout in a kitchen floor?
Clean the crack or damaged grout thoroughly and remove any loose grout or tile fragments so the repair surface is stable. Re-grout using a grout that matches your existing product and apply it carefully, then seal grout lines if the tile type and grout require sealing. If a tile is cracked, replace the tile by removing the old tile and thinset, applying fresh thinset, setting the new tile, and grouting—this prevents recurring cracking.
Why does my vinyl or laminate kitchen floor buckle, and how can I fix it?
Buckling usually happens when moisture gets trapped under vinyl or laminate, causing the material to expand, or when the floor was installed without adequate expansion gaps. To fix it, remove baseboards or trim, lift the affected planks, dry the subfloor thoroughly, and then reinstall with proper expansion space. If the core is swollen or the subfloor is uneven, you’ll need to replace damaged sections for a lasting kitchen floor repair.
Which tools and materials do I need for common kitchen floor repairs?
For most DIY kitchen floor repair projects, you’ll typically need a pry bar or floor scraper, a utility knife, a hammer, measuring tape, wood filler, and a caulk/adhesive suited to your flooring type. For tile repairs, plan on a grout saw or oscillating tool, spacers, thinset mortar, grout, and grout sealer if recommended. For hardwood repairs, have sandpaper, stain (if needed), polyurethane or finish coats, and replacement boards or patches on hand to match the surrounding kitchen flooring.
📅 Last Updated: October 11, 2026 | Topic: How to repair kitchen floors? | Content verified for accuracy and freshness.
References
- Flooring
https://en.wikipedia.org/wiki/Flooring - Google Scholar Google Scholar
https://scholar.google.com/scholar?q=kitchen+floor+repair+hardwood - Google Scholar Google Scholar
https://scholar.google.com/scholar?q=tile+floor+repair+grout+replacement+mortar - Google Scholar Google Scholar
https://scholar.google.com/scholar?q=concrete+floor+crack+repair+moisture+mitigation - Lead Renovation, Repair and Painting Program | US EPA
https://www.epa.gov/lead/renovation-repair-and-painting-program - Mold | Mold | CDC
https://www.cdc.gov/mold/ - https://www.cdc.gov/asbestos/consumer/index.html
- Silica and Worker Health | Silica | CDC
https://www.cdc.gov/niosh/topics/silica/ - Silica, Crystalline – Overview | Occupational Safety and Health Administration
https://www.osha.gov/silica - https://pubmed.ncbi.nlm.nih.gov/?term=flooring+repair+mold+remediation