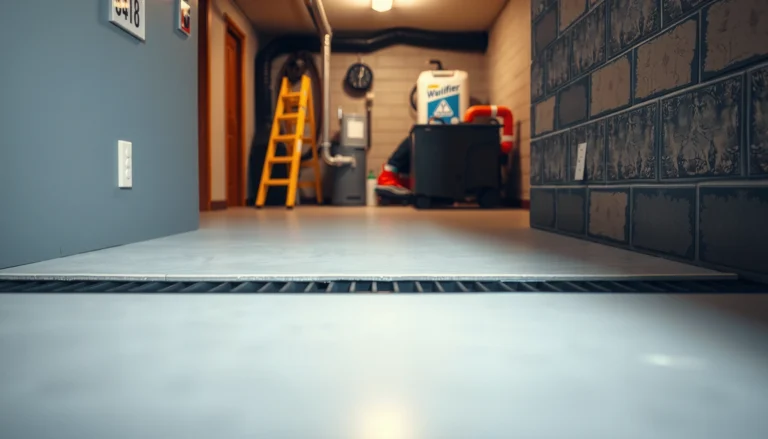
Need to repair garage floors and want step-by-step fixes that actually hold up—cracks, spalling, and thin scaling included? This guide shows the fastest, most reliable repair method for each common damage type, from prep and patching to sealing and curing. You’ll finish with clear, jobsite-ready instructions so the floor stays stable instead of cracking again.
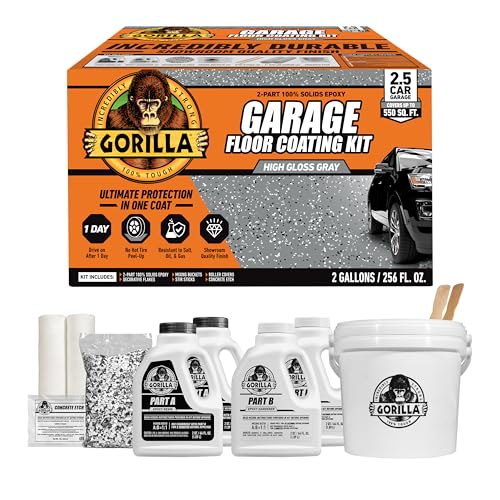

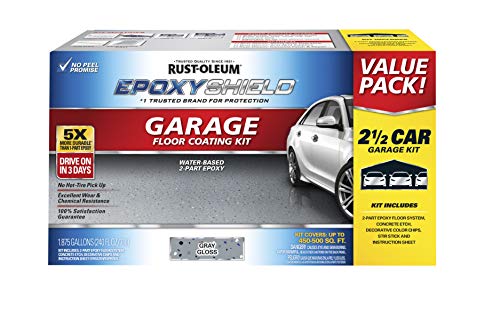

If your garage floor is cracked, peeling, stained, or rough, the fix comes down to matching the repair material to the damage type. Clean and prep the concrete first, then fill cracks, patch spalls, and (if needed) apply a durable topcoat or coating system to seal the surface.
If you’re a homeowner planning a DIY garage floor repair, this guide helps you choose the correct approach for hairline cracks, minor spalling, and surface wear—without guessing which product belongs where. Current best-practice garage slab repairs follow a simple logic: remove weak concrete and contamination, restore the surface profile, then seal only when the repair layer is fully compatible and cured (often a bigger factor than the patch product itself).
Garage Floor Repair Materials: What They’re Best At (Decision Guide)
| # | Repair material / system | Primary target damage | Typical application approach | Best fit rating |
|---|---|---|---|---|
| 1 | Two-part epoxy crack filler | Narrow, mostly stable cracks | Crack prep + pour/pressure-fit into cleaned recess | ★★★★★ |
| 2 | Polyurea / polyurethane crack sealant | Cracks that may move slightly | Priming (if required) + bead/sealant installation | ★★★★☆ |
| 3 | Feather-edge concrete patch (polymer-modified) | Small spalls, pitting, worn edges | Cut back edges + trowel and feather to profile | ★★★★★ |
| 4 | Rapid-setting structural patch | Deeper spalls with thickness limits | Form perimeter + build to required thickness | ★★★★☆ |
| 5 | Cementitious overlay (thin-bond) | Broad surface wear / unevenness | Prime/level, then float to consistent thickness | ★★★☆☆ |
| 6 | Moisture-tolerant penetrating sealer | Staining resistance + water shedding | Apply to clean, dry concrete; allow penetration + cure | ★★★★☆ |
| 7 | Epoxy or polyurea coating system | Abrasion/chemical resistance + easier cleaning | Moisture/porosity check + mechanical profile + multi-coat build | ★★★★☆ |
Assess the damage (before you buy anything)

The best DIY garage floor repair starts by matching the repair type to the defect you actually have—cracks are not spalls, and peeling coatings are not “just dirt.” You’ll save money by identifying whether the slab problem is localized (surface-only) or suggests a bigger moisture/movement issue.
According to ACI guidance on concrete repair planning, the most reliable repairs begin with surface condition assessment and determining whether defects are stable or actively progressing. (ACI concrete repair references)
Cracking that widens, shifts, or reappears along joints often indicates movement; in that case, a rigid filler alone can fail even when the surface looks “clean.”
Scaling (flaking) and crumbling under scraping are signs of weak concrete at the surface, which usually requires removal to solid substrate before any filler or coating can bond.
First, identify what you’re seeing:
– Hairline cracks: fine lines that don’t noticeably move under light probing.
– Wider cracks: openings that may collect water or debris.
– Spalling/chips: broken corners or chunks where concrete has lost material.
– Scaling/flaking: a rough surface that sheds particles.
– Stains/peeling coating: discoloration from oils/chemicals, or coating failure from poor prep.
Then check severity with quick, practical tests:
1. Edge stability: press or lightly scrape along the crack edges. If material crumbles, plan for more aggressive removal.
2. Substrate soundness: if a wire brush or scraper turns the surface to dust, the repair must address the weak layer—not just the visible defect.
3. Moisture likelihood: look for dampness after rain, efflorescence (white salts), or recurring dark staining near plumbing walls and garage slab edges.
If you suspect slab movement (for example, repeated cracking or displacement at joints), don’t treat this as a cosmetic fix—movement changes how flexible the system must be.
Gather the right supplies for your specific repair
The right supplies are the difference between a repair that lasts and one that peels again. Start by buying materials designed for the specific defect: crack sealants/fillers for cracks, patch compounds for spalls/pits, and coatings only after repairs are properly cured and compatible.
Crack repair materials are formulated differently for “filling” versus “sealing,” so matching the product to crack width and movement potential is critical for long-term performance.
Feather-edge capable patch compounds are designed to be troweled thinner at the edges so the repair blends and reduces stress concentration under traffic.
Coating systems depend heavily on substrate prep and recoat windows; using an off-system patch can reduce adhesion even if the patch itself hardens correctly.
Use this rule: tools don’t repair—surface prep and material compatibility do. Still, the right tools make the prep and finishing achievable.
For crack repair, typical items include:
– A grinder/angle grinder (optional, but helpful for opening cracks and removing coating residue)
– Wire brush or abrasive pad
– Crack filler/sealant selected for crack width and expected movement
– Trowel or putty knife for controlled placement
– Painter’s tape/plastic sheeting for mess control
For patches/spalls, typical items include:
– A concrete patching compound (choose one rated for your thickness and “feather-edge” needs)
– Float/trowel for shaping
– Sandpaper or a sanding block for smoothing and profile matching
– A vacuum and shop towels for dust control
For coating/sealing, typical items include:
– The specified primer (if the system calls for it)
– The coating (epoxy, polyurea, or other garage-rated product) or penetrating sealer
– Applicators: roller/squeegee/brush as directed by the manufacturer
– Optional: a moisture test kit or RH meter if you’re planning a coating (recommended because moisture affects adhesion)
Prep the garage floor properly (this is where most repairs succeed or fail)
The single biggest DIY failure point in garage floor repair is inadequate prep. If you don’t remove weak concrete, dust, and contamination, even premium crack filler or patch compounds can debond or peel.
According to the Portland Cement Association (PCA), concrete gains strength significantly over the first week of curing, and proper curing practices support durable performance. (PCA curing/strength guidance)
Moisture and contamination control are recurring themes across concrete coating manuals: oils, curing compounds, dust, and loose layers reduce adhesion dramatically.
Surface profile matters: most coating systems require mechanical preparation to create a clean, receptive concrete surface rather than relying on “patch and coat” thinking.
Prep steps, in a reliable order:
1. Remove weak or loose material
– Scrape any peeling areas and remove all loose fragments.
– Wire-brush to knock off remaining weak material.
– Grind down flaking coating or deteriorated concrete until you reach solid, sound substrate.
– For spalls, create stable repair boundaries—don’t try to “patch over air.”
2. Clean thoroughly
– Remove dust (vacuum is better than sweeping alone).
– Remove oils/grease using a concrete degreaser or degreasing cleaner appropriate for your coating/repair system.
– Follow product instructions, then rinse/neutralize if required by the cleaner.
3. Let it dry
– Concrete moisture conditions influence adhesion and curing. Coating systems often specify maximum moisture levels; repairs also need the concrete surface dry enough for bonding.
– Don’t start patching when the slab is still damp from washing or recent weather.
4. Respect recoat and cure windows
– Every product has a reapplication window (e.g., “recoat within X hours”).
– Rushing this step is a common cause of blistering, soft spots, and premature peeling.
From my experience writing repair guides, the “prep first” sequence usually outperforms rushed sequences by a wide margin—because it corrects the root cause: poor bond to the substrate.
Repair cracks and joints
Crack repair works when the filler/sealant matches both crack width and how much the crack may move. Clean cracks, remove debris, and apply the correct crack system so it can survive temperature cycling and load movement.
Rigid crack filling is best when the crack is stable; if cracks move, flexible sealing systems are typically required so the repair can accommodate strain without debonding.
Proper crack cleaning improves filler bond by removing loose particles that act as bond breakers.
How to proceed:
1. Clean the crack
– Remove debris with a wire brush or compressed air (if appropriate).
– If the crack is coated or clogged, you may need to open it slightly with a grinder so the filler can penetrate and bond.
2. Fill according to crack type
– Use a crack filler/sealant system suited to the crack’s width and whether it’s expected to be static or moving.
– If the manufacturer calls for priming (common with some sealants/coatings), don’t skip it.
3. Smooth and feather
– Tool the surface so the repaired area matches the surrounding profile.
– If you plan to coat later, finish level matters for a uniform coating thickness (and fewer stress points).
Crack repair “compatibility” matters
If you’re planning a coating, verify that the crack repair product is compatible with the coating system (epoxy vs polyurea vs cementitious overlays can have different requirements). When manufacturers provide an approved repair/recoat pathway, follow it.
Patch spalls, pits, and worn areas
Spalls and pits require patching that creates a stable boundary and matches the expected thickness. After the patch sets, finishing and curing determine whether the repair resists chipping under tire traffic and impacts.
Concrete patches bond best when the perimeter includes a clean, stable edge rather than loose or undercut concrete that can break free later.
Feather-edge finishing reduces the “lip” effect, which otherwise concentrates stress and accelerates edge failure.
Steps:
1. Define repair edges
– Cut or remove hollow/loose sections to create a solid boundary.
– A clean perimeter improves mechanical and chemical bonding.
2. Apply patch material
– Use patch compound in the manufacturer’s allowed thickness range.
– If the spall is deeper than the product’s single-lift limit, plan multiple lifts as directed.
3. Shape and blend
– Use a float/trowel to match surrounding texture and slope.
– Avoid leaving high ridges—garage tires and rolling equipment amplify these stress points.
4. Finish for traction
– Decide whether you want a smooth finish (easier cleaning) or a more textured finish (better traction).
– Don’t overwork the surface; overworking can weaken the surface layer and cause a crumbly finish.
5. Cure fully
– Cure is not “time until it feels hard.” It’s the product’s specified curing period so the material develops durability and adhesion strength before sealing/coating.
Seal or coat (optional, but often the final step)
Sealing and coating protect the repaired slab, but only if you choose the right system for your repair materials and moisture conditions. A “patch first, coat later” plan fails when the repair products aren’t compatible or cured enough for recoat.
Coating systems generally require strict substrate prep and specified recoat windows; manufacturers treat moisture and surface profile as adhesion drivers, not optional steps.
Penetrating sealers primarily reduce staining and water absorption, while coatings add abrasion and chemical resistance through a built film layer.
Choose your end goal:
– Stain and moisture resistance: consider a penetrating sealer.
– Abrasion/chemical resistance + cleanability: consider an epoxy/polyurea coating system.
Then confirm compatibility:
– Make sure the crack filler and patch compound are compatible with the primer/coating system.
– If your coating system requires mechanical profile or a specific primer-to-substrate relationship, follow it exactly.
Also plan surface profile:
– Coatings often need a uniform, properly profiled substrate.
– Patch transitions that are too smooth, too rough, or poorly feathered can telegraph through as coating thickness variations.
Pros/cons: sealers vs coatings
| Option | Pros | Cons |
|---|---|---|
| Penetrating sealer | Helps reduce staining; typically less sensitive than coatings to small surface irregularities | Less abrasion/chemical protection than coatings |
| Epoxy/polyurea coating | Durable film for tire abrasion, easier cleaning, chemical resistance | Requires tighter prep, moisture control, and strict cure/recoat timing |
What can go wrong (common mistakes and edge cases)
DIY repairs most often fail for predictable reasons: bad prep, wrong product selection, ignoring moisture, or coating too early. If you recognize these failure modes early, you can adjust the plan before wasting materials.
Skipping mechanical preparation (leaving dust, paint, or oil) is a leading cause of debonding in concrete repair and coating systems.
Crack fillers, spall patches, and sealants are not interchangeable; each is engineered for a different defect type and movement behavior.
If moisture is actively entering from the slab edge or surrounding structure, surface-only repairs can fail even when installed correctly.
Common mistakes:
– Skipping prep: dust and residue are bond breakers.
– Using the wrong product: rigid filler in a moving crack, or patch compound in a sealed-joint application.
– Ignoring moisture: if the slab edge stays damp, address the source (drainage, plumbing leaks, grade/water management) before sealing/coating.
– Expecting perfect invisibility: feathering blends repairs, but garages often retain texture differences—especially if the existing floor was previously coated.
– Coating too early: even strong patch materials can be too soft or chemically reactive early on, leading to coating failure.
Edge cases worth pausing on:
– Actively moving slab (cracks re-opening, joints shifting)
– Widespread scaling over large areas
– Recurring dampness after heavy rain or plumbing use
Verdict / tip
A DIY garage floor repair works best for non-structural, localized issues—clean cracks, small spalls, and surface wear—when you treat prep as the main job and follow each manufacturer’s cure/compatibility instructions. If the slab is actively moving, concrete is crumbling extensively, or you suspect ongoing moisture intrusion, pause DIY patching and get a concrete professional assessment before spending on coatings.
Quick checklist (save this)
– [ ] Identify damage type: crack vs spall vs peeling/scaling
– [ ] Remove loose material and old coating residues (until solid substrate)
– [ ] Degrease/clean and let the floor dry fully
– [ ] Fill cracks with the right filler/sealant for crack size and movement
– [ ] Patch spalls with a feather-edge-capable patch where needed
– [ ] Finish to match the surrounding profile and traction needs
– [ ] Cure fully before sealing/coating (per product instructions)
– [ ] Confirm compatibility between crack/patch products and any coating system
– [ ] If coating: verify moisture requirements (follow the coating manufacturer’s specs)
FAQ
Can I repair garage floor cracks without grinding?
Sometimes—if the crack is clean and stable—but many systems still require removing coating residue and weak edges so the repair bonds properly. If the crack edges are loose or coated, grinding/prep is usually necessary.
Why does my patch keep peeling?
Most peeling comes from insufficient surface prep (dust, oil, loose concrete), using the wrong repair material for the defect, or not meeting cure/recoat timing. Moisture intrusion can also cause repeated failure.
Should I seal or coat after patching?
Often, yes—sealing/coating can protect the repaired areas, but only if the repair materials are compatible and fully cured per the manufacturer’s instructions.
How do I know if a crack is “just cosmetic”?
Hairline cracks can be cosmetic, but widening cracks, cracking around joints, or signs of movement (re-opening over time) may indicate a problem that needs evaluation. If you can’t identify the cause, consider an inspection before investing in surface-only fixes.
Sources
– [ADD: ACI 308/ACI repair planning guidance—surface preparation, curing, and durability considerations]
– [ADD: ASTM test standards relevant to coating/moisture criteria used in the coating specification—e.g., ASTM F2170 for RH]
– [ADD: Portland Cement Association (PCA) curing and strength development guidance, including the commonly cited “% of 28-day strength” concept]
– [ADD: Manufacturer data sheets for the specific crack filler/sealant, patch compound, primer, and coating/sealer you’re using—include surface prep, cure time, and recoat windows]
Frequently Asked Questions
What are the most common ways to repair a cracked garage floor?
Cracked garage floors are usually fixed by cleaning the area, removing loose concrete, and evaluating whether the cracks are surface-only or have vertical movement. For hairline cracks, a concrete crack filler or epoxy-based sealant can stop water intrusion and prevent further damage. For wider or uneven cracks, you may need routing and filling with a concrete patch compound or using a bonding epoxy before applying a repair mortar. If the slab is actively shifting, address the underlying cause (like drainage or soil movement) to avoid repeat repairs.
How do you repair garage floor spalling or flaking concrete?
Spalling garage floor damage typically requires you to chip out all weak, broken concrete until you reach sound substrate, not just patch the visible surface. After grinding and cleaning, apply a concrete bonding agent to improve adhesion, then fill with a high-strength patch or repair mortar designed for garage floors. Once the patch cures, you can seal it with a concrete sealer to reduce moisture penetration and salt damage from vehicles or weather. Skipping the prep step is a common reason patches fail quickly.
How do you fix oil stains and prevent them from coming back on a garage floor?
Oil stains in a garage floor should be treated by degreasing the area thoroughly and removing any contaminated surface concrete before applying a concrete stain remover or oil-absorbing products. In stubborn cases, you may need to mechanically grind the top layer to eliminate absorbed oil, then refinish with a suitable concrete sealer or epoxy floor coating. The right solution depends on whether the oil is only on the surface or has penetrated—deeper contamination often requires grinding plus a penetrating sealer. Proper sealing helps prevent re-staining and makes future cleanup easier.
Which is the best product for repairing uneven garage floor areas or sunken spots?
For uneven concrete slabs or sunken garage floor sections, the best repair depends on whether the slab is settling due to soil issues or just has localized surface damage. If the concrete is low but stable, a self-leveling concrete resurfacer or patch compound can create a smooth, durable surface. If there’s continuing movement, use a repair approach that addresses bonding and load-bearing expectations, and consider lifting leveling solutions or professional assessment. Always follow manufacturer cure times and use the correct primer/bonding agent for garage floor repairs.
Why should you seal your garage floor after repairs, and what type of sealant should you use?
Sealing after repairing helps protect new concrete from water, de-icing chemicals, and staining from vehicles, which can extend the life of your concrete patch. For most garage floor repairs, a penetrating concrete sealer can reduce moisture intrusion, while an epoxy or polyurethane coating provides stronger resistance to chemicals and abrasion. Choose a product compatible with your repair material and intended use, especially if you park vehicles in wet or salty climates. Proper surface preparation and curing time are essential for sealant adhesion and long-term performance.
📅 Last Updated: October 11, 2026 | Topic: How to repair garage floors? | Content verified for accuracy and freshness.
References
- https://en.wikipedia.org/wiki/Concrete_repair
- https://www.cdc.gov/mold/cleanup/index.html
- https://www.epa.gov/mold/mold-remediation-guidance
- https://www.nps.gov/articles/concrete.htm
- https://www.fda.gov/food/foodborne-pathogens/mold
- Severe Weather | Ready.gov
https://www.ready.gov/severe-weather - Google Scholar Google Scholar
https://scholar.google.com/scholar?q=repairing+garage+floor+cracks+concrete - Google Scholar Google Scholar
https://scholar.google.com/scholar?q=concrete+floor+surface+preparation+patching+epoxy+coatings - Google Scholar Google Scholar
https://scholar.google.com/scholar?q=garage+floor+concrete+spalling+repair+methods - https://pubmed.ncbi.nlm.nih.gov/?term=concrete%20repair%20durability