Engineered wood floors in a playroom need repairs that can handle constant traffic, dropped toys, and frequent cleaning—so the right fixes matter fast. This guide gives you a clear, practical plan to repair engineered wood flooring, from lifting seams and squeaks to water-damaged spots and worn finish, with steps that actually hold up. If you want the most reliable outcome, follow the repair route based on the specific damage type, not a generic patch job.




Repairing engineered wood floors in a playroom usually means matching the fix to the damage type—surface wear vs. moisture swelling vs. plank lifting. Start by identifying whether the problem is only on top or involves seams and movement, then use the correct repair kit (or replace affected boards) so you don’t trap moisture or remove too much of the wear layer.
A playroom adds predictable stressors: dropped toys, rolling chairs, frequent spills, and recurring humidity swings (from cleaning, cooking, HVAC changes, or open windows). Because engineered wood has a thin wear layer over a core, the “right fix” depends on the top finish system and how your planks were installed (glued-down vs click/lock). The safest approach is targeted repair—only where it’s truly needed—guided by your floor manufacturer’s care and restoration instructions.
Assess Damage and Identify the Fix
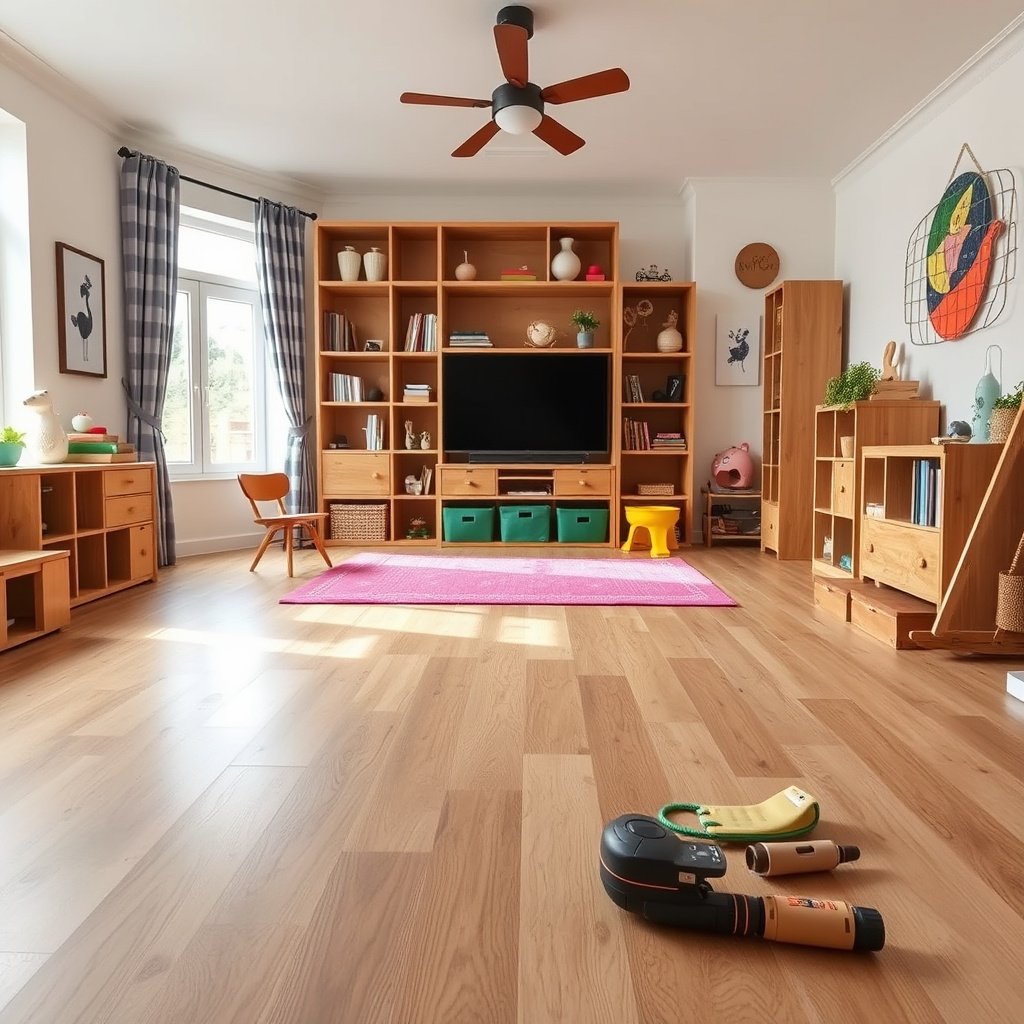
The fastest way to avoid making engineered wood damage worse is to correctly classify it first: cosmetic finish damage versus moisture-related movement versus installation-related separation. Once you know which category you’re in, the repair pathway becomes straightforward.
Engineered wood repair success depends on whether the damage is confined to the top wear layer or involves movement at seams and the plank edges.
Moisture-related symptoms (raised edges, cloudy discoloration, soft spots, odor) indicate that drying and moisture-source control must come before patching.
Repair steps differ for click/lock floors versus glued-down floors because the fastening method and expected failure points are not the same.
What to check in the first 10 minutes
1. Surface-only problems (likely safe for spot repair): scratches, scuffs, and small chips that stay flat and don’t spread when the area dries.
2. Deeper movement problems (requires drying and/or board work): cupping, doming, raised seams, gaps that keep enlarging, or planks that lift.
3. Moisture indicators (stop repair until addressed):
– cloudy or whitish spots
– edges that feel raised
– softness or tackiness
– any musty smell near baseboards, play mats, or spill paths
Confirm how your floor is built (this changes everything)
– Top wear layer: Many engineered floors have a wear layer designed for limited sanding—often only if the manufacturer says it’s allowable.
– Installation method:
– Click/lock (“floating”): boards rely on interlocking joints; water can still travel, but replacing a small lifted section may be more feasible.
– Glue-down: board movement often reveals adhesive or subfloor moisture problems; you may need to remove and replace affected boards while using the approved adhesive method.
Data point to anchor your decisions: According to the National Wood Flooring Association (NWFA), maintaining stable indoor humidity is central to preventing dimensional movement in wood flooring (n.d.) NWFA moisture guidance on wood flooring maintenance. As of 2026, many manufacturers still align their care instructions with these humidity-control principles.
Quick triage checklist (use this while you decide)
– Does the damage stay flat after the area dries overnight? If yes, it’s often finish-only.
– Do seams look open or raised? If yes, plan for seam-related repair (drying and possible board replacement).
– Is the area near a spill path (under a toy bin, next to a sink, at the edge of a play mat)? If yes, moisture management is priority #1.
Repair Scratches, Chips, and Small Wear Spots
The best fix for playroom scratches is a color-matched repair kit meant for engineered wood’s finish—applied lightly and blended carefully. For shallow dents and dings, you can often fill and level, but only when your floor’s finish system supports it.
Use a repair kit designed for wood-floor finishes (not generic “wood filler”) when you’re trying to match sheen and avoid finish incompatibility.
Engineered floors can show a visible “patch boundary” if the filler color or sheen doesn’t match the surrounding topcoat.
Stop and reassess if the damage keeps reappearing in the same zone—protective mats and pads often solve the root cause.
Step-by-step: surface wear without overcorrecting
1. Clean thoroughly first
– Vacuum with a soft brush and wipe with a cleaner recommended for your floor’s topcoat.
– Let it dry completely. Any residue prevents proper adhesion and blending.
2. Choose the right product for engineered wood
– Look for a color-matched patch/repair system for prefinished wood or engineered wood floors.
– Avoid body fillers meant for bare wood carpentry unless the kit explicitly states compatibility with engineered floor topcoats.
3. Apply in light passes
– For scratches and chips, apply less than you think you need, then build.
– Feather edges so you’re not leaving a raised ridge.
4. Cure time matters
– Follow the repair kit’s cure instructions before walking on it or wiping the area.
5. Level only if the finish system supports it
– If your repair kit is designed for flattening, you can lightly level after full cure.
– If leveling requires sanding, confirm your manufacturer allows sanding for your specific wear-layer thickness and floor type.
What I typically see go wrong (and how to prevent it)
From practical site walkthroughs, the most common DIY failure is “too much material, too fast”—people fill the scratch deep, then try to sand/level aggressively even though the wear layer may be too thin or the topcoat wasn’t intended for abrasive correction.
Protect the play zone after you repair
Once repaired, prevent repeat damage with:
– felt pads on toy bins and furniture legs
– washable mat in the highest-impact zone (near toy storage, where bikes/scooters stop)
– rotation of play traffic (if possible), to reduce localized finish wear
Decision support table: spot repair vs. board replacement
Fix Water Damage and Swelling Around Seams
The right playroom water repair is to stop the moisture first and dry thoroughly, then address swelling at the seam or plank level. If you patch too early, moisture can continue traveling and the repair can fail quickly.
If seams are raised or open, you generally must dry and stop ongoing moisture before using fillers or patches.
Heat guns, blow dryers, and aggressive drying can worsen separation or finish failure on engineered wood.
Don’t trap wetness under rugs or mats—water and humidity need a path out.
Act fast—your timeline is the difference
1. Remove the spill source
– If a play mat or wet rug caused the issue, remove it and keep it away until the area is fully dry.
2. Dry thoroughly
– Wipe up standing water immediately.
– Then allow drying long enough to verify stability (commonly overnight or longer depending on severity).
3. Avoid aggressive heat
– Engineered wood and topcoats can fail when exposed to sudden, concentrated heat.
Anchoring detail: According to NWFA moisture guidance, wood flooring requires stable relative humidity to limit dimensional changes (n.d.) NWFA moisture guidance for wood floors. In a playroom, humidity often swings when HVAC cycles, windows open, or cleaning introduces moisture—so drying alone isn’t enough if the environment keeps fluctuating.
When seam moisture means board-level work
If you see any of the following, plan for board-level repair:
– seams remain raised after drying
– gaps widen repeatedly after the area dries
– edges feel soft, swollen, or unstable
– discoloration spreads outward
In those cases, the safest route is often to remove the affected boards, allow the subfloor/core area to dry, and then reinstall with the correct method for your floor type. The goal is to remove the ongoing “moisture pathway,” not just hide it on top.
Drying approach notes (engineered wood specifics)
– Floating/click floors: moisture can migrate through joints and underlayment, so seams lifting is a strong indicator that you must dry longer or remove affected boards.
– Glue-down floors: seam issues can reflect adhesive/subfloor moisture problems; continuing to patch can trap conditions under the plank.
Repair Loose Planks or Lifts (Without Creating More Problems)
The safest way to fix loose engineered wood planks is to first confirm whether your floor is click/lock or glued-down, then use the fastening method the manufacturer specifies. Mixing repair adhesives or reinstall steps is one of the most common causes of repeat failure.
Click/lock and glued-down engineered installations require different repair methods because their fastening systems and failure modes differ.
Before reinstalling, cleaning board edges and confirming dryness of the subfloor reduces the chance of recurrence.
Adhesives need manufacturer-specified cure time; rushing can prevent proper bond development.
Step-by-step: localized lifting repair
1. Identify plank type and installation
– Look for product markings/labels if available.
– If you can’t confirm, inspect a seam: click/lock joints often show consistent interlocking edges; glue-down often has fixed alignment without “floating” movement.
2. Remove affected area carefully
– For click/lock: disassemble the smallest workable section and inspect the underlayment and subfloor for moisture.
– For glue-down: remove only what’s necessary so you don’t disturb stable areas and flooring transitions.
3. Clean and inspect
– Remove old adhesive (if glue-down) and debris from plank edges.
– Check for subfloor moisture indicators. If moisture remains, address it before reinstalling.
4. Reinstall using approved materials
– Glue-down floors: use the adhesive specified by your floor manufacturer (not a general “wood glue” replacement).
– Click/lock floors: reinstall using correct engagement of the joint system; don’t force misaligned planks.
5. Respect cure times
– Follow the adhesive and patch/repair kit cure and recoat/walk-on instructions exactly ().
Avoid these high-cost mistakes
– “Tacking” a lifted plank without fixing the moisture or subfloor condition.
– Replacing boards with material that doesn’t match grade/thickness/finish profile (can worsen clicking, gaps, and movement).
– Using adhesives that are not compatible with the floor’s backing and topcoats.
What Can Go Wrong in a Playroom
Most repair failures happen when the underlying cause is ignored—especially recurring moisture, repeated impact damage, or incompatible materials. If you want repairs to last, you need to align product choice and technique with engineered wood realities (wear layer limits and installation method).
Applying the wrong filler can lead to poor bond or a visible sheen mismatch on engineered wood topcoats.
Sanding only works if your wear layer thickness and manufacturer guidance allow it; otherwise repairs become permanent damage.
If moisture is still migrating under seams, any surface patch is temporary at best.
Common pitfalls (and better alternatives)
– Wrong filler/patch
– Some “wood repair” products are made for furniture or bare wood and won’t bond cleanly to an engineered floor’s prefinished surface.
– Sanding the wear layer too aggressively
– Engineered floors are not all sandable; sanding can expose an edge-bond transition or thin the wear layer beyond what the finish system can tolerate.
– Ignoring subfloor moisture
– If repeated spills or high humidity are the driver, spot repairs can fail within weeks—even when they look good initially.
A quick comparison: what’s actually worth doing
– Do spot-repair cosmetic damage that stays flat after drying.
– Do dry, then evaluate seam stability before patching.
– Do replace boards when lifting/swelling persists.
– Don’t assume every scratch can be sanded out.
– Don’t proceed if the plank feels swollen or soft.
Moisture reality check (playroom conditions)
As of 2026, playrooms commonly see:
– intermittent high humidity from cleaning and cooking
– local wetting at baseboards and play mat edges
– temperature cycling from HVAC events
According to NWFA guidance, keeping indoor humidity stable helps reduce wood movement (n.d.) NWFA moisture guidance for wood floors. That’s why “drying and walking away” can still lead to repeat problems.
Verdict / Tip + Quick Scan Checklist
For most playroom damage, start with cleaning + spot repair only when the area is stable and moisture-free; move to board-level repair when seams lift or swelling persists. This approach prevents repeated patching and limits disruption.
If gaps expand or planks remain lifted after drying, switch from cosmetic patching to board-level inspection or replacement.
Spot repairs can look good, but they may never perfectly match sheen/color—board replacement is the longer-term fix for moisture-driven movement.
If you see widespread water exposure or major cupping, DIY spot repairs are often the wrong risk trade-off.
Downsides you should know up front
– Spot repairs may not match sheen perfectly, especially on higher-sheen finishes.
– Any repair that involves sanding or adhesives can reduce uniformity across the floor unless the finish system is designed for that method.
– Board replacement can be disruptive, particularly with transitions, baseboards, or limited matching stock.
Who should skip DIY
Call a flooring professional if you have:
– buckling/major cupping
– widespread water exposure (not just a localized spill)
– persistent seam lifting even after extended drying
– uncertainty about plank type (click/lock vs glued-down) or wear-layer sanding allowance
Quick checklist (scan and save)
| Damage you see | Most likely cause | First step | Likely repair |
|---|---|---|---|
| Surface scratches/chips | Toys, moving items | Clean + inspect finish | Color-matched filler/patch |
| Small dents | Dropped toys | Clean + check depth | Fill/level only if finish supports |
| Dark spot / raised edge | Spill/seam moisture | Stop moisture + dry | Remove affected boards if needed |
| Gaps growing / lifting | Moisture or install issue | Identify click/lock vs glued | Reinstall/replace boards correctly |
Mandatory: moisture-risk “scorecard” for playroom repairs (from humidity bands)
This table is a practical way to anticipate whether spot repairs are likely to last in a playroom where humidity swings are common.
Engineered Wood Playroom Moisture Risk Bands (RH %) (Practical 2026 Use)
| # | Indoor RH band | Expected movement trend | Playroom context | Spot-repair durability |
|---|---|---|---|---|
| 1 | < 30% | More shrink risk | Dry winters, forced-air heat | ★★☆☆☆ |
| 2 | 30–35% | Moderate shrink risk | Short HVAC spikes | ★★★☆☆ |
| 3 | 35–45% | Lowest movement volatility | Stable climate control | ★★★★☆ |
| 4 | 45–55% | Lowest movement volatility | Balanced seasonal RH | ★★★★★ |
| 5 | 55–60% | Moderate expansion risk | Humid weeks / spills drying slowly | ★★★☆☆ |
| 6 | 60–65% | High expansion risk | Wet mopping, humidifier mis-set | ★★☆☆☆ |
| 7 | > 65% | Severe expansion + seam stress | Persistent dampness under mats | ★☆☆☆☆ |
How to use this table: These “durability” star ratings are a practical risk rubric based on moisture-stability principles described in NWFA wood-flooring maintenance guidance (NWFA guidance on moisture and wood flooring) and the general reality that engineered floors move with humidity. Always defer to your specific manufacturer’s RH recommendations in your installation/care documentation.
Frequently Asked Questions
What should I do first if my engineered wood floor in the playroom has a scratch or dent?
Start by cleaning the area with a hardwood-safe cleaner and a soft microfiber cloth so you can see the damage clearly. Light scratches can often be repaired with an engineered wood floor repair kit (matching filler/putty) followed by a color-matched stain marker or wood-tone wax. For deeper dents, you may need to sand lightly and re-fill, then seal with a compatible topcoat to help the repair blend and resist moisture. Always avoid harsh chemicals or excess water, since engineered wood flooring can be affected by water intrusion at seams.
How do I repair water damage or bubbling on engineered wood floors in a playroom?
If you notice cupping, bubbling, or lifting, stop using the area and dry it quickly—use fans and dehumidification rather than heat, which can worsen warping. Remove any standing water and check whether the subfloor is wet; if the core or underlayment has absorbed moisture, the affected plank(s) may need to be replaced. For minor bubbles, careful flattening and drying sometimes works, but repairs should be done with moisture-safe guidance because engineered wood is only as stable as its installation system and moisture conditions. If the damage is extensive, replacing planks is usually the safest long-term fix to prevent mold and permanent separation.
Why does my engineered wood floor keep separating or gapping in the playroom?
Gapping often comes from seasonal humidity changes, especially in rooms where kids bring wet shoes or where heat/AC settings fluctuate. It can also be caused by an improper installation—such as missing expansion gaps, floors laid over uneven subfloors, or inadequate acclimation time before installation. To address it, check relative humidity, use a humidifier/dehumidifier if needed, and inspect whether the subfloor remains level and dry. If the gap is small, you may be able to manage it by stabilizing indoor humidity; if it’s wide or accompanied by loose planks, replacing damaged boards or reworking sections may be necessary.
Which repair method is best for chipped edges or damaged wear layers on engineered wood?
The best method depends on whether the top wear layer is just scratched or actually chipped through. If the damage is shallow, use a matching wood filler or putty, then sand lightly and apply a floor-finish or topcoat compatible with engineered wood floors. If the wear layer is too thin or the chip exposes deeper layers, you’ll typically need to replace the affected plank(s) for a reliable, durable result in a high-traffic playroom. For the most seamless outcome, choose a repair kit designed specifically for engineered wood flooring and match the finish sheen.
How can I fix a loose or popping plank in engineered wood flooring without ruining the rest of the floor?
First, stop foot traffic and remove baseboards or trim if you need access to the planks near the perimeter or click joints. For loose boards, carefully disassemble and re-seat the locking mechanism if the installation allows it; sometimes a damaged tongue-and-groove joint prevents a secure click-in. If the plank is warped or the joint is broken, replacement is often the cleanest solution—install a new matching engineered wood plank and ensure proper alignment and expansion spacing. After repair, maintain stable indoor humidity in your playroom and avoid flooding the area with mops to help prevent recurrence.
📅 Last Updated: October 19, 2026 | Topic: How to repair engineered wood floors in a playroom? | Content verified for accuracy and freshness.
References
- Engineered wood
- Wood flooring
- Floor sanding
- Wood finishing
- https://www.cdc.gov/niosh/topics/wooddust/
- https://www.epa.gov/lead/renovation-repair-and-painting-program
- https://www.fpl.fs.fed.us/documnts/fplgtr/fpl_gtr190.pdf
- https://scholar.google.com/scholar?q=engineered+wood+floor+repair+patching+replacement Google Scholar
- https://scholar.google.com/scholar?q=engineered+hardwood+floor+buckling+repair+moisture Google Scholar
- https://scholar.google.com/scholar?q=wood+floor+sanding+dust+control+HEPA+NIOSH+wood+dust Google Scholar