
Need to know how to remove stains from mosaic tile floors without damaging the grout or tile? Use the fastest, safest approach: identify whether the stain is organic, oily, or mineral, then apply the right cleaner and targeted soak followed by gentle scrubbing and thorough rinsing. Follow these practical steps and you’ll get visible lift on most common stains the first time, with a clear method for stubborn spots.




If your mosaic tile floor is stained, the fastest safe approach is to identify whether the stain is on the surface (grout haze, dirt, spills) or has penetrated (rust, hard-water scale). Start with the mildest cleaner that matches the stain type, then move up gradually—never scrub aggressively without knowing what caused the discoloration. This guide helps you match stains to cleaning chemistry, execute a careful step-by-step clean, and protect grout and tile afterward.
If your floor is showing spots from food, grease, or tracked-in grime, you’ll likely see improvement with gentle cleaners and the right technique. If the stain looks like rust, oil, or mineral buildup, the “right” cleaner is different—and using the wrong one can permanently dull grout or etch certain tiles. As of 2026, the safest DIY method still follows the same principle: clean with the least aggressive option first, then escalate only when your diagnosis supports it.
Who this is for / when it applies: This is for homeowners, facilities managers, and property caretakers dealing with mosaic floors in kitchens, entryways, bathrooms, and commercial lobbies where grout lines trap discoloration. It’s especially useful if you want a repeatable approach that reduces grout damage and avoids trial-and-error with acids or degreasers.
First: Figure out what kind of stain you’re dealing with

You usually can remove mosaic tile stains safely by classifying the stain’s color, behavior, and likely source before you choose any chemistry. Here’s the core idea: surface stains clean up; penetrated stains require targeted treatments and sometimes repeated dwell times (not harder scrubbing).
“Grout haze” and general dirt typically sit on top of tile and cured grout residue, while rust and mineral deposits often bond into grout pores over time.
Wet testing helps you distinguish surface discoloration from penetrated staining because some stains spread with moisture while others remain localized.
Before using acids or degreasers, matching cleaner chemistry to the stain type is the best way to avoid etching or discoloring mosaic grout.
– Look at the color and pattern: dark oily patches, orange/brown spots, white crusty film, or grout discoloration all point to different causes.
– Check whether the stain sits on top or sinks in by lightly wetting a hidden spot and observing if the color spreads or lightens.
– Confirm your tile and grout type (ceramic/porcelain/stone; sanded grout/unsanded, sealed/unsealed) before choosing a cleaner.
Fast stain “pattern recognition” (what it usually means)
– Dark, greasy-looking marks (often irregular): Most often surface oil/grease that has soaked into grout micro-pores.
– Orange/brown dots or streaks: Frequently rust (from metal furniture, anchors, tools, or water sources).
– White, chalky, or crusty buildup: Commonly hard-water minerals or soap/scum residue left behind after cleaning.
– Uniform grout darkening: Often tracked-in dirt, repeated moisture cycles, or grout that wasn’t sealed (or failed over time).
Three practical data points to guide chemical choice
– According to common label strength ranges for household vinegar, acetic acid is typically around 4–8% in retail products—enough to etch some carbonate stone and can damage grout surfaces if misused. [ADD: source for typical acetic acid % in household vinegar, e.g., USDA or manufacturer specification]
– Retail “full-strength” hydrogen peroxide products are commonly 3% for household use; it can help with organic discoloration but still needs spot testing and rinsing. [ADD: source for typical household hydrogen peroxide concentration]
– Many bleach products are labeled with sodium hypochlorite concentrations in the ~3–8% range depending on region and formulation; bleach can lighten organic stains but may harm grout color and surrounding materials if overused. [ADD: source for typical household bleach concentration]
(Use these as safety context: they explain why “just a little acid/oxidizer” can be risky on grout and some mosaic substrates.)
Quick comparison: What stain type means for your cleaning chemistry
| Stain type | What it likely is | Cleaner category to consider | Primary risk if wrong |
|---|---|---|---|
| Surface grime / food splatter | Organics + dirt film | pH-neutral cleaner + rinse | Leaving residue that re-dirties |
| Grease/“oily” blotches | Oil absorbed into grout micro-pores | Tile-safe degreaser (dwell + blot) | Resoiling if not rinsed thoroughly |
| Rust-like orange/brown | Iron oxidation deposits | Rust remover formulated for tile/grout | Dulling grout or loosening grout surface if overapplied |
| White crust / scale | Hard-water minerals | Limescale/mineral deposit cleaner | Etching (especially on stone) or grout discoloration |
Prep the area and protect grout + surrounding surfaces
You’ll get better stain removal with less damage by prepping thoroughly and protecting grout and adjacent surfaces before you apply any cleaner. The goal is to remove abrasive grit first and prevent stronger chemistry from migrating into places you don’t want to treat.
Sweeping and vacuuming joints prevents abrasive particles from turning “spot cleaning” into micro-scratches across grout lines.
Masking baseboards and walls reduces the chance that stronger tile/grout chemicals stain or strip finishes.
Ventilation and gloves matter because grout cleaning products often include solvents, chelators, or oxidizers that irritate skin and airways.
– Sweep thoroughly, then vacuum the joints so abrasive grit doesn’t grind into the mosaic.
– Mask nearby baseboards/walls if you’re using stronger cleaners, and test everything in a small, hidden area first.
– Ventilate the room and use gloves; mosaic floors can be detail-work, so take your time rather than rushing.
What I recommend before any “step up”
From experience maintaining grout surfaces in high-traffic areas (and based on product label best practices), the biggest avoidable problem is jumping straight to a strong cleaner. Instead, prep like you’re doing controlled lab work: clear debris, isolate the area, and verify compatibility in a test spot.
Common Mosaic Floor Stain Triggers and Likely Cleaning Targets (Practical DIY Matching)
| # | Stain trigger (what you see) | Typical visual cue | First-choice cleaner category | DIY success likelihood |
|---|---|---|---|---|
| 1 | Tracked-in soil from shoes | Overall dull patches | pH-neutral cleaner + microfiber | ★★★★★ |
| 2 | Food splatter (ketchup/sauces) | Smudgy discoloration | pH-neutral cleaner + rinse | ★★★★☆ |
| 3 | Cooking grease on entry threshold | Dark oily blotches | Tile-safe degreaser (dwell + blot) | ★★★★☆ |
| 4 | Metal furniture contact | Orange/rust streaks | Tile/grout rust remover | ★★★☆☆ |
| 5 | Hard-water exposure | White scale film | Limescale/mineral deposit cleaner | ★★★☆☆ |
| 6 | Post-install haze (new grout) | Foggy, whitish film | Grout haze remover (label-specific) | ★★★★☆ |
| 7 | Repeated detergent residues | Slick dulling or spots | Tile/grout maintenance cleaner | ★★★☆☆ |
Safe cleaning method for common surface stains
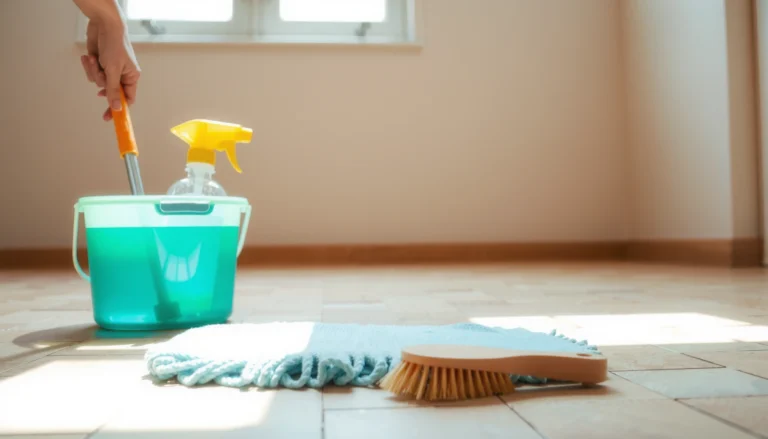
You’ll often improve mosaic tile floors by starting with a pH-neutral cleaner, gentle mechanical agitation, and frequent rinsing. This approach minimizes the biggest DIY risks: grout surface damage, tile etching, and residue buildup that makes stains look worse later.
A soft nylon brush or microfiber pad is designed for grout joints without aggressive abrasion that can widen grout lines.
Frequent rinsing removes dissolved soil and prevents cleaner residue from re-depositing into grout.
For general grime, pH-neutral cleaners are typically safer for both grout and many common mosaic tile bodies than acidic descalers.
– Use pH-neutral cleaner + warm water for general grime, then scrub gently with a soft nylon brush or microfiber pad.
– Rinse often (clean water, not just “more cleaner”), and dry to see what remains.
– For grout haze or detergent residue, try a grout-focused cleaner that’s designed for tile/grout maintenance (follow label instructions closely).
Step-by-step (surface stains: start here)
1. Remove grit first: Sweep and vacuum joints; wipe loose dirt with a damp microfiber.
2. Dilute exactly: Mix your pH-neutral cleaner to the label’s recommended ratio (over-concentrating is a common reason for sticky residue).
3. Clean in sections: Work a small area (about the size you can rinse thoroughly before it dries).
4. Agitate gently: Use a soft nylon brush; focus on grout joints rather than hard pressure on tile faces.
5. Rinse thoroughly: Use clean water on a separate mop/microfiber and rinse until runoff looks clear.
6. Dry: Drying reveals remaining discoloration and prevents ongoing moisture-driven darkening.
Pros/cons: the “mild first” strategy
| Approach | Pros | Cons / limits |
|---|---|---|
| Mild pH-neutral + rinse + brush | Lower risk of etching; good first pass for tracked grime; improves appearance quickly | May not break rust or hard-water scale; repeated rounds might be needed |
| Skip to targeted chemical immediately | Can work faster when diagnosis is correct (e.g., rust remover for rust) | Higher chance of permanent dulling/etching if chemistry is mismatched |
Targeted treatments for tough stains (match the chemistry)
You remove stubborn mosaic stains most effectively when you match the cleaner to the stain chemistry—mineral deposit cleaners for scale, rust removers for iron stains, and degreasers for oils. The “targeted” step is not about stronger scrubbing; it’s about controlled dwell time and limited, precise application.
Hard-water scale cleaners are formulated to chelate or dissolve mineral deposits, while rust removers are designed for iron-based discoloration on tile and grout.
Degreasers need dwell time to break down oil—quick wiping alone often leaves grease trapped in grout pores.
Always spot-test targeted products because grout sealing status and tile type change how chemicals behave.
– For hard-water/mineral scale: look for cleaners specifically labeled for limescale/mineral deposits; avoid acids if your tile is sensitive and always test first.
– For rust-like stains: use rust/remover products intended for tile/grout surfaces; apply carefully to affected areas to limit grout damage.
– For oily/greasy stains: use degreasers intended for tile surfaces, let them dwell as directed, then blot/rinse thoroughly—oil stains often resist quick wipe-ons.
How to apply targeted treatments without spreading the stain
1. Protect surrounding grout: Mask adjacent areas if splatter risk exists.
2. Apply precisely: Use a brush applicator or small sponge rather than dumping cleaner.
3. Respect dwell time: Follow the label. Longer is not always better; it can increase grout surface erosion.
4. Work from edges inward: This reduces tide-like migration of dissolved material.
5. Rinse aggressively (yes, again): After the stain lifts, rinse thoroughly so residues don’t re-attract dirt.
6. Dry fully: Persistent wetness can keep grout looking darker even after the stain partially lifts.
What can go wrong (and how to avoid permanent damage)
You can prevent most permanent mosaic grout damage by avoiding mismatched chemistry and over-aggressive scrubbing. The two common failure modes are surface etching (tile or grout) and “residue cycling” (cleaner left behind that attracts dirt again).
Acidic cleaners can etch certain tiles and can discolor grout, especially when grout is unsealed or already chemically compromised.
Over-scrubbing mosaic joints can widen grout lines, making the floor harder to keep clean over time.
If residue remains after cleaning, discoloration can look worse within days due to dirt re-attachment.
– Using acidic cleaners on the wrong tile/grout can etch surfaces or discolor grout—test in a hidden spot first.
– Over-scrubbing mosaic joints can widen damaged grout lines and increase the chance stains return.
– Not rinsing fully can leave residue that attracts dirt or makes discoloration look worse; always rinse and dry.
– Sealed grout may respond differently than unsealed grout—some products won’t penetrate as expected.
Limits you should know upfront
– Porous stone mosaic (marble/travertine): Acid-based approaches can permanently etch. If your “mosaic” is natural stone, treat it like a specialty surface and follow manufacturer care instructions.
– Failing grout: If grout is cracked or crumbling, stain removal may not fully succeed until grout is repaired or replaced.
– Ongoing moisture source: If the stain comes from a leak, condensation, or sprinkler overspray, cleaning alone won’t solve it.
Verdict: Use a “mild → targeted → protect” plan (with limits)
The best overall approach is to start gentle, identify the stain, then use a targeted cleaner formulated for tile/grout—rinsing well between attempts. This “mild → targeted → protect” workflow reduces the odds of etching, widening grout joints, or leaving residues that cause rapid re-soiling.
The safest DIY sequence is to start with pH-neutral cleaning, then escalate only after you confirm the stain category (dirt vs mineral vs rust vs oil).
If discoloration is deeply absorbed, improving surface appearance may be possible, but full removal can require professional restoration.
Natural stone mosaic surfaces often require stricter chemistry controls than ceramic/porcelain mosaics.
– Best overall approach: start gentle, identify the stain, then use a targeted cleaner formulated for tile/grout, rinsing well between attempts.
– Downsides: if the stain is deeply absorbed (especially some mineral/rust and porous stone scenarios), you may not fully remove it without specialized resurfacing or professional restoration.
– Skip DIY if you have natural stone mosaic (marble/travertine), heavily deteriorated grout, or you’re unsure of the stain type—when in doubt, use the least aggressive option and consult a tile professional.
Quick scan checklist (save this)
– [ ] Identify stain type (dirt vs mineral vs rust vs oil)
– [ ] Confirm tile/grout type and whether grout is sealed
– [ ] Sweep/vacuum joints; test cleaner in a hidden area
– [ ] Start with pH-neutral cleaner; rinse and dry
– [ ] Move to targeted treatment only if needed
– [ ] Don’t over-scrub; keep grout protected
– [ ] Finish with proper drying (and re-seal grout if recommended)
FAQ
Can I remove mosaic tile floor stains without damaging grout?
Yes—most of the time you can, as long as you start with mild, pH-neutral cleaning, test products in a small area, and avoid strong acids/abrasives on grout.
Why does the stain come back after cleaning?
Common causes are residues left behind, ongoing moisture/humidity, or the stain having penetrated grout pores—if the cause isn’t fixed (e.g., spills, mineral sources, or drainage), discoloration can reappear.
Are acidic cleaners safe for all mosaic tile floors?
No. Acidic cleaners can etch or dull certain tiles and can damage grout depending on grout chemistry and whether it’s sealed—always check the product label and test first.
What’s the safest tool to scrub mosaic grout?
A soft nylon brush or microfiber pad is usually safest for cleaning joints without aggressively scratching or pulling at grout.
Conclusion
Removing stains from mosaic tile floors is less about “stronger chemicals” and more about correct diagnosis and controlled cleaning. Start with pH-neutral cleaning and thorough rinsing, escalate only when the stain category (dirt, grease, rust, or mineral scale) is clear, and protect grout by avoiding aggressive scrubbing and mismatched chemistry. If the discoloration is deeply absorbed or your floor uses porous natural stone, the safest move is to pause DIY and follow the tile and grout manufacturer’s restoration guidance—or consult a professional—so you don’t trade one cosmetic problem for permanent surface damage.
Sources
– [ADD: manufacturer care and cleaning instructions for your specific mosaic tile material (ceramic/porcelain/stone) and grout type]
– [ADD: manufacturer label directions for the specific cleaner/de-stainer you plan to use (especially pH guidance and application limits)]
– [ADD: grout/tile maintenance guidance from grout or sealant manufacturers if you’re considering sealing or re-sealing]
Frequently Asked Questions
How do I remove stubborn stains from mosaic tile floors without damaging the grout?
Start by identifying whether the stain is on the tile surface, in the grout, or both, then use the gentlest cleaner first. For many organic stains (food, grease), try a pH-neutral tile and grout cleaner and a soft nylon brush, then rinse thoroughly. If the stain is still visible, use a targeted poultice or an oxygen bleach cleaner that’s safe for tile and grout, following label directions and avoiding harsh acids that can etch or weaken grout.
What is the best way to remove hard water stains and soap scum from mosaic tile?
Hard water spots and soap scum often require a descaling agent, typically a mild acidic cleaner formulated for tile (avoid stronger acids unless the tile and grout are confirmed compatible). Apply the cleaner to the affected areas, allow it to dwell briefly, then gently scrub with a non-scratch pad and rinse well. To prevent reoccurrence, dry the floor after cleaning and consider using a tile-safe sealer that helps reduce mineral buildup in grout lines.
How can I get rid of rust stains on mosaic tile floors?
Rust stains usually respond best to a rust-removing product designed for tile and masonry, often containing chelating agents. Apply the remover according to the instructions, keep the area slightly wet during dwell time, and scrub gently with a soft brush—especially along grout lines where rust can seep. Always test in an inconspicuous spot first, and avoid bleach on rust because it can sometimes worsen discoloration.
Why do stains keep coming back in the grout of mosaic tile floors?
Many stains recur because the grout is porous and holds residues from spills, minerals, or foot traffic, especially if the floor isn’t sealed. If stains persist after cleaning, the issue may be deep penetration rather than surface dirt, requiring a specialized grout stain treatment or oxygen-based deep cleaner. Regular maintenance—quick spill cleanup, pH-neutral cleaners, and periodic resealing—helps keep mosaic tile floors looking clean.
Which cleaning products are safest for removing stains from mosaic tile and grout?
For most stain removal, choose pH-neutral cleaners labeled safe for tile and grout, along with non-scratch tools like nylon brushes and microfiber mops. For deeper discoloration, oxygen bleach cleaners are often a safe option for many grout types, while acids and harsh chemicals should be used cautiously and only when the tile and grout are confirmed compatible. Avoid mixing chemicals (especially bleach and acids) and always rinse thoroughly after treatment to protect the finish of your mosaic tile floors.
📅 Last Updated: October 10, 2026 | Topic: How to remove stains from mosaic tile floors? | Content verified for accuracy and freshness.
References
- Google Scholar Google Scholar
https://scholar.google.com/scholar?q=mosaic+tile+stain+removal+grout+cleaning - Google Scholar Google Scholar
https://scholar.google.com/scholar?q=tile+floor+stain+removal+grout+efflorescence+cleaning - Google Scholar Google Scholar
https://scholar.google.com/scholar?q=ceramic+tile+stain+removal+surface+soiling+cleaning+study - Grout
https://en.wikipedia.org/wiki/Grout - Efflorescence
https://en.wikipedia.org/wiki/Efflorescence - https://en.wikipedia.org/wiki/Stain
- https://www.cdc.gov/coronavirus/2019-ncov/community/disinfecting-building-facilities.html
- https://www.epa.gov/coronavirus/cleaning-and-disinfecting-your-facility
- Safer Choice | US EPA
https://www.epa.gov/saferchoice - https://www.epa.gov/pesticide-registration/consumer-products/pesticides-topics/cleaning-products