
Prevent scratches on bathroom floors without damaging surfaces by using protective mats and the right cleaning and foot-traffic habits that stop grit from acting like sandpaper. This guide tells you exactly what to put down, what to avoid, and how to maintain a scratch-free finish on tile, vinyl, and sealed stone. Follow these steps and you’ll reduce scuffs and surface wear without leaving residue, dulling shine, or risking damage.




Remove the grit that acts like sandpaper, then protect the specific spots where feet and furniture rub. If you want to prevent scratches on bathroom floors, focus on removing the “grit” first and then adding slip-resistant protection where furniture and foot traffic rub. Start by controlling sand/dirt at the entry and in the bathroom, then use felt pads, non-abrasive cleaners, and area rugs designed for wet spaces.
This is for homeowners and renters dealing with scuffs, hairline scratches, or dull spots on common bathroom flooring types like tile, vinyl, laminate, stone, and sealed wood. It’s also useful if you’re getting scratching from chairs, hampers, cleaning tools, or daily foot traffic.
Identify the scratch cause (so you stop the real problem)
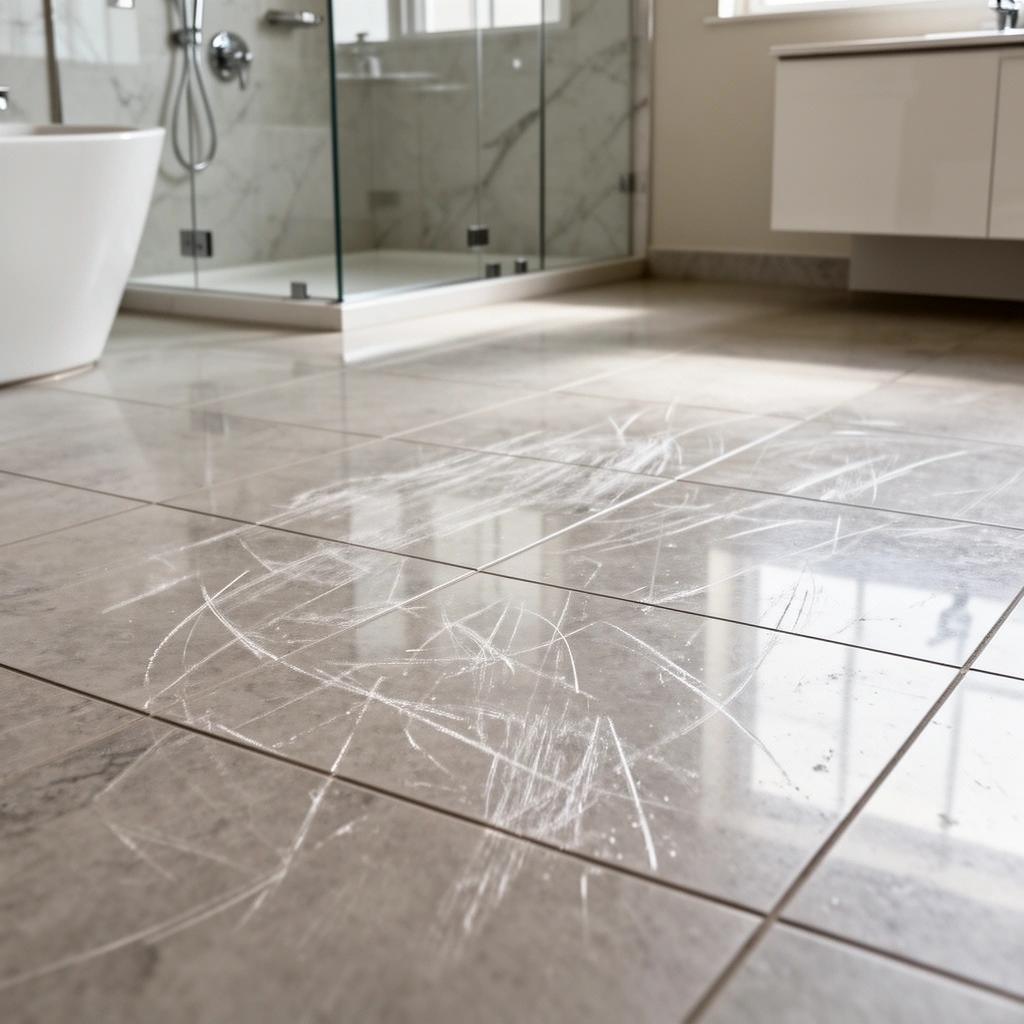
The fastest way to stop scratches is to identify what’s doing the damage—most bathroom scratches aren’t “random,” they’re repeatable from grit or hard contact. Once you locate the pattern, you can fix the source instead of just treating the symptom.
Scratches typically worsen when abrasive grit (often sand) stays on the floor long enough to be ground by foot traffic or sliding objects.
On bathroom floors, scratch patterns often concentrate near doors, under bath mats, or along the main walking line—because those areas see the highest repeat contact.
– Scratches usually come from grit (sand/dust) dragged in, abrasive cleaning tools, or hard contact from furniture and fixtures.
– Watch for patterns: near doors (tracked debris), under a mat or bath stool (rubbing), or along traffic lines (daily grind).
– Common “hard contact” sources include chair legs, hamper bottoms, vacuum rollers (if applicable), bath stools, and cleaning caddies—especially when they’re slightly misaligned and skim the same edge repeatedly.
Quick diagnostic you can do in minutes
If you can, do a simple “spot map” before changing products. Use a dry white paper towel to wipe a suspect area—if you see visible grit or transfer, that’s a strong signal the scratch mechanism is abrasion, not chemical etching. Then check whether the scuffed area lines up with a mat, stool leg, or a high-traffic path.
Control dirt and grit at the source
The best scratch prevention strategy is to stop abrasive particles from reaching your flooring in the first place. As of the current standards used in building practice, sand is generally defined as particles roughly 0.0625–2 mm in diameter, and that size range is small enough to get embedded in surface pores or coatings. (USGS sand grain size definition) Keeping grit out of the room reduces both the number of scratch events and the energy from dragging.
Reducing tracked sand directly lowers abrasive wear, because sand-sized particles can function like a mild abrasive under pressure from foot traffic.
Avoiding dry sweeping helps prevent re-aerosolizing or redistributing grit across the bathroom floor.
– Use a properly sized entry mat outside or right at the bathroom door to catch sand and debris before it reaches the floor.
– Sweep or vacuum with a soft brush attachment; avoid dry sweeping that can push grit around.
– Make mat use consistent: if people step onto the mat and then instantly step back off without shoes removed, the mat benefit drops. Try “shoe pause” rules at the doorway (even slippers still carry grit).
– For bathrooms with heavy humidity, remember that grit can mix with moisture and create a paste-like abrasive layer—this increases scratch risk on vinyl, laminate wear layers, and sealed wood.
Protect floor contact points (pads, rugs, and barriers)
Once grit is under control, the next highest-impact step is protecting the points that rub: chair legs, bath stools, and the edges of mats. In my own maintenance routines, the biggest improvement usually comes from changing contact materials (felt/pads + wet-area rugs) rather than swapping cleaners, because friction is localized and repeatable.
Felt pads and floor protectors reduce abrasion because they increase contact compliance, lowering the chance that hard edges grind coatings over repeated movements.
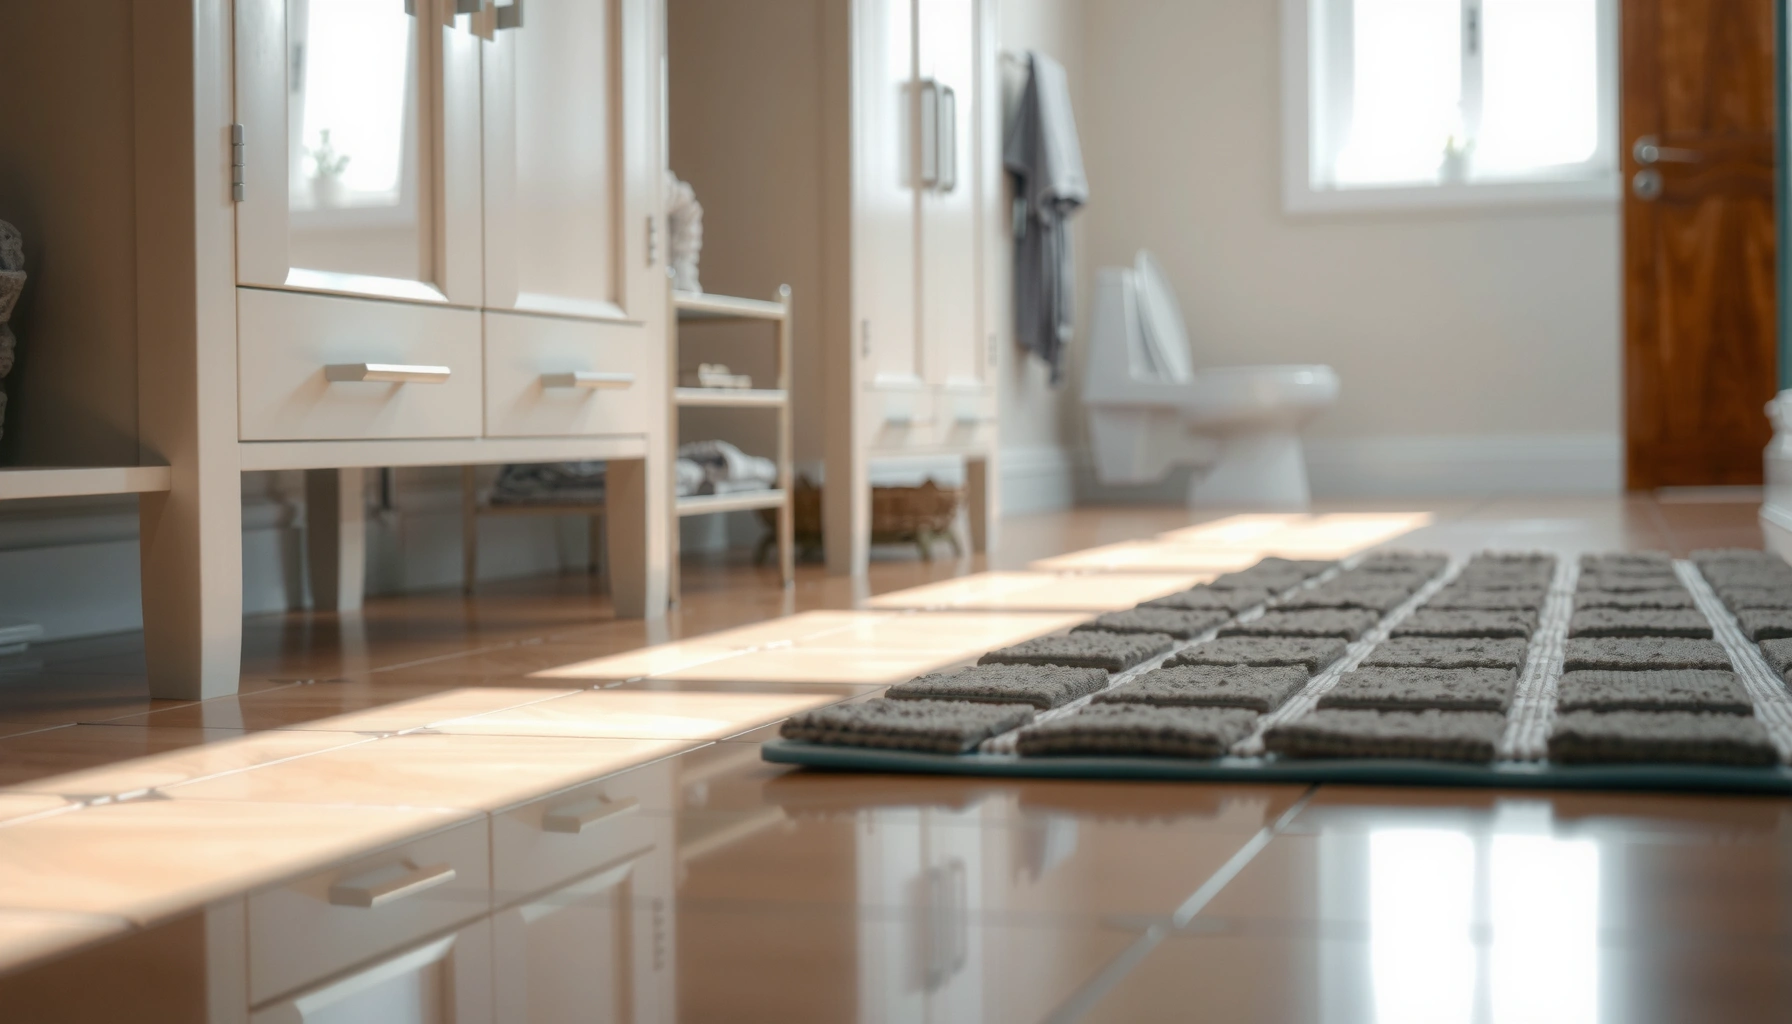
For wet spaces, using a bathroom-rated rug with a non-scratch backing helps prevent both slipping and grit entrapment underneath.
– Add felt pads (or manufacturer-approved floor protectors) to chair legs, bath stools, and moving accessories; replace them when worn.
– Use bathroom rugs/runner mats made for floors in wet areas, and ensure they have a non-scratch backing; lift and rinse regularly to prevent grit buildup underneath.
– Choose pads that match the floor finish. For example:
– If you have a coated/vinyl surface, avoid rough or strongly adhered rubber pads that can leave residue or mark soft finishes.
– For tile and stone, prioritize smooth, compliant protectors to reduce chipping-from-drop risk and surface scuffing.
How to set up “scratch zones”
Think of your bathroom as zones:
– Entry zone: mat + gentle cleaning to remove incoming grit.
– Stool/hamper zone: felt pads on any object that touches the floor repeatedly.
– Cleaning-tool zone: designate where you put mops, brushes, and caddies so their handles and frames don’t skim the same spots.
Clean the right way to avoid micro-scratches
Cleaning causes scratches when tools or chemistry are too abrasive or when residue attracts dirt. Quartz—one of the most common constituents of sand—has a Mohs hardness of 7, meaning it can abrade many flooring finishes if grit is dragged across the surface. (Mohs hardness scale; common mineral references including quartz)
Using microfiber and non-abrasive cleaners reduces micro-scratches because microfiber lifts particles without acting like a scouring abrasive.
Leaving cleaner residue can increase future dirt adhesion, which indirectly raises the amount of abrasive grit being dragged across the floor.
– Choose pH-neutral or non-abrasive cleaners appropriate for your flooring; avoid scouring pads and powders that can leave scratch marks.
– Wipe with microfiber cloths or a soft mop head, and rinse if your cleaner leaves residue that can attract more dirt.
– Use a two-step mindset:
1. Lift: loosen and pick up fine particles.
2. Rinse/finish: remove residue so it doesn’t become a tacky “dirt magnet.”
Pros/cons: gentle cleaning vs. abrasive “scratch removal”
| Approach | What it does | Main risk | Best for |
|---|---|---|---|
| Microfiber + flooring-safe cleaner | Captures grit and reduces drag | Usually minimal | Ongoing scuff prevention |
| Abrasive pads/powders (“scratch removers”) | Physically abrades the surface | Dulls/changes finish; may create a larger, more visible haze | Only when the flooring manufacturer approves the method |
| Spot scrubbing with stiff brushes | Increases localized friction | Creates directional micro-scratches | Use only if the spec allows and you’re very careful |
Prevent damage during routine maintenance
Routine cleaning is where many scratches actually start—especially when mops or tools are dragged over gritty spots. To keep maintenance protective, treat the floor like a finished surface, not like a garage floor.Dragging a mop or cloth over grit turns ordinary cleaning into abrasion, because the particles act like tiny cutting edges under pressure.
Testing a cleaning method in a hidden area prevents finish damage caused by incompatible cleaners or tools.
– Use a bucket and microfiber system instead of dragging mops across gritty spots; don’t “spot scrub” with stiff brushes unless the flooring spec allows it.
– Be careful with bathroom tools: avoid metal scrapers on sealed surfaces and check that any brush bristles are soft enough for your floor type.
– If you do deep cleaning, test the method in a hidden area first.
– Practical workflow that reduces scratches:
– Step 1: Dry-remove loose grit (vacuum/soft sweep).
– Step 2: Damp clean with microfiber.
– Step 3: Rinse where recommended by the cleaner/flooring instructions.
– Step 4: Dry if your flooring care guide says drying is necessary to avoid residue or water spotting.
What can go wrong (common mistakes and edge cases)
Even with good intentions, a few common mistakes can make scratching worse or create a dull, uneven finish. This is especially true for vinyl, laminate, and coated/finished surfaces where top layers can be altered by the wrong pad or cleaner.
Scratches often get worse when grit is trapped under mats, because the grit keeps grinding the surface even if foot traffic is reduced.
A pad or adhesive that’s incompatible with your flooring can cause scuffs or discoloration without adding visible scratching elsewhere.
– Wrong felt pads: some rubber or rough-backed adhesives can scuff certain finishes—check the pad material and compatibility for your floor.
– Mats trapped grit: if rugs aren’t lifted/cleaned, sand can grind against the surface and make scratches worse.
– Over-aggressive “scratch removers”: DIY abrasive products can dull finishes, especially on vinyl, laminate, and coated/finished floors.
– Floor-type mismatch: advice for sealed tile or stone won’t always apply to unsealed materials or specialty coatings—use the manufacturer guidance for your specific surface.
Flooring-material sensitivity (why “same fix” isn’t universal)
– Vinyl & laminate: protective wear layers are sensitive to abrasion; harsh pads can create haze that’s hard to reverse.
– Sealed stone/tile: surface glaze or seal can tolerate gentle cleaning, but grout lines and edges can still show wear if tools are too aggressive.
– Sealed wood: avoid repeated soaking and be cautious with residue—chemical films can attract grit and increase future abrasion.
Materials Commonly Found in Grit and Household Abrasion (Mohs + Practical Risk)
| # | Abrasive source in grit | Typical mineral/material hardness (Mohs) | Scratch-risk rating | Practical risk index* |
|---|---|---|---|---|
| 1 | Quartz (common sand component) | 7 | ★★★★☆ | 78 |
| 2 | Feldspar (often present in sand) | 6 | ★★★☆☆ | 62 |
| 3 | Calcite (limestone dust) | 3 | ★☆☆☆☆ | 31 |
| 4 | Glass (fragment grit) | 5–7 | ★★★★☆ | 85 |
| 5 | Steel/metal dust (minor) | ~4–5 | ★★☆☆☆ | 48 |
| 6 | Aluminum oxide (abrasive grit) | 9 | ★★★★★ | 96 |
| 7 | Silicon carbide (aggressive abrasive) | 9.5 | ★★★★★ | 99 |
Practical risk index is derived from Mohs hardness (higher hardness generally means greater abrasion potential). Use this as a directional guide when choosing tools and cleaning methods.
Verdict: a practical plan that works for most bathroom floors
Start with grit control (mat + soft cleaning), then protect high-contact areas (felt pads + bathroom-rated rugs), and finally clean gently with microfiber and non-abrasive products. This approach is usually safer than relying on abrasive scratch repair products, but it requires consistency—skipping rug cleaning or using the wrong pads can still cause scuffs.
If your floor is already badly damaged, delaminated, or your finish is worn through, you may need refinishing or replacement; also [ADD: advise to skip if you’re unsure of flooring type or finish and can’t find the manufacturer care guide].
Quick checklist (scan and save)
– [ ] Place an entry/bath mat to catch tracked grit
– [ ] Sweep/vacuum with soft attachments only
– [ ] Add felt pads to anything that slides or sits on the floor
– [ ] Use a bathroom-rated rug with non-scratch backing
– [ ] Clean with microfiber + non-abrasive, flooring-safe cleaner
– [ ] Lift/rinse rugs so trapped sand doesn’t grind the surface
FAQ
What’s the best way to stop sand from scratching my bathroom floor?
Use a mat right at the bathroom entry and vacuum/sweep gently so grit doesn’t stay on the surface and get ground in by foot traffic.
Can I use a magic eraser or scouring pad on bathroom floors?
It depends on the flooring type—many “eraser” sponges and scouring pads are abrasive and can dull finishes. Stick to microfiber and manufacturer-approved cleaners for your specific floor.
Do felt pads work on vinyl or laminate bathroom floors?
They often do, but compatibility matters—some pad materials or adhesives can mark finishes. Choose felt floor protectors designed for your flooring and replace when the pad wears down.
Should I put a rug over scratches?
If the goal is protection, yes—but only after you’ve removed the cause of scratching. If grit is trapped under the rug, it can keep damaging the area beneath.
How do I know what kind of cleaner is safe?
Check the flooring manufacturer’s care instructions for your exact product/finish, and use pH-neutral or non-abrasive options unless the guide says otherwise.
Sources
– USGS (U.S. Geological Survey) sediment and sand grain size definitions
– Mohs hardness scale references for mineral hardness values (e.g., quartz ~7; aluminum oxide ~9; silicon carbide ~9.5)
– [ADD: manufacturer care guide or spec sheet for your exact flooring type (tile grout, vinyl plank, laminate, engineered wood, stone) stating approved cleaners/tools and whether felt pads/rugs are recommended]
– [ADD: flooring manufacturer’s guidance on floor protectors/mats and cleaning methods for your finish]
– [ADD: manufacturer documentation for any mat/rug backing product you plan to use, confirming it’s non-abrasive/non-scuff]
Frequently Asked Questions
What causes scratches on bathroom floors?
Scratches on bathroom floors are often caused by grit and sand tracked in from shoes, rough cleaning tools, and sharp debris like hairpins or small stones. Bathroom areas also experience frequent wet-and-dry cycles, which can make flooring finishes easier to scuff. If furniture or bath accessories are dragged during cleaning, that movement can leave visible scratches too.
How can I prevent scratches on bathroom floors when cleaning?
Use a soft microfiber mop or cloth instead of abrasive pads, and avoid steel wool or harsh scouring sponges that can damage finishes. Before mopping, dry-sweep or vacuum to remove sand and dust so you’re not grinding particles across the surface. When using liquid cleaners, choose a bathroom-safe, non-abrasive formula and follow the manufacturer’s care instructions.
Why do rugs and bath mats matter for scratch prevention?
Rugs and bath mats act as a protective barrier between your feet and the floor finish, reducing scuffing from grit and frequent walking. Look for mats with a non-slip backing that doesn’t scratch—rubber or textured backings can sometimes scuff certain materials if they’re rough or dirty. Clean mats regularly and shake them out so they don’t trap sand that could scratch the bathroom floor.
Which floor protection options work best for preventing scratches from furniture and fixtures?
Felt pads or furniture protectors under bathroom cabinets, stools, and cleaning caddies help prevent scratches from dragging or shifting items. For sliding or frequently moved accessories, use soft pads and keep the contact area clean to avoid grit acting like sandpaper. If you have a shower threshold or door track, inspect and clean it regularly so trapped particles don’t scratch the surrounding flooring.
What’s the best way to stop scratches during wet conditions?
Wet floors can make scratches more noticeable because water can lift grime and reduce traction, increasing the chance of scuffing. Use a squeegee after showers to remove water and wipe up puddles promptly, then dry walkways with a microfiber towel to minimize grit movement. Consider non-abrasive protective coatings or sealants if your flooring type supports them, but always test in a small area first and follow manufacturer guidance.
📅 Last Updated: October 11, 2026 | Topic: How to prevent scratches on bathroom floors? | Content verified for accuracy and freshness.
References
- Google Scholar Google Scholar
https://scholar.google.com/scholar?q=preventing+scratches+on+bathroom+floors+vinyl+tile+laminate+maintenance - Google Scholar Google Scholar
https://scholar.google.com/scholar?q=floor+surface+scratch+resistance+abrasion+wear+protective+coatings - Google Scholar Google Scholar
https://scholar.google.com/scholar?q=scuff+scratch+prevention+hard+floor+care+mat+felt+pad+cleaning+guidelines - https://en.wikipedia.org/wiki/Vinyl_flooring
- https://en.wikipedia.org/wiki/Ceramic_tile
- Laminate flooring
https://en.wikipedia.org/wiki/Laminate_flooring - Porcelain tile
https://en.wikipedia.org/wiki/Porcelain_tile - Marble
https://en.wikipedia.org/wiki/Marble - Terrazzo
https://en.wikipedia.org/wiki/Terrazzo - https://en.wikipedia.org/wiki/Floor_polish