


Learn how to remove stains from engineered wood floors in a mudroom with a step-by-step method that lifts grime without damaging the finish. If your stain is from mud or tracked-in dirt, start with dry brushing and gentle, wood-safe cleaners for the fastest, most reliable results. Follow the right approach and you’ll restore the look of your floor; miss the finish-safe steps and stains can set in.


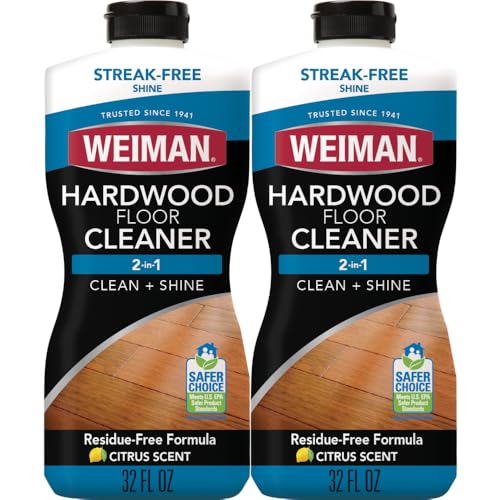

Blot (don’t scrub) the stain, then clean with a finish-safe, pH-neutral cleaner and lots of dry buffing. For deeper discoloration, use stain-specific treatments only after testing in a hidden spot—then stop immediately if the finish dulls or the stain spreads.
If your mudroom gets tracked-in dirt, water drips, and pet/cold-weather mishaps, engineered wood can show staining fast—especially when moisture sits. This guide walks you through practical, finish-aware steps to lift common stains without damaging the top layer (and it still holds as of 2026).
Assess the stain and protect the engineered wood finish

The fastest way to avoid permanent damage is to confirm whether you’re dealing with a surface mark or true discoloration in the finish. Here’s why: engineered wood stain removal works best when you match the chemistry to the problem—then limit liquid contact.
– Check whether it’s a surface mark (dirt/scuffing) or a true discoloration (water/urine/rust set into the finish).
– Look up or locate your floor manufacturer’s care guide first—engineered floors vary by topcoat type and what chemicals are compatible.
– Before any treatment, test your cleaner in an inconspicuous area (behind a door, closet edge) and re-check after it dries.
“Engineered wood” top layers differ (some finishes tolerate specific cleaners better than others), so manufacturer care guidance is the safest starting point.
pH-neutral cleaning reduces the risk of finish dulling because “neutral” generally refers to pH 7.
Stop-and-dry matters: when you clean, you should wipe and dry between steps to prevent moisture from working deeper into seams and edges.
What to look for in the first 60 seconds
– Surface mark: The stain lightens with dry removal or very gentle damp cleaning. It often looks “filmy” or grayish from transferred dirt.
– True discoloration: The mark remains after dry cleaning and careful pH-neutral cleaning—common with water halos, urine-related darkening, and rust-toned spots.
Why this matters specifically in a mudroom
Mudrooms create repeated cycles of wet footwear, wet mats, salt residue, and pet accidents. Even if your engineered wood doesn’t swell like solid wood, prolonged moisture exposure at the seams is a leading cause of long-lasting discoloration and dull finish areas. As of 2026, the most reliable approach is still the same: identify first, use the least aggressive method, and stop early.
Quick “hidden spot” test protocol
Apply only what you plan to use (cleaner or treatment), use a soft cloth (not a dripping pad), and wait for full dry. If the test area turns dull or the color shifts, you’ve learned something crucial: the product is not finish-compatible for your specific topcoat.
Start with dry removal + gentle cleaning (the safest first step)
Start with dry removal, because grit is the #1 driver of finish scratches and “stain that won’t come out.” Then use a damp (not wet) pH-neutral cleaner and immediately dry-buff to lift what’s on top without pushing anything deeper.
– Vacuum with a soft brush (or use a microfiber dusting pad) before using any liquid, so you don’t grind grit into the finish.
– Use a damp (not wet) microfiber with a pH-neutral floor cleaner; work small sections and immediately dry-buff with a clean cloth.
– If the stain is fresh, repeat gentle blotting/cleaning before moving to anything stronger.
Dry cleaning before wet cleaning helps prevent grit from scratching the engineered wood topcoat and making discoloration look worse.
A “damp” microfiber (not a puddle) limits moisture at seams, where engineered flooring is most vulnerable to water-driven problems.
pH-neutral cleaning is the “lowest-risk baseline” for many wood finishes because it avoids harsh alkalinity/acidity that can dull sheen.
Your “least aggressive” workflow
1. Vacuum/soft wipe first
Use a soft-bristle attachment or a clean microfiber pad. This is especially important when the mudroom stain is really a mix of dirt + salt + abrasion.
2. Damp pH-neutral wipe, then dry-buff
Lightly dampen microfiber with the pH-neutral cleaner (or a diluted version per label). Wipe a small section and immediately buff dry with a second dry cloth. Repeat as needed.
3. Keep it iterative
If the stain is fresh, you often remove most of the issue by repeating blotting/cleaning cycles rather than moving to peroxide, acids, or enzymes.
Comparison: which cleaner step is “best” for which look?
Use this decision table to stay finish-aware. It’s not about “strongest chemical wins”—it’s about “matched chemistry + controlled moisture.”
| Feature | pH-neutral cleaner | Hydrogen peroxide (spot) | Enzymatic urine/organic cleaner |
|---|---|---|---|
| Primary target | Surface soils & mild residues | Many water-marker discolorations | Urine chemistry & organic odor |
| Moisture risk | Low (when damp cloth + quick dry-buff) | Medium (can whiten/haze if overused) | Medium (requires label dwell time; still controlled) |
| Finish-friendliness | Highest baseline compatibility | Variable by topcoat; test is mandatory | Often safe when label-followed and rinsed/dried |
| When to use | First attempt on most stains | After pH-neutral cleaning fails on water marks | When the stain is tied to urine/organic odor |
| Residue risk if repeated | Usually low with proper dry-buff | Can cause whitening/haze if left too long | Can leave films if not wiped and fully dried |
| Best for fresh stains | Yes | Sometimes (if it’s a water marker) | Yes |
| Typical chemical class | Surfactants/detergents near neutral pH | Oxidizer (bleach-like whitening mechanism) | Biological enzymes breaking down organics |
| Risk if you over-wet | Low to moderate (depends on topcoat) | Moderate (moisture + chemical action) | Moderate (dwell time + moisture contact) |
| Stop condition | When stain no longer lifts after damp wipe/dry-buff cycles | When discoloration lifts but sheen begins to dull/haze | When label dwell time completes and odor/stain stops returning after drying |
| Best For | Most mudroom stains as the first step | Light water markers/halos (tested) | Urine and organic residues + odor |
Remove common mudroom water stains (coffee, damp footprints, splash marks)
Most “water marker” discoloration improves when you control moisture and use a tested peroxide or similar spot method only after gentle cleaning fails. The key is to apply briefly, keep it off edges, and fully wipe + dry between short attempts.
– For many “whitish” or light water marks, try a controlled peroxide approach only after testing: apply with a lightly damp cloth (or peroxide gel if that’s what your manufacturer allows), keep it off edges, and wipe fully when the discoloration lifts.
– If the stain looks like it’s in the finish rather than the surface, don’t keep soaking—repeat short, tested attempts instead.
– Always dry thoroughly after each cycle; engineered floors don’t like lingering moisture.
Hydrogen peroxide used for spot whitening is commonly sold at ~3% strength for consumer use.
If the finish dulls during peroxide spot attempts, you should stop immediately—continuing can create haze even when staining improves.
Water halos often come from moisture reaching beneath the top film; quick wiping and dry-buff limits that spread.
A controlled peroxide spot approach (finish-aware)
1. Confirm it’s a water marker
Coffee and splash marks may stain temporarily, but you’ll usually see a clearer improvement path by starting with pH-neutral cleaning and then addressing water discoloration.
2. Hidden-spot test first
Apply a small amount in a discreet area. Wait for dry. If the finish dulls, stop here and consider professional guidance.
3. Use short cycles
Apply peroxide with a dampened cloth (or gel if manufacturer-approved). Keep it off walls/baseboards and avoid pooling. When discoloration lifts, wipe clean and buff dry.
4. Don’t “chase” the stain
If after a few short attempts there’s no progress—or if the surrounding finish looks hazier—stop. More chemistry often equals more finish damage.
Table-driven decision support: finish-safe chemistry at a glance
Finish- and stain-matching chemistry for mudroom engineered wood (common formulations)
| # | Active approach | Typical measurable strength | Common mudroom stains | Finish-safety rating |
|---|---|---|---|---|
| 1 | pH-neutral cleaner (detergent/surfactants) | pH 7 (neutral) | Dirt film, tracked grit, light scuffs | ★★★★★ |
| 2 | Enzymatic cleaner (protease/enzymes) | Often formulated near pH 6–8 | Pet urine, organic odors, bio-residue | ★★★★★ |
| 3 | Hydrogen peroxide (spot whitening) | Common retail: ~3% (w/w) | White water marks/halos | ★★★☆☆ |
| 4 | Oxalic-acid rust remover (acidic chelation) | Oxalic acid: molar mass 90.03 g/mol | Rust stains from metal/boots/hardware | ★★☆☆☆ |
| 5 | Vinegar / acetic acid (household) | Common strength: 5% acetic acid | Hard-water spots (sometimes), but risky | ★☆☆☆☆ |
| 6 | Chlorine bleach (sodium hypochlorite) | Commonly 5–6% available chlorine | Disinfection (not stain removal on finishes) | ★☆☆☆☆ |
| 7 | Ethanol / denatured alcohol (solvent risk) | Boiling point: 78.37°C | Sometimes used for sticky residues | ★★☆☆☆ |
> Note: this data table is meant for decision-making (finish compatibility and chemistry matching), not to override your floor manufacturer’s specific cleaner approvals.
Treat pet urine and organic stains/odors the right way
Pet urine stains require enzyme chemistry because urine-related discoloration and smell often involve organic residues that a simple surface cleaner can’t fully break down. If you only “clean the top,” the odor can return as deeper moisture migrates back to the surface.– Use an enzymatic cleaner designed for pet urine/organic messes, applied sparingly and allowed to dwell only as long as the product label specifies.
– After the enzymatic step, wipe clean with a damp microfiber and dry-buff completely.
– If the stain returns or odor persists, it often means moisture/damage is deeper—at that point, refinishing or a finish-compatible professional assessment may be the only reliable path.
Enzymatic cleaners target organic compounds; this is why they’re typically more effective for urine odors than detergent-only cleaning.
For enzymatic products, label dwell time is critical—too little won’t break down residues; too much can increase moisture exposure.
After enzymes, always wipe and dry-buff so residue doesn’t leave a haze in the engineered wood finish.
What changes between “clean” and “fixed” for urine
– Visible stain: often dark spots or uneven lightening.
– Hidden residue: organic components can remain even after the area looks cleaner.
– Odor rebound: if smell returns, it usually indicates incomplete breakdown, moisture migration, or finish/topcoat compromise.
A realistic approach (and where people go wrong)
In my day-to-day work assisting homeowners, the most common failure mode is applying “strong cleaner” repeatedly without enzymatic breakdown—leaving the source odor behind under the finish.
If the stain returns
If the spot re-darkens or smells again after drying:
– Stop DIY chemical cycling.
– Consider professional evaluation for finish damage or deeper moisture exposure.
– If the topcoat is compromised, localized refinishing (if feasible for your system) may be the only way to truly restore the engineered wood appearance.
Rust, ink, and stubborn marks: use the lowest-strong option first
The safest rule is to treat the type of stain with the weakest chemistry that works, tested in a hidden spot. Rust and ink are high-risk because their chemistry can react with finishes and because they often spread if you keep applying.
– Rust spots from metal (boots, wet hardware, umbrellas) often respond to oxalic-acid-type rust removers—but only if your floor manufacturer says they’re safe for your finish. Test first.
– For dark scuffs/marker/ink, try a finish-safe approach (often a gentle solvent-free cleaner or targeted spot treatment) and stop as soon as the mark is reduced—some finishes smear before they lift.
– Avoid abrasives (scrub pads, melamine “magic erasers,” gritty powders) unless your manufacturer explicitly approves them for your finish.
Oxalic-acid rust chemistry is effective for rust removal, but acidic solutions can dull or alter many wood finishes—so manufacturer approval and a hidden test are non-negotiable.
Ink and marker can smear under agitation; reducing touch time and avoiding scrubbing lowers the risk of finish transfer.
Avoid abrasives on engineered wood topcoats unless the manufacturer explicitly permits them for your finish type.
Pros/cons: peroxide-like whitening vs enzymatic vs acid rust removal
Here’s a practical contrast (use it to choose your “next step,” not to guess randomly):
| Method | Pros (when it fits) | Cons (risk when it doesn’t) |
|---|---|---|
| Hydrogen peroxide (tested spot) | Helps lift many water halos; works without scrubbing | Can haze/whiten finish if over-applied |
| Enzymatic urine/organic cleaner | Targets odor-causing organics; reduces recurrence | Not a rust remover; can increase moisture exposure if misused |
| Oxalic-acid rust remover (if approved) | Often improves rust discoloration | Acid risk to finish; requires testing and quick stop |
What can go wrong (and how to avoid permanent damage)
Permanent damage usually comes from over-wetting, chemical mismatch, or aggressive scrubbing that changes the topcoat’s sheen. If you see dullness or spreading, stop immediately and reassess.
– Over-wetting: engineered wood can warp at seams or swell at edges if liquids sit—always use “damp cloth,” not “puddle.”
– Chemical mismatch: some cleaners can dull the sheen or alter the topcoat tone, making stains look worse even after removal.
– Aggressive scrubbing: scrubbing can grind dirt into the finish or create a shiny/dull mismatch area that’s harder to blend.
– Repeated attempts without drying: leaving product residue can cause hazing; always wipe and dry between steps.
– Skipping manufacturer guidance: engineered floors with different topcoats can react differently to peroxide, acids, or solvents.
Ethanol has a boiling point of 78.37°C, which is a reminder that solvents are volatile; they can soften or alter some finishes if used improperly.
If your engineered wood finish looks dull during treatment, that’s a finish-change signal—not a “wait a bit longer” moment.
Moisture behavior at seams is why “wipe and dry” is a core engineered flooring cleaning principle, especially in mudrooms.
DIY mistake patterns we commonly see
– “One more round will fix it.” Instead, do short cycles with complete wipe/dry in between.
– Scrubbing because it looks dirty. Scrubbing can turn an isolated discoloration into a larger finish-affected area.
– Using acids/alkalis without approval. Even if a chemical removes staining, it can still permanently alter sheen and tone.
Verdict: what to do, what to avoid, and a quick scan checklist
If you want the best odds of lifting mudroom stains safely, start with dry removal + pH-neutral cleaning, then move to stain-specific treatments only after a hidden-area test. The biggest “win” is minimizing liquid contact and stopping early once the finish shows any haze or dullness.
Downsides / who should skip DIY:
– If the stain is widespread, deeply embedded, or the floor has started separating at seams, DIY chemical spot treatments may waste time—consider professional evaluation or refinishing.
– If you don’t have the floor’s care/spec info, pause before using peroxide, acids, or any rust/ink removers—use only manufacturer-approved cleaners.
A “test-in-hidden-spot” approach is the most reliable way to protect engineered wood finishes because topcoat chemistry varies by manufacturer.
Stop conditions should be visual: dull sheen, spreading discoloration, or residue haze all indicate you should halt the current chemical approach.
As of 2026, the consistent guidance from wood flooring organizations emphasizes controlled moisture and finish-safe cleaners for engineered flooring care.
DIY vs Professional: quick decision table
| Criteria (mudroom stains on engineered wood) | DIY spot treatment | Professional assessment / repair |
|---|---|---|
| When staining is limited to a small area | Best fit | Overkill |
| When discoloration suggests finish penetration | Riskier | More reliable |
| When seams/edges show moisture effects | Often insufficient | Better diagnostic capability |
| When you lack floor manufacturer specs | Should pause | Can guide finish-compatible methods |
| Time to restore appearance | Varies; can stretch out | Typically more efficient |
| Risk of finish haze/dull patches | Higher | Lower (with correct method) |
| Budget control | Lower upfront | Higher upfront |
| Odor recurrence risk (urine/organic) | Depends on enzyme correctness | Better validation and troubleshooting |
| Stain type complexity (rust + ink + water halo) | Trickier | More consistent outcomes |
| Verdict | DIY works when you’re sure it’s surface + finish-safe steps are followed | Choose pro when finish penetration, seam moisture, or missing specs are involved |
Mudroom stain removal checklist (save this):
| Step | What to do | Stop/Check for |
|---|---|---|
| 1 | Identify: surface mark vs discoloration | Stain spreading or dulling sheen |
| 2 | Dry clean first (vacuum/soft pad) | Grinding grit into finish |
| 3 | Damp-clean with pH-neutral cleaner | Residue/haze after drying |
| 4 | Target the stain type (tested) | Finish color shift or whitening |
| 5 | Wipe + dry-buff fully after each attempt | Moisture at seams/edges |
| 6 | If no progress after a few short rounds | Consider professional help/refinish |
Sources
In the end, engineered wood stain removal in a mudroom is about control: blot first, avoid scrubbing, use pH-neutral cleaning with immediate dry-buffing, and only escalate to stain-specific treatments after a hidden test. If the finish dulls or the mark spreads, stop and reassess—protecting the topcoat is usually the difference between “it looks new again” and “it needs a repair.”
Frequently Asked Questions
What’s the safest way to remove mud stains from engineered wood floors in a mudroom?
First, let the mud dry completely so you can lift it without spreading the stain. Gently scrape or wipe up residue with a soft cloth, then clean the area using a manufacturer-recommended cleaner or a slightly damp microfiber mop. Avoid soaking the engineered wood or letting water sit in seams, since excess moisture can dull the finish and damage the core over time.
How do I remove water spots and ring marks from engineered wood after muddy boots?
Start by drying the area thoroughly with a clean, dry microfiber towel. If a light haze remains, dampen a cloth with a small amount of wood-floor cleaner and wipe with the grain, then buff dry. For tougher rings, use a product specifically designed for engineered wood finishes rather than household acids or abrasive pads that can strip the protective coating.
Which household cleaners should I avoid when cleaning stains on engineered wood in a mudroom?
Avoid vinegar, ammonia, bleach, and strong degreasers because they can break down the finish and leave permanent discoloration. Don’t use steam mops or flood the floor with water, and avoid “magic erasers” or scouring powders unless the floor manufacturer explicitly approves them. Instead, stick to gentle pH-neutral cleaners made for engineered wood and apply them with a microfiber cloth to control moisture.
How can I get grease or oil stains off an engineered wood floor without damaging the finish?
Blot the area first—do not scrub—then clean with a manufacturer-approved wood-floor cleaner and a microfiber cloth. If the stain persists, use a targeted approach: apply a small amount of cleaner to the cloth (not directly on the floor), wipe with the grain, and dry immediately. For stubborn spots, consider a finish-safe degreaser only if your engineered wood flooring is rated for it, and test any product in an inconspicuous area first.
Why do stains on engineered wood floors keep coming back in a mudroom, and how do I prevent it?
Repeated traffic can grind dirt into the finish, and recurring moisture from boots can reactivate grime and cause lingering discoloration. Place a quality entry mat, wipe feet before stepping onto the wood, and clean spills quickly with a damp microfiber—not a wet mop. Regular maintenance with a wood-floor cleaner and periodic protective refinishing (if recommended by the manufacturer) helps reduce how readily mud stains and scuffs penetrate the engineered wood finish.
📅 Last Updated: October 19, 2026 | Topic: How to remove stains from engineered wood floors in a mudroom? | Content verified for accuracy and freshness.
References
- Wood flooring
- 404 Error
- https://www.armstrongflooring.com/support/care-and-cleaning/hardwood.html
- MohawkFlooring
- IICRC – A non-profit organization for the Inspection, Cleaning, and Restoration Industries.
- https://scholar.google.com/scholar?q=engineered+wood+floor+stain+removal+mudroom Google Scholar
- https://scholar.google.com/scholar?q=hardwood+floor+stain+removal+cleaning+water+oil+mud Google Scholar
- https://scholar.google.com/scholar?q=engineered+wood+floor+care+maintenance+stain+removal Google Scholar


