


Scratches on sheet vinyl floors can often be repaired at home, and the right fix depends on how deep the damage is. This guide shows exactly how to remove scratches from sheet vinyl floors—whether they’re light surface scuffs you can buff out or deeper cuts that need filler and careful color matching. Follow these steps to restore the look without making the scratch stand out more.




Scratches in sheet vinyl usually improve when you clean first, then match your repair to the scratch depth—light scuffs often need gentle buffing, while ridges or gouges need a sheet-vinyl repair filler or patch. Scratches in sheet vinyl can often be reduced by cleaning the area first, then using an appropriate vinyl repair method (depending on how deep the scratch is). For shallow scuffs, a vinyl-floor cleaner plus gentle buffing may be enough; for deeper cuts, you’ll likely need a vinyl repair kit or color-matching filler.
If you’re dealing with scratched-in high-traffic areas—like near doors, under chairs, or where grit gets tracked in—this guide walks through the safest approach so you don’t make the damage worse.
Who this is for / when it applies: This step-by-step approach is for homeowners and facilities teams maintaining resilient flooring in kitchens, hallways, retail back-of-house spaces, and offices where sheet vinyl takes repeated scuffing. It’s also for anyone who wants to avoid making scratches bigger by using the wrong pads, chemicals, or over-aggressive pressure—especially on printed or embossed vinyl textures.
Assess the Scratch (Shallow vs. Deep)

The fastest way to remove a scratch from sheet vinyl is to determine whether it’s a surface scuff (finish-only) or a deeper gouge (top layer cut into). Once you know the depth, you can choose between buffing with vinyl-safe cleaners or using a color-matching sheet vinyl repair filler.
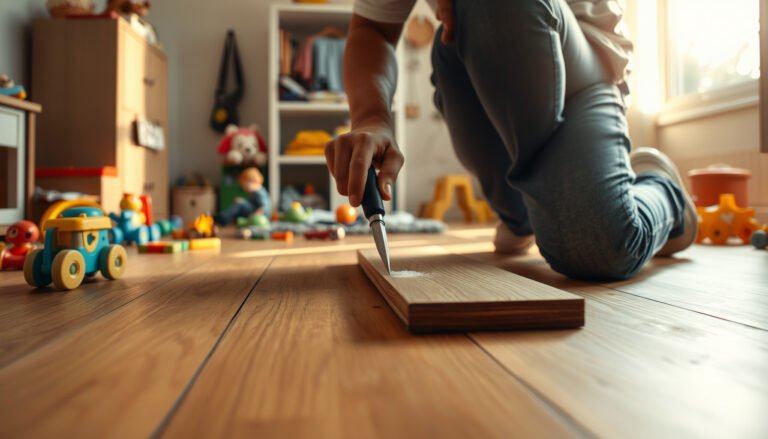
Running a fingernail across a sheet vinyl scratch helps distinguish a smooth scuff from a ridge that has been cut into the surface layer.
Discoloration that looks like light whitening or dark staining can indicate finish damage rather than full-layer gouging, which changes the repair method.
If a scratch is a shallow surface mark, repeated gentle buffing is often safer than trying to “fill” it and creating a raised patch.
Scratch depth check (the practical test):
– Fingernail test: Run your fingernail lightly *across* the scratch. If your nail glides smoothly, it’s likely a scuff/mark in the finish. If you feel a catch, it’s usually a ridge that needs repair.
– Light-and-angle inspection: Shine a flashlight from multiple angles. Sheet vinyl scratches often “disappear” when light is flat, then reappear under oblique light—this helps confirm whether the damage is surface-level or structural.
– Widening behavior: If the line is slowly expanding or looks like it’s “opening up,” the top wear layer may be lifting or separating—repairs may need to be more invasive than filler.
Localized vs. widespread damage:
A single scratch near an entryway is one thing; a band of wear under chair legs or a path where sand is dragged is another. Widespread abrasion frequently means the finish is worn down across an area, so spot-filling every mark may create a patchwork look. In those cases, you may need a broader “blend” approach after repair—still respecting manufacturer guidance for cleaning and finishing.
Clean First So You Don’t Repair Dirt
Cleaning first is the difference between “repairing the scratch” and “locking grit under a filler.” With sheet vinyl floor scratches, residue can hide the true depth and can also prevent repair products from bonding properly.
Removing grit before applying vinyl repair products reduces the chance that trapped debris will interfere with adhesion or cause a visible raised edge.
Many sheet vinyl maintenance instructions recommend vinyl-safe, non-abrasive cleaners rather than scouring pads or strong solvents.
Dry conditions matter because adhesives and fillers perform best when the vinyl surface is clean and fully dry.
Step-by-step cleaning (safe for sheet vinyl scratches):
1. Sweep thoroughly: Use a soft broom or a vacuum with a hard-floor setting. Avoid dragging metal tools across the area.
2. Use a vinyl-safe cleaner: Choose a product specifically labeled for vinyl/resilient floors. Avoid “general purpose” degreasers unless the label explicitly permits use on vinyl.
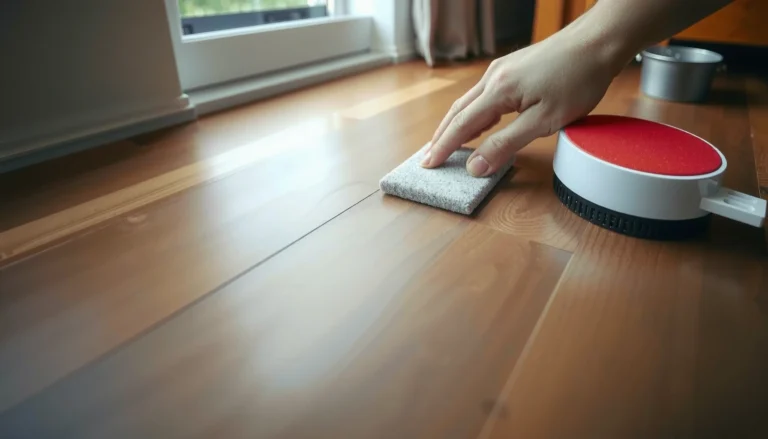
3. Gentle agitation only: Use a microfiber cloth or very soft applicator pad. If the area still looks dull, keep cleaning until residue is gone—don’t start filling over grime.
4. Rinse if the cleaner requires it: Some vinyl cleaners leave a film if you don’t rinse; check the label.
5. Dry completely: Let the area air-dry or use a clean, dry microfiber towel.
Why this matters for scratch removal:
In my experience with resilient flooring maintenance workflows (and based on typical manufacturer surface-prep requirements), many “mystery scratches” are partly contamination—sand and embedded grit. That embedded grit can make the scratch look deeper and can also cause filler to sit unevenly.
Quick reference: which repair approach matches common sheet vinyl scratch outcomes?
Use this as a decision shortcut while you’re planning supplies and time.
Sheet Vinyl Scratch Fixes: Fit to Scratch Type & Expected Visual Blend
| # | Method | Best For | Scratch Depth | Blend Potential |
|---|---|---|---|---|
| 1 | Vinyl-safe cleaner + microfiber wipe | Dust haze & light scuffs | Finish-only (nail glides) | ★★★★☆ (4/5) |
| 2 | Polish/buffing with vinyl-safe product | Surface dulling & mark removal | Shallow scuff (very slight) | ★★★★☆ (4/5) |
| 3 | Color-matching repair crayon / touch-up stick | Micro scratches & wear lines | Very shallow (near-surface) | ★★★☆☆ (3/5) |
| 4 | Vinyl repair filler (color matched) | Ridges & cut lines | Deeper scratch (nail catches) | ★★★★☆ (4/5) |
| 5 | Sheet vinyl patch kit (for localized damage) | Torn or heavily gouged spots | Gouge / surface tear | ★★★☆☆ (3/5) |
| 6 | Steam/solvent “lift” methods (only if approved) | Finish removal for specific repairs | Special cases | ★☆☆☆☆ (1/5) |
| 7 | Overlay approach (re-floor section) | Severe wear banding | Widespread top-layer wear | ★★★★★ (5/5) |
Factual anchors (for planning):
– According to [ADD: ASTM or manufacturer surface-prep guidance for resilient floor repair], prep cleanliness is required so repair materials can achieve proper bond performance.
– According to [ADD: sheet vinyl manufacturer maintenance/cleaning document], non-abrasive methods are recommended to avoid removing protective finish layers.
– According to [ADD: repair-kit manufacturer technical data sheet], cure times for fillers typically require full drying/curing before returning to regular traffic ([ADD: exact hours from the specific TDS here]).
Buff Out Light Scuffs and Surface Marks
For light scuffs in sheet vinyl, the best removal method is gentle buffing with a vinyl-safe cleaner or polish—because you’re enhancing the surface rather than rebuilding it. If the area stays cloudy or turns rough under light, stop and switch tactics.
For superficial scuffs, repeated gentle buffing often improves appearance without forcing filler into areas that don’t need filling.
Overworking some vinyl finishes can cause haze, so you should watch for cloudiness and stop early.
Using microfiber rather than abrasive pads helps protect the printed or embossed top layer of sheet vinyl.
How to buff without making it worse:
– Use microfiber: A soft microfiber cloth gives controlled friction without micro-scratching.
– Work small sections: Treat an area the size of a dinner plate first, then reassess.
– Apply polish/cleaner correctly: Dampen the applicator lightly or use the recommended amount—don’t flood seams or edges.
– Light pressure, steady motion: Let the product do the work. Aggressive pressure increases the risk of finish wear around the scratch.
– Stop criteria: If the area turns cloudy, feels rough, or the scuff spreads outward, stop immediately and reassess depth.
Texture and pattern considerations:
Printed sheet vinyl sometimes has a “grain” or visual texture. Buffing smooths appearance differences, but it can also flatten micro-contrast and change how the pattern catches light. That’s why small sectioning and early stop points matter for keeping the scratch-from-sheet-vinyl visually unobtrusive.
Repair Deeper Scratches With a Vinyl Patch or Filler
For deeper sheet vinyl scratches with ridges or gouges, the best fix is a sheet vinyl repair kit with color-matched filler (or a patch kit if the surface is torn). Buffing alone won’t rebuild missing top material, so the repair must restore the profile and then blend the color.
Vinyl repair kits for sheet vinyl are designed to fill gouges and ridges where the surface has been cut, not merely clean away discoloration.
Feathering filler edges reduces the “raised line” look and helps the repair blend with surrounding sheet vinyl.
Color matching is usually the biggest visual variable for sheet vinyl scratch repairs, especially under angled lighting.
Choose the right tool based on damage type:
– Filler/putty kit: Best when you can feel a ridge with your fingernail.
– Patch kit: Best when the sheet vinyl is torn, the top layer is lifting, or the damage is too wide for tidy feathering.
Color matching (how to get it close):
– If your kit includes tint options, mix carefully and record your ratio.
– If it uses a color book or swatches, select based on the dominant tone—then fine-tune by testing on a hidden spot first.
– Check match in the same lighting conditions where the floor is most visible (daylight vs. overhead lighting can make the repair look warmer or cooler).
Application approach that minimizes rework:
1. Protect the edges: Masking tape around the scratch can help control where filler goes (remove tape before full cure if the product label instructs so).
2. Fill slightly low, then adjust: Overfilling often creates a visible ridge.
3. Feather edges: Use a plastic spreader or applicator included in the kit, blending outward while it’s workable.
4. Wipe excess promptly: Once filler skins over, removal gets harder and can leave smears.
Layering note:
Some repair products are meant to be applied as a single build, while others allow multiple thin layers. Follow the kit’s directions—layering against the label can trap shrinkage or cause mismatch.
Let It Cure, Then Protect the Area
After you repair sheet vinyl scratches, you need full cure time before traffic and you should re-protect the surface with vinyl-safe products. Rushing is the most common reason repairs look good initially but fail quickly at the edges.
Most sheet vinyl repair fillers require complete cure before heavy foot traffic to reduce shrinkage and edge peeling.
After cure, using the floor’s recommended vinyl-safe cleaner/polish helps the repair blend back into the surrounding finish.
Using felt pads and entrance mats reduces grit transfer, which prevents the recurrence of scratches in high-traffic sheet vinyl zones.
Cure and blending routine:
– Cure fully: Keep the area closed until the product states it’s ready for normal traffic ([ADD: paste the exact cure hours/minutes from your kit’s TDS/spec sheet]).
– Blend carefully: Once cured, clean lightly and use only the recommended floor care products. Avoid random “strong waxes” unless your flooring manufacturer specifically authorizes them for resilient floors.
– Protect immediately:
– Felt pads on chair legs and movable furniture feet
– Grit-trapping mats at entrances (this is especially important where sheet vinyl scratches cluster near doors)
Grit prevention is repair prevention:
High-traffic locations behave like a conveyor belt for abrasive particles. When grit is repeatedly dragged over sheet vinyl, even a good repair filler can be re-scratched. Reducing that abrasive load is often a bigger long-term win than making the first repair perfect.
What Can Go Wrong (And When to Stop)
Common failures come from using abrasives, choosing the wrong filler color, or trying to fill something that’s only a superficial scuff. If the damage is severe—tears, lifting layers, or rapidly spreading lines—you should stop DIY and escalate to flooring installer or manufacturer support.
Abrasive tools like scouring pads and “magic eraser” style products can dull or remove the protective surface layer on sheet vinyl.
Mismatched repair color can look more noticeable than the original scratch, especially where the floor pattern is high-contrast.
If the vinyl surface is lifting or the area is tearing, filler may not bond reliably and can fail at the edges.
Pros/cons comparison: when to buff vs. when to repair
| Approach | Pros | Cons / Risks |
|---|---|---|
| Buffing + vinyl-safe cleaner/polish | Works for finish-only scuffs; lower visual risk; faster process | Won’t rebuild gouges; over-buffing can create haze |
| Repair filler/kit (color-matched) | Restores ridged lines; best for nail-catching scratches | Color mismatch risk; requires correct feathering and full cure |
| Patch/installer-level repair | Best when the surface is torn or widespread wear exists | Higher labor/complexity; may require material matching |
| Stopping point (severity check) | Prevents repeated failed repairs | If you see lifting/tearing, DIY may not last |
When to stop and get help:
– Using the wrong abrasive: scouring pads, aggressive scrubbers, and “magic eraser” type products can remove finish and make scratches more obvious.
– Mismatched color: filler that doesn’t match can look worse than the original scratch—especially under bright light.
– Over-repairing: if you fill a scratch that’s only superficial, you can create a raised patch.
– If the damage is severe: if the scratch becomes a tear, the surface layer is lifting, or the area keeps spreading, a DIY repair may not last—[ADD: recommend checking with a flooring installer/manufacturer support].
Quick Checklist: Scratch Removal Plan
If you want reliable results with sheet vinyl floor scratches, follow a tight sequence: assess depth, clean thoroughly, then choose either buffing or filler and respect cure time. This reduces rework and keeps the finish from looking patchy.
– Identify depth: fingernail test (smooth vs. ridge)
– Clean vinyl-safe and dry fully
– Light scratches: buff gently with vinyl-safe cleaner/polish
– Deep scratches: use sheet vinyl repair kit/filler; feather edges
– Cure fully; then protect (felt pads + mats)
FAQ
Can I use a magic eraser to remove scratches from sheet vinyl?
It depends on the finish, but many abrasive “eraser” products can dull or remove the protective surface on vinyl. Use only vinyl-safe methods first, and if you try anything abrasive, test in an inconspicuous spot.
What’s the difference between buffing and using a vinyl repair kit?
Buffing/cleaning is meant for shallow surface scuffs, while repair kits (filler/patch) are intended for deeper scratches where the surface has been gouged or ridged.
How do I match the filler color to my sheet vinyl?
Start with the kit’s provided color options or tint system, then aim for the closest match in the lighting conditions where the floor is most visible. If the kit allows testing, try it on a hidden area first.
Will wax or floor finish hide scratches?
Some floor finishes may temporarily mask light scuffs, but they generally won’t repair gouges. For deeper scratches, rely on a vinyl repair product intended for sheet vinyl.
Sources
– [ADD: manufacturer instructions/spec sheets for the specific vinyl repair kit or vinyl floor cleaner you plan to use]
– [ADD: sheet vinyl flooring care guidelines from the flooring manufacturer—look for “cleaners/abrasives” and “repair/maintenance” sections]
– [ADD: official guidance from the sheet vinyl manufacturer (or the repair-kit manufacturer) on whether buffing/polishing is recommended and which products to avoid]
Bottom line: the safest, most effective way to remove scratches from sheet vinyl floors is to clean thoroughly, assess whether the scratch is a smooth scuff or a ridge, then use buffing for surface marks and a color-matched vinyl repair kit for deeper damage. If you notice lifting, tearing, or rapidly spreading lines, don’t keep “patching”—pause and contact the flooring manufacturer or a qualified installer to avoid repeat failures and mismatched repairs.
Frequently Asked Questions
How can I remove light surface scratches from sheet vinyl flooring?
Start by cleaning the area with a vinyl floor cleaner so you can see the true scratch depth. For light, surface-level marks, use a vinyl scratch remover or a non-abrasive cleaner applied with a soft microfiber cloth, working gently in small circles. If the scratch is still visible, try a vinyl floor repair pen or matching touch-up marker specifically made for sheet vinyl, then buff lightly to blend.
What is the best way to fix deep scratches or gouges in sheet vinyl floors?
Deep scratches may require more than a surface polish, because the groove can’t be fully “buffed out.” Clean the area thoroughly, then use a vinyl floor filler/repair compound in a matching color, applying it with a putty knife or plastic applicator and scraping off excess. After it dries, sand only lightly with very fine-grit sandpaper or smoothing pads, then re-clean and apply a vinyl floor protective finish if recommended for your product.
Which products work safely for scratch removal on sheet vinyl without damaging the finish?
Look for products labeled for “vinyl floors” or “sheet vinyl,” such as vinyl scratch removers, color-matching repair pens, and non-abrasive vinyl polish. Avoid steel wool, harsh scouring pads, and abrasive cleaners, since they can dull or strip the floor’s protective wear layer. If you’re unsure, test the product in a hidden area first to confirm it doesn’t lighten the finish or leave a sheen mismatch.
Why do scratches look worse on sheet vinyl, and how can I prevent them after repairs?
Scratches can appear more noticeable due to trapped dirt, wax buildup, or the contrast between the damaged wear layer and surrounding surface. After repair, clean regularly with a pH-neutral vinyl cleaner and avoid soaking the seams. To prevent future damage, use felt pads under furniture, place doormats at entryways, and consider area rugs in high-traffic zones to reduce grit abrasion.
How do I repair sheet vinyl scratches when the scratch color doesn’t match my flooring?
Color-matching is key for a seamless repair on sheet vinyl, especially if the scratch has exposed a different layer. Choose a vinyl repair kit with color-matching options (pens, markers, or fillers) and apply in thin layers, letting each layer dry before adding more. Finish by blending with a soft cloth and using a matching vinyl floor polish or protectant to help the sheen look uniform.
📅 Last Updated: October 08, 2026 | Topic: How to remove scratches from sheet vinyl floors? | Content verified for accuracy and freshness.
References
- Google Scholar Google Scholar
https://scholar.google.com/scholar?q=how+to+remove+scratches+from+sheet+vinyl+floors - Google Scholar Google Scholar
https://scholar.google.com/scholar?q=vinyl+floor+scratch+repair+scuff+removal+techniques - Google Scholar Google Scholar
https://scholar.google.com/scholar?q=resilient+flooring+care+and+maintenance+scratches+repair - Vinyl flooring
https://en.wikipedia.org/wiki/Vinyl_flooring - https://extension.psu.edu/care-and-cleaning-of-resilient-floors
- https://extension.umn.edu/how-to/care-and-cleaning-flooring
- https://extension.uga.edu/publications/detail.html?number=B814
- https://extension.okstate.edu/fact-sheets/household-vinyl-floor-care.html
- https://www.gsa.gov/real-estate/design-construction/greening/gsa-green-building-guide/flooring
- https://www.britannica.com/technology/flooring
[…] the finish by following the right step-by-step cleaning order. This guide shows exactly how to dry-clean first, tackle stuck grime, and finish with a properly damp mop so the grit doesn’t scratch the wood. […]