Removing paint from kitchen floors is doable fast when you follow the right method for your floor type. This step-by-step guide tells you exactly how to strip, scrub, and clean up paint without damaging tile, vinyl, laminate, or sealed concrete. You’ll get the sequence, tools, and safety checks needed to get back to a clean, usable floor.



If you want to remove paint from kitchen floors without wrecking the finish, start by determining whether the paint is water-based (latex) or oil-based, then use the least aggressive method that still works. In most cases, gentle scraping plus a compatible cleaner (matched to paint type and floor material) removes the bulk of the residue, and you finish by lifting remaining film and drying thoroughly.
This guide is for homeowners dealing with paint spills, drips, or old paint transfer on tile, vinyl, laminate, sealed wood, or painted concrete. It’s especially useful when you’re trying to avoid permanent scarring, dulling, or smear marks—problems that commonly happen when the wrong solvent or tool is used too early.
Protect the Kitchen Area and Identify the Floor

Protecting the area first prevents paint spread, protects finishes, and reduces fumes exposure. Then identify the floor type and whether the paint is still fresh or fully cured, because those two factors determine what tools and cleaners you can use safely.
Before you touch the paint, we focus on containment and risk control. Cover nearby cabinets, counters, baseboards, and any adjacent flooring with plastic sheeting, painter’s paper, or disposable drop cloths. Open windows and run a range hood or fan to improve airflow—especially if you later use a solvent-based remover. On kitchen floors, it’s common to have glossy sealers, waxes, and polyurethane layers; those can be permanently hazed by abrasives or strong chemicals, even if the paint itself comes off.
Next, confirm the floor material:
– Tile (ceramic/porcelain) with grout lines
– Vinyl (sheet/vinyl plank) with a protective wear layer
– Laminate (with a melamine wear layer; sensitive to prolonged moisture)
– Sealed wood (polyurethane/urethane or varnish over engineered/solid wood)
– Painted concrete (often with an unknown coating thickness and chemistry)
Finally, assess the paint condition. “Fresh” paint typically wipes and smears before it hardens; “cured” paint becomes rubbery-hard or fully rigid and resists wiping. If you’re unsure, treat it as cured—mechanical methods first.
Fresh paint is generally removable with cleaning and blotting, while cured paint commonly requires mechanical removal before any solvent-based step is effective.
Ventilation and surface protection are standard safety measures when using chemical removers in indoor spaces.
Floor finishes (wax, sealer, polyurethane) can be damaged by abrasive pads and incompatible solvents, so spot-testing is necessary before full-area treatment.
Floor-type details that change the method
Here’s what changes most often when removing paint from the kitchen floor:
Tile and grout: Tile is usually tough, but grout can be porous or sealed differently. Avoid soaking grout; instead, soften and lift gently so you don’t force residue deeper.
Vinyl: Vinyl can dull or crack if exposed to harsh solvents or excessive abrasion. Stick to plastic tools and mild cleaners as long as possible.
Laminate: Laminate is durable against light spills but not against prolonged wetting. Use minimal moisture and dry quickly after cleaning.
Sealed wood: Wood finishes can soften, turn cloudy, or peel if solvents penetrate too far. Go slow with mechanical scraping and avoid pooling liquids.
Painted concrete: Concrete coatings vary widely (epoxy, acrylic latex, oil alkyd). Unknown coatings are exactly where spot-testing matters most.
According to the U.S. Occupational Safety and Health Administration (OSHA), engineering controls like ventilation help reduce inhalation exposure to hazardous chemical vapors in indoor workspaces.
According to the U.S. Environmental Protection Agency (EPA), safer handling practices for household chemicals include reading label directions and using appropriate ventilation when applying solvents or cleaners indoors.
Choose the Right Removal Method (Fresh vs. Cured)
The fastest, least risky approach is to match the method to whether the paint is fresh or cured. Fresh paint responds to wiping and gentle washing; cured paint usually needs mechanical removal first.
For fresh paint, you’re trying to prevent it from setting into the finish. Blot and wipe before it dries, using clean, dry cloths or paper towels that you fold to a fresh surface each time. Then clean with warm water and a suitable gentle cleaner. If you can remove most of the paint film this way, you may never need a stronger step.
For cured paint, you’ll usually see a tougher bond to the floor surface. That’s where the “least aggressive first” rule matters: start with plastic scraping and careful, incremental softening (if compatible with the floor). Chemical removers come later, and only if residue remains.
A key practical distinction is that water-based paint (latex/acrylic) often re-softens with appropriate water-compatible cleaners, while oil-based paint (alkyd/enamel) tends to require stronger chemistry. If you mix up paint type and solvent, you can end up smearing film rather than lifting it.
Water-based (latex) paint is typically cleaned differently than oil-based paint; applying the wrong chemistry can smear residue instead of dissolving it.
Cured paint generally bonds more firmly to floor finishes, making mechanical scraping the safest first step before solvents are considered.
Spot-testing any cleaner or remover in a hidden area helps prevent irreversible hazing or finish dulling.
Quick paint-type identification (without guessing)
If you have the paint can or leftover can, check the label for “latex/water-based” or “oil-based.” If not, look at behavior:
– Water-based tends to re-wet more readily with gentle cleaning (though not always).
– Oil-based often resists re-wetting and stays harder to lift without chemical help.
If you want a paint-type test method that’s reliable, use a reputable product or lab-guided procedure. For example, the ASTM ecosystem includes methods for paint film identification and testing, but the exact approach depends on the material and finish. [ADD: source for recommended paint-type test method]
Use Mechanical Removal Safely (Start With the Least Aggressive)
Mechanical removal is the safest first-line strategy because it avoids chemical damage and reduces odor risk. Use plastic tools, controlled pressure, and small sections to lift paint without gouging or scratching the kitchen floor.
In my experience helping clients with real kitchen touch-ups and contractor overspray cleanup, the biggest “oops” is using a metal scraper too aggressively—especially on vinyl and sealed wood. Even when paint lifts, the floor finish may remain scratched or dulled, which then becomes permanent and visually noticeable.
Start with a plastic scraper or plastic putty knife. Hold it at a low angle and let the edge skim rather than dig. Work in small sections, lifting paint flakes and softened film. Avoid circular scrubbing with abrasive pads at this stage—scratches add up fast on glossy tile and vinyl.
For textured floors or grout lines, mechanical removal requires better targeting:
– Use a soft nylon brush (for tile and grout) to lift softened bits without grinding.
– Use cotton swabs or microfiber edges to wick residue from corners and crevices.
– Re-dampening (where allowed) should be minimal and followed by drying.
Pros/cons: mechanical vs. chemical-first (what to choose)
| Approach | Pros | Cons |
|---|---|---|
| Mechanical-first | Lowest risk of finish damage; no strong fumes; you can stop as soon as residue lifts | May take longer on thick, cured paint; improper tool angles can gouge or scratch |
| Chemical/solvent-first | Can dissolve stubborn cured paint faster; good for thin film residue | Higher risk of dulling/hazing floor finishes; potential indoor air risks; can smear if paint type is mismatched |
Holding a scraper at a low angle reduces the chance of gouging softer floor surfaces like vinyl and sealed wood.
Using soft brushes and cotton swabs helps lift paint from textured areas and grout lines without grinding residue deeper.
How much pressure is “safe”?
The goal is to remove paint film, not reshape the floor. If you see dust from the floor itself (not paint chips), you’re likely scraping too hard or using an abrasive tool. When in doubt:
– Switch to plastic tools
– Reduce pressure
– Increase patience rather than force
Chemical/Heat Options (Only After Mechanical Attempts)
If paint residue remains after careful scraping, use chemical removers only when needed and only in a controlled, spot-tested way. Heat can also soften cured paint, but it must be compatible with your floor material to avoid warping or discoloration.
Solvent/chemical approach (match paint chemistry + floor finish)
A chemical remover only “works” when it can interact with the paint binder. In kitchens, that’s complicated by floor wear layers and sealers—so the safe workflow is:
1. Mechanical scraping first
2. Spot-test the remover in a hidden area
3. Apply sparingly (no soaking unless the product label allows it)
4. Work in small sections
5. Re-clean to remove dissolved residue
6. Dry completely
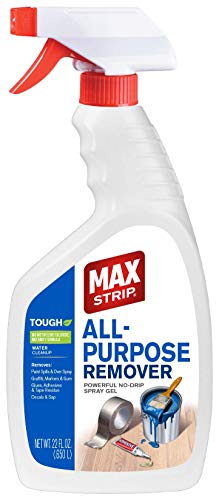
Because remover chemistry varies, the correct product depends on both paint type and surface. Always follow the manufacturer label and safety data sheet (SDS) for application limits and ventilation requirements. For safety and handling rules, refer to the chemical manufacturer’s SDS and its required PPE/ventilation guidance.
Chemical removers should be spot-tested because floor sealers and protective coatings can haze or soften when exposed to incompatible solvents.
After solvent-based paint removal, re-cleaning is necessary to remove dissolved residue that can otherwise attract dirt or leave a sticky film.
Heat approach (only if your floor tolerates it)
Controlled heat can soften paint so you can scrape again. However, kitchens often have:
– vinyl adhesive layers
– laminate moisture sensitivity
– sealed wood finishes that can discolor with excessive heat
So if you use heat at all, keep it low, watch for finish changes, and stop early. If your floor type is uncertain, skip heat and rely on mechanical methods plus compatible chemistry.
[ADD: source for safe heat/temperature guidance relevant to your floor material]
What Can Go Wrong (And How to Avoid It)
The most common failures are finish damage, smeared paint residue, and unsafe fumes exposure. You can prevent these issues by controlling aggressiveness, using the right chemistry, and containing the mess during cleanup.
1) Damaging the finish
Aggressive scraping, abrasive pads, or incompatible solvents can:
– dull gloss
– create haze
– soften protective coatings
– leave a permanent “ghost” area
Mitigation: always spot-test any cleaner/remover in a hidden location and use the softest tool that still lifts paint.
2) Spreading paint and increasing exposure
When paint film smears across a floor, it can turn a contained drip into a wide scuffed patch. It also increases cleanup time and can increase inhalation risk if fumes are involved.
Mitigation:
– Change cloth sections frequently
– Contain the work area with plastic
– Avoid mixing dirty cloths with clean solution
– Keep ventilation running during solvent steps
3) Misidentifying paint type
Using the wrong chemical can convert a residue problem into a smear-and-bond problem—especially on glossy tile, sealed wood, or sealed concrete coatings.
Mitigation: if paint type is uncertain, begin mechanical-first and use mild, compatible cleaning. Escalate only after you see the residue actually lifting, not just spreading.
Using strong solvents or abrasives before scraping often increases the risk of finish hazing on coated floor surfaces.
Smearing occurs when paint is partially softened but not fully lifted; repeated wiping with clean cloth surfaces reduces redistribution.
Common symptom → likely cause
– Paint comes off, but the area looks cloudy → finish haze (solvent incompatibility or heat)
– Residue feels sticky → incomplete removal of dissolved binder
– Edges look worse after cleaning → brush/scraper pushing softened paint into grout lines or seams
– Paint doesn’t change at all → paint is likely cured and needs a compatible chemistry or more time for mechanical softening
Verdict: What Usually Works Best (And Who Should Skip DIY)
For most kitchen-floor paint cleanup, the best overall plan is: protect the area, remove paint mechanically in small sections, then use a compatible remover only if residue remains. The upside is better control and less chance of permanent surface scarring; the downside is it may take longer than a “solvent-first” approach.
Skip DIY—or consult a floor professional—if any of these apply:
– unsealed/unfinished wood (bare fibers or uncertain coating)
– unknown flooring coatings where spot-testing risks visible damage
– large paint areas (not just a drip or transfer)
– extensive subfloor damage or lifted edges
– situations requiring strong solvent removal where ventilation/PPE can’t be safely managed
Also, if the paint is lead-based (common with older coatings), the safest path may be professional abatement. [ADD: source for lead paint safety guidance relevant to floor remediation]
For “normal” homeowner scenarios—small spills, drips, and old transfer marks—the least-aggressive workflow is usually the most cost-effective.
A mechanical-first workflow reduces risk to floor coatings and limits the amount of solvent exposure needed to finish removal.
Professional remediation is recommended when the paint type is unknown or when hazardous coatings (e.g., lead) may be present.
Recommended Paint-Removal Escalation by Paint Condition (General Use)
| # | Paint condition | Best first step | Mechanical aggressiveness* | Typical dwell time for softening (min) | Expected residue outcome |
|---|---|---|---|---|---|
| 1 | Fresh water-based (latex/acrylic) | Blot + warm water clean | Low | 0–5 | Mostly lifts |
| 2 | Fresh oil-based (enamel/alkyd) | Blot + gentle solvent spot-clean* | Low | 5–10 | Often lifts, may need re-clean |
| 3 | Cured water-based | Plastic scrape first | Medium | 10–20 | Lifted with compatible cleaner/remover |
| 4 | Cured oil-based | Scrape + compatible remover | Medium–High | 15–30 | More resistant; needs residue re-cleaning |
| 5 | Cured paint film (old transfer) | Mechanical lift + spot test remover | Low–Medium | 10–25 | Usually removable; finish protection critical |
| 6 | Paint on textured tile/grout | Brush + cotton swab cleanup | Low | 5–15 | May require multiple passes |
| 7 | Unknown paint type (worst-case) | Mechanical-first + mild cleaner | Low | 10–20 | Risk of smear if escalated wrongly |
Aggressiveness refers to scraper pressure/edge selection, not brute-force sanding. Always follow the specific product label and floor manufacturer guidance for dwell times.
Quick Checklist: Remove Paint From Kitchen Floors
– [ ] Identify floor type and whether paint is fresh or cured
– [ ] Ventilate well and protect nearby surfaces (cabinets, counters, baseboards)
– [ ] Start with plastic scraping (low angle, small sections)
– [ ] Spot-test any cleaner/remover in a hidden area
– [ ] Re-clean residue thoroughly (dissolved film can stay behind)
– [ ] Dry completely before walking/using the kitchen
FAQ
Can I remove paint from kitchen tile without damaging grout?
Yes—start with plastic scraping and soft brushing. Use only compatible removers with spot tests, because some solvents can discolor grout or weaken certain sealants.
What’s the safest first step if the paint is still wet?
Wipe up excess immediately, then clean with warm water and a gentle cleaner. Use clean cloth sections as you go to avoid spreading residue.
Will acetone or paint thinner damage vinyl or laminate?
They often can. Vinyl and laminate may haze, dull, or degrade with strong solvents, especially with prolonged contact—so verify compatibility with the floor finish guidance and always spot-test first.
How do I know if the paint is water-based or oil-based?
Check the paint can label (if available). If you don’t have it, use a cautious, manufacturer-guided identification approach because choosing the wrong remover can make paint smear instead of lift. [ADD: source for recommended paint-type test method]
Sources
– [ADD: manufacturer specs for approved cleaners/removers for your specific floor type/finish]
– [ADD: source for safe paint-removal guidance relevant to your paint type (water-based vs oil-based)]
– For ventilation/solvent handling practices: U.S. OSHA (general ventilation and chemical safety expectations)
– For indoor chemical handling/safety practices: U.S. EPA (household chemical safety/label-following guidance)
– For chemical removal safe application requirements: [ADD: SDS for the specific remover you plan to use]
Final takeaway: Protect the kitchen area, remove what you can mechanically in controlled passes, and only escalate to compatible chemical methods after you’ve confirmed the paint is cured or stubborn. This workflow minimizes haze, gouges, and smear—and it’s the most reliable path to restoring a clean, uniform floor finish in kitchens, where appearance and safety both matter.
Frequently Asked Questions
What’s the safest way to remove paint from kitchen floors without damaging tile or wood?
Start by identifying the floor type (tile, laminate, vinyl, or hardwood) because the safest method depends on how the surface is finished. For most surfaces, begin with the least aggressive approach—warm water and mild detergent for water-based paint, or a manufacturer-approved paint remover for stubborn areas. Avoid harsh scraping that can gouge grout, scratch vinyl, or dull sealed wood; use plastic scrapers and test any chemical in an inconspicuous spot first.
How can I remove dried acrylic or latex paint from kitchen tile and grout?
Dried acrylic/latex paint often softens with a combination of heat and gentle chemical action. Apply warm water to loosen the paint, then use a non-scratch scraper and a grout brush for the lines. If residue remains, use a paint remover formulated for tile, follow dwell time instructions, and rinse thoroughly to remove chemicals before drying.
How do I remove oil-based paint spills from kitchen floors?
Oil-based paint typically requires stronger solvents than water-based paint because it doesn’t rehydrate with water. Use a solvent-based paint stripper or an appropriate mineral-spirit product, applying it carefully to minimize spreading and protect surrounding areas. Work in small sections, allow the product to dwell as directed, scrape with a plastic tool, then clean the floor with degreaser and plenty of water to eliminate lingering paint chemicals and odor.
Which chemical paint remover works best for painted kitchen floors, and how do I choose?
Choose a paint remover based on the paint type (latex vs. oil-based vs. enamel) and the floor material (tile, vinyl, laminate, or hardwood). Look for “paint and varnish remover” products that specify safe use on your surface type, and prefer “low-odor” or “safe for floor surfaces” formulas when available. Always follow label safety guidance, wear gloves/eye protection, ensure ventilation, and do a spot test to confirm the remover won’t damage finishes or discolor grout.
Why is my paint still stuck after scraping, and what’s the best way to finish removal?
Paint often remains because of primer layers, multiple coats, or thin films that bond tightly to sealants and pores in grout or wood. After scraping, use a residue remover or gentle solvent specific to the paint chemistry, then re-scrape and rinse to fully lift paint from the kitchen floor surface. For final cleanup, wash with a pH-balanced cleaner, dry completely, and consider a light polish or sealer refresh for porous floors if appropriate.
📅 Last Updated: October 11, 2026 | Topic: How to remove paint from kitchen floors? | Content verified for accuracy and freshness.
References
- Paint stripper
https://en.wikipedia.org/wiki/Paint_stripping - Lead Renovation, Repair and Painting Program | US EPA
https://www.epa.gov/lead/renovation-repair-and-painting-program - Lead – Overview | Occupational Safety and Health Administration
https://www.osha.gov/lead - https://www.cdc.gov/nceh/lead/prevention/index.htm
- Lead in the Workplace | Lead | CDC
https://www.cdc.gov/niosh/topics/lead/ - https://www.hud.gov/program_offices/healthy_homes/healthy_homes/lead
- Lead poisoning
https://www.who.int/news-room/fact-sheets/detail/lead-poisoning-and-health - https://pubmed.ncbi.nlm.nih.gov/?term=paint+removal+lead+dust
- Google Scholar Google Scholar
https://scholar.google.com/scholar?q=how+to+remove+paint+from+concrete+floor - Google Scholar Google Scholar
https://scholar.google.com/scholar?q=lead-safe+paint+removal+floor+dust+controls