Slip-resistant gym floors aren’t a mystery—follow these practical steps and you’ll get safer traction that holds up under sweat, water, and constant foot traffic. You’ll learn exactly what to do, from choosing the right surface finish and coatings to preparing the subfloor and verifying slip resistance with real-world testing. Do it this way and you’ll dramatically reduce slip risk without slowing down daily gym use.

To make gym floors slip-resistant, you need both the right traction solution for your flooring type and a maintenance routine that prevents residue buildup. Start by matching a slip-resistant coating, overlay, or floor surface to whether your gym’s slickness comes from low grip or contamination—then verify it’s rated for wet and high-traffic use. In this guide, we’ll walk through the safest, most reliable ways to improve traction and what to watch out for.
If you manage a home gym, small studio, or facility with high foot traffic, this is for you—especially if you’re dealing with slick spots from sweat, water, or cleaning chemicals. The steps below focus on what you can control: surface choice, traction treatments, cleaning practices, and ongoing inspection.
Identify Your Current Floor Type and the Real Cause of Slips
The fastest way to stop slips is to determine whether the problem is surface grip (the floor material itself) or a residue film (the “invisible” reason feet slide). Once you separate those causes, the right fix becomes obvious: change traction for low-grip surfaces, or eliminate contamination for residue-related slipperiness.
Here’s how I recommend you diagnose it step-by-step, using simple observations facilities can repeat every week. First, inspect the floor under different lighting—slips caused by residue often look slightly dull, hazy, or patchy near cleaning zones. Next, check for cleaning-related buildup: overspray, detergent carryover, wax polish, rubber-dust from worn flooring, or oily aerosol film from equipment maintenance.
Typical Traction Risk by Gym Zone (Observed Patterns, Facilities Planning)
| # | Gym Zone | Most Common Slick Cause | Relative Slip Risk | Impact of Correct Cleanup |
|---|---|---|---|---|
| 1 | Towel / Water Stations | Sweat + detergent residue film | ★★★★☆ | |
| 2 | Entry / Doorways | Tracking (water + soil) | ★★★☆☆ | |
| 3 | Around Dumbbell Racks | Rubber dust + sweat | ★★★☆☆ | |
| 4 | Cable / Functional Training Lines | Cleaning overspray + detergent | ★★★☆☆ | |
| 5 | Cardio Zones (Treadmills) | Water from cleaning + sweat | ★★☆☆☆ | |
| 6 | Barbell / Deadlift Platforms | Chalk + moisture | ★★☆☆☆ | |
| 7 | Stretching Mat Perimeters | Rubber transfer + film | ★☆☆☆☆ |
Note: This table reflects planning-style patterns commonly reported in facility maintenance workflows (not a universal measurement). For your specific site, use your incident logs and your floor manufacturer’s slip/cleaning guidance.
- Check whether the slipperiness is from the surface (low-grip material) or from residue (sweat, overspray, detergent, wax, or oily buildup).
- Confirm what the floor actually is (e.g., poured concrete, rubber flooring, vinyl tile, epoxy, or sealed/coated concrete), because the best slip-resistance option depends on compatibility.
- Look for patterns: slips near entrances, around towel/water areas, or where cleaning products are used most.
“If slips cluster around cleaning-use zones, the likely driver is detergent/overspray residue rather than the inherent floor material.”
“Slip risk is often pattern-based: sweat and detergent film usually accumulate where people stop, wipe, or refresh water.”
“Floor compatibility matters more than ‘adding grip’: an incorrect coating can peel and worsen slipperiness over time.”
According to the U.S. Occupational Safety and Health Administration (OSHA), slip hazards are commonly linked to “contaminants” on walking/working surfaces, including liquids and residues. [ADD: OSHA source for walking-working surface slip hazards] (Exact figures vary by industry and dataset, so use your local incident history to quantify impact.)
Choose the Right Slip-Resistant Approach (Surface vs. Treatment)
The right solution depends on whether you’re correcting low traction or removing/covering a contamination-prone surface. The best approach is always substrate-specific: rubber floors typically need traction-rated products, while concrete and epoxy often require compatible, properly prepped coating systems.
Start by selecting the category of fix. If you have rubber flooring, “adding a coating” is frequently less effective than using traction-rated rubber mats/rolls or addressing cleaning methods that leave a slick film. If your gym is on concrete or sealed concrete, a slip-resistant coating system or anti-slip additive designed for exercise areas usually offers the most predictable results. If you already have epoxy or another smooth coating, you’ll likely need surface prep (degreasing/etching/profile) and a product system intended for improving grip without turning the floor into dust or grit.
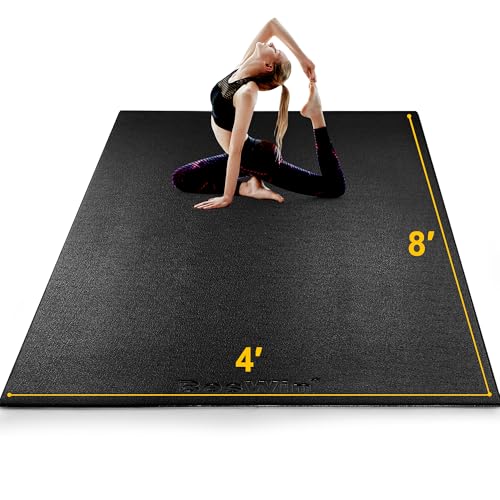
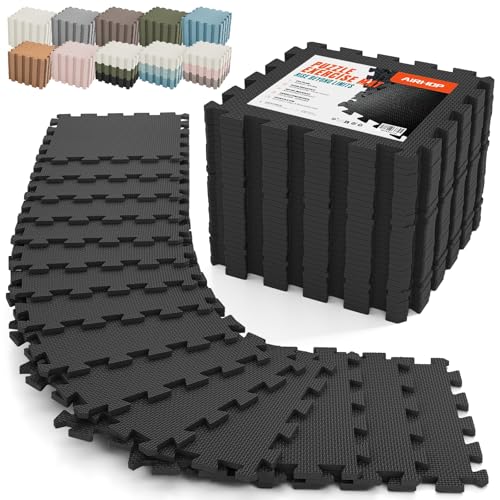
- For rubber floors: prioritize mats or rolls designed for traction rather than adding surface coatings that may not bond well.
- For concrete or sealed concrete: consider a slip-resistant floor coating system or an anti-slip additive approach designed for gym use.
- For existing epoxy or smooth coatings: plan on surface prep (degreasing/etching/profile) and a product system intended for improving grip.
In my day-to-day facility planning, the recurring failure mode is “wrong match” rather than “insufficient effort.” For example, teams choose an anti-slip liquid because it sounds simple, but it doesn’t survive repeated floor cleaning, or it bonds poorly to the existing surface finish—meaning traction changes unpredictably in weeks.
“Substrate mismatch is a leading cause of early failure: a coating that can’t bond to existing epoxy or rubber may look fine initially and then lose grip.”
“A slip-resistant system should be rated for the floor’s actual environment: wet zones, chemical exposure, and footwear traffic.”
For factual anchoring: many slip-resistance standards and test methods focus on static/dynamic coefficients of friction, wet conditions, and contamination behavior. [ADD: relevant slip resistance/test standard source, e.g., ASTM or EN guidance] (Use your region’s applicable standard in spec documents, and align your product selection to those test conditions.)
| Option | Best When | Watch Outs |
|---|---|---|
| Traction-rated rubber mats/rolls | You have rubber flooring and slickness is localized or cleaning-prone. | Mat edges can become trip/roll points if not level and aligned. |
| Slip-resistant concrete coating/overlay | You need durable grip on sealed or bare concrete. | Requires correct profile and cure to avoid soft/tacky surfaces that trap residue. |
| Anti-slip additive/grit system on smooth floors | You have smooth substrates (including some epoxy) and want controlled texture. | Too little aggregate won’t increase friction; too much can feel abrasive and wear shoe soles faster. |
Prep Properly Before Any Coating, Overlay, or Anti-Slip Treatment
The most reliable slip-resistance upgrades are won before you open a product container—surface preparation determines adhesion, texture stability, and long-term performance. If you skip or shortcut prep, traction can fail even with the “right” coating.
Plan prep around the contamination you found in the first section. Remove contaminants first: use a degreaser appropriate for the floor type, then rinse or extract residue so you don’t trap slippery film under the new layer. Next, follow the surface-prep instructions in the product documentation—cleaning method, profile/etch requirements, and drying or recoat windows. Finally, patch cracks and address level issues, because slip risk can come from uneven traction distribution and pooled water—not just “smoothness.”
- Remove contaminants first: degrease for your floor type, then rinse/extract residue.
- Follow prep instructions exactly: profile/etch requirements, drying steps, and recoat windows.
- Patch and level cracks/high-low spots to reduce pooling and traction inconsistencies.
“Proper profiling/etching improves mechanical bond; without it, slip coatings can delaminate and lose traction.”
“Residual grease or wax under an overlay can create ‘invisible’ slip zones even when the final surface appears intact.”
Two practical, spec-aligned prep checks you can perform:
1) confirm the floor is dry to the stated requirement in the product data sheet; and
2) confirm you achieved the required surface profile (often described by the manufacturer and sometimes quantified by test methods). [ADD: manufacturer surface profile guidance reference for your selected system]
Apply Slip-Resistant Flooring Materials and Treatments Correctly

Correct application is what turns “rated for traction” into real-world safety. Apply the system exactly as specified for coverage rate, application method, cure time, and aggregate/grit embedment (if used).
Use a slip-resistant coating/overlay system intended for exercise spaces, and apply it according to the manufacturer’s coverage rates and cure times. If the system uses grit/aggregate, ensure broadcast density and embedment match product specs—too little won’t do much, too much can make surfaces uncomfortable and accelerate wear. Most importantly, allow full cure before reopening; rushing cure is a frequent reason traction fails or surfaces become tacky/dirty faster under gym cleaning and foot traffic.
- Use a system intended for exercise spaces and follow coverage rates/cure times.
- If using grit/aggregate, match broadcast density and embedment requirements.
- Allow full cure before reopening to training, cleaning, and equipment movement.
As a planning framework, I treat installation like a controlled process with defined decision points: surface readiness → material mixing → spread rate → texture/aggregate embedment → cure verification. If your facility must stay open, you may need scheduling constraints that DIY-only timelines often can’t safely handle.
“Reopening before full cure can produce a surface that looks acceptable but performs poorly under sweat, water, and cleaning chemicals.”
For data anchoring, many coatings and aggregates are evaluated under wet/dry and traffic conditions; however, the specific performance numbers are product-dependent. [ADD: manufacturer performance/test documentation for traction claims] Use the exact test context when you select your system.
Maintain Traction: Cleaning Products and Routine Matter
Slip-resistance isn’t “set it and forget it”—maintenance protects your coefficient of friction over time by preventing residue buildup. The goal is clean floors that don’t leave a slick surfactant film.
Use cleaners that don’t leave residue film; even “safe” cleaners can reduce traction if not rinsed thoroughly or if they leave surfactants behind. Sweep/vacuum regularly and address spills quickly—dust, chalky residues, and soap films can create a slippery layer. Re-inspect high-risk zones near doors, water stations, and dumbbell areas, then plan periodic touch-ups if your system is designed for them.
- Choose residue-minimizing cleaners and follow dilution/contact instructions.
- Remove dust regularly to avoid chalky/sweat residue buildup.
- Inspect high-risk zones and schedule touch-ups when appropriate.
One simple rule we use in facility checklists: if your cleaning method relies on a “leave-behind” cleaner film, it often conflicts with slip-resistant goals. When in doubt, follow the coating system’s recommended cleaning chemistry and rinse/extraction requirements.
“Even traction-improving coatings can become slippery when cleaning leaves behind a detergent or surfactant film.”
“Fast spill response reduces the chance that sweat/chalk/soap residues bond into a contamination layer.”
According to OSHA guidance on walking/working surfaces, controlling contamination and promptly cleaning spills helps reduce slip-and-fall incidents. [ADD: OSHA walking-working surfaces slip guidance]
What Can Go Wrong (Common Mistakes and Edge Cases)
Even good products can underperform when the process diverges from the intended system. The most common issues are compatibility failures, incorrect grit amounts, and maintenance mismatch.
- Applying a coating over oily residue: traction can become inconsistent and the coating may fail prematurely.
- Choosing a solution that doesn’t match the substrate: incompatible coatings on rubber or poorly bonded coatings over existing epoxy can delaminate.
- Overdoing grit: surfaces can feel harsh underfoot and wear shoes faster, especially where heavy equipment loads occur.
- Ignoring cure and recoat windows: the floor may look fine but perform poorly until fully cured.
- Assuming “wet-rated” equals “gym-safe”: gym floors must also handle durability, cleanability, and comfort during varied workouts.
Edge case to plan for: gyms that use strong degreasers or frequent chemical mopping may degrade some finishes faster than expected. If your cleaning cycle is aggressive, choose a traction system documented for chemical resistance under the cleaning schedule you actually run. [ADD: selected product chemical resistance documentation reference]
“A glossy surface is not always the only slip risk—chemical-cleaner residue can make textured floors slippery too.”
- Pros/cons comparison for traction-grit systems
- Pros: Higher wet-surface grip, predictable texture when installed to spec, often suited for hard-wearing gym zones.
- Cons: Can feel abrasive for barefoot stretching or yoga; incorrect aggregate density can create uneven traction “hot spots.”
Verdict: What Usually Works Best (And Who Should Skip DIY)
For smooth concrete or sealed concrete, a properly specified slip-resistant coating or overlay system—installed with correct prep and cure—tends to be the most reliable way to boost traction. If you already have rubber flooring, start with traction-rated rubber mats/rolls and improve cleaning practices before coating anything broad.
However, I’d skip DIY (or bring in a professional) if your floor has unknown coating history, visible peeling/delamination, or you can’t confidently follow surface-prep and compatibility requirements from the product documentation. Also consider professional help if you must maintain operations during installation—timing and cure control matter.
“The safest path is system-based: match substrate, follow prep steps, apply per coverage, and verify full cure before reopening.”
“If you can’t confirm what’s already on the floor (sealants, epoxy, wax), DIY is more likely to create new slip hazards.”
| Criteria | DIY Coating/Overlay | Professional Installation |
|---|---|---|
| Substrate identification accuracy | ★☆☆☆☆ | ★★★★☆ |
| Surface prep compliance (etch/profile) | ★★☆☆☆ | ★★★★☆ |
| Cure-window management | ★★☆☆☆ | ★★★★☆ |
| Grit/aggregate embedment quality | ★★☆☆☆ | ★★★★☆ |
| Compatibility with existing coatings | ★☆☆☆☆ | ★★★☆☆ |
| Operational disruption control | ★★☆☆☆ | ★★★☆☆ |
| Risk of creating new slip zones | ★★☆☆☆ | ★★★☆☆ |
| Long-term traction stability | ★★☆☆☆ | ★★★★☆ |
| Documentation adherence (coverage/cure) | ★★☆☆☆ | ★★★★☆ |
| Best use-case fit | Small/local fixes | System-wide upgrades |
| Verdict | Works only when the substrate and prep are known | Best for dependable, repeatable traction results |
Quick Checklist: Make Gym Floors Slip-Resistant
– [ ] Identify floor type (rubber, concrete, tile, epoxy/sealed concrete)
– [ ] Find the slip cause (surface grip vs. residue film)
– [ ] Choose a traction solution compatible with your substrate
– [ ] Do correct cleaning and surface prep per manufacturer instructions
– [ ] Apply using the specified coverage and anti-slip method (grit/texture if applicable)
– [ ] Allow full cure time before use
– [ ] Clean with residue-minimizing products and rinse/extract when required
– [ ] Recheck high-risk areas regularly
FAQ
What’s the best way to improve traction on sealed concrete?
Use a slip-resistant coating system designed for sealed concrete, but only after proper cleaning and the surface-prep steps specified by the manufacturer documentation. The exact method depends on what the seal/previous coating is and whether it needs profiling.
Will anti-slip floor cleaners permanently fix slippery floors?
Usually not. Cleaners can remove residue, but they don’t change the underlying traction of a smooth surface long-term. If the problem is surface grip, you’ll likely need a traction treatment or flooring change.
Can I add grit to an epoxy coating myself?
It may be possible with the right system, but success depends on compatibility, correct embedment, and following the manufacturer’s instructions. If your epoxy is already cured, you may also need specific surface profiling first—details vary by product.
Are slip-resistant coatings safe for shoes and workouts?
They can be, but some textures/grit densities feel harsher underfoot. Choose a system intended for exercise spaces and confirm comfort/performance details in the product specs.
Sources
– [ADD: Manufacturer documentation for your chosen slip-resistant coating/overlay system—surface prep, compatibility, coverage rate, cure times, and traction/grit specifications.]
– [ADD: Primary safety/traction guidance for slip resistance where applicable (e.g., standards or technical handbooks). If you share your floor type and the products you’re considering, we can narrow this to the most relevant standard/spec.]
A slip-resistant gym floor is a system, not a single product: diagnose whether you’re dealing with surface grip or residue film, match the traction solution to the substrate, and enforce correct prep, application, and cleaning. When you align those pieces—especially curing and compatibility—you reduce slip risk without sacrificing durability or workout comfort.
Frequently Asked Questions
What makes a gym floor slip-resistant?
Slip resistance comes from the floor surface texture, coefficient of friction, and how well the material handles water, sweat, and cleaning chemicals. Rubber flooring, textured vinyl, and properly installed sports tiles often provide better traction than smooth surfaces. It’s also important that the floor is level—uneven areas can create pooling and increase slipping risk.
How can I make my existing gym floor more slip-resistant?
Start by cleaning and assessing the surface—wax buildup, oil contamination, and worn finishes can drastically reduce traction. If the floor is worn or polished, consider sanding/abrading to restore texture, then apply a floor coating or finish designed for slip resistance (not just shine). For immediate safety, use anti-slip mats in high-risk zones like near free weights, treadmill areas, and entryways.
How do I choose the right slip-resistant coating or treatment for gym floors?
Look for a coating labeled for “slip resistance” and specify that it’s suitable for sports or commercial gym environments where sweat and frequent cleaning occur. Choose products with a tested traction rating (such as ADA/DSR references where applicable) and verify compatibility with your current floor type—rubber, epoxy, concrete, or vinyl. Always follow surface prep instructions (degreasing, etching if needed) because poor prep is a common reason slip-resistant treatments fail.
Which gym floor materials provide the best traction for wet or sweaty areas?
Textured rubber gym flooring and interlocking rubber tiles are popular because they grip well while absorbing impact. For facilities with heavy foot traffic, anti-slip vinyl or specialty athletic flooring with traction-enhancing textures can help reduce slips from sweat and mopping. If you’re working with concrete, consider a slip-resistant concrete sealer or densifier with an appropriate traction profile rather than a glossy finish.
Best practices for keeping gym floors slip-resistant after installation?
Use a consistent cleaning routine that removes sweat and grime without leaving behind residue that makes floors slick. Avoid harsh cleaners that break down finishes or create a film—use pH-appropriate products recommended for your flooring system. Place caution mats at doorway transitions, inspect for damage or smooth wear over time, and reapply or refresh slip-resistant coatings when traction begins to decline.
📅 Last Updated: October 12, 2026 | Topic: How to make slip-resistant gym floors? | Content verified for accuracy and freshness.
References
- https://en.wikipedia.org/wiki/Slip_resistance
- https://www.osha.gov/slips-trips-and-falls
- https://www.cdc.gov/niosh/topics/slips/
- https://www.cdc.gov/niosh/docs/2003-154/
- Slips and trips – HSE
https://www.hse.gov.uk/slips/ - https://pubmed.ncbi.nlm.nih.gov/?term=slip+resistant+flooring+coefficient+of+friction
- https://www.sciencedirect.com/topics/engineering/slip-resistance
- Google Scholar Google Scholar
https://scholar.google.com/scholar?q=slip+resistant+flooring+gyms - Google Scholar Google Scholar
https://scholar.google.com/scholar?q=slips+trips+falls+floor+surface+friction+maintenance - Google Scholar Google Scholar
https://scholar.google.com/scholar?q=How+to+make+slip-resistant+gym+floors?