
Need to remove hardwood floors from a balcony—without damaging the subfloor or the waterproofing? This step-by-step guide tells you exactly how to pull up planks, manage nails and adhesive, and prep the surface for what comes next. Follow these instructions to get a clean, safe removal in the most common balcony setups.
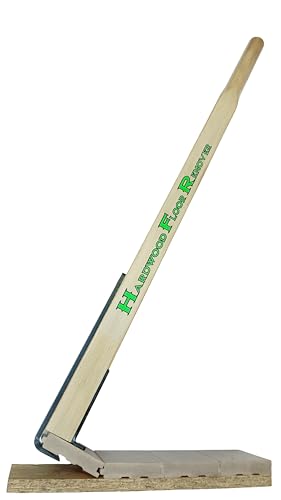



If you’re working on a condo, townhouse, or multi-family balcony where the floor assembly includes a waterproofing system, this guide is for you. It’s written for homeowners, facility managers, and contractors who want a practical, low-damage demolition approach—especially when the “important stuff” (the membrane and drainage layer details) sits under the hardwood.
Tools and prep for removing hardwood floors on a balcony
The fastest way to avoid damage is to prep like a controlled demolition: preserve the balcony’s waterproofing system first, then remove wood in a way that doesn’t tear layers you can’t easily replace. In 2026, that mindset matters even more because many membranes and balcony assemblies are proprietary (and often required for warranty/HOA compliance), so the prep step is where you prevent “invisible” water problems later.
OSHA’s respirable crystalline silica limits apply when removal work creates cutting or sanding dust (action level: 25 µg/m³ TWA; PEL: 50 µg/m³ TWA). OSHA 29 CFR 1926.1153
OSHA requires fit testing for respirators before initial use and at least annually (and whenever workplace conditions change). OSHA 29 CFR 1910.134
Plan around the balcony’s drainage and waterproofing: you want to remove the hardwood while preserving the membrane/subfloor layers below. Before you touch a plank, identify (or confirm from the original build/maintenance documents) where the waterproofing transitions: perimeter terminations, around drains, and at any wall or door thresholds. Those are common “failure points” when hardwood removal goes aggressively.
Gather non-destructive tools first (pry bar, flat bar/scraper, hammer, utility knife) plus protection (eye protection, gloves, dust mask/respirator if you’ll create fine dust). A magnet is also useful for locating hidden nails after boards lift. If you’ll cut adhesive residue, plan for ventilation and dust collection—balcony demolition typically has more airborne dust than interior slab work because you can’t always contain it with a sealed room.
Protect the area: seal off the work zone, cover nearby surfaces, and set up a clear path for carrying planks out safely. Keep traffic off the balcony surface so nobody steps through debris that could scratch the membrane. From my experience working around balcony tear-outs (and how the dust migrates), the single biggest “mess” factor isn’t demolition—it’s poor perimeter sealing and tracking dust through doors; . Even with careful demolition, the balcony remains a moisture-sensitive envelope.
Finally, confirm how your planks are attached. Hardwood on balconies is commonly nailed or stapled into a nailer/strip system, but older or renovation-era installs may include screws, glue/adhesives, or nail/adhesive hybrid methods. That one detail decides whether you should pry, cut, or extract with a combination of tools.
Tools and prep checklist (practical focus)
– Identify drainage plane and membrane terminations (especially near drains and door thresholds).
– Use only controlled “lifting from the edge” techniques (avoid lever action that punctures membranes).
– Stage drop cloths/plastic sheeting to protect walls/doors and reduce dust migration.
– Prepare dust control consistent with the dust you’ll generate (vacuum with appropriate filtration, avoid dry sanding).
– Verify attachment method by removing a single discreet test board.
OSHA thresholds that matter when balcony hardwood removal creates dust (US)
| # | OSHA rule element | Threshold / timing | Why it matters on a balcony | Impact priority |
|---|---|---|---|---|
| 1 | Action level (respirable crystalline silica) | 25 µg/m³ TWA (8-hour) | Triggers enhanced controls/surveillance requirements if exceeded | ★★★★★ |
| 2 | PEL (respirable crystalline silica) | 50 µg/m³ TWA (8-hour) | If dust control can’t keep exposures under this, respirators/engineering controls are required | ★★★★☆ |
| 3 | Medical surveillance trigger | Above action level for ≥30 days/year | If dust exposure is sustained, medical surveillance is required | ★★★★☆ |
| 4 | Respirator use—medical evaluation requirement | Before employee uses a respirator | If you’re required to wear a respirator, it must be medically cleared first | ★★★☆☆ |
| 5 | Fit testing frequency | At least annually (and when changes occur) | Protects against leaks that undermine respiratory control during removal | ★★★★☆ |
| 6 | User seal check | Each time the respirator is donned | Reduces the risk of “looks fitted” but leaking during dust exposure | ★★★☆☆ |
| 7 | Training and maintenance | Proper use, cleaning, inspection per program | Prevents ineffective PPE during repetitive demolition tasks | ★★★☆☆ |
Step-by-step: taking up hardwood planks safely
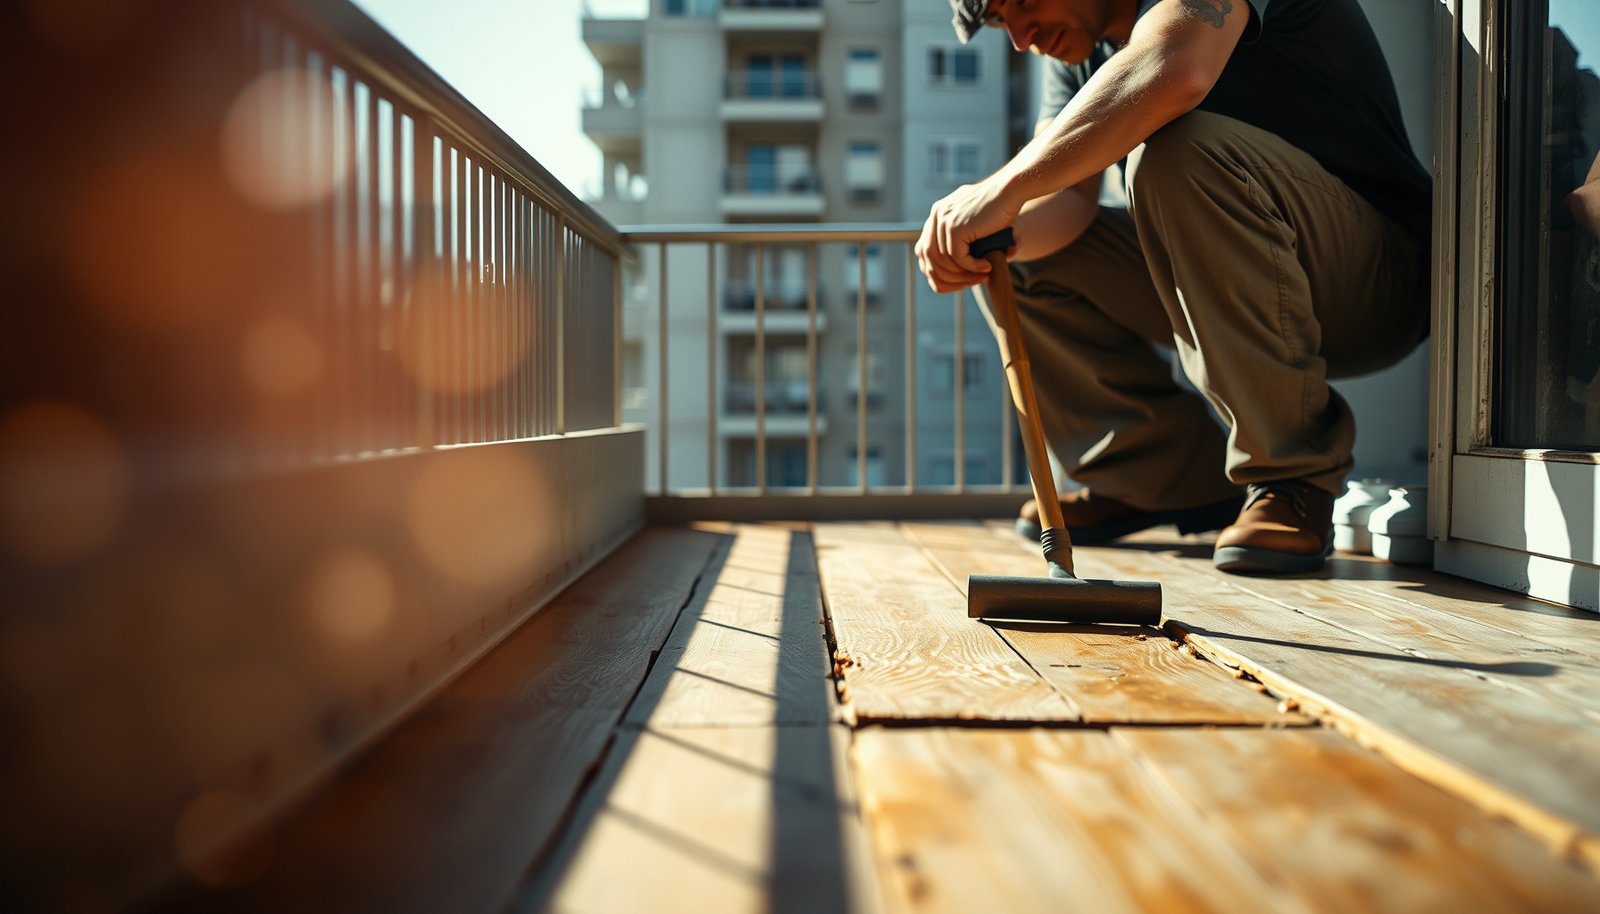
The safest sequence for balcony hardwood is edge-first lifting in controlled increments, with constant attention to how much resistance you feel at each move. This approach minimizes tear-out and helps you avoid damaging the subfloor or the membrane that keeps water out of the building assembly.
A “perimeter first” removal pattern reduces leverage forces on hidden membrane terminations compared with center-lever prying.
OSHA emphasizes controlling dust exposure during work that generates respirable silica-containing dust, which is relevant when cutting/scraping residues during flooring removal. OSHA 29 CFR 1926.1153
Find the best starting point: usually a perimeter board, a corner, or any area that’s already lifting or separated from the subfloor. On balconies, edges often sit closest to transitions (wall terminations, door thresholds, and drainage slopes), so start where you can lift without spreading force across the waterproofing field.
Loosen boards gradually: slide a flat pry tool under the plank, lift a little, then move along the length to avoid ripping large sections of subfloor. The key is incremental lift—think “peel,” not “break.” If the plank won’t lift with moderate leverage, don’t escalate. That resistance often means the boards are nailed/stapled deeper than expected or glued to an underlayer that also serves as a moisture/vapor control layer.
Work in small sections: remove the top wear layer/planks first, then reassess what’s left (underlayment, nailer boards, leftover adhesive, or membrane damage). This is where you preserve decision-making: you learn the attachment method by exposure, then you switch tools accordingly. For example, if you hit a nailer strip that’s firmly fastened, you focus on removing fasteners rather than continuing to pry.
Repeat the process board-by-board or strip-by-strip. A balcony floor assembly is often layered, and each layer responds differently to pry pressure. By switching from “removal” to “inspection” after each section, you reduce the odds that a small membrane puncture becomes a hidden leak later.
Handling nails, staples, and underlayment
Remove fasteners as you go—nails and staples are what catch pry tools and cause sudden membrane-damage jumps. When you pull fasteners cleanly, you reduce the chance of tearing layers underneath and you get a clearer view of whether underlayment is part of the waterproofing system.
OSHA respiratory protection programs require fit testing and medical evaluation before respirator use, which is especially relevant when flooring residue removal creates fine dust. OSHA 29 CFR 1910.134
OSHA’s silica standard addresses cutting/sanding tasks that generate respirable crystalline silica dust, which can occur when removing coatings or bonded layers. OSHA 29 CFR 1926.1153
Remove fasteners as you go: use a claw hammer, pry bar, and needle-nose pliers to pull nails/staples cleanly rather than leaving them to catch on tools later. Start with the fasteners nearest the lifted edge so the plank releases with less bending. If the fasteners are bent or tight, cut the head (with appropriate blades for the surface) before prying, so you don’t apply sudden force upward.
Score adhesive/film layers carefully: use a utility knife to cut through any glued seams so you don’t tear layers underneath. This is especially important on balconies where the “underlayment” may include vapor control or waterproofing-related functions. Cutting glued seams also prevents the common failure mode where an underlayer stays bonded while the hardwood peels away, stretching and puncturing the system.
Keep debris organized: separate wood pieces, fasteners, and underlayment so you can inspect what’s still bonded down. After each section, sweep/vacuum the work zone (with appropriate filtration if dust is present) and do a quick visual check. Organization isn’t just tidiness—it’s how you verify that fastener removal is complete and that you didn’t miss a nail strip that will snag during later work.
Pros/cons comparison: how to treat underlayment during balcony demolition
- Keep underlayment in place (recommended if it’s intact)
-
- Pros: Lower risk of damaging waterproofing/vapor control layers you can’t easily replace.
- Cons: Limits how you can repair substrate flatness unless the next system tolerates it.
- Remove underlayment (only if damaged or required by the new system)
-
- Pros: Allows full substrate inspection and correction if the membrane-related layers failed.
- Cons: Higher risk of widening damage, especially at membrane seams and transitions.
From the field, the “right” decision usually depends on whether the underlayment is purely acoustic/thermal versus part of the balcony waterproofing system. If you’re unsure, treat it as functional until proven otherwise—especially in 2026 where many balcony assemblies use integrated membranes/underlayers.
Protecting the balcony structure and moisture barrier
The goal is simple: don’t introduce new water pathways while you’re removing hardwood. That means avoiding soaking, minimizing scraping that reaches membrane layers, and inspecting the moisture barrier immediately after each removal phase.
Avoid soaking during flooring removal because water can wick into layered assemblies you can’t see, increasing the chance of hidden moisture problems.
A balcony membrane must remain intact after flooring removal; punctures or lifted seams can allow moisture intrusion behind the finish.
Avoid soaking the area: don’t flood with water while scraping; water can wick into layers you can’t see. Use controlled vacuuming and dry/low-moisture cleaning methods as you go. If you must clear dust, use a method that doesn’t drive particles under edges and seams.
Inspect the membrane/subfloor after wood removal: look for punctures, lifted edges, cracks, or uneven spots that could compromise waterproofing. Pay special attention to:
– Perimeter terminations where the membrane meets walls/thresholds
– Areas around drains or scupper openings
– Locations where fasteners were pulled (holes can be a pathway if the membrane gets compromised)
– Any soft subfloor areas suggesting trapped moisture
Don’t assume “underlayments” are harmless: on balconies, layers often have a job (vapor control, waterproofing, drainage plane)—follow what’s there rather than blindly ripping it all out. If you’re planning a balcony floor repair or releveling, remember that “fixing flatness” sometimes requires adjustments to the top build-up, not removal of the entire waterproofing system. In practice, preserving the membrane avoids the most common expensive failure: reinstallation that looks perfect but leaks later.
When you’re preparing to replace damaged boards, relevel, or modify the flooring assembly, plan the next layer sequence before you finish demolition. That reduces time the membrane is exposed and helps you keep the balcony waterproofing system protected.
What can go wrong (and how to avoid damage)
Most balcony problems after hardwood removal are caused by membrane punctures, hidden fastener damage, or dust-related exposure risks. If you anticipate these pitfalls, you can adjust your technique early instead of discovering damage after the new flooring is installed.
OSHA’s respirable crystalline silica limits are 25 µg/m³ action level and 50 µg/m³ PEL (8-hour TWA), which is relevant if your removal work creates cutting/sanding dust. OSHA 29 CFR 1926.1153
OSHA respirator programs require fit testing before initial use and at least annually, which affects whether you can safely continue dust-producing tasks. OSHA 29 CFR 1910.134
Tearing the membrane: prying too aggressively or levering upward can puncture waterproofing—stop if the resistance feels “wrong” and reassess attachment method. “Wrong” resistance often feels sudden (hard stop, then release) rather than gradual. That’s when nails/staples, adhesive bonds, or membrane-attached layers may be resisting.
Breaking boards into small pieces: rushing causes extra cleanup and increases the chance of missing hidden fasteners. If you’re losing boards, your tool angle or starting point is likely incorrect. Re-center on the next perimeter section and use smaller lifts to keep boards intact.
Creating dust hazards: if you sand/scrape residue (or cut fasteners/subfloor), fine particulate can become an exposure issue—pause and use appropriate respiratory protection when needed. As of 2026, the OSHA silica requirements still guide how work should be approached when respirable crystalline silica could be generated (especially from cutting or grinding bonded materials). OSHA 29 CFR 1926.1153
Hidden attachment methods: some balcony installs use adhesives, screws, or nail strips that aren’t obvious from the top—test a small area before committing to a technique. If you see wood coming up with fibers intact but leaving hard residue below, you likely need controlled scoring rather than continued prying.
To reduce “unknowns,” keep a short pause loop: remove a small section, inspect the substrate, then decide the next removal strategy. That habit prevents escalation into membrane damage.
Verdict: when DIY works and when to hire help
DIY is reasonable when the hardwood lifts with normal edge-prying, fasteners come out cleanly, and the waterproofing/membrane appears intact with no punctures or lifted seams. Hire help when you see membrane damage, subfloor deterioration, repeated leaks, or when the balcony system is part of a warranty/condo requirement that expects a specific waterproofing workflow.
If membrane integrity is uncertain during removal (punctures, lifted seams, cracks), a professional inspection is the safest next step before re-flooring.
OSHA requires a compliant respiratory protection program (medical evaluation, fit testing, training) when respirator use is required for dust-producing work. OSHA 29 CFR 1910.134
DIY is reasonable if:
– The planks lift with normal prying (no sudden “hard stop” spikes that suggest bonded layers or membrane attachment)
– You can remove fasteners cleanly without tearing chunks of substrate
– The waterproofing appears intact after removal (no lifted membrane edges, punctures, rot, or soft subfloor)
Consider hiring a flooring contractor or balcony/membrane specialist if:
– You see membrane damage during removal or suspect it behind underlayment seams
– Subfloor deterioration is extensive (soft spots, delamination, rot)
– The balcony has a history of leaks or recurring moisture issues
– The work impacts warranty/HOA documentation or requires a specific system rebuild process
Downside of DIY: the biggest risk is “invisible” damage. Water problems can show up weeks or months later, especially when the balcony floor assembly traps moisture. That’s why conservative technique and immediate membrane inspection are essential.
Quick decision guide (use this before you start)
– Proceed with DIY if you expect nail/staple attachment, see a clear lift pattern, and can inspect the membrane right after each section.
– Stop and escalate if you discover adhesive bonds that demand aggressive scraping/cutting, membrane tears, or soft substrate that suggests hidden moisture intrusion.
Quick checklist (scan) + FAQ
Use this scan to confirm you’re removing balcony hardwood in the least risky way: edge-first lifting, controlled fastener removal, and membrane inspection at every stage. In 2026, the “best practice” is still the same—protect the waterproofing system first, then address the wood and fasteners second.
Edge-first removal plus early fastener removal reduces snagging and sudden upward force that can puncture membranes.
OSHA’s fit testing requirement applies at least annually, which supports safe continuation of dust-producing floor work when respirators are needed. OSHA 29 CFR 1910.134
Checklist before you start
| Step | Quick check |
|---|---|
| Confirm attachment | Are planks nailed, stapled, glued, or screwed? (Test one discreet area.) |
| Protect the balcony system | Plan to remove wood without tearing the membrane or underlayment. |
| Safety gear | Eye protection + gloves; use a respirator/mask if you’ll create fine dust or do cutting/scraping. |
| Work from edges | Start at a perimeter/corner or an existing gap/lift. |
| Remove fasteners early | Pull nails/staples as boards come up to prevent snags and damage. |
| Inspect after removal | Check for membrane punctures, lifted seams, cracks, and soft/rotted subfloor. |
| Plan next layer | Know what you’ll install next (if reusing layers, ensure they’re still sound). |
Sources (primary/official where applicable):
– OSHA Respiratory Protection Standard (29 CFR 1910.134) — for guidance on when and how respirators are used, including fit testing.
– OSHA Respirable Crystalline Silica standard (29 CFR 1926.1153) — relevant if your removal creates cutting/sanding dust that could include respirable crystalline silica.
– Manufacturer installation/removal instructions for your specific hardwood and any balcony membrane/underlayment system:
– Any applicable local building code requirements for balcony waterproofing repairs/replacement:
Removing hardwood floors from a balcony is mainly about protecting what’s underneath: start at the edges, lift slowly, remove nails/staples as boards come up, and inspect the membrane/subfloor after each section. If you control dust, avoid soaking, and treat “underlayment” as potentially functional waterproofing-related layers, you dramatically reduce the odds of hidden leaks. When attachment type or membrane condition is uncertain—especially on older balconies—pausing to get specialist guidance is usually cheaper than repairing balcony failures later.
Frequently Asked Questions
How do I remove hardwood floors from a balcony without damaging the subfloor?
Start by protecting the surrounding balcony surfaces and removing baseboards, trim, and any fasteners you can access. If the hardwood is nailed down, carefully pry at the edges using a flat bar and work row-by-row; for glued planks, use a floor scraper or oscillating multi-tool to loosen the adhesive before lifting. Inspect the balcony subfloor as you go and avoid over-scraping, since balcony waterproofing and cement board layers can be easily damaged. Finish by vacuuming debris and checking for leftover glue or nails so the next flooring system adheres properly.
What tools and supplies do I need to remove hardwood balcony flooring?
Plan on using a pry bar/flat bar, hammer, oscillating multi-tool (great for cutting through nails or adhesive near the joints), floor scraper, utility knife, and a heavy-duty putty knife for adhesive removal. You’ll also want PPE—gloves, eye protection, a dust mask/respirator, and hearing protection—because hardwood removal can create a lot of fine dust. For cleanup, have a shop vacuum with a fine dust filter, trash bags, and a pry-safe waste drop cloth to protect balcony railings and walls.
Why is it important to check balcony waterproofing before removing hardwood?
Balcony waterproofing systems are often integrated under the hardwood flooring, especially when the planks were installed over a waterproof membrane or underlayment. If you remove hardwood without verifying the layers, you can puncture membranes or damage sealant seams, leading to leaks under the flooring. Before removal, look for clues like tile/underlayment edges, a moisture barrier, or prior repair patches, and then proceed gently around penetrations such as drains and expansion joints. If you suspect moisture issues, consider testing or consulting a flooring professional before exposing the waterproofing layer.
Which is better for balcony hardwood removal: prying nailed planks or cutting glued planks?
Nailing down is usually easier to remove by lifting plank sections and pulling nails with a nail puller or pry tool, which helps keep the board intact. Glued hardwood typically requires more aggressive techniques—cutting between planks, softening or breaking up adhesive with a scraper, and using an oscillating tool along edges to reduce tearing of the underlayment. In both cases, work gradually to minimize damage to the balcony subfloor and avoid gouging waterproofing materials. If the adhesive is extensive, you may need additional time for residue removal to ensure the next balcony flooring installation is level and secure.
What’s the best way to clean up and dispose of hardwood flooring from a balcony?
Remove planks in manageable sections so you can carry them safely down without dropping or scraping the balcony floor or railing. Use a shop vacuum to capture dust and small debris after each row, then scrape remaining adhesive to create a smooth surface for new materials. For disposal, bag sawdust and small offcuts separately from long boards if required by local rules, and keep the area clear of nails and staples by sweeping last. Finally, check the balcony surface for nails, low spots, and debris before installing new underlayment or balcony flooring.
📅 Last Updated: October 17, 2026 | Topic: How to remove hardwood floors from a balcony? | Content verified for accuracy and freshness.
References
- Wood Dust – Overview | Occupational Safety and Health Administration
- https://www.cdc.gov/niosh/topics/wooddust/default.html
- Lead Renovation, Repair and Painting Program | US EPA
- Asbestos – Overview | Occupational Safety and Health Administration
- Asbestos | US EPA
- Wood flooring
- Deck
- https://scholar.google.com/scholar?q=remove+hardwood+flooring+how+to Google Scholar
- https://scholar.google.com/scholar?q=balcony+deck+wood+flooring+removal+waterproofing Google Scholar
- https://scholar.google.com/scholar?q=wood+dust+hazards+floor+removal+sanding Google Scholar