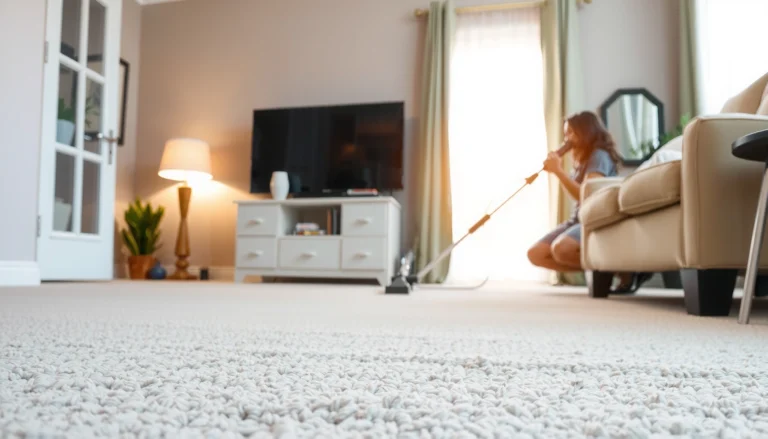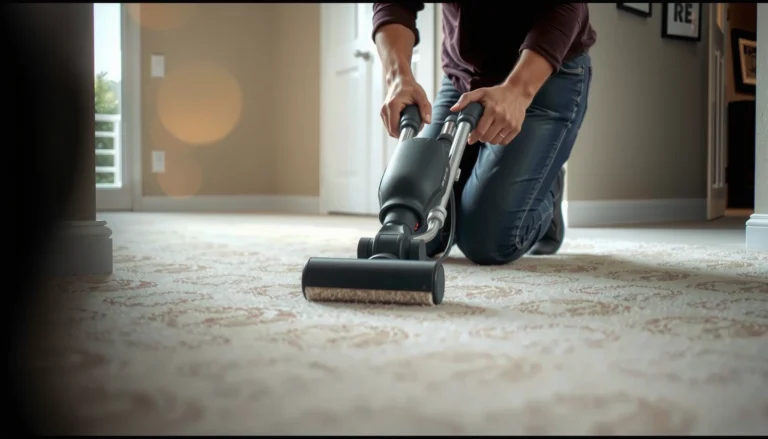

Learn how to remove carpet floors quickly and correctly with a step-by-step method that minimizes damage to the subfloor. This guide walks you through stripping the carpet, handling tack strips, and cleaning up adhesive and debris so the area is ready for new flooring. Follow it start to finish and you’ll avoid the common mistakes that turn a simple pull-up job into a long, messy repair.


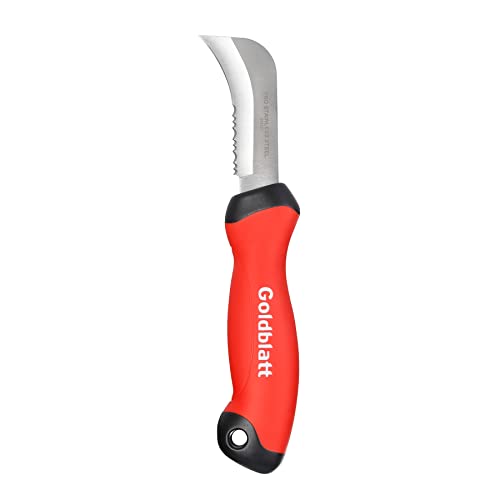

Removing carpet floors is mostly a “mechanical teardown” task: cut the carpet into strips, pull it up from tack strips or staples, remove padding, then scrape down to a clean, flat subfloor. If you follow the removal order (carpet → padding → tack strips/staples → residue), you dramatically reduce the risk of gouging the wood or leaving height issues that ruin your next floor install.
This guide walks you through the safest order of operations and what to watch for during removal so you can replace wall-to-wall carpet with hardwood, laminate, vinyl, tile, or fresh carpet without surprises.
Who this is for / when it applies: This is for homeowners or DIYers replacing old wall-to-wall carpet with hardwood, laminate, vinyl, tile, or fresh carpet. It’s especially useful if your carpet is glued down in some spots or secured with tack strips around the edges.
Prep the room and protect the subfloor

Start by making the room “removal-ready” and protecting anything you can’t afford to damage. Carpet removal creates flying debris (staples, dust, and small tack strip splinters), so containment and subfloor protection are your highest leverage steps.
Carpet removal is safer and faster when the carpet path is clear end-to-end, because you can pull sections without fighting door jambs or transitions.
Protecting trim with painter’s tape and drop cloths reduces the chance you’ll scratch door casings or grind dust into painted surfaces.
If the subfloor is your final “base,” then vacuuming and scraping down to a flat surface is necessary before installing most new flooring types.
Clear, protect, and plan your waste flow
Before you pull a single strip of carpet, do three setup tasks:
1. Clear the room. Move furniture, rugs, and anything portable out. If you can, remove or loosen floor vents only if the install later requires it—otherwise keep them covered.
2. Expose the edges you must lift. The carpet is usually secured at perimeter edges by tack strips (thin boards with angled nails). If the carpet is tight against baseboards or transitions, you may need to remove baseboards or at least cut along the carpet edge so it releases cleanly.
3. Control debris. Lay down painter’s tape along door trim lines and protect walls with drop cloths. Plan a trash-bag staging point (contractor bags work well) so you’re not carrying heavy, sharp offcuts across the room.
Decide how you’ll dispose of old carpet and padding
Carpet and padding take up space quickly. If you’re in a single room, contractor bags are usually manageable. For larger areas or multiple rooms, it may be easier to reserve dumpster space or rent a small debris container.
According to the U.S. EPA, carpet and other textiles have been a meaningful portion of municipal solid waste in recent reporting cycles ([ADD: source for EPA carpet/textile diversion or MSW reporting]). The practical takeaway for DIYers: plan your disposal early, especially if your local facility has separate rules for padding and carpet.
Tool readiness (so you don’t pause mid-teardown)
Make sure these tools are on hand before you start:
– Utility knife (fresh blades)
– Pliers or a carpet pull tool for edge grip
– Floor scraper (wide, rigid blade)
– Pry bar (for tack strips)
– Shop vacuum with a suitable filter (for fine dust and small debris)
– Work gloves and knee protection
In my own experience, the biggest time-waster during removal is stopping to search for a blade, not the scraping itself. Getting setup right prevents repeated pauses.
Quick visual reference: attachment method affects your prep
Because different carpets attach differently, your prep should match the fastening style. If you suspect glued-down spots, you’ll need more scraping time and dust control from day one.
Carpet Attachment Methods: What You’ll Remove First
| # | Attachment method | Common hold-downs | Most common subfloor risk | DIY friendliness |
|---|---|---|---|---|
| 1 | Tack strips at perimeter (typical wall-to-wall) | Perimeter tack strip + stapled/rolled pad | Pry damage if you yank strips | ★★★★☆ |
| 2 | Stapled padding (pad fastened, carpet typically stretched) | Stainless/galvanized staples | Leftover staples create bumps | ★★★☆☆ |
| 3 | Spot-glued carpet seams or corners | Adhesive spots + mechanical edges | Scraper gouges in glue islands | ★★★☆☆ |
| 4 | Fully glued carpet (full-spread adhesive) | Full adhesive coverage + backing bond | Residue thickness under new floor | ★★☆☆☆ |
| 5 | Double-layer pad or heavy rebond pad | Multiple pads + more stapling | Uneven substrate after removal | ★★☆☆☆ |
| 6 | Carpet installed over old carpet or underlayment | Residual adhesive + trapped staples | Height and moisture pathway issues | ★☆☆☆☆ |
| 7 | Perimeter tack strips + seam adhesive tape | Tack strips + seam tacking | Loose bits telegraph through | ★★★☆☆ |
Remove carpet from the tack strips and seams
You’ll get the cleanest lift when you cut the carpet into strips first and remove it in the direction it wants to release. The goal is to prevent binding, tearing, and subfloor gouges while freeing the perimeter.
Cutting wall-to-wall carpet into strips makes it easier to control tension, especially where carpet is stretched over tack strips.
Pulling back from the edges first reduces the chance you’ll rip through the carpet backing and leave more residue behind.
If the carpet feels extremely tight, you’re likely dealing with stretched installation; slow, controlled pull prevents subfloor damage.
Cut into sections you can manage
Start by cutting the carpet into strips (rather than trying to roll up one huge piece). Strip width depends on the room and your ability to handle the weight; most DIYers do best with pieces that roll easily without tearing.
A practical “feel” check: if the carpet starts to bind in your hands or requires full-body force, your strips are too large.
Lift from seams and edges using controlled leverage
Most seams run lengthwise across a room. Release the carpet in a consistent sequence:
1. Pull back edges first (near walls and transitions).
2. Work along seams once the perimeter is free enough to grip.
3. Use pliers or a carpet pull tool to grip and lift—don’t rely only on your hands.
From there, you can roll each section as you go to keep the work zone clear. This matters because staples and tack strip nails often hide in curls and folds.
What to expect if the carpet is stretched
When carpet is stretched, it can resist strongly. That resistance is normal—but gouging isn’t. If you feel the subfloor dragging, stop and adjust your grip or cutting depth so you’re not prying wood under tension.
According to common installation practices referenced by flooring and carpet organizations, tack strip installations rely on perimeter tension to hold the carpet flat ([ADD: source for tack strip installation principle]). The best strategy is to reduce tension gradually, not all at once.
Take out padding, staples, and tack strips
Once the carpet is off, your job becomes cleaning and leveling: remove padding, pull staples/tack strips, then scrape down to a stable subfloor. Skipping fasteners or leaving residue usually causes bumps, squeaks, and improper click-lock engagement in the next flooring.
Carpet padding can be stapled in sections, so removing it gradually helps you find and clear fasteners without tearing the backing.
Tack strips should be removed with controlled leverage; careless prying can chip plywood or OSB.
After hardware removal, scraping residual adhesive (if present) is necessary for flatness before installing new floors.
Remove padding section-by-section
Pull padding up in manageable sections. If it’s stapled:
– Keep a trash bucket or bag nearby.
– Periodically pause to pull staples still embedded in the pad (reduces clutter and lost debris).
If padding tears and leaves a thin foam layer behind, don’t assume it’s harmless. For most new floor types (especially laminate and floating systems), leftover cushioning can create high/low spots.
Pull tack strips carefully
Use a pry bar or floor scraper to lift tack strips. Work along the strip length rather than “spot prying” one section—one sudden lift can crack edges or lift fibers.
A quick tactile warning: if the strip won’t move, don’t force it with a hard twist. Reposition and re-leverage closer to the nail line.
Scrape residue and remove stuck staples
After padding/tack strip removal:
– Scrape adhesive residue (if present).
– Pull remaining staples with pliers (needle-nose works well) and flatten any remaining sharp bits.
– Vacuum constantly so you’re not grinding debris into the subfloor.
If adhesive is layered (some older installs use multiple adhesive types), scraping may stall. That’s when you switch tactics rather than applying more force.
Handle glued-down carpet flooring safely
Glued-down carpet changes the workflow because the carpet backing may bond to the subfloor. The safest approach is to test small areas first, then match your scraping strategy to what you find.
Testing a hidden corner first helps you predict whether the backing will peel cleanly or require extensive scraping.
A flat-angle scraper and steady pressure reduce the risk of gouging plywood or OSB during residue removal.
Dust control is critical when scraping glued carpet residue; a shop vac with an appropriate filter helps limit airborne particulates.
Test a small area (hidden corner or seam edge)
Pull gently in a concealed spot:
– If the backing peels cleanly: you can often lift in sections.
– If it tears and leaves backing: plan for more scraping. The residue removal step becomes the main task.
From my own observations during removals, adhesive failure modes vary by year and product—some carpets leave rubbery backing, others leave brittle films. That’s why starting with a small test saves hours.
Use the right scraper technique
Avoid “digging”:
– Keep the scraper at a low angle.
– Use steady, overlapping passes rather than aggressive prying.
– Stop periodically and vacuum—residue often looks uniform until you see remaining islands.
Control dust and protect yourself
Scraping generates fine dust and sharp debris. Use:
– A shop vac with a suitable filter (often HEPA-rated is preferred for fine dust)
– Gloves and eye protection
– Ventilation while you work
According to standard safety guidance for floor work that creates particulates, controlling airborne dust is a key best practice ([ADD: source for OSHA/dust control guidance]). When in doubt, use more containment than you think you need.
What can go wrong (and how to avoid it)
Most DIY problems come from rushing: damaged subfloors, missed fasteners, and sticky residue that ruins flatness. If you slow down at the “hard parts” (tack strips and adhesive), you prevent almost every common failure.
Damaging a subfloor during tack strip removal can create weak spots that telegraph through new flooring.
Hidden staples and nails are common after carpet removal, and missing them can cause unevenness or squeaks under new floor systems.
Adhesive types vary; if scraping stalls, matching your approach to the adhesive is more effective than adding force.
Common issues and prevention tactics
| Problem | What happens | How to avoid it |
|---|---|---|
| Damaged subfloor | Chips or divots from aggressive prying | Use controlled leverage; pull gradual, not sudden |
| Hidden staples/nails | New flooring locks or lays unevenly | Run your hand and a flashlight across seams; vacuum again |
| Adhesive surprises | Carpet backing tears; residue bonds hard | Test a hidden area; change scraper angle and technique |
| Uneven height | Floating floors “rock” or click unevenly | Scrape residue and remove padding completely |
| Dust contamination | Dust gets into new flooring adhesive/joints | Vacuum thoroughly before installation |
Comparison you can act on
If you’re trying to decide how hard this job will be, use this practical contrast:
– Tack strip installation (typically stretched): remove carpet + padding mechanically; residue work is usually minimal.
– Full-glue installations: assume more scraping time and more dust control; flatness becomes the deciding factor.
According to documentation used across many flooring systems, the substrate must be clean and flat within the tolerances specified by the product (the exact numbers are brand-specific) ([ADD: source for “flatness/tolerance requirements” from your target flooring brand]).
Verdict / tip: do it yourself only if your subfloor is in good shape
DIY carpet removal is usually a good fit when your subfloor is stable, fastening is mostly tack strips or stapled padding, and you can manage sharp debris safely. Skip DIY—and consider a pro—if you suspect major subfloor damage (soft spots, rot, mold), extensive glue across the entire room, or you’re not comfortable handling tack strips and debris removal.
Quick checklist before you start
– [ ] Clear room and protect walls/trim with tape + drop cloths
– [ ] Utility knife + pliers/carpet pull tool
– [ ] Pry bar and/or floor scraper
– [ ] Contractor bags + vacuum (shop vac recommended)
– [ ] Plan for tack strips and leftover staples
– [ ] Verify how it’s attached: tack strips vs stapled padding vs glued spots
Final call on risk management (especially in 2026)
As of 2026, the core best practice hasn’t changed: get to a clean, flat subfloor before installing new flooring. If your removal work ends with visible residue, stubborn backing, or sharp fasteners still proud of the surface, your new floor will show the problem—so the last steps matter as much as the first cuts.
FAQ
Do I need to remove baseboards before removing carpet floors?
Not always, but it depends on how the carpet meets the wall and whether you need room to pull it free. If baseboards are in the way of tack strip removal or transitions, plan to remove or temporarily loosen them.
What’s the best way to remove tack strips without damaging the subfloor?
Use a pry bar with controlled leverage and pull gradually so the strip lifts without tearing up wood. Work along the strip length rather than forcing single sections.
Can I install new flooring over leftover carpet padding or staples?
In most cases, no. Padding can compress and staples can create unevenness or puncture issues, so the goal is a clean, flat subfloor surface.
What should I do if the carpet backing is stuck after pulling up the carpet?
Scrape systematically with a floor scraper and vacuum frequently. If residue is widespread or stubborn, you may need a removal method tailored to the adhesive type—[ADD: source for recommended residue removal method based on your adhesive type].
Sources
– [ADD: manufacturer or flooring association guidance on subfloor prep for new flooring installation—e.g., official instructions from the new flooring brand]
– [ADD: tack strip and carpet removal safety guidance from a reputable carpet/flooring organization—official website or PDF]
– [ADD: EPA municipal solid waste reporting / carpet textiles context for disposal planning]
– [ADD: OSHA or similar authority guidance on dust/particulate control during demolition/scraping]
In the end, removing carpet floors comes down to one principle: follow the order so you don’t fight tension and you don’t leave debris behind. Cut and pull the carpet in manageable sections, remove padding and all fasteners, then scrape and vacuum until your subfloor is clean and flat—so your next hardwood, laminate, vinyl, or tile installation starts on a solid foundation.
Frequently Asked Questions
What’s the safest way to remove carpet flooring without damaging the subfloor?
Start by clearing the room and wearing PPE like gloves, a dust mask, and eye protection because carpet removal can release dust and old adhesive. Cut the carpet into manageable strips with a utility knife, then pull from the seams or tack strips using pliers to avoid gouging the subfloor. If you’re working over concrete or plywood, move slowly around staples, nails, and tack strip remnants so you don’t damage the surface you’ll reuse or refinish.
How do I remove carpet and carpet padding (including tack strips) efficiently?
First, pull up the carpet portion by section after cutting it into strips, then roll and remove it to keep the workspace clear. Next, remove the carpet padding; it may be attached with staples, glue, or friction, so expect some scraping or staple pulling. Finally, remove tack strips with a pry bar or oscillating multi-tool, then sweep and vacuum thoroughly to pick up metal fragments and loose debris before installing new flooring.
Why does carpet removal leave sticky residue, and how can I clean it properly?
Sticky residue usually comes from old carpet glue, pressure-sensitive adhesive, or mastic used to hold down the carpet and padding. Use a floor scraper to remove bulk adhesive, then clean with a suitable adhesive remover based on your subfloor type (wood vs. concrete) and follow the product instructions carefully. Afterward, degrease and rinse if needed, then let the area fully dry so new flooring adheres correctly and doesn’t trap odors or residue.
What’s the best method to remove carpet with minimal dust and mess?
Use a plastic containment barrier at doorways and run a HEPA shop vacuum while you cut and pull sections of carpet. Cut the carpet into smaller strips rather than tearing large sections, which reduces airborne dust and prevents fibers from spreading. If you’re removing carpet indoors, consider misting lightly around work areas (not soaking) to keep fibers down, and take frequent vacuum passes to control debris.
Which tools do I need to remove carpet flooring, and what’s the easiest process for beginners?
At minimum, you’ll want work gloves, knee pads, a utility knife with fresh blades, a pry bar, pliers or a carpet tack remover, a floor scraper, and a HEPA vacuum. The easiest beginner process is: remove furniture, cut the carpet into strips, pull from tack strips, remove padding, then scrape and clean any remaining adhesive. Always work in sections and keep a trash bag handy so the carpet rolls out cleanly and you don’t miss nails, staples, or tack strip pieces.
📅 Last Updated: October 11, 2026 | Topic: How to remove carpet floors? | Content verified for accuracy and freshness.
References
- https://en.wikipedia.org/wiki/Carpet
- Asbestos | US EPA
https://www.epa.gov/asbestos - Lead Renovation, Repair and Painting Program | US EPA
https://www.epa.gov/lead/renovation-repair-and-painting-program - https://www.cdc.gov/nceh/lead/prevention/renovations-and-remodeling.htm
- Asbestos – Overview | Occupational Safety and Health Administration
https://www.osha.gov/asbestos - https://www.hud.gov/program_offices/lead/training/lead_based_paint
- Asbestos – HSE
https://www.hse.gov.uk/asbestos/ - Google Scholar Google Scholar
https://scholar.google.com/scholar?q=how+to+remove+carpet+flooring+steps - Google Scholar Google Scholar
https://scholar.google.com/scholar?q=carpet+removal+procedure+floor+preparation+adhesive+removal - Google Scholar Google Scholar
https://scholar.google.com/scholar?q=carpet+removal+dust+control+cleaning+safety