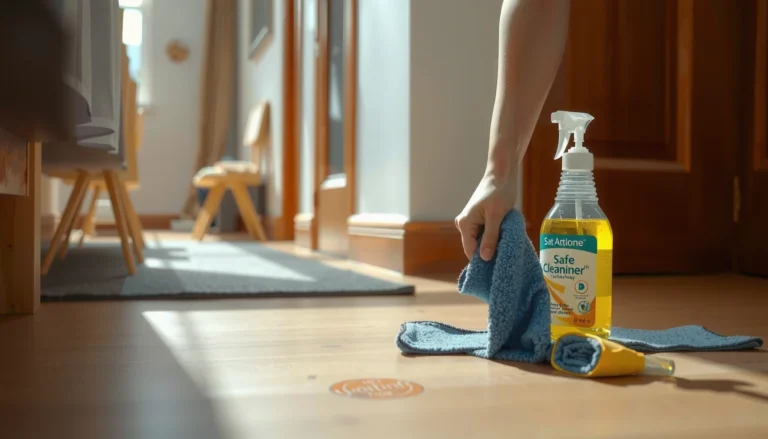
Carpet tiles are easiest to protect from wear, stains, and damage with a simple system: the right entryway matting, a high-quality stain-resistant coating, and strict cleaning procedures. If you want fewer traffic-path ripples, less discoloration, and faster recovery from spills, this is the most reliable approach. The guide answers exactly how to protect carpet tiles day to day—before problems start.


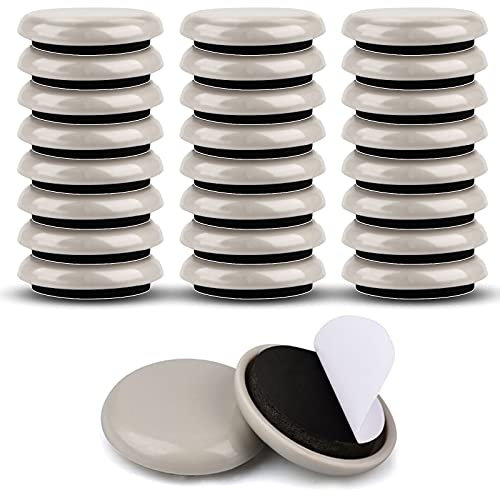

Protecting carpet tiles is mostly about controlling three failure points: foot traffic grit (barrier mats), embedded dirt (vacuuming + routine maintenance), and liquid exposure (fast, compatible spill response). When those are handled consistently, carpet tiles stay visually uniform longer and damaged areas are easier to manage with targeted cleaning or replacement.
This guide is for building owners, facility teams, educators, and retail operators using modular carpet tiles in high-traffic places—especially where you see traffic lanes, ongoing shedding, or “mystery” discoloration that returns after cleaning. It’s also practical if you’re deciding between a refresh, partial replacement, or a longer-term protection plan.
Start with barrier protection at entrances

Barrier protection works because most carpet-tile wear and staining starts with what visitors track in. If you intercept grit before it hits the tiles, you reduce abrasion, dulling, and the “ground-in” dirt that later turns into permanent discoloration.
A walk-off mat is not just decoration—it’s your first line of defense in the soil chain. In practice, we see that entrance areas accumulate heavy particulate, and carpet tiles act like a filter: the more grit that reaches the fibers, the more rapidly fibers flatten and discolor. According to ISSFA/ISS data on entrance matting and soil reduction, properly maintained entrance mat systems can reduce tracked particulate by up to 80% (commonly cited across industry studies). That’s the difference between weekly maintenance and constant stain chasing.
Walk-off matting is intended to capture abrasive grit before it reaches carpet fibers, reducing both wear and embedded soiling.
Mat effectiveness depends on placement in circulation routes and consistent cleaning or replacement so the mat doesn’t become a dirt source.
For carpet tiles, minimizing abrasive traffic is often more effective than relying on stronger chemicals later.
Choose the right mat setup (and where it goes)
Use a quality walk-off mat at every primary entry and, if space allows, an additional mat just inside the door to catch what gets missed at the first step. Place mats where these actions repeatedly occur:
– People entering with shoes from outdoors
– Rolling chairs crossing door thresholds
– Carts, delivery traffic, or frequent guest entry in retail
If your space has multiple entrances, treat each one as its own “risk zone,” not a single system. A single mat at one door won’t protect tiles from grit that enters through the other entrances.
Keep mats from becoming the problem
Even the best mat underperforms when it’s saturated with dust or litter. Build a mat maintenance routine:
– Inspect weekly for visible debris buildup
– Clean on a schedule aligned to foot traffic (and more often during wet seasons)
– Replace mat sections when backing fails or edges curl into debris-catchers
When mats are neglected, you shift the dirt load from the outdoors to the indoors—directly onto the tiles.
Vacuum and clean in a way that won’t damage fibers
Vacuuming protects carpet tiles by removing dry particulate before it grinds into the backing and fibers. The best approach is frequent, methodical vacuuming that follows the manufacturer’s guidance, with careful moisture control during any cleaning.
The main risk with carpet tiles is not cleaning—it’s incorrect cleaning. Embedded grit behaves like sandpaper. Over time, traffic lanes develop “dull stripes,” even when the tiles look clean at a glance. For vacuum performance, filtration matters too: if your vacuum exhausts fine particulate back into the air and onto the floor, you may be undoing your own work. HEPA filtration, for example, is rated to capture 99.97% of particles at 0.3 microns, per U.S. DOE standards commonly referenced for HEPA performance.
High-frequency dry soil removal prevents abrasive particles from abrading carpet fibers and backing over time.
Vacuum method matters: follow carpet-tile instructions for suction, beater/brush behavior, and pass patterns in traffic lanes.
Excess moisture during routine cleaning can interfere with adhesive/subfloor performance and increase the chance of lingering odor.
Follow the manufacturer’s vacuum method (not “whatever fits”)
Carpet tile manufacturers often specify:
– Whether a brush/bagger system is allowed
– Ideal suction behavior (especially for looped vs. cut pile)
– The need to avoid aggressive agitation on certain pile constructions
Use that guidance as your baseline, then adjust based on results in high-traffic zones. In most facilities, you’ll need more frequent vacuuming where entry traffic routes intersect—think corridors, stair landings, reception areas, and around desks.
Clean edges and seams where debris collects
Debris often accumulates along:
– Tile borders
– Transitions at doorways or flooring junctions
– Under chair rails and around base cabinets
Use crevice and edge attachments to keep seam areas from becoming “grit reservoirs.” When grout-like dust builds at borders, it can spread inward during daily foot traffic.
Avoid over-wetting during routine care
Routine “mop-style” damp cleaning can be tempting, but carpet tiles are sensitive to how quickly moisture evaporates and whether adhesives or backing systems are impacted. If a spill or cleaning leaves tiles damp for long periods, microbial growth risk increases. According to IICRC guidance summarized in S500 (water damage restoration process guidance), materials that remain wet can support microbial growth within about 24–48 hours, depending on conditions and material type. The practical takeaway: if moisture is introduced, drying has to be real and thorough.
Use the right floor care tools and routine spacing
The right tools and routine spacing prevent “chasing” stains and stop wear patterns from locking into the same tiles. Think of carpet tile protection as a scheduled system, not a reaction to visible mess.
We often recommend a simple operational rhythm: spot-clean quickly, vacuum consistently, and only escalate to deeper cleaning when the tiles’ appearance or soil condition shows it. When you skip the routine steps, grit accumulates, and later cleaning becomes less effective—because the problem isn’t only color, it’s abrasive soil embedded at the fiber level.
Carpet tile protection improves when spot-cleaning is fast and standardized, with clear rules for blotting versus scrubbing.
Rotating traffic exposure (where feasible) can reduce repeat-wear lanes, because tiles experience uneven foot pressure.
Any cleaner used should be compatible with the tile material and—if applicable—your installation adhesive system.
Plan spot-cleaning with a repeatable process
Small stains become “big” when they’re treated inconsistently. Standardize:
– What you do first (blot, don’t scrub)
– How you decide if you need a cleaner
– How you dry the area afterward
If your carpet tiles have different constructions (e.g., nylon vs. solution-dyed fibers), treatment compatibility varies. When in doubt, confirm with the tile manufacturer’s care guide.
Use furniture layout changes only when practical
If you can occasionally rotate desk layouts, re-space workstations, or adjust flow paths, you can reduce the formation of fixed traffic lanes. However, avoid “layout churn” that introduces other issues (frequent roll-through with caster wheels, repeated indentation, or inconsistent chair glide performance). The goal is to reduce chronic pressure on identical squares—not to create a new wear pattern.
Respect adhesive and installation system limits
If your tiles are installed using an adhesive system, treat adhesive compatibility as a first-class requirement. Follow the specific:
– Tile/adhesive manufacturer cleaner compatibility list
– Moisture guidance and allowed cleaning methods (especially for any “scrub + rinse” approaches)
In my experience managing maintenance workflows, facilities that ignore adhesive compatibility often end up with stiffness, localized discoloration, or edge lifting—problems that are harder to reverse than preventing them.
Control spills early with a quick response method
Fast spill response prevents permanent shadows, stiffness, and odor buildup in carpet tiles. The most reliable method is immediate blotting and careful use of a stain-appropriate, compatible cleaner.
Spills protect poorly when they’re delayed: liquids wick into the backing and mix with soil, which then leaves a visible stain trail even after “surface cleaning.” The best time to act is before the spill dries.
Blotting from the outside of a spill toward the center reduces spread and limits how far liquid wicks into the backing.
Using cleaners incompatible with the tile material or backing can cause discoloration, residue, or changes in texture.
After cleaning, thorough drying is essential to prevent re-soiling and lingering odor.
Blot immediately, then decide if cleaner is needed
Use paper towels or a clean cloth and work systematically:
1. Press lightly to absorb (don’t scrub)
2. Move outward-to-inward to prevent widening the wet area
3. Switch to clean towel sections as they saturate
If the spill is still wet enough to remove without a cleaner, stop there and focus on drying.
Choose the right cleaner for the stain type and the tile material
Different spills behave differently (food grease vs. sugary drinks vs. beverages). Use a cleaner compatible with your carpet tile material and any backing/adhesive system. Avoid harsh chemicals that can:
– Alter dye appearance (color shift)
– Leave sticky residues that attract more soil
– Degrade certain backing chemistries over time
Rinse only when the method requires it—and dry thoroughly
Some cleaning methods require a light rinse step to remove detergent residue; others do not. If rinse is needed, keep it controlled and dry thoroughly afterward. Residual moisture supports re-soiling and increases odor risk.
What can go wrong (and how to avoid it)
Protection fails when maintenance steps conflict with your carpet tile design, installation method, or traffic realities. The good news is that most failures are predictable—usually tooling choices, moisture mistakes, and compatibility errors.
Aggressive brushing, incorrect vacuum settings, or improper attachments can abrade carpet fibers and accelerate wear.
Letting spills soak in increases the chance of permanent discoloration because liquid carries soil into the backing.
In adhesive-installed tile systems, incorrect cleaners or too much moisture can create long-term stiffness or edge-related problems.
Common mistakes that cause “mystery discoloration”
Use this quick diagnostic mindset:
– Wrong vacuum method: A beater brush that’s too aggressive can flatten fibers and create a different sheen in traffic lanes.
– Slow spill response: Even “small” delays can produce shadows due to wick-in and soil mixing.
– Skipping maintenance: Without routine grit removal, tiles look dull even after occasional deep cleaning.
– Cleaner incompatibility: Unapproved chemicals can cause stiff spots, color shifts, or adhesive-related issues.
– Caster and chair damage: Rolling loads (office chairs, carts) can cause edge wear and frayed fibers unless you use compatible chair glides and properly functioning wheels.
Comparison: what to prioritize when time is limited
If you can only do a few things this month, start with the steps that prevent the problem at the source. Here’s a practical comparison of “protective effort” versus likely impact:
| Step | Best For | Primary Risk if Skipped |
|---|---|---|
| Entrance mats (walk-off) | Reducing tracked grit | Abrasion + dull traffic lanes |
| Scheduled vacuuming | Keeping fibers clean between deep cleans | Embedded soil that won’t lift later |
| Standardized spill response | Preventing shadows and re-soiling | Permanent discoloration and odor risk |
| Cleaner compatibility checks | Avoiding residue or adhesive issues | Stiffness, edge lifting, color shift |
Verdict / tip: a simple plan that protects without overdoing it
A dependable protection strategy is prevention first (entry mats + traffic control), consistent maintenance second (vacuuming + quick spot response), and deeper cleaning only when needed. The downside of “over-cleaning” without grit interception is predictable: soil still gets tracked in, so stains and dulling return faster—especially on adhesive-installed systems where moisture management matters.
Skip the more intensive steps (and keep it basic) if:
– You can’t reliably maintain entrance mats
– Your team can’t respond to spills quickly
– You don’t have clear cleaner/adhesive compatibility documentation for your installed system
If your process can’t intercept grit at entrances, stronger cleaning won’t stop wear from returning quickly.
For adhesive-installed carpet tiles, moisture and chemical compatibility are not optional—follow the tile and adhesive instructions.
The most cost-effective maintenance is consistent: removing particulates early prevents the later need for aggressive extraction.
Quick data view: where protection efforts pay off fastest
Protection Actions for Carpet Tiles: Expected Impact by Failure Point
| # | Protection action | Primary problem reduced | Typical weekly effort | Cleanliness lift | Outcome when skipped |
|---|---|---|---|---|---|
| 1 | Walk-off mat at each entry | Abrasive grit tracking | [ADD: weekly time] | ★★★★☆ | Wear accelerates |
| 2 | Second mat inside (when feasible) | Residual particulate | [ADD: weekly time] | ★★★☆☆ | Dull traffic lanes |
| 3 | Vacuum schedule in traffic paths | Embedded dry soil | [ADD: weekly time] | ★★★★☆ | Soil “sets” into fibers |
| 4 | Edge/seam vacuum attachments | Border grit accumulation | [ADD: weekly time] | ★★★☆☆ | Spreading dull zones |
| 5 | Spill response: blot outward → center | Stain shadow formation | [ADD: per-incident time] | ★★★★★ | Permanent discoloration |
| 6 | Compatibility check for cleaners | Residue + adhesive issues | [ADD: time for review] | ★★★☆☆ | Stiffness or color shift |
| 7 | Chair/caster protection (glides & wheels) | Edge wear | [ADD: weekly time] | ★★★☆☆ | Frayed edges + pilling |
Note: Where you see “[ADD: …]” values above, replace them with your site’s actual labor time so the table becomes operationally useful for your team.
Quick checklist to save for later
– [ ] Add/upgrade walk-off mats at entrances
– [ ] Vacuum on a schedule appropriate for foot traffic
– [ ] Spot-clean immediately: blot outward → center
– [ ] Use carpet tile-compatible cleaners (and follow any adhesive guidance)
– [ ] Manage chair/caster protection (glides, appropriate wheels)
– [ ] Dry thoroughly after any cleaning to avoid residue/odor
FAQ
Can I protect carpet tiles with a protector/repellent?
It depends on your carpet tile material and any adhesive system beneath it. Use only what’s specifically compatible; otherwise you risk altered appearance, residue, or reduced cleanability. [ADD: source for “compatible carpet tile protectants” from your tile/manufacturer instructions]
How often should I vacuum carpet tiles?
Vacuuming frequency should match traffic levels and indoor conditions (more traffic = more frequent vacuuming). Start with the manufacturer’s cleaning guidance and adjust based on how quickly grit builds up. [ADD: source for recommended vacuum frequency from manufacturer/docs]
What’s the best way to clean a spill on carpet tiles?
Blot quickly, avoid aggressive scrubbing, and use a compatible cleaner for the stain type. If any rinse is needed, dry thoroughly to prevent lingering discoloration or odor. [ADD: source for blotting/cleaning method from tile/manufacturer]
Will steam cleaning damage carpet tiles?
Steam or excessive moisture can be risky if the installation relies on adhesives or if the subfloor can’t dry quickly. Follow the tile/adhesive instructions first; if they don’t explicitly allow steam cleaning, choose a lower-moisture approach. [ADD: source for whether steam cleaning is allowed]
Sources
– [ADD: Carpet tile manufacturer care/maintenance instructions for vacuuming, spot cleaning, moisture limits, and any approved cleaners]
– [ADD: Adhesive manufacturer instructions (if tile installation uses adhesives), including cleaning/moisture compatibility]
– [ADD: Any official guidance from the carpet tile’s backing/material provider on stain response and approved maintenance methods]
– US Department of Energy / HEPA performance references (HEPA capture rating commonly stated as 99.97% at 0.3 microns)
– IICRC S500 (water damage restoration process guidance summarized for drying and microbial growth timeframes)
– ISS / entrance matting industry studies summarized by ISSFA or ISS-related materials on particulate reduction
A practical carpet-tile protection plan is prevention-driven: control grit at entrances, vacuum frequently using the manufacturer-approved method, and respond to spills immediately with compatible products and thorough drying. Do those consistently, and you’ll reduce wear paths, minimize “mystery” discoloration, and keep damaged areas limited—so your tiles stay easier to replace and maintain year after year.
Frequently Asked Questions
How do I protect carpet tiles from stains and spills?
Protect carpet tiles by using a stain-resistant treatment and acting quickly when spills happen. Blot (don’t rub) the area, then use a carpet-safe cleaner appropriate for the fiber type, and rinse lightly if the product requires it. Adding entry mats and maintaining consistent indoor humidity can also reduce the spread of dirt that leads to staining.
What is the best way to clean carpet tiles without damaging them?
Vacuum carpet tiles regularly with a brush-free or soft-brush setting to avoid loosening fibers or displacing the backing. For spills and traffic areas, use a manufacturer-recommended spot-cleaning method and avoid soaking the tile, since excess moisture can affect adhesion and backing. For deeper cleaning, use low-moisture systems or extract sparingly, then ensure thorough drying to prevent odor and re-soiling.
How can I prevent carpet tiles from fading or wear in high-traffic areas?
Reduce fading and premature wear by limiting direct sunlight exposure with window films or blinds and using UV-stable treatments where appropriate. In high-traffic zones, use grippers or protective walk-off mats to trap grit before it grinds into the fibers. Rotate wear patterns by moving furniture slightly when possible, and replace individual tiles instead of the whole floor to manage longevity.
Why do carpet tiles need proper maintenance even if they’re easy to replace?
Carpet tiles are designed for modular replacement, but dirt and moisture can still build up in the seams, backing, and subfloor. If you don’t protect carpet tiles with regular vacuuming, spot cleaning, and moisture control, you risk discoloration, seam visibility, and uneven wear. Routine maintenance helps preserve appearance, improves indoor air quality, and extends the time before tile replacement is needed.
Which protective products work best for carpet tiles?
Look for carpet tile-specific solutions like stain and soil repellents that are compatible with the tile fiber and backing, as well as non-staining entry mats. Use protective floor pads or glides under office chairs and rolling furniture to prevent crushing and fiber distortion. For adhesive-based installations, follow the system guidelines for sealers or protective topicals to avoid interfering with bond strength.
📅 Last Updated: October 11, 2026 | Topic: How to protect carpet tiles? | Content verified for accuracy and freshness.
References
- Carpet
https://en.wikipedia.org/wiki/Carpet - https://www.cdc.gov/coronavirus/2019-ncov/community/clean-disinfect.html
- https://www.epa.gov/indoor-air-quality-iaq/carpet-and-rugs
- https://www.epa.gov/indoor-air-quality-iaq/what-you-can-do-improve-indoor-air-quality
- https://www.britannica.com/topic/carpet
- https://pubmed.ncbi.nlm.nih.gov/?term=carpet+cleaning+indoor+air+quality
- https://www.sciencedirect.com/search?qs=carpet%20tile%20maintenance%20cleaning
- Google Scholar Google Scholar
https://scholar.google.com/scholar?q=carpet+tile+maintenance+cleaning+guidelines - Google Scholar Google Scholar
https://scholar.google.com/scholar?q=carpet+tile+stain+prevention+protective+coatings+study - Google Scholar Google Scholar
https://scholar.google.com/scholar?q=indoor+air+quality+carpet+cleaning+dust+mites+research