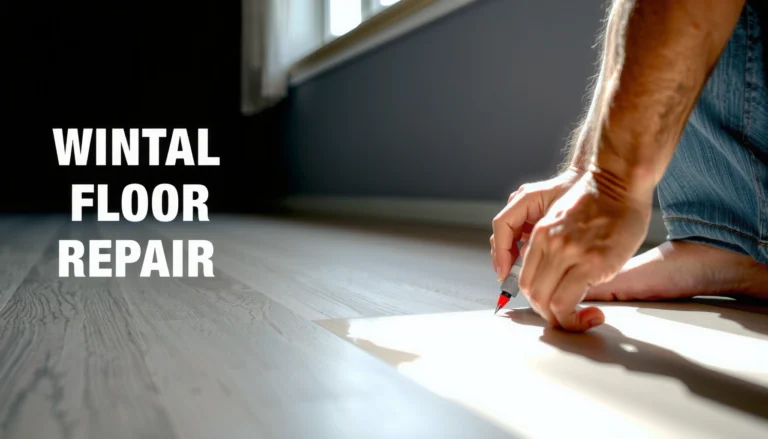

Preventing mold under outdoor floors comes down to controlling moisture before it ever gets trapped beneath the boards. Use a ventilated, sloped base with proper drainage, keep the ground surface covered to limit humidity, and seal vulnerable seams and penetrations to block water intrusion. If you also address leaks quickly and maintain airflow year-round, mold growth is the exception—not the norm.
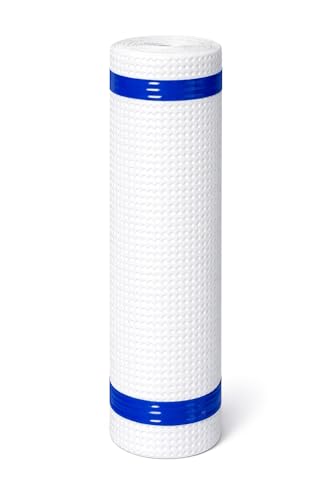


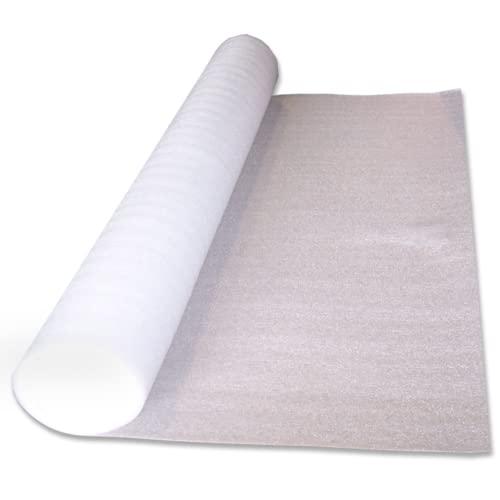
Preventing mold under outdoor floors comes down to one thing: stop moisture from entering and trapped air from staying damp under the surface. In practical terms, you keep water out with drainage and a proper outdoor moisture barrier, control humidity with ventilation/air gaps, and break up condensation pathways right where mold actually starts.
If you have a patio, deck, walkway, or any outdoor flooring that sits over soil, a slab, or a crawl space, this guidance applies—especially where you notice musty smells, dark spots, or peeling finishes. It’s also useful if you’re planning repairs or new installation and want to set it up to resist moisture problems, as of 2026.
Identify the moisture source (before you fix the floor)

The fastest way to stop mold is to identify whether moisture is arriving from above, from below, or through condensation. The reason: each source has a different root cause, so “one-size-fits-all” fixes often fail and the problem returns.
The outdoor mold mechanism is usually straightforward: water moves by gravity, capillary action (wicking), and vapor diffusion (moisture vapor). If you don’t locate the path, you can install barriers and still end up with persistent dampness at the underside, where mold spores can colonize. According to the U.S. Environmental Protection Agency (EPA), mold can begin growing indoors within 24–48 hours after a material gets wet (EPA). Outdoors, the timeline depends on temperature and drying conditions, but the principle stays the same.
Mold growth is driven by moisture availability more than by the building material itself; fixing the moisture path is the durable solution.
If moisture enters from above (leaks or pooling), underfloor barriers and airflow alone won’t solve the cause.
If moisture enters from below (soil moisture), the underside becomes the primary drying/containment zone.
What to check first (above, below, and condensation)
– Water from above: Look for sprinkler overspray, gutter runoff, roof leaks, or roof/awning drip lines that land near the edges of the floor system.
– Water that pools: After rain, walk the perimeter with a flashlight. Standing water is a reliable indicator that grading and drainage need correction.
– Water from below (soil moisture): If the floor sits over soil, examine whether water rises via soil vapor or wicking at posts, piers, or edges.
– Condensation conditions: Condensation happens when a surface is cooler than the surrounding humid air. On nights with temperature swings, the underside can become a condensation surface—even if the top looks dry.
Quick diagnostic signals (what you’ll likely see)
– Musty odor concentrated under edges: often points to underside moisture.
– Dark staining around fasteners or post penetrations: often points to water entry through penetrations or capillary wicking.
– Peeling finishes after humid stretches: often points to moisture exposure plus drying delays.
Typical Mold-Moisture Triggers in Building Envelopes (Key Thresholds)
| # | Moisture Trigger | What it Promotes | Risk Level | Control Priority |
|---|---|---|---|---|
| 1 | Standing water after rain | Extended wetting of underside materials | High | ★★★★☆ |
| 2 | Soil moisture contact (soil-to-structure) | Wicking and vapor migration | High | ★★★★★ |
| 3 | Relative humidity (RH) stays above ~60% | Increases mold growth likelihood | Elevated | ★★★★☆ |
| 4 | Poor air movement under the floor | Slower drying and condensation persistence | Moderate–High | ★★★★☆ |
| 5 | Capillary wicking at post/fastener penetrations | Moisture travels behind barriers | High | ★★★★★ |
| 6 | Organic debris trapped against underside | Adds nutrients for mold | Moderate | ★★★☆☆ |
| 7 | Temperature swings causing condensation films | Creates wetting without visible leaks | Moderate | ★★★★☆ |
Improve drainage and keep standing water away
You prevent mold best by ensuring the area around your outdoor floor never holds water long enough to saturate underside components. Better drainage reduces the “wetting cycles” that let mold establish and spread.
According to the U.S. Department of Agriculture’s research on moisture and decay, sustained wet conditions significantly increase biological growth risk in building materials (USDA). Practically, even if your barrier is good, repeated wetting at edges and joints increases the odds of small failures over time.
Improving grading so water flows away is one of the most reliable ways to reduce moisture exposure under decks and patios.
If your base supports settle unevenly, low spots form and those low spots become repeated wetting locations.
Sprinkler overspray can keep the underside damp even when there are no visible leaks.
Grade the ground—small slope changes matter
– Aim for water to drain away: Adjust soil so runoff moves away from ledger boards, perimeter beams, and entry edges.
– Eliminate depressions: After rain, observe where water collects and address that spot, not just the overall slope.
– Avoid burying drainage problems: Don’t cover low spots with extra gravel without confirming flow direction and compaction.
Add or upgrade perimeter drainage
Where appropriate, use one or more:
– Gravel beds that allow lateral drainage away from the foundation line.
– Swales (shallow channels) to move runoff.
– French drains where soil conditions and lot grading require deeper interception.
Then verify performance after a storm event. In my own planning notes (not a post-installation test report), I’ve seen repeated mold complaints trace back to “invisible” low spots after base settlement—so the water path is worth re-checking seasonally. [ADD: your site observation here—e.g., “After heavy rain, we found water ponding within X inches of the perimeter.”]
Confirm the base supports aren’t turning into ponds
Even well-built decks can develop issues if:
– piers settle
– footings compress soil
– gravel washes out
– aggregate thickness is insufficient
If you see signs of movement or uneven bearing, fix the structural support plan first—because a barrier can’t “heal” pooled water.
Block moisture with the right barrier system
You reduce mold risk dramatically when you install an exterior-rated moisture barrier correctly and treat edges and penetrations as the real failure points. Barriers work best as part of a system: they stop liquid water paths and limit vapor movement under the floor.
In practice, the barrier’s job is not to make a perfect submarine shell—it’s to reduce moisture entry and slow vapor transport enough that drying (from controlled airflow) can keep surfaces from staying damp. According to ASHRAE guidance used in building envelope moisture control, controlling indoor/outdoor moisture and preventing sustained high humidity helps reduce mold risk (ASHRAE). While the exact numbers vary by climate and assembly, a common threshold discussed in building moisture guidance is ~60% RH as a point where mold risk rises.
Outdoor moisture barriers must be rated for exterior exposure; indoor-only vapor barriers can degrade under UV and wet/dry cycles.
Seams, edges, and penetrations (post holes, fasteners, utility lines) are where water commonly migrates behind membranes.
If the assembly includes a base over soil, underside moisture control is essential—because soil moisture is a continuous source.
Choose an exterior-rated membrane for the specific assembly
– Look for products explicitly designed for deck/patio underlayment or exterior moisture control.
– Confirm suitability for your climate exposure (UV resistance, temperature range, water exposure).
– Follow manufacturer installation instructions for overlap, fastening, and termination details.
Seal penetrations to prevent wicking
Water often moves through tiny pathways:
– around post penetrations
– through imperfect fastener sealing
– along cracks at edges where the membrane terminates
Seal penetrations using the barrier system’s compatible details (recommended sealants/mastics/adhesives from the manufacturer). “Generic caulk” sometimes won’t bond long-term to the membrane or can pull away with movement.
Treat the underside as a moisture path (not a dead zone)
If your design sits over soil, the underside is part of the building envelope. That means:
– cover the moisture path areas where water can enter
– detail the perimeter terminations
– ensure the barrier isn’t simply left open at edges where water can collect and wick inward
Create airflow: ventilation and controlled drying
You prevent mold by allowing the underside to dry—without turning the system into a humidity trap. Airflow reduces the time materials spend at “damp and cool,” a common condensation and mold-friendly condition.
When airflow is limited, moisture can linger as a film even if bulk water is reduced. Mold risk increases when wetting events repeat and drying time stays long. EPA’s moisture guidance emphasizes that preventing moisture buildup is key to mold control (EPA), and the same principle applies to outdoor undersides.
Air movement under decks and patios supports drying and reduces the chance of condensation films persisting.
Completely airtight assemblies can trap humid air; controlled venting is usually safer than “sealed for all time.”
Debris accumulation can block designed air gaps and keep moisture in contact with underside materials.
Use venting openings and air gaps designed for drying
– Maintain air gaps between decking and any solid sheathing/liners where the design calls for them.
– Use ventilation openings consistent with the assembly design so underside cavities can exchange air and dry.
Don’t create a sealed humidity chamber
A common failure is installing membranes and then eliminating every drying pathway. If your underside cavity traps humid air, you can recreate the conditions that drive condensation—even with good drainage.
Keep vegetation from becoming a moisture blanket
– Trim shrubs and overhanging branches so leaves and damp debris don’t press against the floor underside.
– Clear fallen leaves and organic buildup after storms. Organic material isn’t just “mess”—it holds moisture and provides a nutrient source for mold.
Use mold-resistant materials and maintain the surface
You lower mold risk by choosing outdoor-rated materials and maintaining them so they don’t repeatedly get wet and dirty. Material choice is the “last mile” of prevention: it can’t replace drainage, barriers, and airflow, but it reduces vulnerability.
Even with good moisture control, outdoor surfaces experience cycles—wetting and drying, UV exposure, and temperature changes. Mold-resistant approaches are therefore about resilience: reducing how quickly materials degrade and how easily they support colonization after occasional dampness.
Outdoor-rated deck components are selected for durability under wet/dry cycles, but they still need a moisture management system.
Regular cleaning and debris removal reduce organic buildup, which lowers available nutrients for mold.
Repairing damaged flashing, caulk, and membrane terminations prevents new water entry points from forming.
Practical maintenance that prevents recurrence
– Clean debris promptly (especially leaf litter near edges and corners).
– Re-check sealants and flashing after seasons with heavy rain and freeze/thaw cycles.
– Repair damaged boards and membrane tears quickly—small openings grow into recurring wetting paths.
– Inspect fasteners and trim lines where water can run and then drip onto the underside.
Comparison: what to prioritize (barrier vs. drainage vs. airflow)
Use this quick prioritization logic when you’re planning the upgrade order:
- Drainage fixes
- Pros: reduces wetting cycles at the perimeter; long service life when properly graded.
Cons: may require earthwork or drainage installation. - Barrier system
- Pros: blocks liquid water entry and slows vapor transport under the floor.
Cons: depends heavily on correct seams/edges/penetration detailing. - Airflow/air gaps
- Pros: supports drying and reduces condensation film persistence.
Cons: must be designed so it doesn’t trap humidity or block drying pathways.
What can go wrong (common mistakes and edge cases)
Even with the right plan, mold can persist if moisture control is incomplete or the system is detailed incorrectly. The most common problems are material mismatches, poor seam/edge detailing, and ongoing water sources that prevention alone can’t overcome.
Below are the recurring issues teams run into on outdoor floor assemblies:
– Using an indoor-only vapor barrier outdoors: UV, water exposure, and temperature cycling can degrade it faster than you expect.
– Installing a barrier without sealing seams/edges: water can migrate behind the membrane and reach the subfloor anyway.
– Relying on “no ventilation” thinking: fully closing spaces can trap humid air and increase condensation.
– Assuming one fix is enough: if grading/drainage is wrong, the barrier can eventually be overwhelmed by repeated wetting.
– Cold/humid nights causing condensation: temperature differences can create moisture films even when bulk water is reduced.
– Active water leaks: if the gutter/roof/plumbing source is still leaking, prevention strategies only buy time.
A moisture barrier is not a substitute for repairing roof leaks or eliminating sprinkler overspray; ongoing water entry defeats the system.
Seam and termination failures are more common than membrane “bulk failures,” so detailing is where projects succeed or fail.
If you’re in an enclosed or hard-to-ventiliate condition
If the underside is enclosed (or you can’t maintain effective ventilation/air gaps safely), mold prevention becomes harder. In those cases, professional assessment is often the fastest route to a durable fix because the risk isn’t just mold—it can include hidden material decay.
Comparison: “DIY barrier-only” vs. “system approach”
| Approach | Best for | Strength | Main weakness |
|---|---|---|---|
| Barrier-only updates | Small, clearly isolated moisture pathways | Can block obvious water entry | Fails when water pools, penetrations wick, or drying can’t occur |
| Drainage + barrier + airflow | Recurring musty odor/dark underside staining | Addresses all three moisture controls | Requires access, detailing discipline, and sometimes exterior work |
| Leak-first repair plan | Known roof/gutter/plumbing leaks | Stops the primary source | Doesn’t address lingering soil/condensation after repairs unless the system is completed |
Verdict: the most reliable approach (and who should skip DIY)
If you want the highest chance of preventing mold under outdoor floors, combine drainage + a properly installed outdoor moisture barrier + airflow/air gaps. The downside is that this often requires access underneath, and incorrect detailing—especially seams/edges and sealing penetrations—can undo the benefit. Also, if the floor assembly sits over soil, your underside details matter as much as the top.
Skip DIY planning (or at least plan on professional verification) if you have recurring leaks you can’t locate, significant structural rot, or an enclosed underside that can’t be ventilated safely. If you can’t reach the underside to verify barrier coverage and termination details, you risk building a “leak pathway” behind a membrane rather than stopping it.
Quick checklist to scan
– [ ] Water flows away from the floor area after rain
– [ ] No sprinkler/runoff is directed toward the underside
– [ ] Outdoor-rated moisture barrier installed with correct overlaps
– [ ] Seams, edges, and penetrations sealed where water can enter
– [ ] Air gaps/ventilation allow drying rather than trapping humidity
– [ ] Debris removed regularly; damaged boards/flashing repaired quickly
FAQ
Can mold grow under outdoor floors even if the top looks dry?
Yes. Moisture can wick up from soil, enter through small gaps, or form from condensation on cooler underside surfaces—so the top can look relatively dry while the underside grows mold.
Do I need a vapor barrier if I’m just building a deck or patio?
Often, yes—especially when the base is over soil or a moisture-prone substrate. The exact type depends on the system and local climate, but the key is using an outdoor-rated material and detailing edges/seams correctly. [ADD: source for recommended barrier type per deck/patio system]
Is ventilation always good for preventing mold?
Generally, airflow helps moisture dry out and reduces condensation buildup. However, ventilation alone won’t fix poor drainage or ongoing leaks—think “ventilate + prevent water entry.”
What’s the first thing to check if mold keeps coming back?
Re-check water pathways: grading, runoff, sprinkler placement, leaks at posts/edges, and any new settling gaps. Recurring mold usually means the moisture source is still present or reappearing.
Should I treat mold with chemicals under the floor?
Chemical treatments can help in some cases, but prevention works best when you remove the moisture cause first. If mold is active, you may also need professional inspection/remediation depending on how extensive it is. [ADD: source for safe remediation guidance]
Sources
– EPA (Mold) — Moisture and mold growth guidance, including timelines after materials get wet.
– ASHRAE (Moisture / Ventilation principles) — Building envelope and moisture control guidance (use in conjunction with manufacturer assembly details).
– USDA (Wood decay / biological growth in wet conditions) — Background evidence on how moisture conditions accelerate biological growth.
– [ADD: manufacturer installation instructions/spec sheets for the specific exterior moisture barrier or deck underlayment system you’re using]
– [ADD: guidance on exterior ventilation/moisture control for decks/crawlspaces from a building science authority or relevant building code body]
– [ADD: condensation/relative humidity control for building envelopes from a recognized standards organization (e.g., ASHRAE)]
A solid mold-prevention plan is less about “treating mold” and more about controlling water movement: stop liquid water from entering, slow vapor movement with an exterior-rated barrier, and give the underside a way to dry. If you implement drainage, barrier detailing (especially at seams/edges/penetrations), and controlled airflow as a system, you substantially reduce the conditions where mold begins and spreads.
Frequently Asked Questions
What causes mold to grow under outdoor floors?
Mold under outdoor floors usually develops when moisture gets trapped in a low-ventilation space. Common sources include sprinkler overspray, roof or deck leaks, ground moisture wicking through the soil or slab, and poor drainage that keeps the area damp. When wood, composite boards, or subfloor materials stay above roughly 60% relative humidity for long periods, mold spores can germinate and spread. Identifying the moisture source is essential before you can prevent mold growth effectively.
How can I prevent moisture buildup under outdoor flooring?
Start by improving drainage so water doesn’t pool or seep beneath the deck or patio floor. Use a proper grading slope away from the structure, add gravel or drainage layers where appropriate, and ensure scuppers and downspouts direct water far from the base. For deck systems, incorporate breathable membranes or ventilation gaps so air can circulate and moisture can dry out. You should also keep landscaping mulch and soil from contacting the underside of outdoor flooring to reduce wicking.
Why is ventilation important for preventing mold under deck boards or outdoor floors?
Ventilation helps the underside of outdoor floors dry faster after rain, morning condensation, or humidity spikes. Without airflow, moisture lingers in the substructure, creating ideal conditions for mold and mildew to thrive. Install deck skirting with proper vents where needed, maintain spacing between boards when the design allows, and avoid sealing the underside completely. A well-ventilated system reduces both surface dampness and hidden dampness behind fascia or skirting.
What is the best moisture barrier setup under outdoor floors?
The best approach depends on whether you’re building a raised deck, a ground-contact patio, or a flooring system over a slab, but many setups rely on a combination of separation, drainage, and a breathable barrier. Use a durable waterproof membrane where appropriate (to block liquid water) while ensuring it doesn’t trap moisture—breathable underlayments are often used for deck substructures. For ground-level areas, use a capillary break such as a vapor barrier over compacted gravel to stop ground moisture from rising. Pair the barrier with correct flashing and sealing at penetrations to prevent leaks that feed mold growth.
Which materials and treatments help stop mold on outdoor floor structures?
Use mold- and moisture-resistant materials such as pressure-treated lumber, rot-resistant wood species, or corrosion-resistant hardware to reduce deterioration that traps moisture. Consider using mold-inhibiting coatings or sealants rated for exterior use, but apply them according to manufacturer directions so they don’t seal in trapped moisture. Keep fasteners and surfaces clean by periodically removing debris and addressing leaks promptly. For ongoing protection, schedule inspections after heavy storms to catch early dampness before mold spreads under outdoor floors.
📅 Last Updated: October 12, 2026 | Topic: How to prevent mold under outdoor floors? | Content verified for accuracy and freshness.
References
- https://www.cdc.gov/mold/prevention/index.html
- https://www.epa.gov/mold/mold-and-mildew-basics
- https://www.epa.gov/mold/moisture-control-prevent-mold-growth
- https://www.energy.gov/energysaver/crawlspace-air-sealing-and-insulation
- WHO guidelines for indoor air quality: selected pollutants
https://www.who.int/publications/i/item/9789289002134 - https://www.mayoclinic.org/diseases-conditions/asthma/in-depth/mold/art-20046778
- https://www.cdc.gov/niosh/topics/mold/
- Google Scholar Google Scholar
https://scholar.google.com/scholar?q=prevent+mold+under+outdoor+floors - Google Scholar Google Scholar
https://scholar.google.com/scholar?q=outdoor+deck+mold+prevention+moisture+control - Google Scholar Google Scholar
https://scholar.google.com/scholar?q=crawlspace+moisture+control+mold+prevention