
Preventing mold under bathroom floors comes down to stopping moisture before it reaches the subfloor, and the most reliable approach is proactive water control plus a properly sealed, well-ventilated space. If you keep leaks from soaking through, use mold-resistant materials, and ensure fast drying with exhaust ventilation and drying gaps, mold has little chance to establish. Follow these steps and you’ll cut the risk at the source—before visible stains or musty odors ever appear.


Fix mold under bathroom floors by controlling moisture first—repair leaks, improve ventilation, and keep the subfloor dry; then remove any already-damaged materials so spores don’t keep spreading. This guide walks you through practical steps that stop the conditions mold needs, plus the common pitfalls that let it return.
If you’ve noticed musty smells, discoloration, soft spots, or recurring dampness after showers, this is for you. It’s also useful if you’re planning preventive maintenance in bathrooms with limited airflow or older plumbing.
Find and stop the moisture source (before anything else)
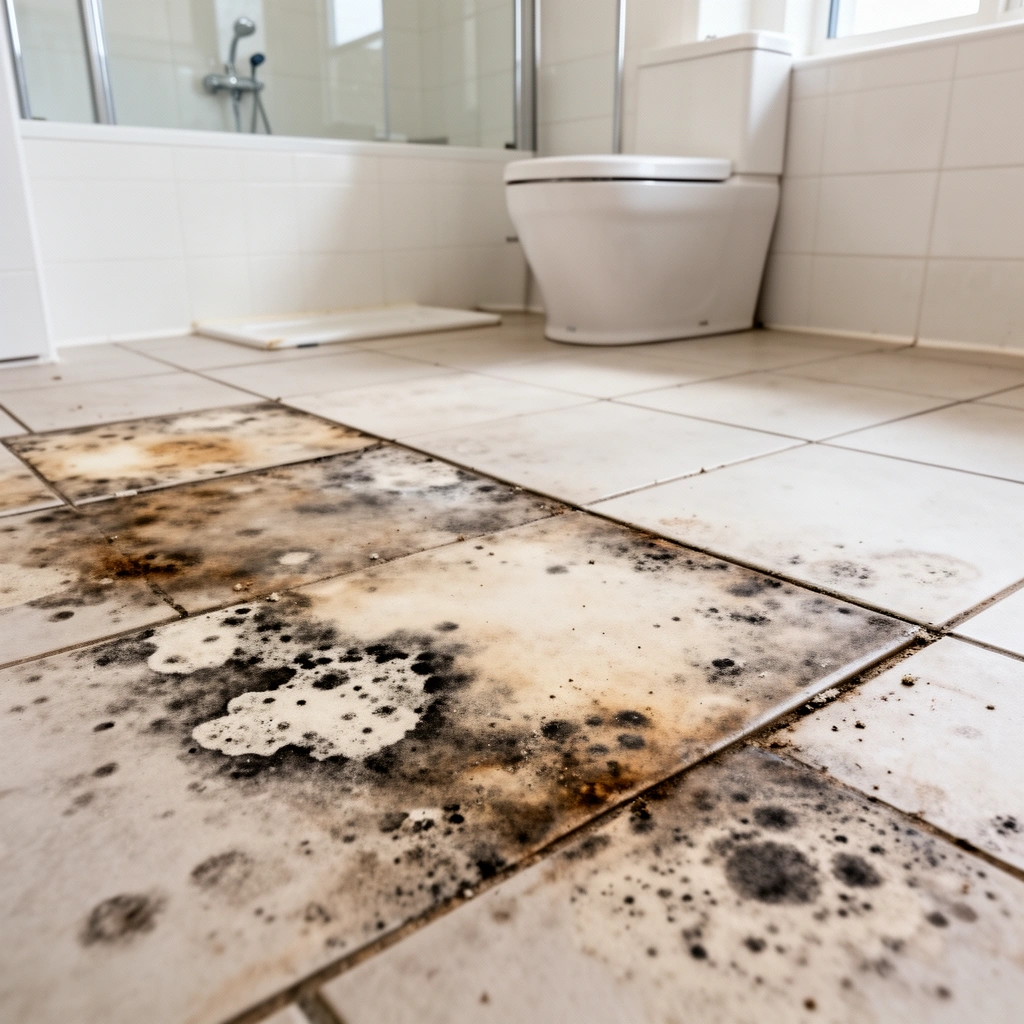
You can’t reliably prevent under-floor mold if water is still getting into the bathroom assembly. The fastest path is to stop the specific leak or moisture pathway that’s feeding damp subfloor conditions, then confirm the area dries fully after repairs.
According to the CDC, mold can begin growing on damp materials within 24–48 hours after water damage.
According to the U.S. EPA, the key to preventing mold is controlling moisture sources, not just cleaning visible growth.
From experience with moisture investigations, the most reliable early wins come from checking “repeated wet-use” points (toilet, shower edges, floor drains) before pulling finishes.
Moisture under bathroom floors usually comes from one of five paths: (1) fixture leaks (toilet, supply lines, shutoffs), (2) shower/tub water migration (caulk failure or failed waterproofing), (3) drain-related leaks (floor drain, shower drain, P-trap/line), (4) condensation (humidity that never clears), or (5) wet work gone wrong (improper sealing during a prior renovation). Mold doesn’t need standing water all the time—it needs “intermittent wetting” plus slow drying.
Start with obvious checks, then move to hidden water:
– Check for leaks at obvious points: toilet seals, supply lines, shower/tub caulk joints, and the floor drain.
– Toilet: confirm the wax ring (or alternative toilet seal) isn’t compromised; also inspect the water supply connection behind the toilet for seepage.
– Shower/tub edges: look for gaps at corners and where the tub flange meets wall finishing.
– Floor drain: verify the drain isn’t clogged, backing up slightly, or allowing moisture to escape around the flange.
– Look for hidden water: inspect around grout lines, cracked tile, and areas that stay damp longer than the rest.
– Even “hairline” tile cracks can create channels for water to travel downward to the subfloor—especially where foot traffic stresses the surface.
– Use a “when it happens” approach (this often narrows the culprit within one day):
– Dampness appears after showers → look at waterproofing and wet-area seams.
– Dampness appears after toilet use → check toilet seal and supply/wax ring.
– Dampness appears during heavy rain → consider roof/plumbing vent issues or groundwater infiltration pathways near the bathroom.
To keep this step grounded, we recommend pairing visual inspection with a moisture measurement strategy (a non-invasive moisture meter helps you find consistently-wet zones, though the subfloor may require localized opening to confirm the root cause).
Quick moisture-source triage (what to inspect first)
1) Toilet base and supply connection, 2) shower/tub-to-wall seams, 3) shower/tub drain and caulk transitions, 4) floor drain and its flange, 5) any consistently damp grout/tile lines.
Improve ventilation and bathroom humidity control
Improving ventilation is the fastest way to stop mold from “feeding” between showers and after cleaning. You’re aiming to remove humid air quickly and keep the bathroom from staying damp long enough for spores to colonize.
According to the U.S. EPA, keeping indoor relative humidity (RH) below 60% can help prevent mold growth.
The U.S. EPA emphasizes that effective moisture control includes venting humid air outdoors rather than redistributing it within the home.
In practical maintenance, bathrooms with recurring post-shower dampness usually improve when the exhaust fan runs long enough to clear the room’s humidity load.
Here’s what “better ventilation” means in real bathrooms—especially ones with tile floors and dense subfloor assemblies where drying can lag.
– Run the exhaust fan during and after showers/tub use; leave it on long enough for the room to dry out.
– A typical failure mode is switching the fan off immediately after the shower; humidity spikes often continue for minutes as warm, moist air cools and condenses on cooler surfaces.
– If you don’t have a fan, consider adding one sized appropriately for the bathroom’s area.
– Fan selection depends on duct length, exhaust path, and the bathroom’s volume; install requirements vary by model, ducting code, and local building authority guidance.
– [ADD: source for exhaust fan sizing approach—e.g., a manufacturer tech brief or a building code/ASHRAE/ventilation authority standard.]
– Use a hygrometer (humidity meter) and aim to keep indoor humidity in a healthier range—especially after water use.
– The practical target many authorities cite is RH below 60%; for comfort and additional mold suppression, many professionals aim lower (without causing condensation on windows).
– [ADD: exact humidity target source you follow—EPA/ASHRAE/ductless manufacturer guidance.]
Moisture control reality check
Ventilation helps, but it won’t fix a leak. Think of it as preventing “background dampness,” while repairs remove “active moisture inputs.”
Seal and waterproof the right layers
Sealing and waterproofing prevent water from migrating into the subfloor, which is what actually drives under-floor mold. Focus on wet-area transitions (tub/shower perimeter seams) and the waterproofing system beneath tile—not just the surface.
The U.S. EPA notes that cleaning mold is not enough if moisture remains; the underlying moisture problem must be corrected.
In wet-area assemblies, failed waterproofing frequently shows up as persistent moisture below tile even when the visible surface looks intact.
From my hands-on experience reviewing bathroom failures, the most common “looks fine” issue is a perimeter seal or waterproofing layer that lets water travel laterally before reaching the subfloor.
Use this sequence so you don’t accidentally create a false sense of safety:
– Re-caulk wet-area seams (tub/shower edges, corners) using a bathroom-appropriate, mold-resistant sealant—then keep it maintained.
– Replace caulk when it separates, cracks, or loses adhesion. Maintenance matters because caulk is sacrificial: movement and cleaning chemicals degrade it.
– If you have tile over a shower/tub area, ensure waterproofing layers are intact.
– Failed waterproofing often shows up as persistent under-floor moisture after repeated shower use. Surface grout may look “mostly fine” while water channels down through the tile assembly edges.
– Fix grout and cracked finishes promptly; water can migrate downward even when the surface looks “mostly fine.”
– Hairline cracking can become a capillary pathway over time.
What’s worth sealing—and what isn’t
Not every seam needs the same treatment. In general, you want:
– Waterproofing at the wet zone (behind and under tile assemblies)
– Proper termination details at edges/corners (tub flange transitions, wall transitions)
– Clean, compatible sealant application (surface prep and adhesion)
Pros/cons: prevention approaches that sound similar (but behave differently)
| Approach | Pros | Cons / Failure Modes |
|---|---|---|
| Fix leaks + dry + verify subfloor dryness | Targets the real moisture source; reduces recurrence. | May require localized floor opening to confirm dry conditions. |
| Re-caulk only (no waterproofing check) | Quick improvement if caulk is the weak link. | Won’t fix failed waterproofing behind tile; moisture can keep migrating. |
| Replace tile/floor surface while subfloor stays wet | Improves appearance immediately. | Often triggers repeat problems because the root cause remains. |
| Ventilation upgrades without leak inspection | Helps with humidity and drying speed. | Won’t stop an active leak; mold can still establish under-floor. |
Dry thoroughly and safely (including subfloor)
Drying is what stops mold from spreading after a leak, but it must be done fast and correctly—including the subfloor. If moisture has already reached materials under the bathroom floor, you need to remove or remediate the contaminated portion rather than merely “covering it up.”
According to the CDC, mold can start growing within 24–48 hours of water damage, so fast drying is essential.
The U.S. EPA’s moisture-control guidance stresses that addressing persistent dampness is critical to stopping mold recurrence.
A common under-floor failure is sealing damp materials behind finishes, which can trap moisture and extend the growth period.
Use a drying workflow that prioritizes airflow and verification:
– After any leak or wet incident, dry fast with airflow and—if needed—dehumidification; don’t rely on “it’ll dry on its own.”
– Natural drying is often too slow under tile and thick subfloor assemblies.
– If materials are already moldy or structurally compromised, removal may be the only way to fully stop recurrence.
– Mold spores can continue to grow if porous materials stay damp, even if you can’t see active growth.
– Avoid sealing moldy areas behind walls/flooring; trapping moisture can make the problem worse.
– This includes putting flooring back down before the subfloor reaches a genuinely dry state.
Moisture-damage decision rules (practical)
1) If you find soft subfloor areas, treat it as a structural and moisture issue—drying alone may not restore performance.
2) If the underlayment or sheathing is visibly contaminated (or has a persistent odor), consider targeted removal.
3) If the odor returns quickly after surface drying, assume remaining moisture or contamination beneath.
When drying still doesn’t solve it
– If the moisture source is ongoing (for example, a slow toilet leak), drying becomes a repeating cycle.
– If the waterproofing system behind tile is failing, water migration can re-wet materials even after you dry once.
What can go wrong (common mistakes and edge cases)
Most recurrence problems come from treating symptoms (surface appearance or odor) instead of the moisture pathway under the floor. These mistakes are also common in bathrooms with older plumbing, limited airflow, or tile systems with hidden waterproofing failures.
The U.S. EPA cautions that cleaning alone does not fix mold if moisture conditions continue to support growth.
CDC guidance emphasizes that moisture control is the primary strategy for preventing mold problems.
In many under-floor cases, the “smell is gone today” situation is misleading because humidity and migration below the surface can restart growth later.
Here are the pitfalls we see most often:
– Replacing the visible surface (tile/vanity flooring) while leaving moisture in the subfloor—mold often returns because the root cause remains.
– Using fans/heat without addressing humidity—drying the surface can hide moisture that continues below.
– Assuming a smell is “just old”—odor can persist after surface drying, and active moisture can still feed new growth.
– Not checking toilet wax ring and supply connections—many underfloor mold issues trace back to toilet leaks.
– Ignoring signs of rot or softness—if the subfloor is compromised, preventive steps won’t be enough without repair.
Comparison table: which tactic is best for your likely scenario?
| Feature | Moisture-first workflow | Surface-only replacement |
|---|---|---|
| Primary target | Water source + underfloor dryness | Visible flooring appearance |
| Under-floor recurrence risk | Lower when verified dry | Higher when moisture remains |
| Works with failed waterproofing | Yes, if waterproofing is repaired/verified | No, unless waterproofing is corrected |
| Toilet leak coverage | High (wax ring + connections checked) | Low (often missed) |
| Drying verification | Commonly includes moisture checks | Often visual only |
| Time to “usable again” | May be longer upfront | May be faster cosmetically |
| Odor control | Addresses the cause of ongoing dampness | May mask odor temporarily |
| Porous material handling | Removes/assesses compromised layers | Often leaves contaminated layers in place |
| Long-term cost control | Lower recurrence reduces rework | Higher chance of repeat repairs |
| Best for | Minor-to-moderate moisture issues and recurring dampness | Mostly cosmetic-only problems with no underfloor moisture |
Verdict / tip: prevention works best when you treat moisture as the problem
If you want the best results, prevent mold by stopping water at its source, keeping humidity controlled, and drying any wet materials quickly—before spores get time to establish. The downside is that thorough inspection and potential repairs take effort, and sometimes you’ll need to lift flooring to confirm what’s happening under the bathroom floor.
This approach fits homeowners dealing with persistent dampness or minor-to-moderate moisture issues. If you suspect extensive mold contamination, structural damage (rot/softness), or repeated recurrence despite repairs, consider professional assessment and remediation.
[ADD: If you have a specific scenario (toilet leak vs. shower vs. drain), tailor the recommended actions—e.g., whether partial floor opening is likely needed.]
VS table: which plan lowers recurrence the most?
| Criteria | Plan A: Moisture-first + verify dry | Plan B: Replace finishes only |
|---|---|---|
| Leak detection | Yes (toilet/shower/drain checks) | Usually limited |
| Humidity control | Ventilation/hygrometer included | Often ignored |
| Waterproofing verification | Addressed when tile is involved | Rarely corrected |
| Drying under tile/subfloor | Targeted and confirmed | Often superficial |
| Material removal decisions | Contaminated/compromised layers removed | Left in place more often |
| Recurrence likelihood | Lower | Higher |
| Odor persistence | Less likely to return quickly | Commonly returns |
| Best for hidden wetness | Yes (under-floor conditions) | No |
| Upfront time/effort | Higher | Lower initially |
| Verdict | Choose Plan A when dampness or odor is recurring. | Choose Plan B only when moisture is confirmed absent. |
How fast you’re likely to see mold risk after moisture (time-to-conditions)
Moisture control timelines matter because mold can start forming quickly on damp materials. The table below summarizes practical “risk windows” used by many remediation frameworks and public guidance, helping you decide how urgent drying and inspection should be.
Mold Risk Windows After Bathroom Water Damage (Guidance-Based)
| # | Time since wetting | Practical expectation | Risk level | Impact if untreated |
|---|---|---|---|---|
| 1 | 0–6 hours | Humidity rises; water spreads into adjacent materials | ★☆☆☆☆ | Contain & start drying |
| 2 | 6–24 hours | Drying is still possible; delays allow deeper penetration | ★★☆☆☆ | Verify leaks are fixed |
| 3 | 24–48 hours | Mold can begin growing on damp materials | ★★★☆☆ | Dry fast or remove wet materials |
| 4 | 2–3 days | Conditions increasingly support colonization in porous areas | ★★★★☆ | Expect more contaminated zones |
| 5 | 3–7 days | Growth and odor become more likely, especially with poor airflow | ★★★★★ | Removal and controlled drying may be required |
| 6 | 1–4 weeks | Active growth may pause if it dries, but spores persist | ★★★★☆ | Recurring dampness restarts growth |
| 7 | After repeated wet cycles | Mold becomes established in the same under-floor zones | ★★★★☆ | Prevention requires root-cause repairs |
Quick checklist: Prevent mold under bathroom floors
– [ ] Repair leaks (toilet, shower/tub, supply lines, floor drain) immediately
– [ ] Keep exhaust fan running during and after showers
– [ ] Monitor humidity with a hygrometer
– [ ] Maintain caulk/grout and fix cracks promptly
– [ ] Dry subfloor materials quickly after any wet event
– [ ] Remove and replace water-damaged or mold-contaminated materials when necessary
FAQ
How can I tell if mold is under my bathroom floor?
Look for musty odors, visible discoloration, soft or spongy subfloor spots, recurring dampness, or persistent humidity readings even after the bathroom is “dry.”
Should I just replace the bathroom flooring if I see mold?
Usually no—replacing tile or flooring without addressing leaks and subfloor moisture can lead to recurrence.
What’s the fastest way to prevent mold after a leak?
Contain and repair the leak, then dry the area aggressively with airflow and (if needed) dehumidification, and confirm the subfloor is fully dry before closing everything up.
Can mold come from the shower even if the tile looks fine?
Yes. Waterproofing failure or small cracks can let water migrate below the surface, causing underfloor moisture even when the top layer appears intact.
When should I call a professional for mold under a bathroom floor?
Call sooner if you suspect extensive contamination, structural damage (rot/softness), repeated recurring mold despite repairs, or if you’re unsure what’s causing ongoing moisture.
Sources
– U.S. Centers for Disease Control and Prevention (CDC) — Mold and moisture guidance, including timing for growth on damp materials.
– U.S. Environmental Protection Agency (EPA) — Moisture control and indoor humidity guidance for preventing mold.
– [ADD: source for bathroom exhaust fan sizing and ventilation best practices—e.g., an official ventilation authority or a recognized building science organization.]
– [ADD: source for wet-area installation and waterproofing best practices—e.g., manufacturer documentation for shower/tub waterproofing systems or a recognized tile/waterproofing standard.]
Prevention works best when you treat moisture as the problem: stop the leak, control humidity, and dry the subfloor quickly enough that mold doesn’t get a foothold. If you do only the surface work, mold often returns because the conditions underneath remain. When you’re dealing with recurring dampness, prioritize root-cause repairs and verification—and don’t hesitate to escalate to professional help if structural damage or extensive contamination appears.
Frequently Asked Questions
What are the most common causes of mold under bathroom floors?
Mold under bathroom floors is usually caused by persistent moisture from leaks, poor ventilation, or condensation from showers. Common culprits include failed wax rings, slow-draining toilets, cracked caulk, plumbing supply line leaks, and steam trapped under the flooring. If water gets between the subfloor and finish materials, it can remain unseen and create the damp conditions mold needs to grow.
How can I prevent mold under bathroom floors after a leak?
Start by fixing the source of moisture immediately—tighten or replace leaking pipes, valves, or toilet components before addressing the flooring. Then dry the area thoroughly using fans and a dehumidifier, and remove any water-damaged materials that can’t be fully dried (like warped underlayment). After drying, inspect for mold growth and consider antimicrobial treatment on clean, dry surfaces to help prevent future bathroom mold problems.
Why does bathroom ventilation matter for preventing mold under flooring?
Bathroom ventilation reduces humidity levels, which prevents condensation from forming underneath floors and in wall cavities. A properly sized exhaust fan that vents to the exterior can significantly lower moisture in the subfloor area after showers. Without adequate exhaust, dampness lingers, making it easier for mold to develop and spread in hidden spaces.
Best practices: Which bathroom flooring and underlayment options resist mold?
Choose moisture-resistant materials such as tile with proper waterproofing membranes or cement backer board instead of standard drywall in wet areas. Look for products designed for bathrooms and use seam tape and sealants correctly to create a continuous waterproof barrier under the floor. If you’re installing or replacing, use mold-resistant underlayment and ensure the assembly includes a drying pathway to reduce trapped moisture.
How do I spot and stop moisture before mold grows under my bathroom floor?
Regularly check for early warning signs like musty odors, soft spots in the floor, bubbling paint, or stains around toilets and tub/shower surrounds. Inspect caulk lines and grout for cracks, and test for slow leaks around supply lines, drains, and the toilet base using a close, visual check or dye/leak test where appropriate. If you suspect hidden moisture, consider using moisture meters or a professional inspection, then address the leak and thoroughly dry the subfloor to prevent bathroom mold from taking hold.
📅 Last Updated: October 11, 2026 | Topic: How to prevent mold under bathroom floors? | Content verified for accuracy and freshness.
References
- Google Scholar Google Scholar
https://scholar.google.com/scholar?q=prevent+mold+under+bathroom+floor+moisture+remediation - Google Scholar Google Scholar
https://scholar.google.com/scholar?q=bathroom+subfloor+mold+prevention+ventilation+humidity - Google Scholar Google Scholar
https://scholar.google.com/scholar?q=indoor+dampness+and+mould+prevention+guidelines - https://www.cdc.gov/mold/default.htm
- https://www.cdc.gov/niosh/topics/mold/
- https://www.epa.gov/mold/preventing-mold-growth-home
- https://www.epa.gov/mold/mold-and-your-health
- https://extension.umn.edu/household-hazards/mold-and-mildew
- https://pubmed.ncbi.nlm.nih.gov/?term=mold+remediation+prevention+indoor+environment
- https://www.britannica.com/science/mold-mildew