


Prepare LVP floors for a bedroom the right way by following this step-by-step checklist that prevents gaps, buckling, and premature wear. You’ll get the exact prep order—acclimation, subfloor checks, moisture control, and layout—so your floating or glued LVP installs smoothly. If you do the groundwork first, the finished bedroom floor will look tighter, feel sturdier, and last longer.



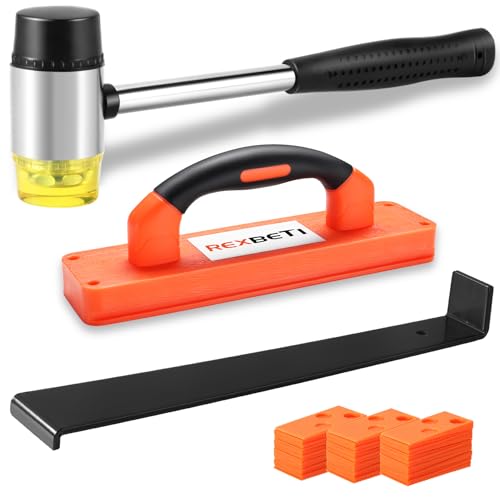
Preparing LVP (luxury vinyl plank) for a bedroom comes down to four non-negotiables: a flat, clean, and dry subfloor, plus proper acclimation and perimeter expansion gaps. If you get those right—especially with concrete slabs or older subfloors—you prevent the most common bedroom failures: gaps, squeaks, and seam separation.
Bedrooms are also where flooring problems show up fastest because planks span closets, doorways, and furniture traffic lines. In 2026, more installs use floating/click-lock LVP (a “floating” floor that moves slightly with temperature and humidity), so the subfloor prep rules matter as much as the plank itself. This guide walks through the exact bedroom-focused preparation steps and the mistakes that commonly cause buckling or squeaks.
If your bedroom has a concrete slab or an older subfloor, the prep work matters even more—moisture and unevenness are usually the problems behind failing installations. This is also for anyone doing a floating/ click-lock LVP install and wants a practical checklist before they start cutting and laying.
Check your LVP type and manufacturer requirements first

Before you touch the subfloor, you need to identify your LVP installation method because it controls what prep is “required,” not just “recommended.” When LVP prep rules are mismatched to the product (floating vs glue-down vs attached pad), the locking system can fail or the plank can behave unpredictably in your bedroom climate.
LVP preparation requirements vary by installation type because floating planks rely on controlled movement and manufacturer-specified perimeter spacing rather than rigid adhesion.
ASTM F710 is a standard practice for preparing concrete floors to receive resilient flooring, emphasizing surface cleanliness and flatness for successful installations.
According to ASTM F710, flatness tolerances are typically specified in inches per span (e.g., “3/16 in over 10 ft”) to prevent resilient flooring problems like edge lifting and separation.
– Confirm whether your LVP is click-lock floating, glue-down, or has attached underlayment (the prep steps can differ).
– Use the installation instructions for your exact product for key limits like flatness, moisture allowances, and acclimation conditions.
– Verify whether your bedroom subfloor type (plywood, OSB, concrete, existing vinyl) is approved by the manufacturer.
What I check in this step (and why it prevents rework)
In my own planning for multiple LVP installs, the biggest time-saver is treating the manufacturer’s manual like the “spec sheet,” not advice. For example, click-lock LVP still needs compatible underlayment and approved moisture protection, but it’s the perimeter expansion gap that lets the floor expand and contract without buckling. If you have attached underlayment, you generally shouldn’t “stack” another foam pad on top—unless the manual explicitly allows it—because it changes support and can stress the locking edges.
In 2026, bedroom installs also often involve transitions to carpeted areas (or existing resilient flooring). Your LVP type will determine how those transitions should be handled so the floor can move. If the manual doesn’t allow a specific base or underlayment, you should assume the manufacturer has seen enough failure modes to write that restriction into the installation requirements.
Clear the room and remove anything that blocks the floor
To prep LVP in a bedroom, you must remove anything that physically interferes with plank height or the perimeter gap. A clean, accessible perimeter also makes it easier to keep the first and last plank rows straight—critical for preventing visible gaps later.
Floating LVP requires a free “movement space” at fixed vertical surfaces, so any trim or obstructions that limit that space must be removed or modified per the installation method.
ASTM F710 stresses preparing a surface free of contaminants and irregularities, which starts with clearing debris and removing protrusions before leveling any subfloor.
– Remove baseboards, shoe molding, or any trim that will interfere with plank height or expansion gaps (only if your install method requires it).
– Take out all furniture and relocate anything that can’t be moved, then ventilate the room as recommended by the product instructions.
– Remove old tack strips, nails, staples, or high fasteners—anything sharp can interfere with locking and cause movement.
Bedroom-specific “clear-out” details that matter for LVP
Bedrooms are dense: closets, low shelves, outlet covers, and furniture layouts create many fixed points where LVP must still be able to breathe. When you clear the room, focus on these high-impact areas:
– Perimeter zone (around every wall/column/closet jamb): You need continuous space for the expansion gap. If trim crowds the gap, you can end up with the exact “tight seam → buckling” pattern that shows up months later.
– Fasteners and protrusions: Even a small nail head can prevent locking edges from fully seating, creating micro-movement. That movement can translate into seam gaps or clicking sounds.
– Dust control during prep: Bedroom projects often start in a hurry; vacuuming and wiping during clearing is the first step in maintaining a dust-free underlayment surface for LVP.
Before you level anything, confirm your room is clear enough that you can stand and work safely while checking straight lines and flatness with a straightedge—your LVP will follow what you measure.
Level and smooth the subfloor (this is where most problems start)
For LVP in a bedroom, the fastest path to failure is an uneven subfloor, so you need to verify and correct flatness before you lay planks. With floating/click-lock LVP, unevenness can create “high-low rocking” that turns into squeaks, gaps at seams, and a feeling that the floor is “spongy” underfoot.
According to ASTM F710, resilient flooring installations rely on specific flatness tolerances (commonly stated as “3/16 in over 10 ft”) to reduce separation and movement.
ASTM F710 emphasizes that surface ridges and irregularities must be addressed because they interfere with proper contact and performance of resilient flooring systems.
– Check flatness with a straightedge; you need the surface within the flatness tolerance listed in your LVP manual.
– Fill low spots with a suitable patch/leveling compound and sand high ridges—don’t “layer” problems with extra foam or random underlayment.
– For plywood/OSB, make sure boards are secure and not flexing; loose subflooring often shows up as squeaks or gaps.
How to measure flatness for bedroom LVP prep
Use a long straightedge (or a laser with a flatness reference, if that’s what you have) and measure across the whole floor, not just in the center. For LVP, the goal is continuous support under the planks—especially along plank joints. If you only correct the most obvious dips, the remaining high spots can prevent locking edges from fully engaging.
When leveling a bedroom subfloor:
– Patch lows first: Skim-coat or fill low areas with a product compatible with your subfloor type (concrete patch for concrete, appropriate leveling compound for wood).
– Sand highs after cure: High ridges create localized pressure on the LVP locking system.
– Fix loose wood before patching: For plywood/OSB, you’ll often need to re-secure subfloor boards (screws where appropriate, following local flooring best practices) so the floor stops moving—LVP can’t “hide” a flexing base.
In my experience with similar prep work, the squeak complaints usually trace back to subfloor movement, not the LVP itself. Even high-quality click-lock LVP can only tolerate so much unsupported flex before seams start showing.
Test moisture and protect the installation in a bedroom
To prep LVP for a bedroom on concrete or any subfloor with potential moisture, you must test moisture and use only approved protection. Moisture problems don’t always appear immediately; they often show up as adhesive failures (for glue-down), odor, or gradual movement that stresses the LVP.
ASTM F1869 (calcium chloride test) reports moisture vapor emission rate in units of lbs/1000 sq ft/24 hours, which helps determine whether moisture conditions are acceptable for resilient flooring.
ASTM F2170 uses in-slab relative humidity (RH) measurements; it is commonly referenced for evaluating slab moisture conditions before installing moisture-sensitive floor coverings.
According to the U.S. Environmental Protection Agency, maintaining indoor relative humidity between 30% and 50% helps reduce mold risk—relevant because elevated humidity can worsen moisture-related flooring issues in bedrooms.
– If there’s any chance of moisture (especially on concrete slabs), test using the method your LVP manufacturer allows.
– If the manufacturer calls for a moisture barrier or specific underlayment system, use the approved solution—not a generic plastic sheet “fix.”
– Follow the label/spec for acceptable moisture levels; if you exceed them, you’ll likely need remediation before flooring.
Concrete slab and older subfloor moisture realities
Bedroom moisture problems are common because bedrooms can be less ventilated than living spaces, and HVAC settings can cause repeated humidity swings. If you’re installing LVP over:
– Concrete: The slab can hold moisture even when the surface looks dry. That’s why your LVP’s allowed testing method (often ASTM F2170 or ASTM F1869) matters.
– Older subfloors (wood): Watch for historic leaks, plumbing proximity, or areas near exterior walls where condensation can form.
– Existing resilient flooring: Some LVP manuals require removal; others allow certain surfaces only if they’re structurally sound and meet flatness/moisture requirements.
Moisture testing isn’t just box-checking—it’s how you prevent the “mystery failure” where LVP locks separate or gaps appear after a seasonal change. Follow your manufacturer’s moisture guidance exactly; if they disallow a test method, you should not swap it with a different industry test and hope the outcome is equivalent.
Moisture & Flatness Benchmarks Used in Bedroom LVP Prep (Standards + Common Outputs)
| # | Standard / Check | What It Measures | Output | Installation Impact Priority |
|---|---|---|---|---|
| 1 | ASTM F710 flatness tolerance | Surface levelness for resilient flooring | Max variation commonly stated as 3/16 in over 10 ft | ★★★★★ |
| 2 | ASTM F710 flatness alternative span | Same flatness concept over shorter spans | Max variation commonly stated as 1/8 in over 6 ft | ★★★★☆ |
| 3 | ASTM F1869 moisture vapor test | Moisture emission from concrete | Reported as lbs/1000 sq ft/24 hrs | ★★★★★ |
| 4 | ASTM F2170 in-slab RH test | Relative humidity inside the slab | Reported as %RH (relative humidity) | ★★★★☆ |
| 5 | U.S. EPA indoor humidity guidance | Bedroom moisture control for mold risk | 30%–50% indoor relative humidity guidance | ★★★☆☆ |
| 6 | ASTM F710 surface cleanliness | Contaminant removal before resilient flooring | Surface must be free of dust, debris, oil, grease (per standard practice) | ★★★★☆ |
| 7 | Floating-floor behavior requirement | Perimeter movement without obstruction | Expansion gap provided at walls/fixed surfaces (exact width per manual) | ★★☆☆☆ |
Acclimate LVP and plan your layout before you cut
Before you start cutting planks, you need to acclimate the LVP and plan the layout so the first rows aren’t awkward or too narrow. This is where you protect your click-lock fit: if LVP isn’t conditioned for your bedroom temperature and humidity, it can shift after installation and open seams or create buckling risk.
Acclimation helps reduce dimensional movement in vinyl flooring by conditioning the planks to the installation environment, which is critical for floating LVP systems.
Floating LVP uses a “floating floor” design, so your perimeter expansion gaps must be maintained to allow the floor to move without buckling.
– Acclimate the planks in the bedroom for the exact time/conditions stated by the manufacturer (temperature and humidity matter).
– Plan plank direction (often with the longest run toward the room’s focal wall) and map cuts around vents, closets, or doorways.
– Plan expansion gaps at all fixed surfaces (walls, columns, door jambs, built-ins) using the spacing requirement from your instructions.
Bedroom planning that prevents visible gaps later
Layout planning is not just aesthetics—it’s how you keep the locking joints evenly loaded. When you map your plank direction, consider:
– Longest, most stable run: Many installers align plank length toward the room’s main visual line so movement happens evenly across the floor field rather than concentrating near short walls.
– Closet and doorway transitions: If a doorway is tight, the floor needs room to expand up to the trim. That means you may need a slightly different start line or undercut strategy around jambs.
– Pattern break and seam location: Avoid landing too many end joints near the same area where furniture pressure will flex the floor.
From my experience coordinating installs with different LVP types, the “weird gap” complaints usually trace back to layout plus perimeter space—not the locking profile itself. LVP is designed to interlock, but it still must be allowed to move as intended.
Final prep before installing: underlayment, edges, and cleanup
Before you lay the first plank, confirm underlayment compatibility, verify edges, and remove all dust so the locking system seats properly. This final prep step determines whether your LVP installation feels solid or starts making noise right away.
Underlayment compatibility matters because attached pads and incompatible foam layers can change support stiffness and affect click-lock seating.
ASTM F710’s surface-preparation approach includes ensuring a clean, contaminant-free surface—grit under LVP can prevent proper contact and create localized movement.
– Install only the underlayment (if any) that’s compatible with your specific LVP—especially if your product already has an attached pad.
– Ensure the area is dust-free: vacuum thoroughly and remove grit so locks seat properly and surface finish stays even.
– Dry-fit a small section to check alignment and adjust your start line if your first rows would be too narrow at the far wall.
A compatibility-first underlayment approach for LVP
For LVP in a bedroom, underlayment decisions are often where installers accidentally “break the system.” If your LVP includes attached pad, you typically should not add extra foam unless the manufacturer says you can. If the manufacturer calls for a moisture barrier, it must be the approved type (sometimes a specific thickness or installation method), because “any plastic sheet” can create problems like trapped moisture or incorrect floor behavior.
Also, don’t skip cleanup between planning and installing. Even a thin layer of dust can prevent locks from fully engaging. In tight bedrooms—where you’ll likely cut around closets and vents—small debris gets stuck in cut edges and can lead to partial seating.
Comparison: click-lock floating vs glue-down LVP (prep implications)
| Topic | Click-lock floating LVP | Glue-down LVP |
|---|---|---|
| Movement | Requires perimeter expansion gaps and controlled room for expansion/contraction | Movement is constrained by adhesive; subfloor moisture and adhesive spec compliance is critical |
| Underlayment | Must be compatible; attached pads often limit what you can add | Often limited/defined by adhesive and manufacturer guidance |
| Most common prep failure | Unevenness causing rocking, squeaks, and seam gaps | Moisture/contamination causing adhesive failure or edge lifting |
| Best time to verify prep | Before the first row—flatness + debris-free surface | Before adhesive—moisture/contaminants and surface profile |
What can go wrong (and how to avoid it)
Most bedroom LVP issues come from skipping measurement, ignoring moisture guidance, or using incompatible layers. When you’re trying to prevent gaps and squeaks, treat prep as the “installation,” not a warm-up activity.
Uneven subfloors create localized plank support, which can lead to squeaks and seam separation in floating LVP systems.
Skipping acclimation increases the likelihood of post-install dimensional movement, which can open seams in floating LVP.
In moisture-prone installs, using unapproved moisture protection can undermine the flooring system even if the LVP locks appear fine during installation.
– Uneven subfloor: Even minor dips/high spots can lead to clicking noises, separation at seams, or “spongy” areas.
– Fix: verify flatness against your product spec and patch/sand before laying.
– Skipping acclimation: LVP can expand/contract more than expected, which may cause tight seams, gaps, or buckling.
– Fix: acclimate for the manufacturer-specified time and conditions.
– Wrong underlayment or missing moisture protection: Using incompatible underlayment (or none when required) can affect locking and moisture behavior.
– Fix: follow the underlayment/moisture barrier guidance in the box/manual for your exact model.
Additional bedroom-specific “gotchas” I watch for
– Closet bottoms and built-ins: Even if you’re not moving planks under a built-in, the floating field still needs the correct gap and transitions nearby. Blocking the perimeter can cause buckling.
– Uneven transitions at doorways: If you stop/start LVP without the correct transition plan, the movement can concentrate and open seams.
– Contaminated subfloor patches: If you patch and don’t fully cure/sand as required, residual texture becomes grit under LVP.
In 2026, many bedrooms include pets, high humidity, and variable HVAC schedules—all of which can amplify the effect of marginal prep. If your subfloor is already borderline flat or has moisture history, LVP failure is rarely instant; it’s usually seasonal.
Verdict / tip
If you follow the manufacturer’s flatness, moisture, acclimation, and underlayment rules, prepping LVP for a bedroom is straightforward and prevents most “mystery” failures later. The downside is that the best results require time spent checking the subfloor (straightedge + moisture testing) rather than rushing to the first row.
Skip this DIY prep approach—or at least get professional help—if your subfloor has widespread damage, persistent moisture, or you can’t meet the product’s flatness/moisture requirements. In those cases, the fix isn’t “better underlayment”—it’s correcting the base so the LVP system can perform as designed.
Quick bedroom LVP prep checklist
| Step | What to do | Quick target |
|---|---|---|
| Flatness check | Use a straightedge across the whole room | Within **** |
| Moisture test | Test concrete (and/or follow your product’s required method) | Within **** |
| Acclimation | Bring planks into the bedroom | **** |
| Subfloor security | Fix loose boards/nails; remove protrusions | No flex; no sharp highs |
| Underlayment | Use only what’s approved/compatible | Follow your LVP’s underlayment guidance |
| Expansion gaps | Leave spacing at walls and fixed objects | **** |
| Cleanup | Vacuum/sweep before install | No dust/grit under planks |
Sources
– Manufacturer installation instructions for your exact LVP model (box/manual): flatness tolerance, acclimation conditions, approved subfloors, underlayment/moisture barrier requirements, and expansion gap spacing.
– ASTM F710, Standard Practice for Preparing Concrete Floors to Receive Resilient Flooring (surface preparation and flatness guidance for resilient flooring).
– ASTM F2170 and ASTM F1869 (commonly used concrete moisture test methods; use only as allowed by your LVP manufacturer).
– U.S. Environmental Protection Agency (EPA) moisture control guidance (for indoor humidity targets relevant to bedroom moisture management).
Prepping LVP for a bedroom isn’t the glamorous part of the job, but it’s the part that determines whether your floor stays quiet, tight, and gap-free. If you treat flatness, moisture protection, acclimation, and expansion space as “installation steps,” you’ll avoid the most common—and most expensive—redo scenarios.
Frequently Asked Questions
What are the best steps to prepare LVP floors for a bedroom before installation?
Start by clearing the room completely and removing baseboards or quarter-round if required for your LVP flooring installation method. Next, inspect the subfloor for damage and clean off dust, paint, and debris so the underlayment and planks can sit flat. Confirm the subfloor is level and dry, then acclimate the LVP planks according to the manufacturer’s instructions before laying them in the bedroom.
How do I check if my subfloor is level and ready for LVP in a bedroom?
Use a straightedge or level to check for high and low spots across the entire bedroom floor area. Most LVP manufacturers require the subfloor to be within a small tolerance (often about 1/8 inch over 6 feet, but always follow the specific product). If you find dips or uneven areas, sand down high spots or use a self-leveling compound or appropriate patch to create a flat base.
Why is acclimating LVP flooring important before installing it in a bedroom?
LVP can expand or contract when temperature and humidity change, so acclimation helps prevent gaps and buckling after installation. Keep the planks in the bedroom where they’ll be installed and allow them to sit for the time specified by the manufacturer, usually 24–48 hours. Maintain normal living conditions in the room during preparation and installation for the best results.
Which underlayment should I use for LVP in a bedroom, and how do I install it?
Many click-lock LVP products include an attached underlayment, but some installations require an additional underlayment for comfort and moisture control. Choose a compatible underlayment recommended for LVP and your subfloor type (plywood, concrete, or existing flooring). Lay the underlayment flat with seams taped as directed, and avoid overlapping or bunching so the bedroom floor remains smooth and stable.
How can I prepare for cutting and layout when installing LVP in a bedroom?
Plan your layout before you start—dry fit a few rows to check how the planks will run, especially around doorways and closets. Aim to stagger plank seams and leave the required expansion gap at walls and fixed objects like vents or posts, typically around 1/4 inch (confirm your manufacturer’s requirement). Use the right tools (a fine-tooth saw or LVP cutter for clean edges) and measure twice to reduce waste and ensure a professional-looking LVP bedroom floor.
📅 Last Updated: October 27, 2026 | Topic: How to prepare a LVP floors for bedroom? | Content verified for accuracy and freshness.
References
- Vinyl flooring
- RFCI – Resilient Flooring Covering Institute
- Mold | US EPA
- https://www.cdc.gov/mold/default.htm
- https://scholar.google.com/scholar?q=how+to+prepare+subfloor+for+luxury+vinyl+tile+lvp+installation+acclimation+moisture+flatness Google Scholar
- https://scholar.google.com/scholar?q=lvp+flooring+installation+guidelines+subfloor+preparation+underlayment+expansion+gap Google Scholar
- https://scholar.google.com/scholar?q=ASTM+F710+F2170+resilient+flooring+moisture+testing+and+concrete+preparation Google Scholar


