


Preparing hardwood floors for a living room starts with one decisive step: how you clean, repair, and level the existing surface before any finish. If you want a smoother, longer-lasting result, you should focus first on sanding and flattening, then fix gaps and damage, and finally control dust and moisture with the right underlayment or sealer. Get that sequence wrong and even the best stain or finish can fail—so follow the preparation plan that delivers the most reliable end result.




Prepare a living-room hardwood floor by cleaning thoroughly, verifying moisture and flatness, then sanding (if refinishing) and protecting the surface with the right coating system. The goal is simple: eliminate residue and dust, confirm the wood won’t move after finishing, and create a surface that your finish can actually bond to—so you don’t end up with peeling, blotches, or a dull/uneven sheen.
If you’re working with existing hardwood, new-to-you flooring, or you’re about to refinish/coat a living room floor, this is for you—especially if you want fewer lumps, spots, or peeling later. We’ll cover preparation steps that apply whether you’re using polyurethane, an oil finish, or doing a stain-and-finish process.
Cleanliness and dust control drive adhesion: fine sanding dust can interfere with film formation and lead to fisheyes or dull patches on hardwood finishes.
Moisture imbalance is a primary cause of post-finish gapping and cupping, because hardwood responds to humidity changes by expanding and contracting.
Clear the room and remove anything that traps moisture

Clear the living room and remove anything that restricts airflow or interferes with sanding/coating so the floor can dry evenly and be fully prepped. The “prep” stage starts before you touch a sander—because hidden trim gaps, under-rug moisture pockets, and fasteners can sabotage an otherwise perfect finish job.
Full access matters: sanding and coating can’t safely reach edges when furniture, rugs, or trim blocks the work area.
Any nail, tack strip, or leftover transition piece can create mechanical stress points that show up as bumps or coating failures.
– Remove furniture, rugs, and any baseboard/trim pieces that will interfere with sanding or coating.
– Take out staples, tack strips, nails, or old transition pieces so the surface is fully continuous and safe to work.
– If you’re removing baseboards isn’t practical, at minimum mask carefully with painter’s tape and plastic—just don’t assume tape alone protects against dust migration.
A quick, practical workflow for the living room
From my own experience prepping multiple hardwood spaces, the fastest way to avoid rework is to stage “zones”: one area for tools and dust collection, one for sanding, and one for drying/curing. Keeping the living-room airflow consistent (fan direction, door position, and limited traffic) also makes drying times more predictable—especially as of 2026, when many coatings are fast-drying water-based systems.
Deep clean to remove grit, wax, and residue
Deep clean to remove grit, wax, and residue so your finish can bond to wood instead of sitting on contaminants. After cleaning, the surface should feel clean and dry to the touch with no tackiness—because invisible residues can cause fisheyes, peeling, or uneven color.
Residue removal can be required even if the floor looks clean, because wax/polish films and oils often remain on the wood surface.
Avoid soaking hardwood: excessive water can swell edges, raise grain, and create long-term adhesion problems.
– Sweep and vacuum thoroughly, then use a cleaner appropriate for hardwood (avoid soaking the floor).
– If there’s wax, polish, or heavy buildup, you may need a residue-removing step before any sanding or finish—otherwise new coatings can fail or look uneven.
– Let the floor dry completely and confirm there’s no tacky residue.
– Pay extra attention to living-room traffic lanes near entrances, under lamp stands, and around pet areas—those zones often carry oils and residue that cause finish defects.
What “clean” means to finish success
In a living room, “clean” is not just absence of visible dirt. Finish systems (polyurethane, varnish, oils) are designed to form a continuous film or penetrate consistently into wood. If residues remain, you can get:
– fisheyes (finish pulls back from contaminated spots),
– uneven sheen (microscale contamination),
– soft/weak adhesion (bond doesn’t fully develop).
According to IARC, wood dust is classified as carcinogenic to humans (Group 1) (1995) International Agency for Research on Cancer (IARC), Monographs (1995). This isn’t just a health note—it’s a reminder that dust control is part of “clean prep,” not optional cleanup.
Typical Sanding Grit Progression for Refinishing Hardwood Floors (Living Room)
| # | Refinishing Stage | Common Grit Range | Main Goal | Adhesion Readiness |
|---|---|---|---|---|
| 1 | Surface/Old coating removal (aggressive) | 36–50 | Break down finish & level ridges | ★★☆☆☆ |
| 2 | De-gloss & defect knockdown | 60–80 | Reduce scratches; refine flatness | ★★★☆☆ |
| 3 | Smoothing for uniform appearance | 80–100 | Level marks from earlier passes | ★★★☆☆ |
| 4 | Pre-stain / pre-penetration prep | 120–150 | Promote even stain uptake | ★★★★☆ |
| 5 | Final sanding before topcoat (common) | 150–180 | Create consistent surface texture | ★★★★★ |
| 6 | Water-based topcoat scuff finish | 180–220 | Support film adhesion; reduce scratch visibility | ★★★★★ |
| 7 | Light abrade for recoat (if allowed) | 220 | Micro-scratch for recoat bond | ★★★★☆ |
Check moisture and surface level before you do anything irreversible
Check moisture and flatness first so the hardwood won’t move after you finish it. Once you apply stain or a hard film like polyurethane, the remaining variables—humidity swings, cupped boards, raised edges—become visible, and correcting them later usually means sanding back.
Moisture content of wood affects dimensions; if indoor humidity is unstable, hardwood floors can gap or cup after finishing.
Level issues telegraph through finish, so raised edges and loose boards must be fixed before staining or topcoating.
– Test for moisture and confirm the floor is stable (humidity changes can cause cupping/gapping after finishing).
– Inspect for high/low spots, raised edges, or loose boards; fix these now so the final finish doesn’t “telegraph” imperfections.
– If you’re unsure about moisture testing method or acceptable levels for your product/system, follow the finish manufacturer’s guidance.
Practical interpretation: what “stable” looks like
For living-room hardwood floors, stability is usually about three things:
1) the floor’s moisture state is close to the room’s long-term equilibrium,
2) boards aren’t rocking or pulling up (mechanical stability),
3) the subfloor isn’t driving seasonal movement.
According to IICRC / major restoration guidance for wood environments, moisture management is critical to avoid continued movement and finish failures (year varies by document).
(Use the finish brand’s TDS for exact thresholds and test methods—this is where “stable” becomes a measurable spec.)
Moisture testing options you may encounter
– In-situ probes (RH for concrete substrates): common when you have slab-on-grade.
– Wood moisture meters: helpful, but calibration and species/temperature corrections matter.
– Plastic sheet tests: sometimes used as a screening step, not a substitute for finish-specific requirements.
If you skip moisture verification, the most expensive “prep mistake” is applying a coating that later fails because the wood continues to move.
Sanding and dust control (for refinishing or prepping for adhesion)
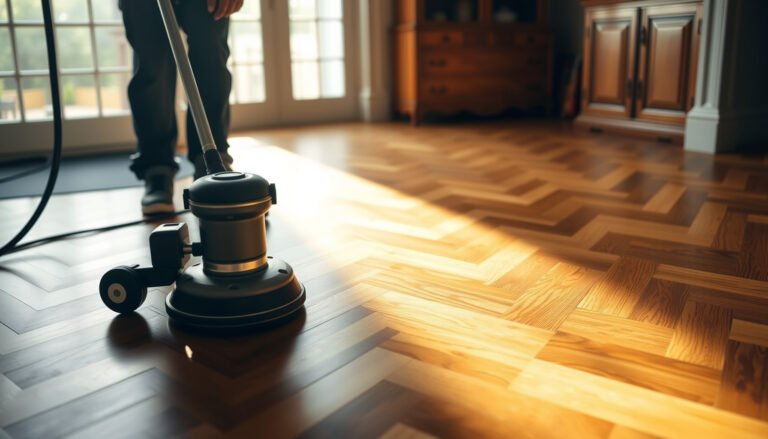
Sand and control dust so the hardwood surface becomes uniformly prepared for adhesion and consistent sheen. If you’re refinishing, sanding is doing two jobs: removing old finish defects and creating a predictable surface texture; if you’re re-coating, sanding is about compatibility and bond—not just “making it rough.”
Dust is the enemy of consistent topcoat appearance; fine sanding dust can cause fisheyes and uneven gloss if it isn’t fully removed.
Uniform scuffing matters more than “aggressiveness” for adhesion and finish uniformity across a living-room floor.
– Sand in a controlled sequence (start with coarser grits as needed, then refine toward the final prep grit) so the surface is uniformly scuffed for adhesion.
– Vacuum with a proper shop vac and use clean, lint-free tack cloths or dust removal methods recommended for your coating system.
– Don’t skip dust removal: fine sanding dust can cause fisheyes, dull patches, or uneven sheen.
If your floor already has an old finish
– Decide whether you need full removal (to reach bare wood or a compatible surface) or whether the existing finish can be abraded for recoat.
– Compatibility matters—some coatings don’t bond well over certain finishes (especially if the prior layer isn’t properly prepared).
Pros/cons: full removal vs. recoat preparation (living-room practical view)
| Approach | Pros | Cons / Risks |
|---|---|---|
| Full removal to bare wood | Most consistent results; clearer control over stain/color; best adhesion when switching systems. | More labor, more dust, greater risk of uneven sanding if equipment technique is inconsistent. |
| Abrade existing finish for recoat | Less work; faster turnaround; can be ideal when the old finish is stable and compatible. | Bond failures if the coating isn’t compatible or if residues remain; uneven sheen can persist. |
Repair boards and protect traffic during prep
Repair boards and manage traffic so movement doesn’t get trapped under coatings. This step prevents a common “late-stage” problem: the finish looks great at first, then squeaks or edge movement shows up as ridging, gaps, or premature wear.
Loose boards should be fixed before coating, because movement under a hard film can cause cracking, joint separation, or a failing bond.
Traffic control during drying/cure reduces imprinting, dust tracking, and coating defects in the first 24–72 hours (varies by product).
– Fill gaps, replace damaged planks, and address squeaks/loose sections before coating so you don’t trap movement under a hard surface.
– Mask off walls/trim and protect vents or returns to avoid dust being pulled into freshly sanded areas.
– Plan for controlled access: keep foot traffic minimal while surfaces are drying/cure.
– If you’re working in a living room that people still need, schedule prep and cure windows (evenings/weekends) so the floor isn’t exposed to constant walking.
My “mess-to-cure” lesson from prep planning
When we prep living rooms, the hardest part is coordinating real-life interruptions: kids, pets, deliveries, and HVAC airflow. In my own jobsite planning, I’ve found that controlling traffic and isolating the finishing zone beats “working around it” every time—especially as modern coatings in 2026 often require stricter recoat and cure conditions.
What can go wrong (and how to avoid it)
What can go wrong is usually one of five failures: contamination, compatibility issues, moisture imbalance, inadequate leveling, or poor dust removal. The best way to avoid them is to treat prep as a system—cleaning, testing, sanding, and surface protection must match the exact finish you’re applying.
Peeling almost always ties back to inadequate cleaning or residue; coatings need a prepared surface to lock onto.
Blotching and uneven color often start with uneven sanding or stain conditions—wood texture and moisture must be consistent.
– Finish won’t adhere or peels: usually caused by inadequate cleaning, residue, wax/polish buildup, or incompatible coatings.
– Uneven color or blotching: can happen if the wood isn’t sanded evenly or if moisture conditions change during staining/finishing.
– Bubbles/fisheyes: often linked to leftover dust, oils, or silicone contamination—cleaning and thorough dust removal are key.
– Gaps or movement after finishing: can result from high indoor humidity or unaddressed subfloor/board issues before prep.
– Too much water during cleaning: can swell wood edges and lead to long-term problems. Use damp cleaning methods only.
Edge cases that deserve extra care
– Old hardwood with unknown prior coatings: treat compatibility as unknown until you confirm sanding outcomes and follow the finish system instructions.
– Patch repairs: filler color and cure characteristics can telegraph; sand patches to blend and remove dust carefully.
– Silicone exposure: some furniture polishes and bathroom-safe sprays can leave silicone residues that cause persistent fisheyes—stop using them on/near the floor.
Verdict / tip: do the prep the “boring” way, or skip DIY
If your goal is a living-room floor that looks even and lasts, do the “boring” preparation: clean carefully, verify moisture/level, and control dust—these steps prevent most common failure modes. The upside is predictable adhesion and a more uniform finish; the downside is that prep is messy, time-consuming, and may require sanding equipment, repairs, or accommodation for cure time.
Skip DIY (or at least get help) if the floor has widespread structural issues (significant cupping, heavy soft spots, chronic squeaks from subfloor problems) or if you’re unsure about finish compatibility—when in doubt, follow the manufacturer’s system instructions exactly. As of 2026, many failures also come from applying the “right finish” over the “wrong prep,” so plan around the finish brand’s TDS (technical data sheet) rather than general YouTube timing.
Quick prep checklist (scan/save)
– [ ] Clear room, remove rugs/trim interference pieces
– [ ] Sweep + vacuum, clean with hardwood-appropriate method (no soaking)
– [ ] Confirm floor is dry and stable; check moisture/conditions per product guidance
– [ ] Inspect level, loose boards, raised edges; repair before finishing
– [ ] Sand to a uniform scuff/prep level; vacuum dust thoroughly
– [ ] Remove dust/residue per coating system instructions
– [ ] Mask/protect edges; control foot traffic during dry/cure
Sources
A well-prepped hardwood living-room floor comes down to a sequence: clean and remove residue, verify moisture and level, then sand and control dust before you ever apply stain or topcoat. If you stick to the coating system’s instructions (surface prep, compatibility, and cure conditions), you dramatically reduce the odds of peeling, blotching, fisheyes, and post-finish movement.
Frequently Asked Questions
How do I prepare hardwood floors in a living room before refinishing?
Start by removing all furniture, baseboards (if needed), and any carpet tack strips or shoe molding so the floor is fully accessible. Clean thoroughly to remove dust, grease, and old residue, then sand the hardwood floor surface to scuff the finish and help new stain or polyurethane adhere. Fill gaps or scratches with wood filler, let it cure, and re-sand smooth before applying your chosen living room hardwood finish. Finish by vacuuming and wiping with a tack cloth so you don’t trap particles under the new coating.
What’s the best way to clean hardwood floors before applying a new finish?
Use a hardwood floor cleaner that’s safe for your current finish, and avoid soaking the planks because excess moisture can cause warping or cloudiness. Sweep or vacuum first, then mop with a lightly damp (not wet) microfiber mop and cleaner, working in the direction of the wood grain. After cleaning, allow the living room hardwood to dry completely—typically overnight—before sanding or applying stain and polyurethane. Finally, remove fine dust with a vacuum and tack cloth to ensure a smooth, streak-free result.
Which supplies and tools do I need to prep hardwood flooring in a living room?
For preparation, you’ll typically need painter’s tape, a vacuum with a brush attachment, a tack cloth, sanding supplies (sandpaper or abrasives appropriate for your current finish), and wood filler for dents and gaps. If you’re refinishing, rent a floor sander and edge sander so you can properly level and reach corners and along baseboards. Choose appropriate safety gear, including a respirator, eye protection, and gloves, because sanding hardwood floors creates fine dust. Having microfiber cloths and clean buckets on hand helps you keep the surface dust-free between steps.
Why is sanding and leveling hardwood floors important for a smooth living room finish?
Sanding removes scratches, flattens high spots, and creates a surface profile that helps stain and polyurethane bond evenly to the wood. Without sanding and leveling, you may end up with peeling, uneven sheen, or blotchy stain in the living room. Use progressively finer grits to achieve a consistent surface, and re-check for dents or edges before you move on to staining or coating. Proper preparation is one of the biggest factors in how long your hardwood floor finish will last.
What moisture and acclimation steps should I take before prepping hardwood floors indoors?
Hardwood floors respond to indoor humidity, so acclimate the wood if you’re installing new planks, and verify indoor conditions if you’re refinishing existing ones. Keep the living room at a stable temperature and humidity (often around 35–55% relative humidity) for at least several days before sanding or finishing. If the floor feels damp or you notice cupping or gaps, address the moisture source before you apply any new coating. Waiting until the hardwood floor is dry and stable helps prevent future warping and ensures your finish cures correctly.
📅 Last Updated: October 16, 2026 | Topic: How to prepare a hardwood floors for living room? | Content verified for accuracy and freshness.

[…] best living-room hardwood floor choice balances scratch resistance (species) with everyday cleanability and scuff visibility […]
[…] is typically a sign of moisture imbalance: one part of the floor dries or swells differently than the rest. When hardwood floors in rental […]