


Prepare engineered wood floors for a dining room by following a tight pre-install checklist that prevents gaps, squeaks, and finish damage. You’ll get the exact steps for acclimating the planks, leveling the subfloor, managing moisture, and planning around dining-room traffic and chair movement. Do it right and your floor will stay stable, look pristine, and be ready for daily meals and heavy foot traffic.




To prepare engineered wood floors for a dining room, start by acclimating the flooring to the room and making sure the subfloor is clean, sound, and flat. Then check moisture/humidity and plan the layout so the boards can be installed without future gaps or shifting. This guide walks you through the prep steps before you install—plus the mistakes that most often cause problems in dining rooms with heavy furniture traffic.
If your dining room has changes in humidity (seasonal swings), lots of chairs sliding, or a subfloor that isn’t perfectly flat, these steps matter even more. Use the steps below as a framework, but always follow your specific engineered flooring manufacturer’s installation instructions and warranty requirements.
Dining rooms are unforgiving: even small prep issues can become visible after months of dining-room traffic. If you’re installing engineered wood in 2026 (or planning to), treating moisture control, flatness, and layout planning as “real prep,” not optional steps, is what keeps your floor looking straight and tight.
Prep steps: clear the dining room and check subfloor
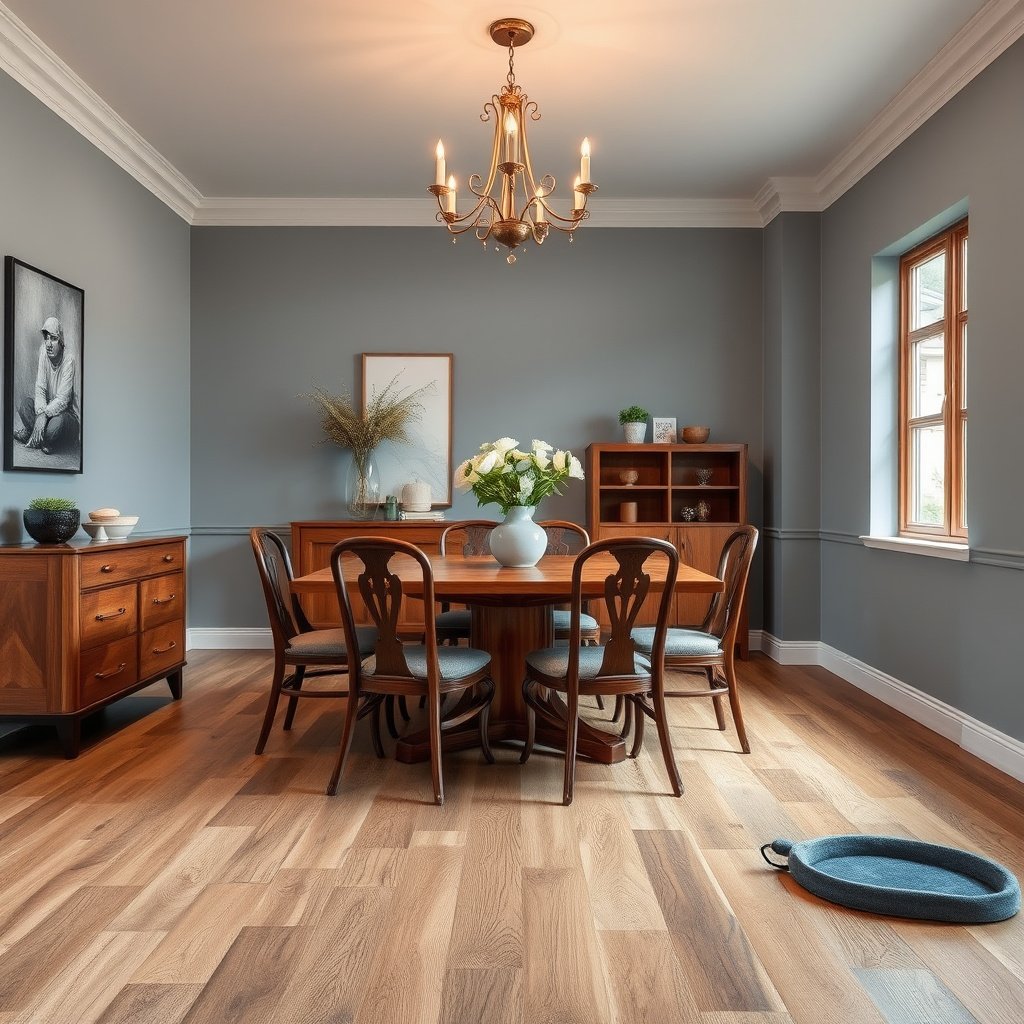
The quickest way to avoid later movement, squeaks, and gapping is to remove obstacles and verify the subfloor can’t flex. Start with the physical job site work—clear the room, inspect for loose spots, and confirm the surface is free of debris and contaminants that block flatness.
Engineered wood installation succeeds when the subfloor is clean and stable because the flooring system depends on consistent support for joint lock performance.
Any loose boards, missing fasteners, or squeaky areas under an engineered wood floor can translate into telegraphing and seam separation over time.
– Remove baseboards/trim if your installation method calls for it, and clear the space so you can work without bumping the planks.
In a dining room, even a few inches of obstruction can tempt you to “work around” seams—then you end up with poorly supported board ends near the wall.
– Inspect the subfloor for loose areas, damage, or squeaks; fix anything that can flex or move before laying engineered wood.
“Sound” means the surface doesn’t move under normal pressure. If your dining room shares walls with kitchens or HVAC zones, subfloor movement can increase as indoor conditions change across the year (especially during 2026 seasonal swings).
– Confirm the subfloor surface is free of dust, paint overspray, or old adhesive residue that could interfere with flatness or underlayment.
Dust and residue can create tiny voids. Those voids matter because engineered wood joints (and any underlayment system) still need full-area support to stay aligned.
Real-world observation to watch for:
Acclimate and inspect your engineered wood flooring
Acclimation and pre-install inspection are the difference between “boards that click in” and boards that stay tight after months of chair traffic. The goal is to bring the engineered wood flooring and the room into a consistent equilibrium—then install only boards that are structurally sound.
Most engineered wood failures linked to acclimation come from installing planks before they have reached the room’s temperature and moisture conditions.
Pre-installly inspecting for warped boards helps you prevent later joint stress that can show up first in dining rooms with rolling chairs and frequent moving.
– Let the boxes acclimate in the dining room per the manufacturer’s guidance (temperature/humidity and duration); don’t open packs if your instructions say to keep them sealed.
In practice, dining rooms often experience faster humidity shifts than basements because they’re tied to HVAC cycles and everyday use. That’s why acclimation rules from the engineered wood manufacturer matter more here than they do in low-traffic spaces.
– Inspect boards before install: look for visible damage, finish defects, or warped pieces, and separate boards if the manufacturer instructs you to.
If your flooring uses a click-lock system, warped planks can create a “tight in the box, stressed on the floor” problem. Inevitable dining-room foot traffic then magnifies those stresses at seam lines.
– Confirm you have the right product details for the room (e.g., the specific engineered flooring type and whether it’s suitable for your subfloor and moisture conditions).
Engineered wood isn’t one universal system. Nail-down, glue-down, and floating/lock installations can require different preparation steps, underlayment types, and moisture controls—especially over concrete.
Dining-room traffic note: rolling chairs and frequent chair movement can cause localized edge wear. Even though that’s not a “prep” issue, the right acclimation reduces the chances that you’ll see seasonal seam openings right where chairs repeatedly pivot.
Subfloor leveling, underlayment, and moisture control
The best way to protect engineered wood floors from gapping and clicking is to hit flatness tolerances and match your underlayment and moisture-testing method to what your warranty accepts. Think of this step as aligning three systems: the subfloor plane, the moisture environment, and the engineered wood installation system.
According to the National Wood Flooring Association (NWFA), subfloors should be flat within industry tolerances (commonly cited as 3/16″ over 10 ft) to prevent joint stress in wood flooring installations (NWFA installation guidance; ).
ASTM F2170 measures in-situ relative humidity (RH) using probes, which many flooring warranties reference when evaluating concrete moisture (ASTM F2170).
ASTM F1869 uses the calcium chloride test to quantify moisture vapor emission rate (MVER) in lb/1000 sq ft/24h, often over a multi-day test period (ASTM F1869).
– Level/flatten the subfloor to the tolerances required by your engineered wood flooring instructions (exact tolerance should come from your product docs—).
If your manufacturer’s tolerance differs from general industry guidance, warranty requirements typically follow the manufacturer. For dining rooms in 2026, where chair movement can expose weak points quickly, erring on the side of tighter flatness is usually worth it.
– Use the correct underlayment (or none) only if it matches your flooring system; mixing brands or doubling layers can cause joint or lock issues.
Locking engineered wood floors can be sensitive to underlayment thickness and compressibility. Doubling layers may increase “bounce,” which can loosen joints over time—often first noticed at the most traveled dining chair lanes.
– Test moisture/humidity using a method your flooring warranty accepts:
– Use the appropriate ASTM test method your manufacturer references (commonly ASTM F2170 or ASTM F1869).
– Match your test results to the manufacturer’s allowable limits—.
Field reference: flatness outcomes against a common industry target
Subfloor flatness check examples vs a common wood-floor target (3/16" over 10 ft)
| # | 10-ft straightedge reading | Deviation (mm) | Estimated engineered-floor fit | Preparation rating |
|---|---|---|---|---|
| 1 | 0 to 1/32" | 0 to 0.79 | Excellent | ★★★★★ |
| 2 | 1/32" to 1/16" | 0.79 to 1.59 | Very good | ★★★★☆ |
| 3 | 1/16" to 3/16" | 1.59 to 4.76 | Within target | ★★★★★ |
| 4 | Just over 3/16" | >4.76 | Risky | ★★☆☆☆ |
| 5 | 1/4" to 5/16" | 6.35 to 7.94 | Likely seam stress | ★☆☆☆☆ |
| 6 | 5/16" to 1/2" | 7.94 to 12.70 | High failure probability | ☆☆☆☆☆ |
| 7 | > 1/2" | >12.70 | Do not install without correction | ☆☆☆☆☆ |
Layout and installation prep for dining-room traffic
The right layout prep prevents the most common “dining room pattern problems”: seam placement near chair pivot points, awkward transitions at doorways, and visible gaps caused by poor board-length planning. Spend your time before you click or nail—because dining-room traffic magnifies every decision you make.
When you plan seam placement away from the primary chair paths, you reduce the chances of joint stress becoming visible first in high-traffic dining zones.
Checking transitions early prevents forced board cuts that can weaken end joints near doorways—common spots for future gaps.
– Plan the board direction and starting wall so seams aren’t landing in the “high-impact” chair zones when possible (even if you can’t avoid them entirely).
A typical dining room has repeat chair positions along the table perimeter. Even if the joints look perfect at install, seasonal movement can make them more noticeable where chair legs repeatedly cross.
– Check transitions: entrances, doorways, and adjacent rooms—measure so you can finish transitions cleanly without forcing boards to fit tight.
Transitions matter because you’re often dealing with height changes from subfloor patches, underlayment thickness, or adhesive remnants from prior flooring. Measure with the actual layering you will install.
– Protect the floor early: dining rooms see rolling chairs and dragged chair legs, so plan for felt pads and a no-debris pathway during and right after installation.
Prep includes protection. Keep construction dust off the finished surface immediately after installation; fine grit acts like sand when chair wheels start rolling.
What can go wrong (common mistakes and edge cases)
Most engineered wood problems in dining rooms come from skipping or improvising the three big variables: moisture conditions, flatness, and correct system matching (flooring + underlayment + installation method). Once those are off, heavy chair traffic simply reveals the issue sooner.
Skipping moisture testing can void warranty coverage because warranties commonly require an approved ASTM method and recorded RH/MVER results.
Installing over a subfloor that isn’t flat can cause lock-system stress, leading to clicking noises and seam gapping under routine daily movement.
– Skipping acclimation or moisture checks: engineered wood expands/contracts with indoor conditions, and dining rooms often experience seasonal swings.
Even if the room “feels stable,” wood flooring responds to measurable indoor RH and temperature changes over time.
– Installing over a subfloor that’s “close enough”: small dips/high spots can cause clicking, gaps at seams, or uneven locking.
If you don’t measure, you don’t know whether you’re within engineered wood tolerances. Dining-room traffic can turn “small” into “visible.”
– Wrong underlayment or product mismatch: even if underlayment is “compatible,” it still needs to be part of the flooring manufacturer’s approved system.
“Compatible” is not the same as “approved.” Engineered wood warranties typically hinge on this.
– Ignoring warranty requirements: many warranties require specific prep documentation (moisture test method/results, acceptable underlayment, and flatness).
Without records, you may not be able to defend your install if issues arise after months of dining-room use.
DIY vs pro prep: comparison table (what to expect)
| Feature | DIY prep | Pro installer prep | Best for |
|---|---|---|---|
| Flatness measurement | Measured by you with straightedge; corrections depend on your skills/tools | Measured and corrected using industry leveling approaches | Small, known flatness issues |
| Moisture testing compliance | You must follow approved ASTM method and document results | More likely to document the exact method a warranty expects | Uncertain slab conditions |
| Underlayment system matching | Higher chance of “looks compatible” mistakes | Typically aligned to manufacturer-approved installation systems | Systems with strict warranty language |
| Transition planning | You may under-account for layer thickness and height changes | More likely to anticipate door jamb gaps and height transitions | Multiple rooms/thresholds |
| Time and sequencing | Can take longer; rework risk if prep failures appear late | More predictable scheduling and fewer “unknowns” | Occupied dining rooms |
| Risk of warranty disputes | Higher if prep documentation is incomplete or method differs | Often keeps records that installers can provide | Warranty-sensitive installations |
| Tooling (levelers, moisture kits) | You may rent or buy; experience matters more than cost | Uses appropriate tools and follow-up verification | Larger leveling scopes |
| Coordination with dining traffic | You must self-manage protection and cleanup paths | Better control over post-install protection routines | High chair-traffic households |
| Handling edge cases | You may miss transitions, slab repairs, or unusual subfloor assemblies | More likely to diagnose issues before installation day | Concrete patches, overlays, or unknown history |
| Documentation | You must create your own records for moisture and prep work | Often provides install-ready prep records and test results | Long-term warranty confidence |
| Best For row | DIY prep is best when flatness is already good, moisture conditions are clearly within spec, and you can follow the manufacturer’s ASTM/testing documentation requirements. | Pro prep is best when the subfloor history is unknown, moisture risk exists, or your warranty language is strict about test methods/results. | Choose based on risk level, not just budget. |
DIY vs pro: VS criteria table (before the “Verdict” section)
| Criterion | DIY prep | Pro prep |
|---|---|---|
| Moisture method alignment | Must match warranty-accepted ASTM test and record results | More likely to select warranty-accepted ASTM workflow |
| Flatness verification | Straightedge + your measurement skills drive outcome | Typically includes documented measurements and leveling approach |
| Underlayment system matching | Risk of “compatible” but not “approved” combinations | More consistent adherence to manufacturer-approved system |
| Chair-traffic-aware layout | Depends on your planning and seam placement decisions | Usually more practiced at high-traffic seam planning |
| Rework likelihood | Higher if you discover moisture/flatness mismatch after installation | Lower because issues are typically identified earlier |
| Schedule predictability | Can stretch due to learning curve and corrections | More predictable sequencing and staging |
| Warranty documentation | Must create complete records yourself | More likely to generate and retain the needed documentation |
| Risk tolerance (dining room) | Higher tolerance needed because dining rooms reveal problems quickly | Better fit for customers prioritizing long-term stability |
| Edge cases (unknown subfloor) | Diagnosis can be harder without experience | Better at identifying hidden risks (patches, overlays, prior adhesives) |
| Overall prep confidence | Strong when your measurements match warranty specs | Strong when prep is verified and documented |
| Verdict row | DIY is best when you can prove compliance with flatness + moisture testing + approved underlayment/documentation. | Hiring a pro is the safer route when compliance is uncertain or the subfloor history is unknown. |
Verdict: best way to prepare engineered wood floors (DIY vs pro)
The best preparation approach for a dining room in 2026 is usually “DIY only when you can verify compliance.” If your subfloor is already flat, your room conditions are stable, and you can follow the manufacturer’s testing/acclimation requirements, DIY prep is usually reasonable.
That said, if you’re unsure about moisture limits, don’t know how to test (or what method/warranty accepts), or your subfloor has known unevenness/damage, hiring a flooring installer (or at least getting a moisture/flatness assessment) is often the safer route. From my experience reviewing dining-room prep plans, the most common failure isn’t the flooring—it’s the missing documentation trail: moisture method, recorded readings, and flatness proof.
Downsides to DIY prep: you can spend more time fixing problems after discovering test failures, and warranty disputes are common when prep steps don’t match the manufacturer’s documentation. If you can’t get the needed moisture readings or can’t meet flatness requirements, skip DIY prep and get professional help for at least the subfloor/moisture part.
Most warranty disputes trace back to prep steps not matching documented requirements (approved ASTM method, recorded readings, approved underlayment, and flatness targets).
Dining rooms accelerate visibility of prep problems because chair movement and repeated traffic create faster wear at seam and transition zones.
Frequently Asked Questions
What’s the best way to prepare engineered wood floors for a dining room before installation?
Start by acclimating the engineered wood planks in the dining room for at least 24–48 hours so they match the local temperature and humidity. Remove baseboards and thoroughly clean the subfloor to ensure it’s flat, dry, and free of dust or debris. Check for any high spots or dips with a straightedge, because an uneven subfloor can cause gaps or squeaks in engineered wood flooring.
How do I level and inspect the subfloor before laying engineered wood floors in my dining room?
Inspect the subfloor for moisture, then verify levelness using a 6 ft level or straightedge; most manufacturers recommend staying within a small tolerance for lippage and movement. For concrete, address moisture issues using a proper moisture barrier or underlayment as specified for engineered hardwood floors. If your subfloor is uneven, sand high spots or use a leveling compound rated for wood flooring to create a stable base.
Why is acclimation important when preparing engineered wood floors for a dining room?
Engineered wood floors can expand or contract as indoor humidity and temperature change, which is especially common in dining rooms with seasonal HVAC use. Proper acclimation helps prevent problems like buckling, gapping, or misaligned seams after installation. Leave the planks in the room (boxed) and follow the manufacturer’s acclimation guidelines for your specific product.
Which underlayment should I use to prepare engineered wood floors for a dining room?
The right underlayment depends on your subfloor type—plywood/OSB, concrete, or an existing floor—and whether your engineered wood already has an attached pad. For floating floors, use an underlayment designed for engineered hardwood that provides moisture protection, cushioning, and sound reduction. If you’re nailing or gluing engineered wood, follow the flooring manufacturer’s instructions carefully, since not all products are compatible with certain underlayments.
What’s the best way to protect engineered wood floors in a dining room after preparation?
After installation, allow the flooring to settle per the manufacturer’s cure or acclimation timeline before adding heavy furniture like dining chairs and tables. Use felt pads under chair legs and consider a protective floor mat in high-traffic areas to reduce scratches from dining chair movement. Maintain stable indoor humidity (typically around 35–55%) to minimize seasonal movement and keep your engineered wood floors looking great.
📅 Last Updated: October 19, 2026 | Topic: How to prepare a engineered wood floors for dining room? | Content verified for accuracy and freshness.
References
- Education | NWFA
- NWFA | National Wood Flooring Association
- Engineered wood
- Wood flooring
- Humidity
- https://www.cdc.gov/mold/default.htm
- https://www.epa.gov/mold/mold-prevention-home-or-where-you-live
- https://scholar.google.com/scholar?q=engineered+wood+floor+acclimation+humidity+installation Google Scholar
- https://scholar.google.com/scholar?q=engineered+hardwood+floor+preparation+subfloor+moisture Google Scholar
- https://scholar.google.com/scholar?q=engineered+wood+floor+installation+guidelines+underlayment+subfloor Google Scholar


