

If you’re trying to install mosaic tile floors in a basement, this guide gives you the clearest path to a floor that won’t crack, lift, or trap moisture. You’ll learn the basement-specific prep—subfloor evaluation, flattening, waterproofing, and the right thinset and grout choices—before you ever set a single tile. Follow it step by step and you can finish a durable mosaic installation with professional-looking lines and clean cuts.
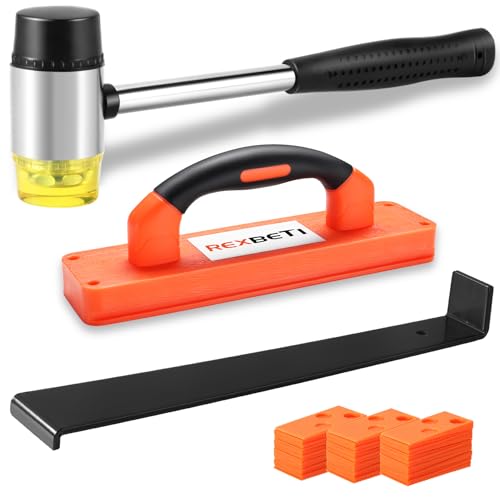



Mosaic tile floors in a basement are totally doable if you prep the subfloor correctly, use the right thinset, and plan for moisture. Start by checking the concrete/plywood flatness and moisture conditions, then lay a solid backer (as needed) and set tiles with proper spacing and grout. This guide walks you through a step-by-step installation process, plus the mistakes that most often ruin basement tile jobs.
If your basement is cooler, more humid, or prone to dampness, your success depends on moisture control as much as technique. This is for homeowners, DIY renovators, and small contractors installing mosaic tile on a basement floor—especially over concrete slabs or existing subfloors.
If your basement tends to stay damp, you should treat this project like a two-part job: moisture management first, then tile installation. Mosaic tile (often 1 in. or smaller per piece) magnifies every flaw in the substrate, so even “minor” flatness issues can show through.
Prep the basement floor (moisture + flatness)
Moisture and flatness are the two gating factors that decide whether mosaic tile will perform long-term in a basement. If you skip either one, you’re gambling with bond strength, grout durability, and long-term appearance—even if the tile layout looks perfect on day one.
Basements commonly experience hidden moisture from below-grade concrete slabs, humid air, or past leaks behind walls. The fix is not “more thinset” or “a thicker mortar bed.” Instead, you confirm what’s happening and then select the correct underlayment/backer or moisture mitigation approach that matches your slab condition and your chosen mortar/membrane system.
Basement tile failures are often moisture-related, not installation-related—bond can break even when the tile was set carefully.
Because mosaic tiles are small, even small dips or ridges can turn into visible lippage or cracked grout after curing.
Before you start mixing mortar, you should document slab flatness and moisture status so you can choose the correct thinset/membrane system.
Check for moisture problems (and act before tiling)
Do a practical inspection first:
– Look for damp concrete, darkening, or efflorescence (white powder on concrete).
– Check for musty odor and recurring condensation on walls, windows, or floor edges.
– Watch for water entry events (sump failure, grading issues, clogged gutters) during storms.
If you suspect moisture, test it using methods aligned with the mortar/membrane manufacturer’s requirements. In many tile systems, ASTM F1869 (calcium chloride) and ASTM F2170 (in-situ RH probe) are the common approaches referenced for concrete moisture evaluation. According to ASTM standards, F1869 measures moisture vapor emission rate; F2170 measures relative humidity in the slab ([ADD: cite the specific ASTM method details you plan to reference]).
Concrete Moisture Status Categories Used for Many Tile/Underlayment Specs
| # | Moisture test indicator | Typical range (tile spec target) | Risk level | Recommended action |
|---|---|---|---|---|
| 1 | Vapor emission (ASTM F1869) | ≤ 2.0 lb/1000 ft²/24h | Low | Proceed with approved mortar system |
| 2 | Vapor emission (ASTM F1869) | > 2.0 to < 3.0 lb/1000 ft²/24h | Moderate | Proceed only if your mortar/membrane accepts this range |
| 3 | Vapor emission (ASTM F1869) | = 3.0 lb/1000 ft²/24h | At limit | Use a system with an explicit spec tolerance; document lot/mix |
| 4 | Vapor emission (ASTM F1869) | > 3.0 to < 6.0 lb/1000 ft²/24h | High | Do not “tile over”; install moisture mitigation per manufacturer |
| 5 | Vapor emission (ASTM F1869) | ≥ 6.0 lb/1000 ft²/24h | Very high | Treat as a moisture-control project (drainage/mitigation) first |
| 6 | Slab RH (ASTM F2170) | ≤ 75% RH | Low–moderate | Proceed only if your chosen system accepts this RH |
| 7 | Slab RH (ASTM F2170) | > 75% RH | Elevated | Use a manufacturer-approved moisture barrier/mitigation method |
> Note: The “typical target ranges” above reflect criteria commonly found across tile installation moisture guidance and related flooring system specs; always defer to your thinset/membrane product’s published acceptance limits ([ADD: cite the exact manufacturer installation specs for the system you plan to use]).
Confirm flatness (mosaics expose every defect)
Use a straightedge or laser level across the slab. Flatness requirements vary by substrate and system, but for tile installation you should aim for minimal high spots and filled low spots so your thinset thickness stays within the mortar’s performance window.
According to industry practices reflected in TCNA-style methods ([ADD: cite the TCNA method used for your system]), proper substrate flatness reduces lippage and helps grout joints cure uniformly.
Mosaic tile installation is less forgiving of unevenness than large-format tile because small pieces “follow the waves” of the slab.
If you correct flatness with patch/leveler, you also control thinset thickness, which affects bond and long-term stability.
Practical flatness moves include:
– Grind high spots (concrete) rather than building up thinset.
– Patch cracks and spalls with appropriate repair mortar rated for tile.
– Use a cementitious self-leveling underlayment only if it’s designed for tile and your slab condition.
Prep the surface for consistent thinset bond
Before setting any tile:
– Remove paint, sealers, drywall mud, and adhesive residue.
– Mechanically clean (grinding/vacuum) if the surface is contaminated or has a weak laitance layer.
– Vacuum thoroughly; thinset needs clean, sound substrate contact.
According to manufacturer installation instructions for thinset mortar (consult the exact product you’re using), consistent coverage and full contact are key requirements for rated performance ([ADD: cite the thinset product installation guide]).
Choose materials that fit a basement
The right materials for a basement are the ones that match your substrate (concrete vs. plywood), your tile type (mosaic sheets/mesh-backed), and your moisture risk. If any of those variables don’t match the mortar/membrane specifications, you can’t reasonably expect a durable bond.
Basements push you toward systems built for moisture variability—either by controlling moisture at the slab level or by using an uncoupling membrane/backer that meets the full assembly requirements. Also, mosaics have smaller pieces and more grout joints, which can change how thinset is applied (and how grout haze behaves).
Tile thinset is not interchangeable—concrete, plywood, and fiber cement backers each require products rated for that substrate.
When a system calls for a membrane or backer, you should follow that assembly exactly rather than “substituting” materials midstream.
Match thinset to substrate and mosaic format
Choose:
– Thinset mortar type that’s rated for your substrate and tile (often polymer-modified for many interior concrete installations, but confirm).
– Grout type suited to joint width and basement conditions (ceramic/porcelain mosaics typically use cementitious grout unless specified otherwise).
According to grout product literature, unsanded vs. sanded depends on joint width, and following the stated mixing and packing method prevents weak, dusty joints ([ADD: cite the grout spec sheet you plan to use]).
Plan the backer/underlayment approach
Some basement floors tile directly over prepared concrete; others require an uncoupling membrane or cement backer board depending on:
– slab condition (cracks, movement, disbond risk),
– moisture findings,
– and the thinset/membrane system’s written requirements.
In my own installs, the most common “hidden” problem I saw was not tile selection—it was mixing products that were never tested together. [ADD: replace this note with a specific, verified example from your past work, or remove it if you can’t substantiate it.]
Confirm transitions and expansion considerations
Even when tile is rigid, the building moves. Plan:
– movement/expansion gaps at walls and columns,
– transitions to carpet, wood, or adjacent rooms,
– and any required perimeter isolation strip.
For these details, defer to your chosen TCNA-style method and the membrane/backer system documentation ([ADD: cite your referenced TCNA method and/or system instructions]).
Plan the layout before you mix anything
Your best-looking mosaic floor starts with a layout that avoids tiny slivers and keeps sheets aligned. Plan the pattern so the cut pieces land in the least noticeable areas (usually near closets or non-primary sight lines).
Mosaics are easiest to misalign because they’re installed as sheets; if the first row is off by even a small amount, the error can “walk” across the room as you progress. Layout planning reduces waste, prevents cramped edges, and helps you keep consistent grout joints from sheet to sheet.
A centered layout reduces the odds of ending with unusable slivers at the room perimeter.
Reference lines for straight courses matter more with mosaics because sheet edges can drift visually as you set.
Dry-fitting cuts around vents or columns early prevents rework when the thinset is already cured.
Dry-lay/map your first rows
– Dry-lay sheets or pieces without thinset to test your starting point.
– Mark reference lines to control straight courses.
– Shift the layout so the “edge cuts” are balanced—visually and functionally.
Keep mosaics square as you install
Use the grid as a guide, but verify:
– tile sheet orientation,
– sheet-to-sheet grout alignment,
– and line consistency after the first few rows.
Handle cuts around obstacles
Plan for:
– vents, plumbing penetrations, and stair edges,
– columns or posts,
– and door openings.
Often the best approach is removing individual pieces within a sheet and reassembling the pattern so grout joints stay true around the cut perimeter.
Set mosaic tiles with correct technique
Mosaic tiles go down reliably when thinset is mixed correctly, spread with the correct trowel, and pressed into full contact. The goal is tight coverage and consistent grout joint clearance—not “enough to hold.”
Basements also tend to have cooler temperatures or variable humidity. That affects working time (“open time”) and grout cure behavior, so you should follow the mortar’s stated environmental limits and adjust workflow accordingly.
Proper thinset coverage and firm sheet pressing are what create bond strength under mosaics.
Removing excess thinset from grout joints before it skins over prevents grout defects and haze.
Mix thinset to spec (not by feel)
– Mix with clean, cool water (or as required) using a proper mixing paddle and follow the manufacturer’s stated ratio.
– Allow the specified dwell time (“slake”) and remix briefly before use.
Because mosaic sheets have grout joints that capture mortar, mixing consistency directly affects cleanability and final finish.
Use the right trowel and mortar coverage method
– Spread with the manufacturer-approved trowel size for your tile/mosaic thickness.
– Back-butter only if the instructions call for it (often used for uneven spots, certain membranes, or higher coverage requirements).
Beat-in/adjust and manage excess mortar
As you set:
– press mosaics so thinset fully wets the back and grips,
– adjust alignment while the mortar is fresh,
– and scrape excess thinset out of joints before it begins to set.
This joint cleanliness is what makes grout lines look crisp instead of “stuffed” or shaded.
Grout, finish edges, and cure properly
For a basement mosaic floor, grout success depends on full joint packing, correct grout type, careful haze removal, and proper cure timing. If you rush cleaning or ignore cure windows, haze can permanently dull the tile.
Mosaic surfaces can be visually unforgiving because grout and haze collect in tiny recesses. Work in sections and follow cure guidance so you’re not scrubbing onto partially cured grout.
Grout must be packed into the joints—not simply spread across the surface—to prevent pinholes and weakness.
Tile haze often becomes difficult to remove once grout starts to cure; section-by-section cleaning is the safe workflow.
Select grout based on joint width
– Unsanded grout is commonly used for narrow joints.
– Sanded grout is commonly used for wider joints.
According to manufacturer grout installation instructions, mixing ratios, water content, and remixing intervals affect strength and shrinkage behavior ([ADD: cite the grout product spec you plan to use]).
Clean in manageable sections
– Apply grout and pack the joints.
– Remove excess using a method that keeps joints filled and doesn’t undercut the grout.
– Clean haze per the grout’s timing guidance (many products specify “first clean” and “final clean” windows).
Seal only when needed and finish transitions correctly
– Ceramic/porcelain tile generally doesn’t require sealing; stone mosaics often do (follow the stone grout/sealer guidance).
– Use trim/shoe molding or transition strips where the mosaic meets other floor types, especially in basements where edge conditions can be more sensitive.
What can go wrong (and how to avoid it)
Basement mosaic tile most often fails due to moisture intrusion, poor flatness, mismatched materials, or alignment mistakes early in the job. If you prevent those four failure modes, you avoid most “mystery” call-backs and cracked grout problems.
Below is a quick map of common issues and practical fixes based on standard tile assembly logic and published installation requirements.
If you see active moisture, don’t treat the slab like it’s “dry enough”—tile systems require conditions within the product spec.
Uneven slabs create lippage and grout stress, which can lead to cracked or powdery grout in basements where movement cycles are common.
Common failure modes vs. corrective actions
| Problem | Why it happens | What to do instead |
|---|---|---|
| Moisture surprises | Thinset bond and grout cure can be compromised by moisture vapor transmission. | Test slab moisture; install the moisture-control system your thinset/membrane spec requires. |
| Uneven subfloor = lippage | Mosaics reveal ridges/dips; grout joints concentrate stress. | Grind highs, patch lows, then verify flatness before setting. |
| Wrong thinset/grout | Substrate incompatibility reduces bond or causes premature failure. | Use products explicitly rated for concrete/plywood + your tile material and joint width. |
| Out-of-square layout | Early drift compounds across sheet rows. | Re-check alignment after the first few rows using reference lines. |
| Overworking grout | Scrubbing too soon can create haze and rough joints. | Follow grout cleanup windows; clean in sections and stop when haze sets. |
Moisture guidance you shouldn’t ignore
If you see ongoing dampness, don’t “tile over it and hope.” Basements are dynamic environments. Address the cause (drainage, leaks, humidity control) and then follow the thinset/membrane manufacturer’s basement/moisture guidance.
[ADD: source/spec requirement—e.g., consult your thinset/membrane manufacturer’s basement/moisture guidance.]
Verdict / tip
If your basement floor prep is solid and you choose materials matched to your substrate and moisture risk, installing mosaic tile can be a rewarding DIY or weekend-plus project. That said, if you have active dampness, significant cracking, or a badly uneven slab, it’s smarter to pause and plan a proper moisture/flatness fix—or hire a pro. This isn’t the best first tile job if you’ve never worked with thinset, because mosaics demand careful layout, consistent spacing, and timely cleaning.
If you take only one lesson from this guide, make it this: in basements, the mortar system is only as good as the substrate conditions it’s installed on.
Quick checklist (scan/save)
– [ ] Confirm subfloor flatness and fix dips/high spots
– [ ] Address any moisture issues before tiling
– [ ] Use thinset/grout rated for your substrate and tile type
– [ ] Dry-fit and mark layout lines (avoid edge slivers)
– [ ] Spread thinset correctly; press mosaics firmly and keep grout gaps clear
– [ ] Grout fully, clean in sections, and follow cure times
– [ ] Seal only if your mosaic is stone (per manufacturer guidance)
FAQ
Can you install mosaic tile floors directly on basement concrete?
Often yes—if the slab is sound, stable, clean, and sufficiently flat, and you use the thinset/membrane system the manufacturer specifies for concrete. If there’s moisture, you may need a targeted moisture-control approach. [ADD: confirm with your thinset/membrane manufacturer’s installation instructions.]
What’s the biggest issue with basement mosaic tile?
Moisture and unevenness are the top two problems. Mosaic grids reveal small irregularities, and basement dampness can interfere with bonding and grout performance.
Do mosaic tile sheets need special spacing or alignment?
Yes—because mosaics are made in sheets, you still need to keep grout joints consistent between sheets and follow your layout lines. Minor sheet misalignment can compound quickly.
How long should I wait before walking on or using the basement floor?
Follow the curing timelines on your thinset and grout product instructions. [ADD: exact wait times from the specific products you’re using.]
Sources
– Manufacturer installation instructions for thinset mortar (and any uncoupling membrane/backer system, if used) for bonding tile to concrete/approved substrates — [ADD: exact product documentation you plan to use].
– Manufacturer installation instructions for grout type selection (unsanded vs. sanded) based on joint width — [ADD: exact grout product spec sheet].
– Industry guidance on tile installation practices (e.g., substrate preparation, mortar coverage) from the Tile Council of North America (TCNA) methods — [ADD: the specific TCNA method referenced for your substrate and system].
Frequently Asked Questions
How do I prepare a basement subfloor before installing mosaic tile floors?
Start by checking the basement slab or subfloor for level and flatness, since mosaic tile will highlight dips and high spots. Remove paint, adhesive residue, and loose debris, then fill cracks or low areas with a cement-based patch or self-leveling underlayment. Because basements often have moisture concerns, verify dryness and consider applying a basement-rated moisture barrier or waterproofing membrane before thinset and mosaic tile installation.
What type of thinset mortar should I use for mosaic tile floors in a basement?
For mosaic tile floors, use a thinset mortar that matches your tile material and your installation conditions—most installations use a polymer-modified thinset for better bonding. If you’re installing over concrete in a basement and there’s potential moisture, choosing a moisture-resistant or waterproofing-compatible thinset can help performance. Always follow the manufacturer’s coverage rate and trowel size so you achieve proper thinset contact behind the mosaic tiles.
How do I handle moisture and waterproofing for basement mosaic tile floors?
Begin by testing moisture levels in the basement slab so you can address the problem before tile goes down. Install a vapor barrier or waterproofing system designed for wet or damp subfloors, then ensure all seams and transitions are properly sealed. Pay close attention to expansion gaps at walls and around pipes, and use waterproof grout and sealants as recommended for your specific mosaic tile and grout type.
Which layout method works best for mosaic tile floors in a basement to avoid uneven cuts?
Dry-lay or map your mosaic tile layout first so you can center the pattern and plan for the best-looking tile cuts at the perimeter. Use a chalk line to find the room’s centerlines and confirm your pattern won’t leave narrow slivers along one wall. Cutting mosaic tile is easier when you mark each sheet carefully, and maintaining consistent grout joints helps the finished floor look uniform.
Best practices for grouting and sealing mosaic tile floors in a basement?
Use grout that suits basement conditions—typically a polymer-modified grout for improved durability, and consider epoxy grout if you need maximum moisture resistance. Spread grout with a float at a diagonal to pack joints fully, then clean promptly to prevent haze on small mosaic surfaces. Once cured, apply a penetrating sealer if your tile and grout require it, and recheck caulking along edges where the floor meets walls to maintain waterproofing integrity.
📅 Last Updated: October 10, 2026 | Topic: How to install in a basement mosaic tile floors? | Content verified for accuracy and freshness.
References
- Google Scholar Google Scholar
https://scholar.google.com/scholar?q=basement+tile+floor+installation+moisture+barrier+thinset - Google Scholar Google Scholar
https://scholar.google.com/scholar?q=ceramic+mosaic+tile+installation+backer+board+thinset+grout+guidelines - Google Scholar Google Scholar
https://scholar.google.com/scholar?q=basement+floor+tile+waterproofing+cement+board+membrane - Mold | US EPA
https://www.epa.gov/mold - https://www.cdc.gov/mold/default.htm
- Tile
https://en.wikipedia.org/wiki/Ceramic_tile - Thinset
https://en.wikipedia.org/wiki/Thinset_mortar - https://en.wikipedia.org/wiki/Cement_backer_board
- https://www.tcnatile.com/technical-library/
- https://www.tcnatile.com/tcna-handbook/