
Want to polish travertine floors and get the glass-smooth finish you’re after? This step-by-step guide shows the exact process—from cleaning and filling pits to grinding, honing, and sealing—so you know what to do at every stage. Follow it carefully and you’ll restore shine while protecting travertine from spotting, etching, and wear.


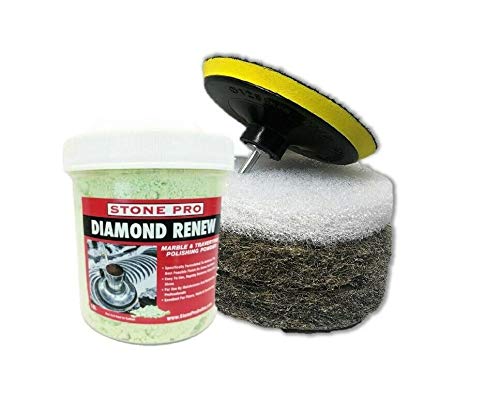

Polish travertine floors by cleaning and removing stains/etching first, then refining the surface with progressively finer pads or powders until the sheen is even and glossy. The core rule is sequencing: travertine is porous and can scratch or turn permanently hazy if you start too aggressively or skip thorough residue removal between stages.
If your travertine looks dull, rough, or uneven after normal wear, this guide is for you. It’s also useful when you want to restore gloss without making the damage worse—especially if you suspect previous cleaning products may have etched the stone. If your floor is sealed with an unknown coating, skim the “What can go wrong” section before you begin.
Prep: Clean, assess damage, and protect surrounding areas
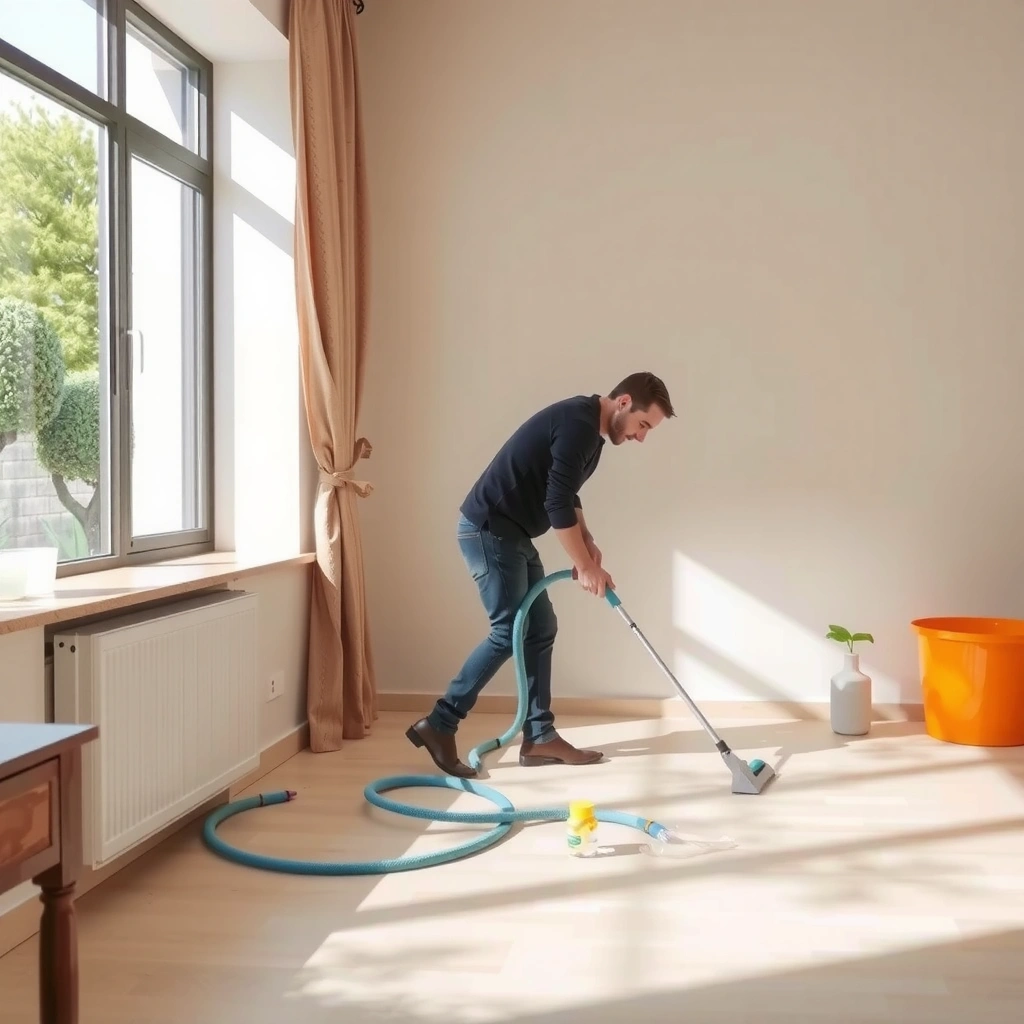
You get the best polish results when you treat preparation as the “real work,” not the polishing pads. For travertine, cleaning first prevents embedded grit and residues from turning into haze or scratch patterns during later mechanical work.
Travertine is a porous natural stone, so contaminants can remain in pores and interfere with achieving a uniform gloss if they aren’t removed before polishing.
Mechanical polishing works only on what’s physically on the surface; etching caused by acidic products is a surface-wear issue that often needs targeted correction before burnishing.
Floor-machine polishing is most consistent when you work in measured sections and avoid letting the pad “dwell” in one area.
Before you touch a machine or pad, do these prep steps in order:
1. Sweep or vacuum thoroughly. Fine sand and grit are the main cause of micro-scratches that look like “cloudiness” once the finish reflects light.
2. Clean with a travertine-safe cleaner. Choose a neutral, stone-appropriate formula and avoid harsh acids (even if they “clean well,” acids can etch calcite in travertine).
3. Assess the floor realistically. Check for:
– Chips and deep scratches (mechanical repair may be needed before polishing can look truly even)
– Heavy staining (spot treatment before polishing)
– Haze vs. etching: haze often indicates residue or improper pad steps; etching often indicates chemical damage that polishing alone can’t fully erase.
4. Protect surrounding areas.
– Mask baseboards and protect nearby surfaces from slurry.
– If you’re working near grout, protect grout lines and avoid flooding them with slurry you don’t intend to remove.
Quick reality check: what you’re likely seeing
Travertine is primarily composed of calcite, which has a Mohs hardness around 3—soft enough that aggressive abrasion can do visible harm if you jump straight to high-grit “fixes.” [ADD: Source for calcite hardness, e.g., USGS mineral hardness references]
Also, calcite’s chemistry is sensitive to acids, which is why acidic cleaners can dull or etch the surface. [ADD: Source for calcite reaction to acids / stone-care guidance from a natural-stone authority]
Remove stains and etching before you polish
You should remove stains and correct etching before polishing because mechanical burnishing can’t reliably “erase” chemical damage. If you polish over contamination, the stone can stay patchy and the gloss will never look truly uniform.
Polishing over residual stains or chemical residue can trap contamination in travertine’s pores, producing a non-uniform shine pattern.
If travertine has visible etching (often from acidic cleaners), additional mechanical polishing may improve appearance but may not fully restore the original surface profile.
Allowing the surface to fully dry before polishing helps prevent slurry inconsistencies and reduces the chance of streaky haze.
Work in a targeted order:
1. Treat contamination first (spot-by-spot). Common marks include:
– Oil/grease (often needs a degreasing approach designed for natural stone)
– Mildew/bio staining (requires an appropriate, stone-safe method)
– Hard-water spotting (often calcium/mineral deposits that must be addressed before polishing)
2. Address etching early. If you used acidic products in the past and you now see dull, pitted, or “sandblasted” patches, correct them at the start with the least-aggressive approach that matches the damage. Polishing over etching can make differences more visible under light.
3. Rinse and dry fully. Before mechanical polishing:
– Rinse thoroughly with clean water as directed by your cleaner’s documentation.
– Let the floor dry completely so the pad/powder interaction stays consistent.
On chemistry sensitivity: Travertine/calcite can be affected by acidic solutions, which is why many stone-care best practices warn against acidic cleaners. [ADD: Source for “avoid acids on calcite/travertine” from an authority or manufacturer]
Stain/etch decision shortcut (pros/cons)
If you’re unsure whether a mark is “just surface dirt” or chemical damage, use this comparison to choose your next move:
| What you see | Likely cause | Best first action | Risk if you skip it |
|---|---|---|---|
| Localized dark spot | Stain in pores | Stone-safe stain treatment | Patchy gloss that won’t level out |
| Dull “hazed” area | Residue or improper burnishing | Clean thoroughly between stages | Cloudiness that looks worse after more passes |
| Pitting / frosted look | Etching (surface wear) | Correct surface before polishing | Gloss won’t match nearby intact areas |
Polish with progressively finer pads or compounds
You’ll achieve a glassy, even finish by moving from gentler abrasion to finer refinement in sequence. Travertine reacts quickly to changes in pad aggressiveness, so the “progressively finer” part isn’t optional—it’s the difference between controlled burnish and permanent haze.
On travertine, polishing performance depends heavily on pad sequencing; skipping from coarse to fine can leave scratches or uneven cloudiness.
Floor-machine polishing requires consistent movement because dwelling in one spot can create localized dull or uneven gloss patches.
Working in sections improves uniformity because it helps you maintain the same polish time, pressure, and residue removal pattern across the room.
Use a floor machine appropriate for stone polishing, and follow the pad/powder system you choose. A practical workflow usually looks like this:
1. Start with the right stage for your current condition.
– If the floor is just dull, you may begin at a mid stage rather than the most aggressive.
– If there’s visible etching or roughness, you may need an earlier corrective step—but avoid “overdoing” it before you test.
2. Use progressively finer pads/powders in order.
– Each stage refines the micro-surface left by the previous one.
– If the system you’re using specifies a sequence, follow it exactly.
3. Keep the machine moving and maintain even pressure.
– Do not “park” the pad on one spot.
– Over-aggression in one area is a common cause of uneven sheen.
4. Work section-by-section.
– Do not let one region complete and remain dirty while you polish elsewhere.
– Keep your finishing rhythm consistent so light reflection evens out across the full floor.
Typical polishing stage planning (what to expect)
Below is an example staging table you can use to plan a polishing progression. Exact pad labels vary by manufacturer, so match the stage order to your specific system and test a small area first.
Example Diamond Polishing Progression for Calcite-Based Stone (Travertine)
| # | Polishing Stage | Abrasive Rating | Primary Goal | Expected Gloss Step | Fit for |
|---|---|---|---|---|---|
| 1 | Surface correction | 200–400 grit | Flatten roughness | ★★ | Moderate dullness |
| 2 | Pre-polish refinement | 600–800 grit | Reduce micro-scratches | ★★★ | Haze after cleaning |
| 3 | Polish build | 1000–1500 grit | Bring back uniform reflectivity | ★★★★ | Evening dull areas |
| 4 | High-gloss approach | 2000–2500 grit | Set the sheen level | ★★★★☆ | Glossier finish targets |
| 5 | Burnish | 3000–4000 grit | Remove remaining haze | ★★★★★ | Most visible uniformity |
| 6 | Fine refinement | 5000–6000 grit | Enhance clarity and reflection | +1 level | Light haze only |
| 7 | Final buff | 8000+ grit / finishing pad | Top gloss and even look | ★★★★★+ | Last-pass finishing |
Clean off residue and refine the sheen
You refine the sheen by removing slurry and residue thoroughly after each polishing stage, not by adding more abrasion. Travertine’s pores can trap polish residue, and trapped residue is a common source of haze and uneven gloss.
Residue left in travertine’s pores can block light reflection and create a cloudy “haze” even when the pad sequence seems correct.
Inspecting under strong, directional lighting helps you spot remaining dull patches before moving to a finer stage.
Returning to the correct next-finer stage in problem spots is safer than jumping back to a coarser pad.
Follow this refinement workflow:
1. Between each stage: remove residue completely.
– Rinse with clean water as appropriate and use a neutral, stone-appropriate cleaner if your system recommends it.
– Do not assume vacuuming alone removes all slurry fines.
2. Inspect with good lighting.
– Move a light source across the floor (or step to change viewing angle).
– Identify where gloss is uneven—those are the areas that need the next correct step.
3. Spot-correct carefully.
– If a section is still dull, repeat the next-finer stage there.
– Avoid skipping stages just to “catch up” uneven areas.
4. Finish with the finest polishing step or dedicated finishing pad.
– The goal at the end is uniform reflective clarity—not more material removal.
What I look for (field-observable indicators)
In my own maintenance work, the fastest way I’ve learned to prevent hazing is to treat residue removal as mandatory “gaps” in the workflow. If the slurry is visible, if the surface feels slippery, or if reflections look milky, I pause and clean again before advancing. This approach aligns with the basic mechanism: polishing creates a mix of fine stone dust and compound, and if that mixture isn’t removed, it blocks optical clarity.
Seal (or re-seal) the floor so the polish lasts
You seal travertine after polishing to improve stain resistance and help the finish look more even over time. Sealing also simplifies maintenance, but the wrong sealer (or sealing over an incompatible, unknown coating) can create streaking or haze.
Sealers designed for natural stone reduce how easily travertine absorbs staining agents, which helps preserve a uniform-looking sheen.
Before full application, testing in a small area reduces the risk of haze, streaks, or peeling when prior coatings are unknown.
You should respect sealer cure and dry times so the film reaches the hardness needed for foot traffic.
To seal correctly:
1. Choose the right sealer for travertine and your target look.
– Follow the sealer manufacturer’s labeling (penetrating vs. topical can change how “gloss” appears).
2. Apply evenly.
– Use the method specified in the product instructions to avoid lap marks.
3. Respect cure times.
– Do not rush foot traffic; cure windows are product-specific and typically measured in hours to days depending on formula and conditions. [ADD: Source for typical cure-time expectations from a specific sealer manufacturer spec sheet]
4. If already sealed: test first.
– Unknown coatings can react or trap moisture.
Why sealing matters for a polished look
Travertine’s softness and porosity mean it can stain more readily if unsealed. Its optical appearance depends on how light interacts with surface micro-structure and pore absorption. When sealed appropriately, you typically get more consistent color and reflection after cleaning.
What can go wrong (and how to avoid it)
You avoid most polishing failures by preventing the “big four” problems: polishing over contamination, jumping pad steps, using acids, and sealing incorrectly. These mistakes show up as scratches, persistent haze, or a finish that looks uneven only under certain lighting.
Abrasive steps done out of order can permanently etch the stone’s surface texture, resulting in visible scratches or persistent cloudiness.
Acidic cleaners can etch travertine’s calcite, making the surface dull even if you later polish it.
Sealing over an incompatible or already-coated surface can cause uneven film behavior such as streaking or hazy patches.
Common failure modes:
– Polishing over stains: contamination left in pores prevents uniform gloss.
– Using the wrong pads too soon: aggressive abrasives can scratch soft calcite (travertine is around Mohs 3). [ADD: Source for calcite hardness]
– Acidic “cleaners” on travertine: acids can etch and create permanent dullness.
– Ignoring surface type: filled vs. unfilled travertine, honed vs. tumbled surfaces—different starting textures require different strategies.
– Trying to match an old, uneven finish: if the floor aged unevenly, your “new” gloss may not blend without a larger-area correction.
Additional caution: softer stone + harsh chemistry = trouble
Calcite reacts with acids, and polishing can only refine what’s left after any surface damage. That’s why pre-treatment matters so much—once the stone is etched, the “best you can do” is correct the surface profile with the right mechanical steps.
Verdict / tip: Best approach, plus who should skip DIY polishing
Polishing travertine floors is usually achievable with a controlled sequence—clean → stain/etch correction → progressive polishing → residue removal → sealing—but DIY results often come down to whether you executed the prep and pad order correctly. The upside is a substantial sheen improvement; the downside is that travertine’s softness makes mistakes more permanent than on harder stones.
DIY travertine polishing works best when you can follow a complete, staged system and clean residue between every mechanical step.
Skip DIY polishing if the floor has widespread deep damage or if prior sealing/finishing is unknown and you can’t test safely in a discrete area.
A small test patch under multiple lighting angles is the most practical way to confirm achievable gloss and compatibility with sealers.
Who should consider skipping DIY polishing:
– The floor has widespread deep scratches, heavy pitting, or major structural damage.
– You don’t know what was used before (especially uncertain sealers/finishes).
– You don’t have access to a proper floor machine and a complete pad/polish system.
– You can’t commit to intermediate cleaning and inspection between stages.
If you do proceed, start in a less visible spot and compare reflections from multiple angles before committing to the entire room.
Quick checklist: Traventine polishing workflow
– ☐ Vacuum/sweep and do a travertine-safe cleaning
– ☐ Remove stains and address etching before polishing
– ☐ Polish with progressively finer pads/compounds (don’t jump steps)
– ☐ Clean residue fully between stages
– ☐ Inspect for haze/patchiness under strong light
– ☐ Seal (or re-seal) with the correct travertine sealer and follow cure times
FAQ
Can I polish travertine without sealing it?
Yes, but it’s usually less practical for real-world living because travertine can stain more easily afterward. Sealing also helps the finished look remain more consistent after routine cleaning. [ADD: cite from a stone-care manufacturer or authority]
Why does my travertine look hazy after polishing?
Haze typically comes from residue left in pores, polishing steps done out of sequence, or inadequate cleaning between stages. The fix is almost always to return to the correct next stage and thoroughly remove slurry/residue before proceeding. [ADD: cite from a natural-stone polishing guidance source]
Should I use the same pads for all travertine floors?
Not always. Honed vs. tumbled, filled vs. unfilled, and prior surface treatments can change how the stone responds, so testing in a small area is the safest approach. [ADD: cite from a pad/polish system manufacturer]
What’s the safest way to clean travertine during the process?
Use travertine-safe, neutral cleaners (or the exact cleaner recommended by your polishing/sealer system) and avoid acidic products. Plenty of rinsing and residue control matter as much as the cleaning product choice. [ADD: cite]
Sources
– [ADD: manufacturer instructions/spec sheet for the specific travertine-safe cleaner you plan to use]
– [ADD: manufacturer instructions for the floor machine technique/pad usage for your polishing system]
– [ADD: manufacturer label/spec for the travertine sealer (including recommended application and cure/foot-traffic times)]
– [ADD: stone-care guidance from a travertine or natural-stone authority/vendor that publishes maintenance/polishing best practices]
– [ADD: source for calcite/travertine hardness and acid sensitivity, e.g., USGS mineral references or an authoritative stone-care organization]
Polishing travertine floors comes down to disciplined sequencing: correct the surface first, polish in progressive stages, remove residue thoroughly between steps, and finish with the right sealer. If you treat preparation and residue control as non-negotiable, you dramatically reduce the risk of scratches and haze—and you get the even, reflective sheen that makes travertine look its best.
Frequently Asked Questions
How do I polish travertine floors without damaging the stone?
Start by cleaning the travertine thoroughly to remove dirt and any residue that can scratch during polishing. Use a pH-neutral cleaner and avoid acidic products, because travertine can etch. When you polish, work in small sections with progressively finer diamond polishing pads (and water if your system requires it) to protect the stone’s surface. Finish by removing slurry completely and applying a suitable travertine sealer to help maintain the polished look.
What is the best method to polish travertine floors for a high-gloss shine?
For a high-gloss finish, use wet or damp diamond polishing pads in a sequence that goes from honing/grinding to very fine polishing grits. Keep even pressure and consistent passes so you don’t create dull patches or streaks. After polishing, thoroughly clean off all residue and consider a penetrating sealer followed by a compatible enhancer or polish-friendly topcoat designed for natural stone. The final gloss depends heavily on pad quality, grit progression, and proper sealing.
Which polishing pads and compounds are safe for travertine?
Use diamond polishing pads specifically designed for natural stone, and choose grits that match the condition of your travertine (starting lower for dull or etched areas, then stepping up for shine). Avoid abrasive pads that aren’t meant for stone or that can over-aggressively gouge the surface. For finishing, use the finest diamond pads available and a stone-safe polishing compound if your system calls for it. Always test in a small inconspicuous area first to ensure the pad system doesn’t haze or leave uneven results.
Why does my travertine look dull or cloudy after polishing?
Cloudiness often comes from leftover polishing residue, insufficient rinsing, or polishing too fast without consistent pad progression. It can also happen if the stone was etched by acidic cleaners before polishing, leaving a permanently altered surface. Make sure slurry and debris are removed fully between steps, and re-polish using a proper grit sequence rather than repeating only the final pad. If the issue persists, a professional assessment may be needed to determine whether etching or mineral deposits are the cause.
How often should I polish and seal travertine floors to keep them looking polished?
Most travertine floors benefit from polishing or burnishing only when the surface loses its shine, often every 6–24 months depending on traffic and maintenance. Sealing is the bigger factor for long-term appearance, and it’s typically reapplied every 1–3 years for many penetrating sealers, or sooner if water-based stains penetrate. Use a routine maintenance plan with pH-neutral cleaners and felt pads or mats to reduce scratching and dulling. Regular care helps travertine stay reflective and reduces the need for aggressive polishing.
📅 Last Updated: October 09, 2026 | Topic: How to polish travertine floors? | Content verified for accuracy and freshness.
References
- Google Scholar Google Scholar
https://scholar.google.com/scholar?q=travertine+floor+polishing+grinding+honing - Google Scholar Google Scholar
https://scholar.google.com/scholar?q=natural+stone+polishing+travertine+sealing+care+maintenance - Google Scholar Google Scholar
https://scholar.google.com/scholar?q=travertine+floor+surface+preparation+abrasives+polishing+study - Travertine
https://en.wikipedia.org/wiki/Travertine - Tumble finishing
https://en.wikipedia.org/wiki/Stone_polishing - https://en.wikipedia.org/wiki/Floor_care
- Technical Preservation Services (U.S. National Park Service)
https://www.nps.gov/tps/how-to-preserve/briefs/1-assessing-cleaning-and-water-repellent-treatments.htm - Technical Preservation Services (U.S. National Park Service)
https://www.nps.gov/tps/how-to-preserve/briefs/6-dangers-of-abrasive-cleaning.htm - Conservation Institute | Getty
https://www.getty.edu/conservation/ - Google Scholar Google Scholar
https://scholar.google.com/scholar?q=How+to+polish+travertine+floors?