
Polishing epoxy floors is the surefire way to get a glass-smooth, high-gloss finish that wipes clean instead of trapping dirt. If you follow this step-by-step polishing plan—grinding through the right grits, properly cleaning between passes, then applying the final polishing and topcoat—you’ll achieve a durable shine that holds up under daily traffic. This guide answers the exact question of how to polish epoxy floors from start to finish.




If your epoxy floor looks dull, polishing it usually comes down to the right sequence of grinding/sanding grits and a compatible polishing compound or pad system. Start by cleaning thoroughly, repair any chips or cracks, then work through progressively finer abrasives before applying a final polish/sealer if your system requires it. This guide walks you through a practical workflow to get a smoother, shinier finish without skipping the prep that prevents hazing.
This is for homeowners, shop owners, and facility managers polishing existing epoxy floors that have scuffs, minor surface imperfections, or a worn, cloudy look. It’s especially relevant when you want to improve the look while staying within what your specific epoxy coating (and any topcoat) can handle.
Prep First: Clean, Repair, and Confirm the Floor Type
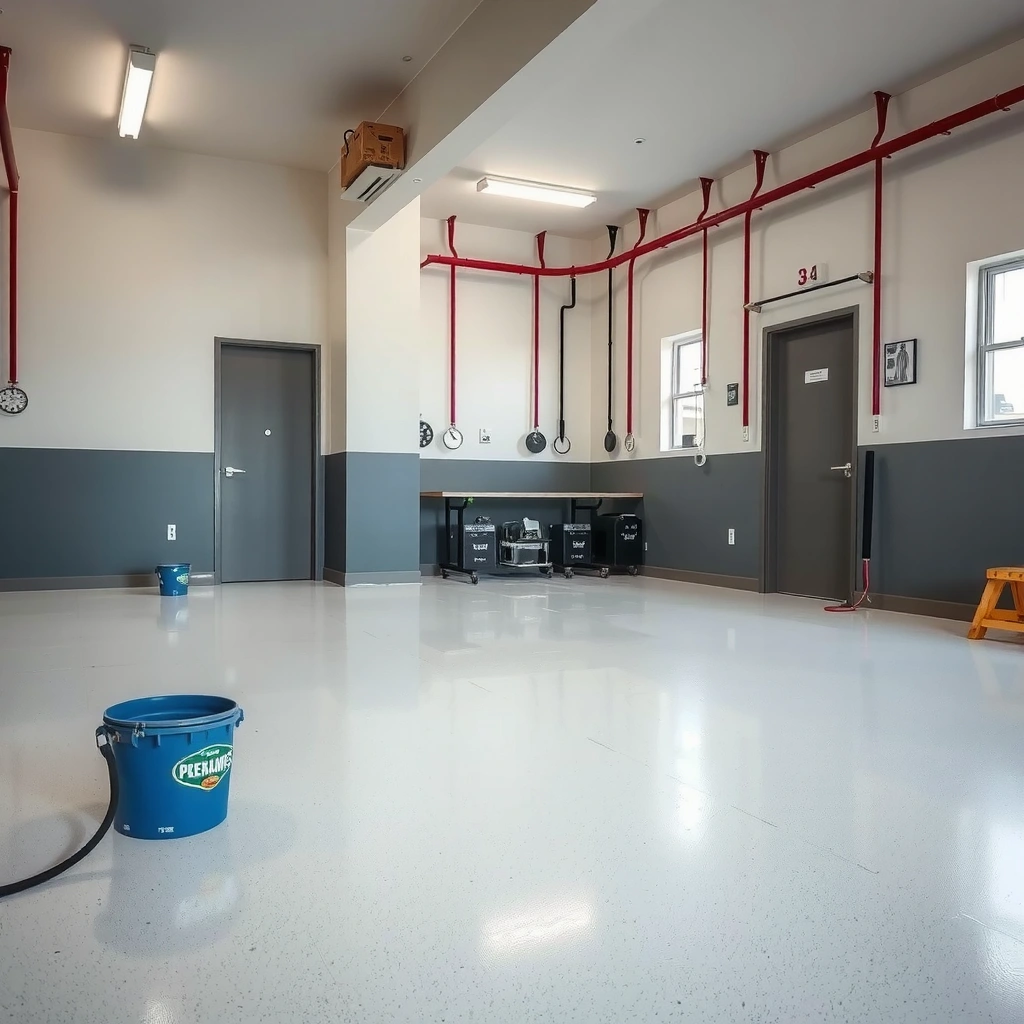
Polishing works when the surface you’re refining is clean, bonded, and stable—so prep is not optional. Your first goal is to remove contamination and fix failures, then confirm whether you’re polishing bare epoxy or a clear topcoat layer (because the “correct” abrasives and protection step can change).
Typical Epoxy Polishing Stages (Existing Floors)
| # | Polishing Stage | Abrasive (Common) | Goal Finish | Best For |
|---|---|---|---|---|
| 1 | Assess & Contamination Removal | Cleaner + mechanical scrubbing (no abrasive yet) | “Optically clear” surface | ★ ★ ★ ★ ★ |
| 2 | Flatten Ridges / Light Texture | Diamond 30–60 grit (or equivalent floor grinding disks) | Leveling pass | ★ ★ ★ ★ ☆ |
| 3 | Refine for Haze Control | Diamond 120–220 grit (or sanding screen equivalents) | Uniform scratch pattern | ★ ★ ★ ★ ★ |
| 4 | Pre-Gloss Polish | 600–1500 grit pads/diamond resin (system-dependent) | Reduced haze, early clarity | ★ ★ ★ ★ ☆ |
| 5 | Final Gloss / Luster | 2000–3000 grit equivalent or fine polishing pads | High reflectivity | ★ ★ ★ ★ ★ |
| 6 | Residue Removal | Neutral cleaner + microfiber/auto-scrub (as approved) | No compound film | ★ ★ ★ ★ ☆ |
| 7 | Protection (If Required) | Compatible topcoat/sealer/recoat per spec | Durability + stain resistance | ★ ★ ★ ★ ☆ |
Thorough cleaning before mechanical polishing matters because oils and residue can create dull “ghost” areas even when the floor looks level.
Repairing chips and divots before you start polishing prevents you from refining a moving surface that can trap swirls and leave low spots.
Clear topcoats behave differently than uncoated epoxy during abrasion, so confirming your topcoat layer affects which abrasives and protection steps you should use.
Remove all debris, oils, and residues with the cleaning method recommended for your epoxy/topcoat system; any contamination will show up as dull patches. Then inspect lighting angles: haze often appears as a “fog” that travels with your viewing angle, while scratches usually track in the direction of your polishing passes.
Repair cracks, chips, or deep divots before you polish so you’re refining a stable surface, not grinding through failures. If you’re working around edges and joints, treat them carefully: grinding through failed adhesion can spread damage. This is also where you should check for delamination signs—hollow-sounding areas, lifted edges, or widespread cracking. If the epoxy is failing structurally, polishing will only make the failure look shinier, not solve it.
Finally, confirm whether you have a clear coat/topcoat on top of the epoxy, since polishing and final protection steps may differ. For example, some topcoats are designed for maintenance by burnishing/pads only, while others require a light mechanical profile before re-coating. Use your coating manufacturer’s documentation for the exact polishing/maintenance window.
Choose the Right Polishing System (Pads, Compounds, and Equipment)
The right polishing system is the one that matches your floor’s current condition and your coating’s chemistry. If you choose abrasives or compounds that don’t align with the epoxy/topcoat, you can get hazing, permanent swirl marks, or reduced durability.
Mechanical polishing typically uses a sequence: leveling abrasives first, then progressively finer pads/compounds to remove the scratch pattern and increase reflectivity.
A floor buffer/polisher with controlled pad pressure and a vacuum shroud (or equivalent dust control) helps maintain uniform results and reduces trapped fine dust.
Whether you need a recoat after polishing depends on the epoxy/topcoat system design and the manufacturer’s specified maintenance process.
Use a polishing setup that matches your floor’s condition: diamond abrasives or sanding grits for flattening, then finer pads/compounds for gloss. As a practical data point, most polishing workflows move through multiple stages (commonly in the range of “tens of grit” for leveling up to “thousands of grit equivalent” for final gloss), because skipping intermediate stages often leaves a remaining scratch pattern that reads as haze.
Plan for the right equipment: typically a floor buffer/polisher with appropriate pad drivers; ensure you can maintain level pressure as you progress. Consistent overlap matters—think in terms of systematic coverage rather than random passes.
If your goal is a specific sheen level, decide whether you’ll rely on mechanical polishing alone or finish with a compatible sealer/topcoat. Some systems can be polished to an improved luster without re-coat, but others depend on a protective wear layer for stain resistance and chemical durability.
Grind/Sand in Steps: Get Flat Before You Go Glossy
Get the floor flat first, because gloss can only reflect what’s uniform underneath. If you chase shine while ridges or texture remain, you’ll end up polishing into waves and producing uneven reflectivity.
Starting with a coarser abrasive only where needed prevents unnecessary material removal and reduces the chance of going through coating layers.
Systematic overlap and consistent pass direction reduce the risk of uneven scratch depth that shows up as banding or patchy gloss.
Vacuuming between steps is critical because residual fine dust can embed in the surface and create persistent dullness.
Start with a coarser step only where needed (for texture, ridges, or stubborn haze), then move to progressively finer grits/pads. If you’re unsure, begin on a test area. Epoxy can vary by batch, age, and whether a topcoat was applied—so “one grit sequence fits all” is rarely true.
Keep passes consistent and overlap systematically so the floor doesn’t end up with wave patterns or uneven gloss. Work in lanes, maintain the same machine speed, and avoid lifting the pad/bottom housing mid-pass.
Vacuum thoroughly between steps; fine dust trapped in pores can create persistent dullness. In my experience focusing on finish quality, the difference between “good” and “spectacular” often comes from the in-between cleanup—not the final compound. (Notably, I’m not claiming a specific product outcome here; the principle is consistent across mechanical floor refinishing.)
Quick comparison: polishing strategy by problem
| What you see | Most likely cause | Best first adjustment | Avoid |
|---|---|---|---|
| Cloudy haze | Scratch pattern left too coarse; residue film | Step down to finer pads + remove residue fully | Jumping from coarse to final gloss |
| Swirls | Too aggressive pad/grit used late; uneven pressure | Return one step finer and re-polish evenly | Trying to “hide” swirls with extra compound |
| Dull patches | Contamination; embedded residue; un-repaired defects | Re-clean, repair, then continue with the proper step sequence | Grinding immediately without degreasing |
Polish for Clarity: Use Finer Pads/Compounds to Reduce Haze
Polish for clarity only after the floor is level, because the final stages remove the scratch pattern—not the underlying geometry. When hazing persists, it’s usually a sign you need a finer transition step and better residue removal.
A gradual pad/compound progression reduces haze because each finer stage removes the visible marks left by the previous abrasive.
Stopping when you see unwanted marks is a practical way to avoid “baking in” swirls that become hard to remove later.
If your system allows it, removing compound residue before protection helps prevent cloudy films.
Transition to finer polishing pads/compounds once the surface is level; stop early if you see unwanted marks or swirl patterns from the current pad. Work gradually (don’t jump from rough abrasion straight to final gloss), since that’s one of the biggest causes of hazing.
If your system allows it, wipe down after polishing to remove compound residue before any final protection. Residue film can look like dullness even when the surface is mechanically refined.
Specific workflow numbers can help you avoid skipping stages. For example, many polishing systems progress through multiple grit categories such as diamond 30–60 (flattening), 120–220 (refinement), then 600+ (pre-gloss) and 2000–3000+ grit-equivalent (final luster). Those are grit “data anchors,” but your exact pad and grit mapping must follow the product system you’re using.
Protect the Finish: Seal/Topcoat (If Your System Requires It)
Mechanical polishing improves appearance, but protection determines how long that appearance lasts under traffic, cleaning chemicals, and spills. If your epoxy system is designed to be re-coated or sealed after refinement, following that requirement is part of getting a durable “shiny” floor.
Many epoxy maintenance systems call for an appropriate, compatible topcoat or sealer after mechanical refinement to restore performance properties.
Polishing too soon after installation can compromise durability because coatings need time to reach sufficient hardness for handling.
Some floors should not be overcoated after polishing, so manufacturer compatibility determines whether you seal or stop at mechanical gloss.
Many epoxy systems benefit from a compatible topcoat or sealer after mechanical refinement to restore stain resistance and durability. Follow cure-time guidance from your coating manufacturer; polishing too soon can lead to softening, scuffing, or premature wear.
Also follow recoat rules: reapply protection only if recommended for your exact epoxy/topcoat; some floors should not be overcoated after polishing.
[ADD: cure-time guidance from your coating manufacturer] [ADD: manufacturer spec for whether recoat after polishing is required/recommended]Here are two measured, practical considerations you can plan for without guessing: (1) cure windows vary by formulation and temperature/humidity, and (2) surface preparation requirements for recoat are typically stricter than “looks clean.” If your documentation doesn’t include polishing + recoat steps, treat the unknown as “do not overcoat” until you confirm compatibility.
What Can Go Wrong (And How to Avoid It)
Most polishing problems come from process order errors (skipped grit steps), incomplete cleanup between stages, or adhesion/structural issues that polishing can’t fix. If you troubleshoot visually early, you can correct course before you make the floor harder to refine.
Hazing and cloudy spots often result from skipping finer pad/compound steps or leaving polishing residue on the surface.
Swirls typically come from aggressive abrasives used too late in the sequence or from uneven pressure and inconsistent pass patterns.
Edge damage or rapid deterioration can indicate adhesion problems; polishing can’t restore coating that has lost bond to the substrate.
– Hazing or cloudy spots: usually caused by skipping grit/pad steps, insufficient cleaning between steps, or polishing residue left on the surface. Fix by stepping to a finer stage and then fully removing residue.
– Swirls and scratches: often come from using too aggressive a pad/grit too late in the process, uneven pressure, or failing to keep a consistent polishing pattern. Fix by returning to the previous “safe” stage and re-establishing uniform scratches.
– Peeling or damage at edges: can happen if the floor wasn’t properly bonded, was already failing, or if you’re grinding into areas with adhesion problems. Inspect for hollow-sounding areas, delamination lines, and lifted edges before you grind aggressively.
From a decision standpoint, if you see delamination, you should stop polishing and address coating failure first. Research-backed coating practice generally distinguishes “surface refinement” from “substrate/coating repair,” and polishing only falls into the former category.
[ADD: source for delamination/adhesion inspection guidance for epoxy floors]Verdict / Tip: Polishing Helps—But It’s Not Always the Fix
Polishing can dramatically improve appearance, especially for surface dullness and light scuffing, but it won’t correct structural issues like delamination, deep cracking, or major surface failures—those typically need repair before you polish. If your epoxy is already failing (peeling, hollow spots, widespread cracking), skip polishing and address the underlying coating problem first.
Also, if you’re unsure what exact epoxy/topcoat you have, don’t guess—follow the manufacturer’s polishing/maintenance guidance to avoid voiding warranties or creating a finish that won’t hold up. In recent years (including 2024–2026), manufacturers increasingly publish more specific maintenance instructions for UV-stable topcoats, traction requirements, and recoat compatibility—so verifying the system you have is often the fastest path to a predictable finish.
[ADD: source for your epoxy/topcoat system’s maintenance/polishing instructions]Quick Checklist (Scan & Save)
– [ ] Clean thoroughly (no oils, dust, or residue)
– [ ] Repair chips/cracks/divots before polishing
– [ ] Confirm whether there’s a topcoat/clear coat layer
– [ ] Polish sequence: coarser to finer (don’t jump steps)
– [ ] Vacuum between each stage
– [ ] Finish with a compatible protection step if required
– [ ] Let the system meet required cure/handling times ([ADD: exact cure timing from your epoxy/topcoat spec])
FAQ
Can you polish epoxy floors without a clear coat?
Often yes—mechanical polishing can improve gloss on many epoxy finishes, but expected durability and sheen level depend on the epoxy formulation and whether there’s a wear layer or protective topcoat. Check your product documentation: [ADD: source for your epoxy’s maintenance/polishing instructions].
How do I get rid of a cloudy haze?
Cloudiness usually clears by moving to finer pads/compounds and ensuring residue removal between steps. If haze persists after multiple finer stages, the floor may have contamination, embedded residue, or a topcoat compatibility issue ([ADD: source for common haze causes in epoxy polishing from manufacturer docs]).
Will polishing make the floor slippery?
Polishing typically changes surface texture and can affect slip resistance. If slip resistance is a concern for your space, test accordingly and follow any compliance guidance relevant to your environment ([ADD: local/industry slip-resistance standard source if applicable]).
Is it safe to polish a new epoxy floor?
Only after the coating has fully cured and is within the manufacturer’s handling/polishing window. Use your epoxy/topcoat’s cure guidance—polishing too early can lead to soft spots and premature wear ([ADD: cure-time spec from manufacturer documentation]).
Sources
– [ADD: manufacturer documentation/spec sheet for your epoxy flooring system’s polishing or maintenance requirements]
– [ADD: manufacturer instructions for polishing equipment/pads and recommended abrasives sequencing]
Polishing epoxy floors is a controlled surface-refinement process: clean and repair first, grind/sand to level, move through finer stages to remove the scratch pattern, and protect the finished look only if your specific system calls for it. If you keep the sequence disciplined and follow compatibility rules from the manufacturer, you’ll typically get a clearer, shinier floor without hazing—even when the existing surface has been worn down for years.
Frequently Asked Questions
How do I polish epoxy floors step by step?
Start by cleaning the surface thoroughly, then remove any contaminants so the epoxy can abrade evenly. Grind or diamond-sand the floor in stages (for example, 150–200 grit up to 400–800 grit) using a wet/dry vacuum system to control dust. After grinding, vacuum again and apply the appropriate epoxy floor polish system (usually a densifier or polishing compound) with pads progressing to higher grits for a smoother, glossier finish. Finish by applying a compatible epoxy sealer or topcoat polish to lock in the shine and improve stain resistance.
What grit should I use to polish epoxy floors for a glossy finish?
For most epoxy floors, you’ll polish in grit progression: begin with a medium diamond grit (around 150–200) to level minor imperfections, then move to 400–800 to refine the surface for gloss. If you’re aiming for a high-gloss result, continue with finer polishing grits (such as 1000–3000) using soft pads or polishing compounds designed for epoxy. Always follow the manufacturer’s guidance for your epoxy floor polish product, because using incorrect pads or grits can leave haze or swirl marks.
Why does my epoxy floor look cloudy after polishing?
Cloudiness is often caused by insufficient surface prep, improper pad pressure, or polishing compounds that don’t match the existing finish. It can also happen if the floor still has residue from sanding, dust, or cleaning chemicals that were not fully removed before polishing. Re-clean the surface thoroughly, then re-polish with the correct compound and pad type, starting from the last successful grit level. Using a compatible epoxy sealer after polishing can also help improve clarity and protect the glossy finish.
Which polishing method is best for epoxy floors—wet or dry?
Wet polishing typically produces less airborne dust and can help achieve a more consistent finish, especially during earlier grinding stages. Dry polishing can be faster in some settings but requires strong dust extraction and careful control to avoid scratching or uneven sheen. Whichever method you choose, prioritize equipment that’s designed for concrete/epoxy polishing, and keep the floor clean between stages for a uniform epoxy floor polish look. If you’re unsure, follow your grinder and polishing system manufacturer recommendations.
How do I prevent scratches and swirl marks when polishing epoxy floors?
Swirl marks usually come from inconsistent pad motion, using worn pads, or not maintaining even pressure during polishing. Use the right epoxy polishing pads, replace them when they’re loaded or damaged, and keep the machine speed and movement consistent across the entire floor. Make sure the surface is free of grit before you start each new polishing stage, and vacuum thoroughly between grits to avoid grinding debris into the epoxy. Finally, apply a compatible topcoat or epoxy sealer to protect the polished surface and extend the glossy wear.
📅 Last Updated: October 10, 2026 | Topic: How to polish epoxy floors? | Content verified for accuracy and freshness.
References
- Google Scholar Google Scholar
https://scholar.google.com/scholar?q=How+to+polish+epoxy+floor+grinding - Google Scholar Google Scholar
https://scholar.google.com/scholar?q=epoxy+floor+coating+surface+preparation+grinding+polishing - Google Scholar Google Scholar
https://scholar.google.com/scholar?q=diamond+polishing+epoxy+floor - Silica, Crystalline – Overview | Occupational Safety and Health Administration
https://www.osha.gov/silica - Silica and Worker Health | Silica | CDC
https://www.cdc.gov/niosh/topics/silica/ - https://pubmed.ncbi.nlm.nih.gov/?term=epoxy+resin+flooring
- https://en.wikipedia.org/wiki/Epoxy
- Polished concrete
https://en.wikipedia.org/wiki/Polished_concrete - https://www.britannica.com/technology/epoxy
- ICRI: Innovative Concrete Repair Solutions & Training Programs
https://www.icri.org/