
Need to know how to measure for outdoor floors accurately before you buy materials or schedule installation? This step-by-step guide walks you through measuring length, width, slopes, and any irregular edges so you can calculate square footage with confidence. If you follow the process exactly, you’ll get a precise takeoff that minimizes waste and prevents costly fitment mistakes.




If you want outdoor floors to fit without gaps or costly redo, measure the area in sections and confirm the finished size includes borders and edges. Measure length and width first, then adjust for slopes, posts, drains, and irregular cutouts before ordering—this is the most reliable way to get correct coverage on patios, decks, walkways, and pool-area flooring. This guide walks you through a practical, installer-style method for measuring outdoor flooring accurately.
This is for homeowners, DIYers, and contractors planning patios, decks, walkways, or pool-area flooring where small measurement errors can show up quickly. It’s also useful if you’re working with tiles, pavers, or modular decking and need to calculate coverage before you buy.
What to measure first (and what to write down)
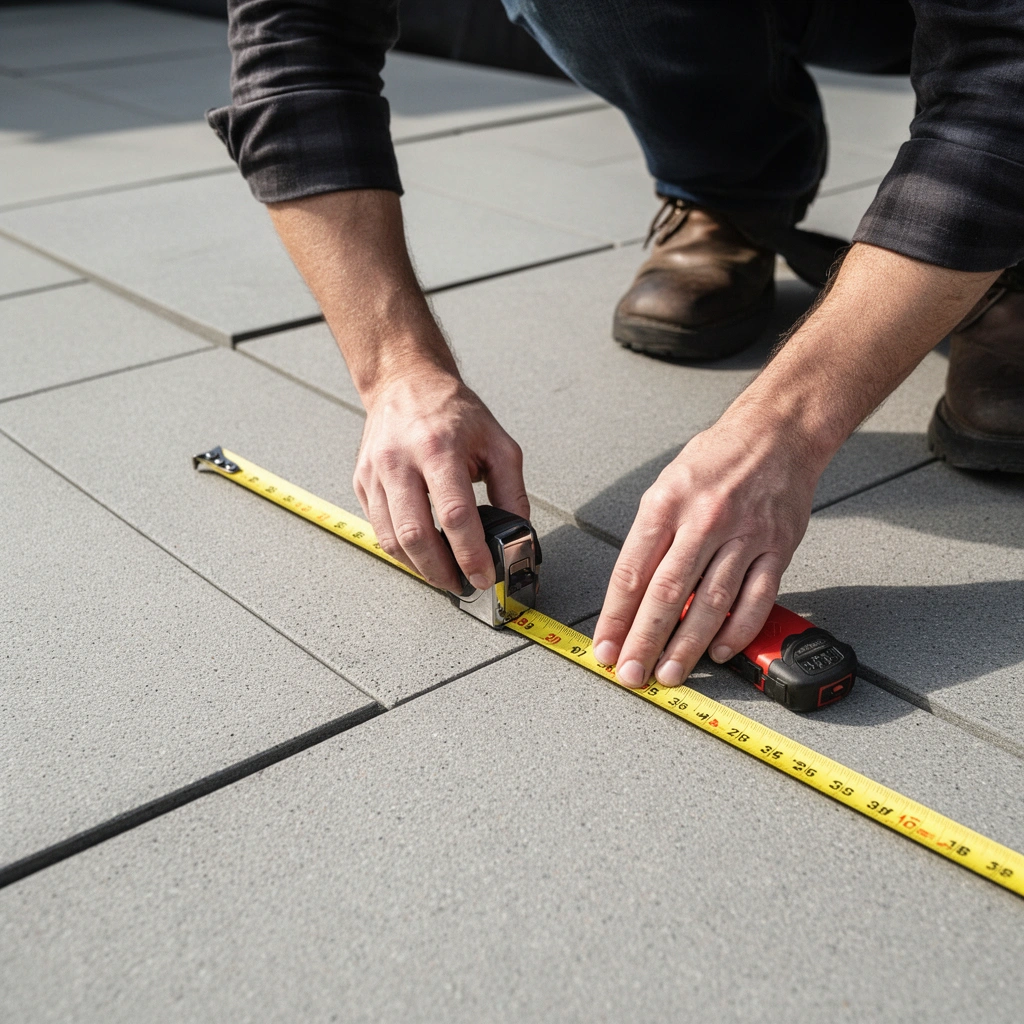
Measure the main footprint first, then document every boundary and obstruction before you do any area math. This prevents “measurement drift,” where small rounding choices add up across long runs—especially when you later subtract drains or fit around posts.
A correct starting datum (one consistent corner/reference) reduces cumulative error when you split an outdoor floor into sections.
Outdoor flooring plans should be measured and totaled as the finished layout area, but bedding/edge restraints must come from the flooring system’s installation documentation.
To keep results consistent, create a simple sketch (paper or phone) with labeled measurements. Then write down:
– Measure the main footprint: outside-to-outside length and width (in inches or feet—pick one unit and stick with it).
– Record both: write length and width clearly, along with the unit (e.g., “12 ft 6 in” or “150 in”).
– Note obstacles and boundaries: steps, planters, posts, drain covers, curbs, and any walls the flooring meets.
– Decide your reference point: measure from a consistent starting corner so totals don’t drift.
A few measurement “anchor” practices I recommend based on how outdoor flooring layouts behave in the field:
– Use tape measures and a line-of-sight reference: if a wall is not perfectly square, measure from the same datum every time.
– Record “outside-to-outside” for the finished footprint: for pavers/tiles, that usually means the outer edge the finished surface will reach; for decking, it may mean the outer joist or board end limits depending on your product system.
– Photograph your datum and key obstructions: if you revisit the job later, your notes won’t have to guess what you meant.
Quick reference unit conversions to avoid mistakes
If your plan is in inches but your product spec is in square feet (common for tiles/pavers), convert only after you’ve totaled in one unit.
Common Measurement Conversions for Outdoor Floor Takeoffs
| # | Conversion item | Use in outdoor measuring | Exact factor | Measurement confidence |
|---|---|---|---|---|
| 1 | Inches → Millimeters | Tile/paver specs in mm | 1 in = 25.4 mm | ★★★★☆ |
| 2 | Feet → Inches | Deck footprints measured by tape | 1 ft = 12 in | ★★★★★ |
| 3 | Feet → Meters | International flooring specs | 1 ft = 0.3048 m | ★★★★★ |
| 4 | Square feet → Square meters | Coverage in metric markets | 1 ft² = 0.092903 m² | ★★★★☆ |
| 5 | Square inches → Square centimeters | Small format tile math | 1 in² = 6.4516 cm² | ★★★★☆ |
| 6 | Square feet → Square yards | Some aggregate/subbase estimates | 1 yd² = 9 ft² | ★★★★★ |
| 7 | Inch → Centimeter | Deck hardware or edging heights | 1 in = 2.54 cm | ★★★★★ |
How to measure irregular outdoor shapes
You measure irregular outdoor spaces best by breaking them into simple geometric “chunks” and handling each cutout explicitly. Instead of guessing the final outline, you total rectangles/triangles and then subtract areas you won’t cover.
Most takeoff errors come from unmeasured cutouts (drains, bases, posts) showing up after the main footprint is already totaled.
For angled or curved corners, measuring along clear longest edges is typically more reliable than trying to estimate the curve as one dimension.
Use a “section-by-section” method:
– Break the space into simple rectangles, triangles, and cutouts, then add or subtract areas as needed.
– Measure each “missing” section (like a rounded corner, hearth, or tree cutout) so you reduce the total correctly.
– For curves or angled corners: use straight-line measurements along the longest edges and then confirm how your product handles transitions (for example, how pavers transition at edges, or how tiles trim at a radius).
A practical approach to curved corners (what to record)
Curved patios are where people typically lose accuracy. For curved layouts, capture enough information to reproduce the shape with your chosen installation pattern:
– Measure radius (center-to-edge) if the curve is truly circular, and confirm the layout system can follow that radius.
– If it’s not circular, approximate with short chord segments: measure the longest straight edges feeding the curve and the widths at 2–4 points along the curve.
[ADD: source/measurement method for curved layouts if needed]
Obstacles you should treat as cutouts (not “trim later”)
– Drain grates and utility covers
– Base plates for railings or pergolas
– Steps and raised landings
– Planters or island boundaries where flooring won’t enter
Be explicit in your sketch: label each cutout with its measured dimensions and note whether you need clearance for a frame, grille, or structural detail.
Account for slope, drainage, and height changes
If your outdoor floor site is not level, you must measure the slope direction and account for system thickness differences so the surface stays correct. The key is separating “plan area” (what you see on top) from “height reality” (how many millimeters/inches you need for proper bedding, leveling, and drainage).
Outdoor drainage depends on slope direction; flooring that’s level over a failing grade can trap water near drains or building edges.
Installation documentation often defines the required bedding/leveling thickness; measuring only the footprint can still create height mismatches later.
Do the following:
– If the outdoor area slopes, measure the grade direction (where water travels) and note thickness/height differences.
– Plan for drainage points: keep the flooring flat where required, but make sure water moves toward the right outlet (especially near drains).
– Confirm flooring system thickness rules: include bedding/leveling thickness in your “finished” dimension where the manufacturer requires it.
– Edge restraints and transitions: where flooring meets walls/steps, there may be clearance requirements to prevent buckling or cracking under expansion.
[ADD: exact spec requirement from your flooring manufacturer]
What to measure for slope (simple but useful)
You don’t always need to survey like an engineer, but you do need directional awareness:
– Note where water currently runs after rain.
– Measure a few representative elevations (at least 3–5 points) if the job is large or if you’re unsure about grade.
– If there’s a drain, measure from drain centerline outward to understand where water should converge.
Slope + expansion gaps: don’t mix the rules
Even when slope is fixed, many outdoor systems require expansion gaps at edges or between sections. Those gaps can change your final usable “coverage” versus your measured plan footprint.
[ADD: expansion/joint requirement from manufacturer documentation]
Calculate coverage: waste, borders, and layout overlap
Once you know the finished footprint (including cutouts and slope limits), calculate material coverage using product rules and an allowance for waste. This is where tiles/pavers/deck boards often diverge from “area math,” because edging, restraints, and patterns change the final number of units.
Your “measured area” and your “materials coverage” rarely match 1:1 once borders, edge restraints, and pattern overlap are included.
Patterned installations should be laid out from a centerline or datum; measuring without a layout rule can unbalance the border rows.
Follow this workflow:
– Compute total area from your measured sections, then add allowance for waste (cutting, alignment, odd edges).
– Include borders/edge restraints:
– If your product uses edging, starter strips, or overlap, your “measured area” may differ from “materials coverage.”
– If you’re installing in a pattern (staggered, grid, herringbone):
– Measure from the centerline (or a chosen datum) so the layout stays balanced.
– Use your specific manual’s layout rule.
[ADD: layout rule from your specific product/manual]
A quick comparison of common outdoor coverage inputs
Below is a simple way to compare how different outdoor flooring types “consume” coverage differently during install.
| Outdoor flooring type | Coverage math focus | Where waste usually comes from | What to confirm in the manual |
|---|---|---|---|
| Concrete pavers | Finished surface area + joint allowance | Cuts at borders, adjusting to irregular edges | Edge restraint system + joint width |
| Outdoor tiles | Surface area including trim strategy | Small-format cuts, offsets near openings | Required movement joints + thinset coverage |
| Modular decking tiles/planks | Decking footprint at support layout | Gaps/edge trims, post/drain alignment | Support spacing + edge finishing rules |
| Peel-and-stick or sheet systems | Seaming/overlap geometry | Overlaps and perimeter sealing | Overlap width + perimeter treatment |
Waste allowance: use the spec, or document your assumption
If you don’t have manufacturer guidance, you still need a defined waste rate—because you can’t “estimate later” without risking a short order.
[ADD: exact waste % recommendation from manufacturer or your installer plan]
What can go wrong when measuring outdoor floors
Even careful measurements can fail if you ignore how outdoor systems behave—especially around slope, expansion, drainage, and cutouts. The good news is these problems are predictable, so you can catch them early with a targeted review.
Expansion gaps around edges and movement joints are often as important as footprint area for preventing cracking and lifting.
Small rounding mistakes become visible after the final row—outdoor flooring tolerates fewer “close enough” outcomes than indoor trim.Common pitfalls:
– Mixing measurement systems (inches vs. feet) or rounding too early—small errors compound across long runs.
– Forgetting cutouts (drains, supports, base plates) until late—this can force awkward final rows.
– Ignoring slope and drainage needs: materials can settle unevenly or direct water the wrong way.
– Not checking product tolerances: some systems require expansion gaps around edges; others assume a specific subbase thickness.
[ADD: expansion/joint requirement from manufacturer documentation]
Pros/cons: measuring “by eyeballing the outline” vs. “section-by-section”
| Method | Pros | Cons |
|---|---|---|
| Eyeball outline | Fast for simple rectangles | High risk around curves, drains, and borders |
| Section-by-section | Improves accuracy for irregular shapes | Requires more notes and sketching |
A few field-level checkpoints that prevent rework
– Before ordering, verify your final measured width/length matches what the product expects for borders and edge systems.
– If you have a drain, confirm clearance requirements with the drain/installation spec.
– Confirm subbase or leveling thickness requirements before final “finished” dimensions.
[ADD: source for drain/installation clearance rule if applicable]
Verdict: a practical measuring method that usually works
Use the “section-by-section” approach: measure the footprint, subtract cutouts, and adjust for slope and edge requirements based on the product specs. This method is reliable for most outdoor flooring installs, but skip it (or get help) if your site has complex grading changes, multiple drains, or structural constraints you can’t verify—those cases may require a pro or at least a careful read of your system’s installation documentation.
In practice, the biggest time saver is treating measurement as a controlled deliverable: one sketch, one consistent datum, clearly labeled cutouts, and a coverage calculation that mirrors the manufacturer’s rules. As of 2026, installers still see avoidable shortages and last-row “fit” issues most often when expansion gaps, edging systems, or drainage openings are discovered too late in the process.
Quick measurement checklist (scan/save)
– [ ] Measure length + width from a single consistent corner
– [ ] Split irregular areas into rectangles/triangles + subtract cutouts
– [ ] Mark drains, posts, steps, and any openings before calculating
– [ ] Note slope direction and any height changes
– [ ] Verify product requirements (expansion gaps, bedding thickness, edge restraints) from the manual
– [ ] Calculate area, then add appropriate waste allowance ([ADD: exact waste % from your material plan/spec if available])
FAQ
Do I measure the subbase area or the finished flooring area?
Measure the area your flooring will cover (the finished layout), but confirm bedding/leveling thickness and edge requirements from your product documentation so totals match the system’s installation method.
How do I handle measurement around a drain or utility cover?
Measure the drain cover opening as a cutout, including any required clearance, and subtract it from the total area before calculating material coverage ([ADD: clearance rule from your drain/installation spec if applicable]).
What’s the best way to measure a curved patio?
Use a practical split: approximate the curve with short, measured segments or fit it into a layout your flooring system supports, then follow the manufacturer’s guidance for curved installations ([ADD: source for curved installation guidance]).
Should I measure in inches or feet?
Pick one unit and stick to it—record everything in the same unit to avoid conversion errors, then convert only at the end if needed.
How much extra material should I order for outdoor flooring?
Add a waste allowance for cutting and alignment, but use the guidance specific to your flooring type (tiles/pavers/deck boards) and pattern; if you don’t have a spec, [ADD: exact waste % recommendation from manufacturer or your installer plan].
Sources
– [ADD: manufacturer installation manual/spec sheet for your outdoor flooring type—required for expansion gaps, bedding/leveling thickness, and edge/clearance rules]
– [ADD: product technical documentation for waste allowance guidance, if the manufacturer provides one]
– [ADD: any relevant local code or drainage guidance source if your project depends on slope/drain requirements]
Frequently Asked Questions
How do I measure my yard or patio for outdoor flooring?
Start by outlining the exact area you want to cover, including any walkways or transitions. Use a tape measure to record length and width, then multiply to estimate total square footage; for irregular shapes, break the space into rectangles and add them together. Measure any slopes or raised edges and note where cuts or borders will be needed for accurate outdoor flooring installation.
What’s the best way to measure for tiles, pavers, or planks in an outdoor floor layout?
Measure the usable installation footprint and identify the main directions your tiles, pavers, or outdoor floor planks will run. Include allowance for spacing by measuring around the perimeter and factoring in expansion gaps, typically at edges and transitions to walls or existing surfaces. If you’re installing over an existing patio, measure around any posts, drains, steps, or garden features so your outdoor floor design stays square and consistent.
How do I measure for proper slope and drainage when installing outdoor floors?
Outdoor floors must drain, so measure the current slope (or create a planned slope) using a level or string line across the area. A common target is about 1/4 inch per foot, but check local requirements and the product’s recommendations. When measuring, note the lowest point so water flows away from the home, doorways, and any sensitive areas.
Which measurements should I take for outdoor flooring around doors, steps, and transitions?
Measure door clearances and step heights to ensure the finished outdoor floor thickness won’t interfere with thresholds or create tripping hazards. Record the thickness build-up you’ll have (subbase, underlayment/membrane, and the outdoor flooring surface) and compare it to existing surfaces for smooth transitions. Also measure distances to curbs, pool edges, or garage aprons so you can plan starter rows, border strips, and accurate cuts.
Why do I need to add waste when measuring for outdoor flooring materials?
Outdoor flooring often requires cuts for edges, corners, and irregular landscaping features, and waste accounts for those losses. A typical planning buffer is 10–15% for patios with simple layouts, and up to 15–20% for complex patterns or diagonal layouts. Measuring the area accurately first, then adding waste, helps you avoid running short mid-installation and ensures enough material for consistent color and batch matching.
📅 Last Updated: October 12, 2026 | Topic: How to measure for outdoor floors? | Content verified for accuracy and freshness.
References
- Google Scholar Google Scholar
https://scholar.google.com/scholar?q=how+to+measure+for+outdoor+flooring+patio+deck+square+footage+layout - Google Scholar Google Scholar
https://scholar.google.com/scholar?q=estimating+materials+for+outdoor+surfaces+pavers+concrete+slab+measurement - Google Scholar Google Scholar
https://scholar.google.com/scholar?q=deck+construction+layout+measurement+joist+spacing+board+coverage - https://en.wikipedia.org/wiki/Deck
- Patio
https://en.wikipedia.org/wiki/Patio - Concrete slab
https://en.wikipedia.org/wiki/Concrete_slab - Levelling
https://en.wikipedia.org/wiki/Leveling - Square foot
https://en.wikipedia.org/wiki/Square_foot - https://www.cdc.gov/niosh/topics/slips/training.html
- https://www.britannica.com/technology/floor