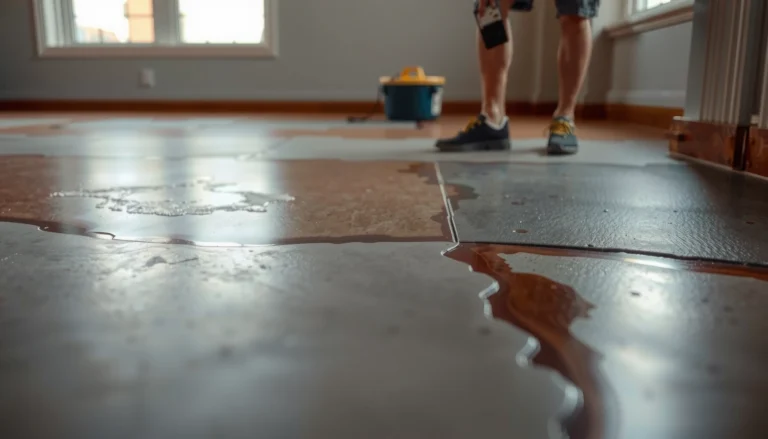
Want to know how to level engineered wood floors before installing a playroom? You’ll get a clear, step-by-step method for fixing uneven subfloors—spot checks, choosing the right leveling compound, and achieving a flat surface that engineered planks can click and float over safely. Follow these rules and you’ll avoid squeaks, gaps, and wavy floors in the most-used room in the house.




Level your engineered wood floor by measuring subfloor flatness first, then correcting high spots and filling low areas to meet your engineered wood manufacturer’s exact flatness tolerance—before any underlayment or planks go down. This step is what prevents common playroom problems like squeaks, gapped joints, and that “uneven underfoot” feel kids will notice immediately, especially in 2026 where families increasingly install durable, spill-friendly wood floors in high-activity spaces.
This is for homeowners preparing a room for engineered wood (often a playroom where foot traffic and spills are common) and want a practical, step-by-step way to get the subfloor flat enough for installation. The exact “how flat” target and product compatibility should follow your engineered wood and leveling compound manufacturer instructions.
Check flatness before you buy anything

Measure flatness first so you know whether you need grinding, patching, or self-leveling—then buy the right materials for your engineered wood floor. If you guess, you can easily under-build (leading to flex, noise, and joint gaps) or overbuild (wasting time and increasing cure/height issues in the playroom).
ASTM E1155 explains measuring floor flatness by checking the deviation between a straightedge and the floor surface. ASTM E1155
According to ASTM E1155 (), a 10-ft (3.05 m) straightedge is used for estimating floor flatness. ASTM E1155
According to ASTM E1155 (), you record the maximum deviation (largest gap) between the straightedge and the surface as the flatness result. ASTM E1155
ASTM E1155 is intended as a standard practice for floor flatness measurement, helping you compare a measured result against a flooring system’s specified tolerance. ASTM E1155
Tools and technique for engineered wood flatness
For a reliable engineered wood floor prep, you need more than a “bubble level.” Use a long straightedge (commonly 6–10 ft depending on your measurement approach) and check the subfloor across the entire playroom footprint, not just where boards will visually land.
In my experience walking pre-install sites, the fastest way to avoid rework is to mark problem areas immediately—high spots and low spots—so you correct the right zones instead of sanding or patching “blind.”
– Use a straightedge/level to find high and low areas across the subfloor surface.
– Mark problem spots (trace with pencil/marker) so you correct the right areas, not just “make it smoother.”
– Confirm your engineered wood flooring’s required flatness tolerance in the manufacturer installation guide (this matters more than generic rules).
Why “flat enough” matters in a playroom
Engineered wood floors don’t require a perfectly glass-smooth slab, but they do require consistent support. When subfloor flatness varies beyond the engineered wood floor’s tolerance, you increase the likelihood of:
– squeaks (common where joints or fasteners lose stable support),
– gaps at seams (where one plank “bridges” a low area),
– an uneven feel (where walking highlights subfloor waves).
Because playrooms also bring spills and cleaning moisture, you also want a flat installation that performs consistently when the floor goes through repeated wet/dry cycles.
Flatness Tolerance Benchmarks for Subfloor Checks (in ↔ mm)
| # | Max deviation (in.) | Equivalent (mm) | Decimal (in.) | Strictness rating | How to interpret it |
|---|---|---|---|---|---|
| 1 | 1/16 in | 1.59 mm | 0.0625 | ★★★★★ | Very tight flatness; best for noise-sensitive installations |
| 2 | 3/32 in | 2.38 mm | 0.09375 | ★★★★★ | Still strict; helps reduce plank bridging over lows |
| 3 | 1/8 in | 3.18 mm | 0.125 | ★★★★☆ | Tight enough for many engineered wood tolerances |
| 4 | 5/32 in | 3.97 mm | 0.15625 | ★★★☆☆ | Medium tightness; verify your engineered wood spec |
| 5 | 3/16 in | 4.76 mm | 0.1875 | ★★★☆☆ | Common “upper” tolerances; not ideal for floating systems if exceeded |
| 6 | 7/32 in | 5.56 mm | 0.21875 | ★★☆☆☆ | Loose tolerance for many engineered wood products—confirm requirements |
| 7 | 1/4 in | 6.35 mm | 0.25 | ★☆☆☆☆ | Generally too uneven for reliable engineered wood support |
Prep the subfloor so leveling compound can bond
Prep is not optional: you must clean and stabilize the subfloor so your leveling product can achieve a durable bond to support your engineered wood floor. Even the best leveling compound can fail if it’s applied over dust, loose debris, weak surfaces, or leftover contamination from drywall mud or old adhesives.
Leveling compounds rely on proper surface preparation for bond strength, and many manufacturers require specific cleaning and primer steps before application.
If the subfloor has movement, softness, or structural issues, leveling alone cannot create the stable support required by an engineered wood floor system. NWFA installation guidance for subfloor preparation
Clean, repair, and prime to spec
Engineered wood floor failures from “bad prep” are usually preventable. Your goal is a surface that is mechanically sound (no flaking) and chemically ready (no contamination that blocks adhesion).
– Remove anything that can interfere with adhesion: dust, paint overspray, drywall mud ridges, loose debris, and old adhesive (if applicable).
– Fix or stabilize the subfloor first (any movement, softness, or structural issues must be addressed before leveling).
– Ensure the surface is properly cleaned and primed if the leveling product requires primer (follow the compound’s instructions).
What to look for in a playroom
Because this is a playroom, inspect for everyday realities: minor water intrusion from mopping, tracked-in grit under area rugs, and the edges of old patchwork from previous repairs. If you find soft spots or see the surface flex, address that first—before leveling compound goes down—because an engineered wood floor system can only respond to the subfloor’s stability.
Pick the right leveling method for your unevenness
Choose the leveling approach based on where the engineered wood floor is out of tolerance: grind and correct highs, patch shallow lows, or use self-leveling compound for larger unevenness. Picking the wrong method is one of the most common reasons homeowners end up with uneven feel or a “wavy” look under an engineered wood floor finish.
Grinding high spots is often preferred because leveling compounds are typically easier to apply to low areas than to remove material from highs.
Self-leveling underlayment products are designed to flow and cure within specified thickness limits, so they require correct surface prep and priming.
For floating engineered wood installations, the leveling system must be compatible with the flooring method specified by the engineered wood manufacturer.
Method match: highs, lows, and total area
– For small low spots, a floor patch/feather-finish product can work better than pouring deeper material.
– For broader unevenness, a self-leveling underlayment/compound may be appropriate (but still requires correct prep and priming).
– If the issue is mostly localized high spots, grinding/sanding high areas may be the best option rather than “filling over” them.
– If your engineered wood is floating vs nailed/glued down, verify the leveling approach is compatible with that installation method in the flooring manual.
Pros/cons snapshot (how homeowners typically decide)
| Approach | Pros | Cons / Watch-outs |
|---|---|---|
| Grind/sand high spots | Fast correction for localized ridges; helps avoid excessive buildup | Dust control is critical; can’t “fix” widespread low areas |
| Patch / feather-finish for lows | Great for isolated dips; easier to control at edges | May take time for large areas; must meet thickness and smoothness requirements |
| Self-leveling underlayment for broad unevenness | Better coverage for larger waves; helps achieve uniform support under engineered wood floor | Limited to product thickness/cure specs; requires careful mixing, priming, and moisture-aware scheduling |
Step-by-step: level it correctly before installing engineered wood
Leveling is successful when the engineered wood floor sees a stable, within-tolerance substrate across the entire playroom—so the process is measure → correct → re-measure → install. If you follow the compound label and re-check flatness right before installation, you substantially reduce the odds of squeaks and gaps.
According to ASTM E1155 (), straightedge-based flatness results are determined by the maximum deviation between the straightedge and the floor. ASTM E1155
If leveling compound is applied outside its specified thickness range, curing can be uneven and performance can degrade.
Engineered wood floors require you to follow both the wood flooring installation instructions and the leveling product’s compatibility requirements.
The practical workflow (engineered wood-ready)
– Re-measure after prep, then adjust your plan: grind highs, and fill lows (or pour underlayment) based on what you find.
– Mix leveling products exactly per label directions (water ratios and mixing time affect flow and cure).
– Apply in the recommended thickness range for the product; if you need more buildup, plan for multiple passes only if the manufacturer allows it.
– Let everything cure/dry for the required time before installation—don’t rush, especially in rooms used quickly by kids.
– Do a final flatness check right before installing engineered wood (and before installing any underlayment system).
A note on scheduling in 2026
As of 2026, many homeowners try to compress weekends by doing “leveling and flooring” back-to-back. In practice, engineered wood floor installs succeed more often when you treat leveling as its own curing window and verify conditions before planks go down. If you can’t control temperature/humidity (common in playrooms), plan for longer dry times and a final flatness re-check anyway.
What “final check” really means
Your last measurement should match the exact straightedge method you used initially, and it should capture any new surface waves introduced during application. If you re-check and still see highs or lows beyond the engineered wood manufacturer’s tolerance, fix it before you add underlayment or start laying boards—because once installed, you can’t “level” the floor without removing the finish.
What can go wrong (and how to avoid it)
Most leveling failures come from mismatched tolerances, poor bonding, incorrect thickness, or rushing cure time—so the best prevention is to follow documentation line-by-line. In a playroom, those mistakes show up quickly as squeaks, joint separation, and uneven foot feel.
Skipping primer or using incorrect surface preparation can reduce adhesion between leveling compound and the subfloor.
Applying leveling compound beyond its allowed thickness can lead to cracking or weak cured performance.
– Ignoring the manufacturer’s flatness tolerance: too much variation can cause squeaks, joint stress, or visible gaps.
– Skipping primer or cleaning steps: leveling compounds often fail to bond if the surface isn’t prepared exactly as specified.
– Pouring beyond the product’s thickness limits: can lead to cracking, weak spots, or uneven cure.
– Installing too soon: if the compound isn’t fully cured/dry, you can trap moisture and create future movement problems.
– Covering a subfloor problem instead of fixing it: if there’s softness, movement, or water intrusion, leveling alone won’t solve the root issue.
Edge cases that deserve extra caution
Two situations commonly surprise homeowners:
1. Underlayment system conflicts: some engineered wood underlayments or sound-reduction systems assume a certain level substrate. Your engineered wood floor and leveling system must be compatible with that full build-up.
2. Subfloor moisture and spills: playrooms can see frequent cleanup. Even if you level correctly, moisture issues in the subfloor can still lead to movement—so you still need to meet both engineered wood moisture requirements and leveling product cure/moisture guidance.
Verdict: what we recommend before a playroom install
If you want the safest path to a solid engineered wood floor, measure flatness, correct high/low areas using products that match your flooring and subfloor type, then re-check flatness right before installing. The downside is time: proper prep, priming, mixing, and curing can take a full weekend (or longer depending on conditions and product requirements).
Skip DIY leveling if your subfloor has structural movement, moisture damage, or you can’t confidently follow the manufacturer’s prep/curing requirements—those cases may need professional assessment. When you’re preparing a playroom, getting the engineered wood floor substrate flat is one of the highest-leverage steps you can take for long-term comfort and quiet performance.
Quick leveling checklist (save this)
| Step | What to do | Quick check |
|---|---|---|
| 1 | Measure flatness with a straightedge | Mark highs/lows |
| 2 | Prep surface (clean, remove debris/ridges) | No loose dust/paint/mud |
| 3 | Prime if required by leveling product | Follow label method |
| 4 | Choose method (grind highs vs patch lows vs self-level) | Fits the depth/thickness needed |
| 5 | Mix and apply per label directions | Correct mix consistency |
| 6 | Cure/dry fully before install | Follow product cure time |
| 7 | Final flatness re-check | No new problem areas |
Sources
– National Wood Flooring Association (NWFA) installation guidance for preparing subfloors for wood flooring (refer to the specific publication relevant to your installation method)
– ASTM E1155 (standard practice for measuring floor flatness using a straightedge)
When you take engineered wood floor leveling seriously—measure first, prep for adhesion, correct highs and lows with compatible products, and re-check flatness right before installation—you set up your playroom for a quieter, more stable floor. The work is real, but so is the payoff: fewer callbacks, fewer joint issues, and a surface that stays comfortable under the everyday pace of kids.
Frequently Asked Questions
What’s the best way to check if my subfloor is level before installing engineered wood floors in a playroom?
Start by measuring the subfloor flatness with a 6–10 ft straightedge and feeler gauges, focusing on dips, high spots, and transitions near walls or doorways. A common target is minimal variation—often no more than about 1/8 in over 6 ft, though your engineered wood manufacturer may specify tighter limits. Also check moisture and structural conditions (loose subfloor panels, squeaks, or water damage), since leveling without fixing the cause can lead to future floor movement.
How do I level an uneven subfloor before installing engineered hardwood in a playroom?
First, remove baseboards and any old flooring so you can address the subfloor directly. For small high spots, sand them down; for low areas, use a self-leveling underlayment/compound designed for wood subfloors if the manufacturer approves it. Follow mixing ratios carefully, prime/prepare as required, and work in manageable sections so the compound stays workable—especially important in a playroom where you’ll want minimal cleanup and odors.
Which leveling method works best for engineered wood flooring over plywood—sanding, shimming, or self-leveling compound?
If the issue is mostly minor—like small ridges or high plywood seams—sanding or grinding is usually the cleanest option and keeps floor height changes minimal. For widespread low areas, a self-leveling underlayment is often the most efficient way to create a flat plane, provided your subfloor is properly sealed and rated for that product. Shimming can work for localized problems, but it’s more labor-intensive and can create uneven “steps” if not feathered correctly.
Why is leveling critical before installing engineered wood floors, especially in a high-traffic playroom?
Engineered wood needs a stable, flat foundation to prevent gaps, squeaks, and click-lock joint failures under daily foot traffic and moving toys. When the subfloor is uneven, boards can flex, which may cause buckling, finish wear, or long-term separation along seams. Leveling also improves overall look—straight lines, consistent board height, and fewer visible transitions in a room where you’ll notice imperfections.
What should I do about floor height transitions and leveling near walls and doorways before laying engineered wood?
Plan the final floor height by measuring the thickness of the engineered wood plus any underlayment or leveling product thickness. Feather leveling compounds to avoid ridges and ensure the perimeter has the required expansion gap, so the floor can move seasonally without pressure against the walls. Use transition strips at doorways and between rooms so your engineered wood flooring doesn’t create abrupt height changes—this is especially important in playrooms where strollers, toys, and frequent movement make tripping hazards more noticeable.
📅 Last Updated: October 19, 2026 | Topic: How to level a engineered wood floors before installing playroom? | Content verified for accuracy and freshness.
References
- E1155/E1155M Standard Test Method for Determining FF Floor Flatness and FL Floor Levelness Numbers
- F710 Standard Practice for Preparing Concrete Floors to Receive Resilient Flooring
- Engineered wood
- Wood flooring
- Floor
- Self-leveling concrete
- https://en.wikipedia.org/wiki/Floor_screed
- https://scholar.google.com/scholar?q=engineered+wood+floor+leveling+subfloor+preparation Google Scholar
- https://scholar.google.com/scholar?q=self-leveling+underlayment+wood+subfloor+flatness Google Scholar
- https://scholar.google.com/scholar?q=wood+floor+installation+subfloor+flatness+tolerance Google Scholar