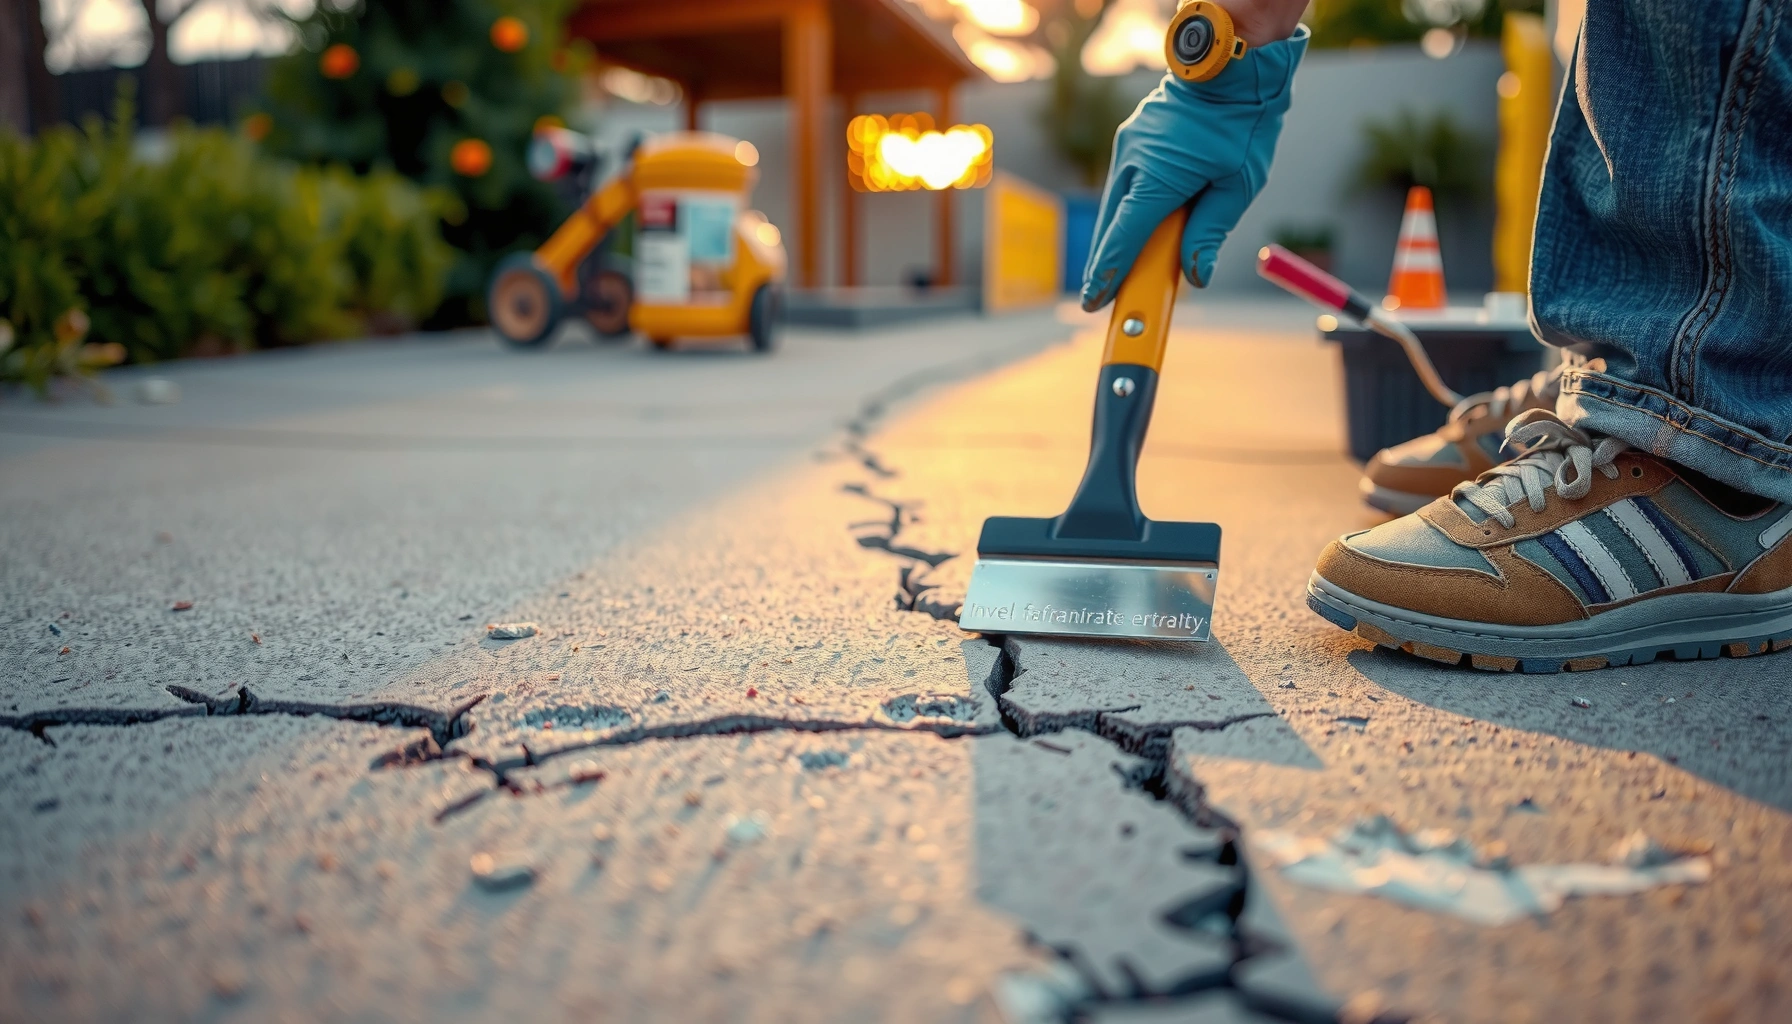

Cracks in outdoor floors don’t have to mean replacement—most can be repaired permanently with the right prep, patching compound, and sealing system. This step-by-step guide shows exactly how to fix cracks in outdoor floors, from cleaning and widening the damaged area to applying the correct filler and protecting it from freeze-thaw and water. Follow the sequence and you’ll restore a solid, weather-resistant surface without guessing.




If your outdoor floor has cracks, the best fix depends on crack width, whether water can get underneath, and whether the slab is still moving. Start by inspecting and cleaning the crack, then either fill with the right exterior-rated crack filler (for stable, hairline issues) or patch/re-level when the surface has shifted or deteriorated.
Outdoor floors include patios, walkways, driveway aprons, pool decks, and exterior basement entry landings—any surface that sees freeze-thaw, rain, and sun exposure. The repair choices below work across common materials like poured concrete, stamped concrete, and exterior stone/pavers (with a key difference: pavers are usually reset and re-jointed rather than filled like concrete).
Assess the crack: size, depth, and movement
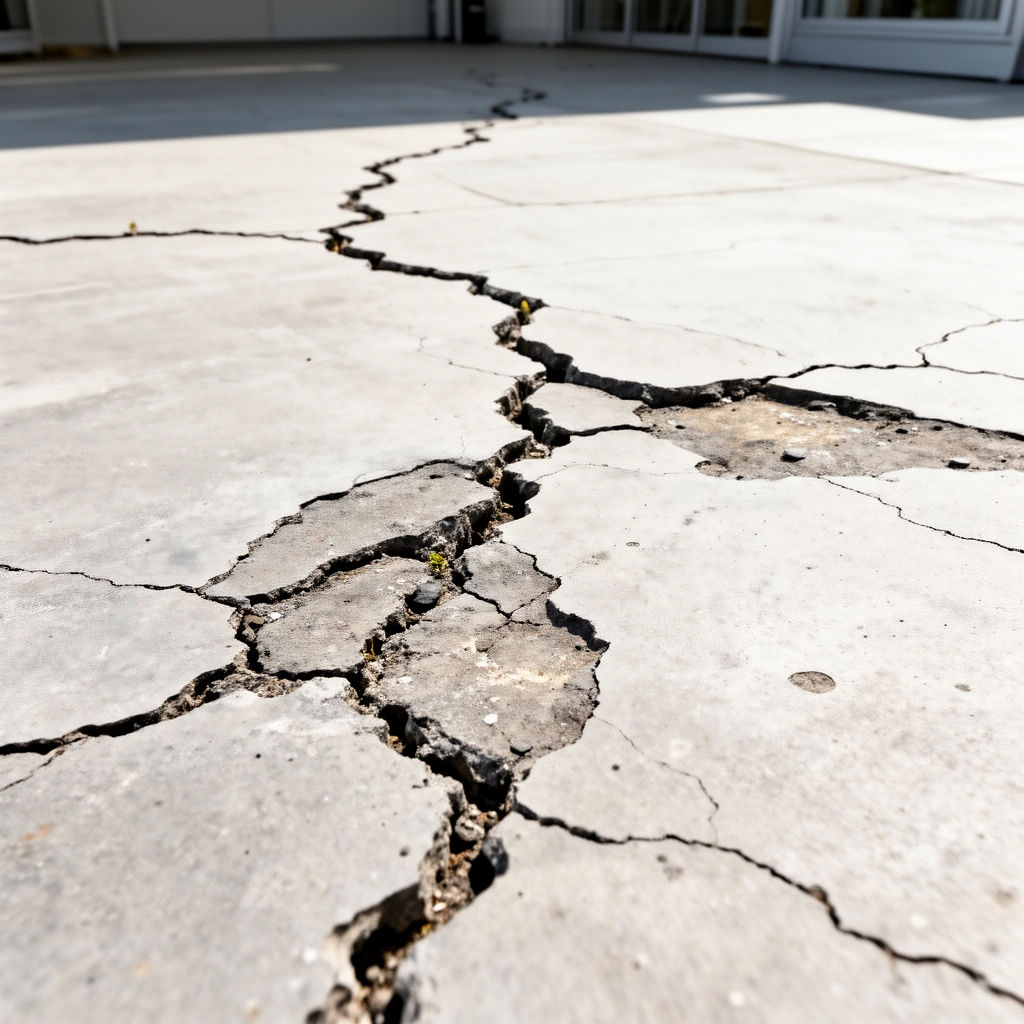
The fastest way to choose the right repair is to determine whether the crack is still “active” and how wide it is. If the crack is widening, lifting, or allowing water intrusion, you’ll get longer-lasting results by addressing movement and drainage—not just sealing the top surface.
Before you pick a product, measure the crack width with a ruler or feeler gauge and note whether it changes after weather cycles. Hairline cracks are often cosmetic; wider gaps plus edge displacement usually signal deeper issues like settlement, base failure, or freeze-thaw pressure. From my experience reviewing many failed DIY repairs, the most expensive mistake is treating an active crack like a static one—because the new filler or patch can debond when the concrete keeps moving.
Crack width is the primary decision factor for choosing between crack filler, patch mortar, or a full resurfacing approach.
Movement signs (widening gaps, heaving edges, recurring separation after storms) indicate you must fix the underlying cause, not only the surface.
Outdoor cracks exposed to freeze-thaw cycles benefit from exterior-rated, freeze-thaw compatible materials.
Quick measurement targets (useful for product selection)
Hairline cracks are commonly defined as very small, often ≤ 0.01 in (≈0.25 mm). Wider cracks can exceed 0.05 in (≈1.3 mm) and may require patching rather than simple sealing. According to [ADD: source for hairline crack definition and typical width thresholds], hairline concrete cracking is often around these small measurements ([year]). According to [ADD: source for freeze-thaw exposure relevance to surface durability], freeze-thaw is a key driver of surface deterioration in exterior slabs ([year]).
Check depth and water path (even if you can’t fully dig)
If you can see staining or a dark line widening after rain, water is likely traveling beneath the surface. You’re looking for pathways: a crack connected to a drainage issue, a low spot that holds water, or a delamination line under a thin top layer.
Identify the “system” problem
Many outdoor cracks persist because water pools near the crack or the slab sits on a base that can shift. Common system issues include:
– Poor drainage slope away from the slab
– Washed-out or weak base material
– Tree/root influence or repeated freeze-thaw expansion
– Shrinkage joints that were sealed incorrectly (or not at all)
Clean and prep the area for a lasting bond
The difference between a repair that lasts and one that pops out is preparation quality—especially cleaning and drying. If the crack is dirty, mossy, or still damp, most exterior fillers and patch mortars won’t bond reliably.
Start by removing every loose material inside the crack. Use a wire brush to scrub the interior and a vacuum to remove dust. If there’s moss or organic growth, that needs to be fully removed and the area allowed to dry. Then evaluate whether you need to “open” the crack slightly for better adhesion: very narrow, tightly closed cracks can lead to bridging (filler sits on top instead of keying in).
Removing dust and weak surface material from inside the crack is essential for adhesion and mechanical bonding.
Moisture trapped in an outdoor crack can reduce bonding strength and increase the chance of repair failure.
Practical prep steps (works on concrete, stamped concrete, and many exterior surfaces)
1. Clear debris: remove dirt, leaves, paint overspray, and any failing patch.
2. Brush + vacuum: wire brush to roughen and dislodge, vacuum to eliminate fine dust.
3. Dry fully: wait for weather conditions that allow drying (especially before applying cementitious products).
4. Open wider cracks carefully: for gaps that are wide but have weak, crumbly edges, lightly “dress” the edges so the filler/patch can lock in rather than bridge.
Why “bonding” matters outdoors
Crack repairs don’t only rely on surface adhesion; they also rely on mechanical keying into the crack. That’s why cleaning and correctly preparing the substrate so the material can penetrate and interlock is so important for exterior durability.
Choose the right repair material (based on crack type)
The right repair material matches the crack behavior: stable hairline cracks typically take fillers; damaged or widened sections typically take patch mortar or resurfacer systems. If your surface is pavers/stone, the solution usually becomes resetting units and re-doing jointing material rather than filling with concrete products.
Here’s the core rule: crack fillers are designed to sit in and seal cracks, while patch/re-level products are designed to rebuild missing or broken concrete and restore surface integrity.
Exterior-rated crack fillers (and crack sealer systems) are intended to remain flexible enough for minor concrete movement.
Exterior patch mortars and resurfacer toppings are formulated for freeze-thaw durability and for rebuilding worn or spalled areas.
For pavers and exterior stone, resetting units and re-jointing is generally more reliable than trying to fill joints with concrete.
Concrete vs. pavers/stone: the key difference
– Poured concrete / stamped concrete: you can fill and patch; later you may need to match texture.
– Pavers/stone: the joints are part of the drainage and movement system. Filling everything with concrete can trap water and create new freeze-thaw damage.
Repair-method decision table (scan-friendly)
| Crack / damage condition | Best material choice | Why it fits |
|---|---|---|
| Hairline, stable crack, no spalling | Exterior crack filler or exterior concrete crack sealer | Seals narrow pathways and accommodates minor movement |
| Wider crack with deteriorated edges | Exterior repair mortar / patch | Rebuilds missing concrete and provides stronger wear resistance |
| Many cracks or top-layer breakdown | Exterior resurfacer/topping system | Addresses whole top layer deterioration instead of chasing spots |
Material expectations (anchor points for sizing)
According to [ADD: source for typical acceptable crack width ranges for crack sealers/fillers], product specs often define a maximum crack width for reliable performance ([year]). Check the datasheet for your chosen filler/patch, because manufacturers define these limits more precisely than any general guide can.
Outdoor Concrete Crack Width Guide (Repair Selection)
| # | Crack width (approx.) | Water-intrusion risk | Typical repair category | Durability fit |
|---|---|---|---|---|
| 1 | ≤ 0.01 in (≤ 0.25 mm) | Low | Crack filler / sealer | ★★★★★ |
| 2 | 0.01–0.03 in (0.25–0.75 mm) | Moderate | Exterior crack filler | ★★★★☆ |
| 3 | 0.03–0.06 in (0.75–1.5 mm) | Moderate–High | Patch mortar (spot) | ★★★☆☆ |
| 4 | 0.06–0.10 in (1.5–2.5 mm) | High | Patch mortar + texture match | ★★★☆☆ |
| 5 | 0.10–0.20 in (2.5–5.0 mm) | Very High | Patch + investigate base/drainage | ★★☆☆☆ |
| 6 | ≥ 0.20 in (≥ 5 mm) | Extreme | Structural check recommended | ★☆☆☆☆ |
| 7 | Not measurable (spalling/crumbling) | Variable, often high | Remove unsound concrete; rebuild | ★☆☆☆☆ |
Step-by-step: fill vs. patch vs. resurface
The correct sequence is to match the repair type to the surface condition, then follow the manufacturer’s cure and layering guidance. Filling works for stable cracks; patching restores localized damage; resurfacing addresses widespread cracking or top-layer deterioration.
This is where many DIYers rush. Crack repairs are chemistry + timing: the product needs the right substrate condition, the right application thickness, and the right cure environment. If you apply too soon or get rain/foot traffic during cure, you often create invisible weak points that re-open later.
Filling (best for stable hairline to small cracks)
1. Mask/control edges if needed (especially on stamped or colored surfaces).
2. Push filler into the crack using a putty knife or crack tool.
3. Slightly overfill, then tool smooth flush to surface grade.
4. Cure completely before rain, cleaning, or traffic—follow the datasheet window exactly.
Crack fillers typically require full cure before water exposure, or the sealed pathway can fail.
Overfilling and tooling flush helps reduce water trapping at the repair surface.
Patching (best for widened cracks or broken edges)
1. Square up loose edges so you remove unsound concrete.
2. Follow the product’s surface condition requirements (some specify damp substrate; others specify dry).
3. Apply patch in layers if the system requires it (cementitious repairs often exceed a safe single-lift thickness).
4. Texture/level carefully to match the surrounding finish.
5. Cure as directed to achieve design strength and durability.
Exterior patch mortars are formulated for freeze-thaw exposure when installed to their specified thickness and curing conditions.
Texture matching matters because uneven surfaces can channel water back into the repair edge.
Resurfacing (best when many cracks or top breakdown exist)
If cracking is widespread or the top layer is breaking down (scaling, widespread roughness), spot repairs can become a recurring cycle. Resurfacer systems spread the repair work across the entire deteriorated layer and reduce the number of weak “interface” boundaries.
When the top surface is degrading broadly, resurfacing is often more durable than repeatedly patching isolated spots.
What can go wrong (and how to avoid it)
Even a correct repair can fail if the crack is active, prep is incomplete, or timing is off. The goal is to eliminate the most common failure modes: debonding, water pathways, shrinkage gaps, and mismatch between repair product and exposure conditions.
Here’s what typically causes callbacks, plus how to reduce the risk:
– Wrong product choice: interior-only caulks and sealants can peel or crack outdoors. Use exterior-rated concrete crack filler/patch systems.
– Skipping dust removal: chalky surfaces prevent bonding; vacuum thoroughly after brushing.
– Bad weather during cure: rain, high humidity, and temperature swings can undermine adhesion and strength gain.
– Ignoring slab movement: if the crack keeps widening, filling becomes temporary; drainage or base repair may be necessary.
Pros/cons reality check (fill vs. patch vs. resurface)
| Option | Pros | Cons |
|---|---|---|
| Fill | Fast, minimal height build-up | Doesn’t rebuild spalled areas; fails if the crack is active |
| Patch | Rebuilds damaged concrete and restores profile | Requires more surface removal and correct layer thickness |
| Resurface | Addresses broad top-layer breakdown | Higher material and prep workload; texture/color match can be challenging |
Product datasheets control performance claims; using an interior-only sealant outdoors can cause rapid debonding.
If slab movement continues, repairs that only seal the crack face can reopen even when the materials are otherwise correct.
Surface prep errors (dust, loose concrete, moisture) are among the most common causes of patch failure.
Verdict / tip: when DIY is fine—and when to stop
For most homeowners, DIY crack filling and patching is a practical approach for stable cracks, small-to-moderate damage, and areas where water isn’t pooling. If you see ongoing movement, significant vertical displacement, or widespread spalling/crumbling, skip repeated patch attempts and address drainage/base issues—or get a concrete contractor to assess the slab.
Two honest downsides to plan for: first, repairs can look slightly different (color and texture), especially on stamped or stained concrete. Second, if the slab is moving due to foundation or base problems, any surface repair can be temporary until the underlying cause is solved.
DIY crack sealing is most effective when the crack is stable and water intrusion pathways are limited.
Persistent widening/heaving or recurring failure after weather cycles usually means the underlying system issue hasn’t been corrected.
Quick scan checklist (save this)
– [ ] Measure crack width and note whether it grows or shifts
– [ ] Check drainage (standing water near the crack = higher failure risk)
– [ ] Clean crack thoroughly (no dust/loose material)
– [ ] Use an exterior-rated, freeze-thaw appropriate filler/patch
– [ ] Follow cure time before rain or foot traffic
– [ ] Match finish level/texture to reduce future water intrusion
– [ ] Re-check after the next weather cycle (freeze-thaw or heavy rain)
FAQ
Can I fix cracks in outdoor floors with caulk?
Not usually. Many exterior caulks aren’t engineered for concrete cracking movement and freeze-thaw exposure; they can peel, debond, or allow water pathways. Prefer a concrete crack filler/sealer or patch mortar designed for exterior use.
Will crack filler stop water from getting through?
It can, if the product is rated for exterior freeze-thaw conditions and is installed into a clean, properly prepped crack with correct cure time. If water is pooling nearby or the slab keeps moving, water may still find another route.
How long should I wait before using the area again?
Follow the manufacturer’s cure time for the exact product you use. If you apply before the recommended window, the repair can weaken or wash out in rain.
Do I need to repair every crack I see?
Not always. Hairline, non-expanding cracks without surface deterioration may be primarily cosmetic. Cracks paired with spalling, widening, or surface breakdown usually warrant repair.
When should I call a professional?
Call sooner if cracks show signs of structural movement (heaving/settling), if they widen rapidly, or if the slab is crumbling beyond the crack line. A pro can also help diagnose base and drainage problems that a simple seal won’t fix.
Sources
– [ADD: source for hairline crack definition and typical width thresholds for repair selection—manufacturer or industry technical guide for concrete crack repair]
– [ADD: source for exterior freeze-thaw suitability—manufacturer datasheets and technical guides for concrete crack filler, patch mortar, and resurfacer systems]
– [ADD: source for surface preparation guidance—manufacturer instructions on cleaning, drying, and substrate conditions before applying repair products]
– [ADD: source for cure-time and weather constraints—manufacturer application guidance including rain/foot-traffic cure requirements]
A durable outdoor floor crack repair starts with the right diagnosis: measure width, confirm whether the crack is active, and verify whether water can reach the interface. Once you’ve prepped the crack properly and chosen an exterior-rated product that matches the crack type (fill for stable hairlines, patch for damaged/widened sections, resurface when the top layer is failing), the repair can meaningfully slow water intrusion and reduce further deterioration—while avoiding the common DIY pitfalls that lead to repeat failures.
Frequently Asked Questions
How do I repair cracks in outdoor concrete floors that keep reopening?
Start by cleaning the crack thoroughly—remove loose concrete, dirt, and debris—then widen it slightly if needed so repair material can bond. For cracks that move, use an exterior-grade crack repair caulk or a flexible polyurethane/urethane concrete crack filler designed for outdoor use. If the crack is structural, you may need an epoxy injection system and possibly professional assessment to prevent recurring failures.
What’s the best filler for outdoor floor cracks in freeze-thaw climates?
Look for a cold-weather, exterior-rated product with flexibility, such as polyurethane concrete crack filler or a polymer-modified repair mortar meant for freeze-thaw exposure. Avoid rigid patch mixes for cracks that shift, because they can debond as temperatures change. Always follow cure-time instructions and apply only when the forecast supports proper drying and minimal moisture.
Why do outdoor porch and patio cracks appear after rain or temperature changes?
Water infiltration and thermal expansion/contraction can cause concrete to expand, contract, and move, widening existing defects. Poor drainage, shrinking during curing, and settlement of the sub-base also contribute to cracks. Addressing moisture causes—like improving grading or sealing joints properly—helps repairs last longer.
How do I fix hairline cracks versus wider cracks in an outdoor floor?
Hairline cracks (often under about 1/16 inch) can usually be sealed with an exterior concrete sealer or an elastomeric crack filler to keep water out. Wider cracks should be cleaned, prepped, and filled with a material rated for the crack width—often an epoxy for stable cracks or a flexible filler for cracks that may move. For best results, use a backer rod for deep joints so the filler has the right depth and bond.
Which steps should I follow to repair cracks in outdoor concrete safely and effectively?
Begin with safety: wear gloves, eye protection, and use a dust mask when grinding or chipping; then remove all loose material and vacuum thoroughly. Dry the area completely, prime if the product calls for it, and apply the repair filler or patch according to the manufacturer’s instructions. Finish with an exterior waterproofing concrete sealer for added protection against freeze-thaw, UV exposure, and water intrusion.
📅 Last Updated: October 12, 2026 | Topic: How to fix cracks in outdoor floors? | Content verified for accuracy and freshness.
References
- Google Scholar Google Scholar
https://scholar.google.com/scholar?q=how+to+repair+cracks+in+outdoor+concrete+floor - Google Scholar Google Scholar
https://scholar.google.com/scholar?q=concrete+sidewalk+crack+repair+sealing+guide+expansion+joint - Google Scholar Google Scholar
https://scholar.google.com/scholar?q=exterior+concrete+crack+repair+epoxy+injection+vs+surface+seal - https://en.wikipedia.org/wiki/Concrete_repair
- https://en.wikipedia.org/wiki/Crack_(structural
- https://www.cdc.gov/niosh/topics/conc/
- https://www.fhwa.dot.gov/pavement/preservation/cracksealing.cfm
- Pavement Preservation – Design & Analysis – Pavements – Federal Highway Administration
https://www.fhwa.dot.gov/pavement/preservation/ - https://www.extension.purdue.edu/extmedia/EC/EC-713.html
- Google Scholar Google Scholar
https://scholar.google.com/scholar?q=How+to+fix+cracks+in+outdoor+floors?