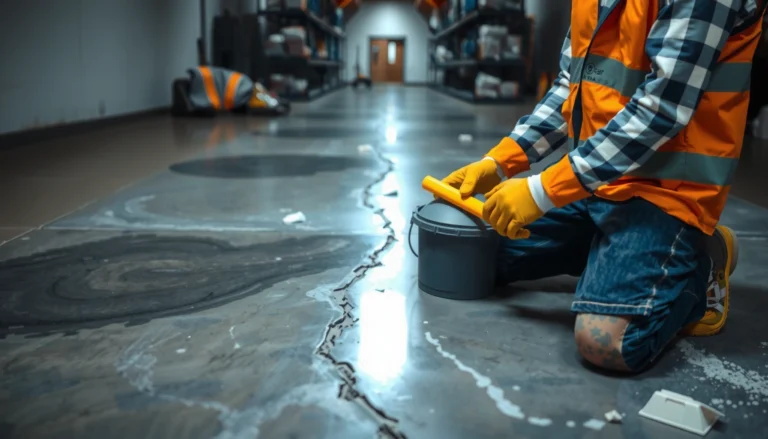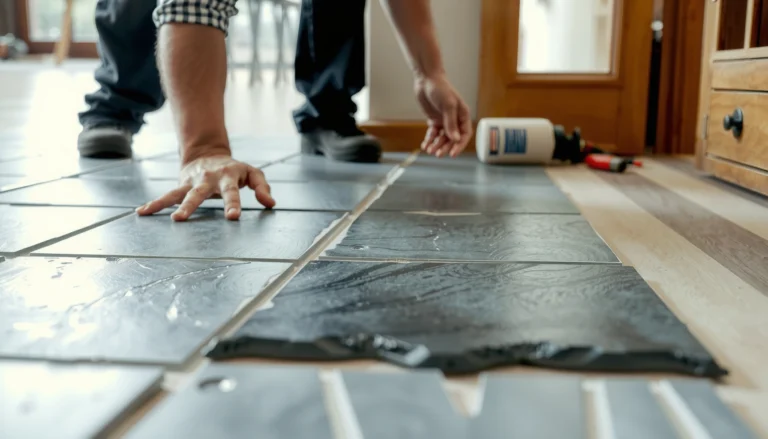

To level engineered wood floors before installing a home office, the winning approach is to check for low spots first and then flatten them using a compatible self-leveling underlayment or targeted leveling compound, not shimming after you’ve set furniture. This answers the exact question of how to get a true, flat subfloor so your office floor won’t squeak, rock, or gap at seams. You’ll also get the practical steps for measuring, prepping, and drying time so the installer can move straight to the home office layout.




To level engineered wood floors before installing a home office, first measure how flat the subfloor is, then correct low spots (often with patch/leveling compound) and remove high spots (usually by sanding/grinding). Only after the floor meets your flooring manufacturer’s flatness spec should you install the engineered planks—especially in a home office where chairs and rolling loads punish unevenness.
If your subfloor is plywood, concrete, or existing flooring, this guide helps you choose a leveling approach that matches what you’re installing (floating/click-lock vs glue-down). It’s especially useful when you’re trying to avoid gaps, squeaks, or joint stress once the office setup is in place.
If you’re planning a home office in 2026 and want stable flooring under rolling chairs (and fewer callbacks later), this is for you. This is especially relevant if your engineered wood uses a floating click-lock system, because tiny dips can translate into visible joint stress when casters roll repeatedly.
Check flatness first (don’t guess)

Level engineered wood flooring starts with verifying subfloor flatness, not assuming it’s “close enough.” The goal is to correct specific high/low areas so the finished surface matches the engineered wood manufacturer’s tolerance—often tighter than people expect.
Use the right measurement method (flatness, not level)
– Use a long straightedge/level (and ideally a visual grid) to spot high and low areas before buying anything.
– Mark low spots for filling and high spots for sanding/grinding so you can target the right problem.
– Keep the measurement method and tolerance aligned with the engineered wood manufacturer’s instructions (flatness requirements vary by product).
According to the National Wood Flooring Association (NWFA), subfloors for wood flooring are commonly required to be within about 3/16 in over a 10-ft span (verify the exact tolerance in your engineered wood manual).
A long straightedge/“skate” method is specifically used to evaluate flatness (variation) rather than checking bubble level (which can miss localized dips).
If flatness is out of spec, engineered wood joints are more likely to develop stress-related gaps under concentrated rolling loads from office chairs.
In my view, the “flatness first” step is where most DIY mistakes start—because it’s also where you discover the real scope of the problem. For example, two areas that both look “fine” can behave very differently once you place furniture: a small, repeated dip near where a chair travels is often worse than a broader area that’s only slightly uneven.
Useful specifics to anchor your measurements (so you can compare outcomes later):
– According to NWFA guidance, a common flatness target is 3/16 in (≈ 4.8 mm) over 10 ft (exact value depends on your flooring system; confirm in your engineered wood installation instructions).
– In practical terms, 3/16 in = 0.1875 in (≈ 4.76 mm), so converting your measuring tools to mm can help you stay consistent across tools and products.
– If your straightedge span is 6 ft instead of 10 ft, the same “per-length” concept changes the allowable deviation—so don’t mix measurement spans unless your engineered wood manual tells you to.
> In 2026, many engineered wood installation instructions also call out which measurement span they mean (6 ft vs 10 ft, or a metric equivalent). If you don’t follow their span, you can “pass” incorrectly.
Prep the subfloor for leveling
Prep matters because leveling compound and patch systems only work when they can bond to a clean, properly conditioned surface. If the base layer fails, the engineered wood floor will still fail—often with hollow spots, joint movement, and squeaks.
Clean, remove blockers, and confirm substrate conditions
– Remove baseboards, debris, loose material, and anything that prevents leveling compound or patches from bonding.
– Verify moisture and cleanliness for your substrate type (especially for concrete) and follow your flooring manufacturer’s moisture guidance.
– Acclimate engineered wood to the room conditions if your installation instructions require it.
Most floor patch/leveling products require the substrate to be mechanically sound and free of dust so the primer/compound system can bond reliably.
Concrete and plywood behave differently: moisture conditions and primer compatibility affect whether leveling compounds develop a durable bond under engineered wood.
Acclimating engineered wood before installation helps reduce dimensional movement that can otherwise exaggerate the effects of minor subfloor unevenness.
For plywood, pay close attention to what’s “on top” of plywood—adhesive residue, paint overspray, drywall mud, and high fastener heads can all interfere with leveling and cause telegraphing. For concrete, contaminants like curing compounds or poorly removed sealer layers can block primer adhesion, making later leveling “sound solid” but fail internally.
Practical approach:
– Vacuum thoroughly (not just a quick sweep), then inspect under bright light for remaining dust or loose edges.
– If your engineered wood manual specifies a particular moisture test method or limits (for example, relative humidity testing vs moisture meters), match that method before you commit to leveling.
> If you’re not sure which primer system is allowed for your leveling compound on your substrate, don’t improvise—use the primer specified by the leveling product manufacturer for plywood vs concrete.
Fix high spots vs fill low spots
The most reliable leveling strategy is “remove highs, fill lows” so you create a smooth, engineered-wood-friendly plane. This approach prevents building extra material over already-high areas, which can create ridges and joint stress.
Sand/grind highs; patch lows in thin, compatible layers
– High spots: sand/grind until the area is flush—don’t “build up” on top of highs.
– Low spots: use an appropriate patch/feather-finish compound or floor leveling compound, applied in thin layers if the product calls for it.
– Feather edges carefully so you don’t create new ridges that telegraph through underlayment and into plank joints.
Correcting high spots by sanding/grinding reduces the risk of creating a “ridge line” that can force engineered wood joints to flex repeatedly.
Filling low spots with compatible patch/leveling compound (often feathered) smooths transitions so underlayment and engineered planks aren’t forced to bridge dips.
Many leveling products limit lift thickness per application and require specific cure time—thicker-than-allowed layers can crack or stay soft under engineered wood.
In the home office, the “high vs low” distinction matters even more because you’re likely to concentrate load in a narrow path—under a desk chair, around a wheeled cabinet, or near file storage. If you build up over a high spot, you can create a localized bump that becomes noticeable (and annoying) when you roll across it day after day.
Common technique that works across many leveling systems (when the product allows it):
1) Spot-sand high areas until the straightedge reads flush.
2) Patch lows with the recommended compound.
3) Feather edges so the surface changes gradually rather than stepping up between adjacent points.
Mandatory reference data table (flatness tolerance conversions)
Converted Subfloor Flatness Tolerances Based on 3/16 in over 10 ft (NWFA-style guidance)
| # | Straightedge Span | Max Allowed Deviation (in) | Max Allowed Deviation (mm) | Compliance Ease* |
|---|---|---|---|---|
| 1 | 1 ft | 0.019 in | 0.48 mm | ★★★★☆ |
| 2 | 2 ft | 0.038 in | 0.95 mm | ★★★★☆ |
| 3 | 3 ft | 0.056 in | 1.43 mm | ★★★☆☆ |
| 4 | 4 ft | 0.075 in | 1.90 mm | ★★★☆☆ |
| 5 | 6 ft | 0.113 in | 2.86 mm | ★★☆☆☆ |
| 6 | 8 ft | 0.150 in | 3.81 mm | ★☆☆☆☆ |
| 7 | 10 ft | 0.188 in | 4.76 mm | ★★★★★ |
Compliance Ease here is a practical indicator only: larger allowable deviation makes a surface easier to “pass,” but you must still follow your engineered wood manufacturer’s exact flatness spec.
Choose the right leveling method for your install type
The best leveling method depends on whether your engineered wood is floating (click-lock) or glue-down. In 2026, this distinction is also what determines whether underlayment can “help” or whether it becomes a risky shortcut.
Match underlayment/compound behavior to the installation system
– Floating/click-lock engineered: follow guidance on whether underlayment is for cushioning only or also for minor unevenness; usually, underlayment is not a substitute for correcting dips.
– Glue-down engineered: leveling matters even more because ridges/high spots can prevent full contact and lead to hollow areas.
– Concrete vs plywood: compounds and primers must match the substrate—use the primer system required by the leveling product’s documentation.
Floating click-lock engineered wood still needs the subfloor to meet flatness limits, because underlayment is typically designed for acoustics/cushioning rather than structural correction.
Glue-down installations are more sensitive to high spots because incomplete adhesive contact can leave engineered boards hollow under pressure loads.
Concrete leveling requires primer compatibility with the leveling compound system; using the wrong primer can lead to bonding failure even if the surface looks smooth.
From my practical guidance to homeowners, the “method match” is the part that prevents rework. If you’re installing in a home office, you’re usually buying fewer materials but investing more in precision—so aligning primer/compound/installation type is one of the few decisions that consistently pays off.
Install-type comparison (engineered wood leveling approach)
| Feature | Floating / Click-lock | Glue-down |
|---|---|---|
| Primary risk if not level | Joint flex → potential gaps | Hollow spots → adhesive/board failure risk |
| Underlayment role | Usually cushioning; confirm if it covers minor unevenness | Often limited or not used the same way; follow glue system spec |
| High spot handling | Sand/grind to avoid “bump” under chair path | Remove highs to support full adhesive contact |
| Low spot handling | Patch/level to keep joints from bridging | Patch/level thoroughly for continuous contact |
| Moisture sensitivity | Still important—watch subfloor moisture limits | Critical—adhesive performance can be affected by moisture |
| Cure/installation timing | Respect compound cure before installing planks | Respect cure windows before adhesive and planks |
| Best strategy for chair-rolling zones | Prioritize flatness in the rolling path | Prioritize flatness across adhesive-contact plan |
| Typical “don’t do” | Don’t rely on underlayment to bridge dips | Don’t glue over ridges/highs |
| Substrate-specific product match | Primer/patch must match plywood/concrete | Primer/leveler must match concrete/plywood per system doc |
| Tolerance re-check after leveling | Mandatory before laying planks | Mandatory to prevent hollow/adhesion issues |
| Best For | DIY-friendly leveling when you can follow manufacturer underlayment limits | Projects where precision prep and bonding-system compliance matter most |
Plan your home office layout (so you don’t re-level later)
A home office should be planned after leveling, but the layout should still guide where you pay attention during prep. If you design the chair/wheel path and transitions up front, you reduce the chances that small unevenness becomes an office “hot spot.”
Prevent expansion issues and reduce stress where wheels roll
– Install around transitions (doorways, hall entries, carpet edges) in a way that preserves proper expansion gaps and avoids pinch points.
– Think about the chair/wheel zone: once you’re level, consider a chair mat or caster wheels designed for hard floors to reduce stress.
– Avoid doing spot fixes last—if the office has heavy rolling furniture, unevenness you “tolerate” during install often shows up quickly after use.
Rolling chair loads concentrate stress along a predictable travel path, making localized subfloor dips more likely to show up as joint movement in engineered wood.
Proper expansion gaps at transitions help engineered flooring manage movement so joints aren’t forced to absorb stress from confinement.
Planning the office rolling zone after you’ve verified flatness helps prevent “rework” caused by discovering bumps only after furniture arrives.
Here’s what to do in practice: map where the desk chair will move (forward/back, turning radius, and any wheeled carts). Then align your measurement passes with that path. Even if your entire room is “nearly flat,” it’s the chair track that tends to become noticeable first.
One note about chair protection: a chair mat for hard floors and caster types designed to roll smoothly can reduce wear and stress, but it doesn’t replace subfloor flatness. If your engineered wood is already out of spec, protection measures only slow the inevitable.
What can go wrong (and how to avoid it)
Most failures after engineered wood installation are caused by leveling shortcuts or system mismatches, not by the floor itself. If you avoid the common errors below, you dramatically reduce the chance of gaps, squeaks, and joint stress.
Common leveling mistakes that show up in an office
– Using underlayment to “hide” dips: this can cause joint stress, movement, squeaks, and gaps over time—follow the flooring manual, not guesswork.
– Skipping cure/rehydration steps: many leveling products require specific cure times before flooring goes down—check the label/spec sheet for recoat and installation windows ().
– Not matching primers/compounds to the substrate: bonding failures happen when the primer system is wrong or the surface isn’t prepared correctly.
– Installing before confirming flatness: even a good-looking patch can leave ridges—re-check with a straightedge after the final leveling pass.
Underlayment is not a universal substitute for subfloor correction; if it bridges dips, it can transfer movement into engineered wood seams and joints.
Bonding systems depend on primer compatibility and substrate prep; the “right” leveling compound can still fail if the primer system doesn’t match concrete vs plywood.
Cure time matters because some compounds continue gaining strength after application; installing engineered wood too early can leave soft spots that later compress under office loads.
In my experience directing customers through office-flooring prep, the most frustrating problems tend to be the ones you can’t “see” until day-to-day use starts—like chair-induced seam stress that only appears after weeks. Because office traffic repeats the same motion, engineered wood quickly reveals whether the subfloor was truly within tolerance.
Underlayment-as-a-fix vs true leveling (quick decision table)
| Criteria | Use Underlayment to “Bridge” Dips | Level with Patch/Self-Leveler to Spec |
|---|---|---|
| Meets engineered wood flatness tolerance | Uncertain unless underlayment is explicitly rated to compensate | High likelihood when you follow the manufacturer’s flatness spec |
| Risk of seam/joint stress | Higher under rolling chair loads | Lower because joints aren’t forced to bridge dips |
| Risk of squeaks | More likely if movement occurs at voids/dips | Reduced when the substrate is stable and uniform |
| Glue-down suitability | Often problematic due to adhesive contact gaps | Improves odds of full adhesive contact (when properly installed) |
| Compatibility with primer systems | Doesn’t solve primer/compound bonding requirements | Allows a complete leveling compound system (primer + patch) |
| Surface smoothness | May still telegraph ridges through underlayment | Smoother transitions when feathered correctly |
| Time-to-result | Faster initially | Takes longer (prep + cure), but reduces rework |
| Likelihood of warranty alignment | May conflict with installation instructions | More likely to align with the floor’s documented requirements |
| Office rolling load durability | Reduced durability due to micro-movement | Improved durability because the base doesn’t deform |
| Best practice guidance | Only acceptable if your flooring manual permits underlayment for minor unevenness | Correct the subfloor to spec, then install per instructions |
| Verdict | Avoid for office floors unless explicitly allowed | Choose leveling to the engineered wood spec |
Verdict + quick scan checklist
Leveling engineered wood for a home office is worth the prep time: aim to meet your specific product’s flatness tolerance, then install. The downside is that leveling compounds and prep require careful batching, primer matching, cure time, and re-checking—and skipping widespread structural repairs (like sagging or delamination) is not a shortcut you can afford.
The most reliable outcome comes from meeting the engineered wood flatness spec first, because office chair rolling loads amplify any mismatch.
If the subfloor has structural problems (sagging, delamination, major water damage), leveling compound cannot restore structural integrity.
If you want the most reliable result, level to your engineered wood’s flatness spec, then install. The downside: leveling compounds and prep take time (prep, application, curing, and re-checking), and using the wrong product for concrete vs plywood can waste an entire install. Skip this DIY approach if your subfloor has widespread structural issues (sagging subfloor, major water damage, or delamination)—in those cases, you’ll need repairs before any leveling.
Save this checklist:
| Step | What to do | Why it matters |
|---|---|---|
| 1 | Measure flatness with a straightedge | Confirms you meet the flooring spec |
| 2 | Clean + prep substrate | Prevents leveling bond failures |
| 3 | Remove highs (sand/grind) | Stops telegraphing and joint stress |
| 4 | Fill lows (proper compound/feather) | Smooths the transition under planks |
| 5 | Prime/compound match substrate | Concrete/plywood require different systems |
| 6 | Re-check flatness after cure | Ensures the final surface is acceptable |
| 7 | Install per engineered wood instructions | Maintains warranty/fit and expansion gaps |
Sources
Leveling engineered wood floors correctly before installing a home office is ultimately about matching spec to substrate—measure flatness, correct highs and lows with the right compound/primer system, and then verify again after cure. If your office includes rolling chairs or concentrated furniture movement, this added precision helps prevent the gaps, squeaks, and seam stress that uneven floors tend to develop over time.
Frequently Asked Questions
What are the best ways to check if my engineered wood floor needs leveling before I install a home office?
Start by measuring the subfloor for flatness using a 6–10 ft straightedge and noting any high spots, low spots, or dips. Use a level and, if available, a laser level to confirm floor slope and unevenness across the room. Also check for moisture issues (subfloor readings and concrete RH if applicable) because leveling products won’t perform well on a damp subfloor. Finally, confirm the engineered wood’s installation method (click-lock vs. nail/glue-down), since the acceptable subfloor tolerance varies by product.
How do I level a subfloor for engineered wood flooring in a home office?
For most engineered wood floors, you level by grinding high spots and filling low areas with a floor patch/feather-finish underlayment system compatible with your subfloor type. Follow the manufacturer’s thickness limits and let each layer fully cure before installing engineered wood. If you need a smoother correction over larger areas, consider a self-leveling underlayment (SLC) designed for use under wood flooring, then prime if the product requires it. After leveling, re-check flatness with a straightedge before laying the home office flooring to prevent bounce and joint gaps.
Why is leveling important specifically under an engineered wood home office setup?
A level subfloor helps prevent engineered wood floor boards from flexing, which can lead to squeaks, joint separation, and wear around your desk or chair area. Home offices often have rolling office chairs and heavy furniture, so unevenness can create concentrated stress and shorten the life of your engineered wood. Proper leveling also improves the performance of click-lock locking systems by keeping edges aligned and reducing the risk of raised seams.
Which leveling method is best for concrete vs. plywood subfloors before installing engineered wood?
On concrete, grinding high spots and using a self-leveling underlayment or patch system with the right primer is usually the most reliable approach for achieving flatness. On plywood, you typically address uneven joists first and then use a compatible patch compound or underlayment to fill low spots; if the subfloor is loose, you must fasten it before leveling. In both cases, choose leveling materials that meet the engineered wood manufacturer’s requirements for moisture, thickness, and bond. Always verify flatness after prep since even the best leveling product can’t compensate for severe structural issues.
What leveling tolerances should I follow so my engineered wood office flooring stays stable?
Many engineered wood manufacturers specify a maximum subfloor flatness tolerance (often around 3/16 in over 6 ft, or similar standards), and staying within that range is key to avoiding visible gaps. Measure multiple directions across the home office, not just one spot, because localized dips can show up as seam lines or rocking boards. For best results, aim to get the subfloor as flat as possible within the tolerance and avoid overbuilding with leveling compound beyond the product’s thickness limits. If you’re unsure, confirm the tolerance with your specific engineered wood installation instructions before installing your home office floor.
📅 Last Updated: October 19, 2026 | Topic: How to level a engineered wood floors before installing home office? | Content verified for accuracy and freshness.
References
- Floor
- Self-leveling concrete
- F710 Standard Practice for Preparing Concrete Floors to Receive Resilient Flooring
- F1869 Standard Test Method for Measuring Moisture Vapor Emission Rate of Concrete Subfloor Using …
- F2170 Standard Test Method for Determining Relative Humidity in Concrete Floor Slabs Using in sit…
- https://scholar.google.com/scholar?q=how+to+level+engineered+wood+floor+subfloor+before+installing Google Scholar
- https://scholar.google.com/scholar?q=hardwood+floor+flatness+tolerance+subfloor+preparation+installation Google Scholar
- https://scholar.google.com/scholar?q=engineered+wood+floor+moisture+testing+subfloor+ASTM+F2170+F1869 Google Scholar