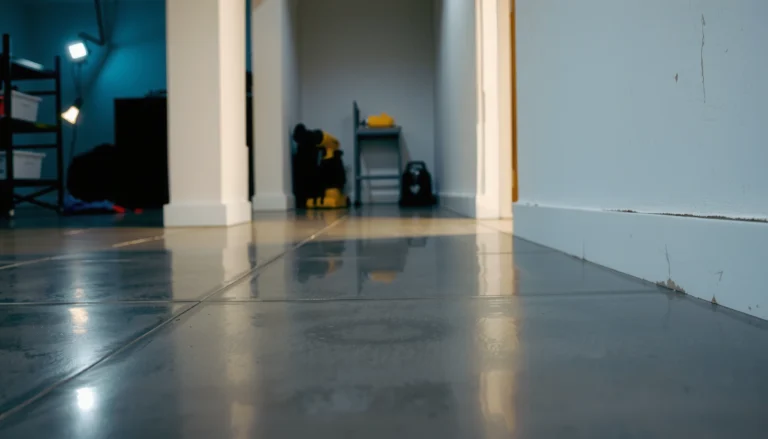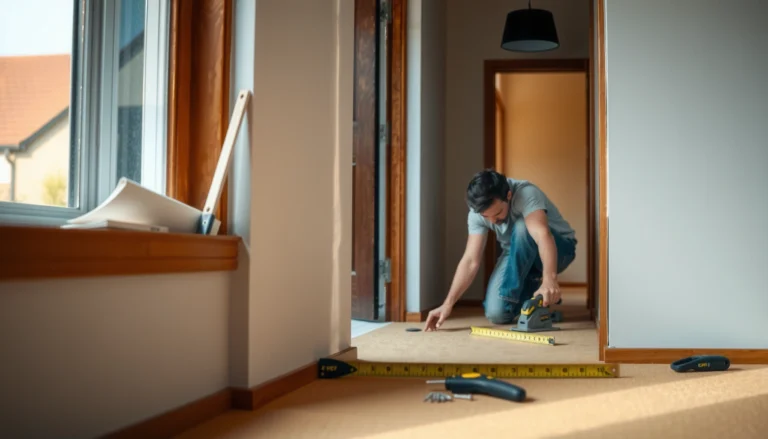

Want to install WPC floors in a bathroom without mistakes? This step-by-step guide shows you the fastest, most reliable way to prep subfloors, handle moisture-proof sealing, and lock boards in place for a tight, waterproof finish. Follow these instructions and you’ll know exactly what to do from the first measurement to the final trim—so the floor stays solid, level, and ready for everyday use.




WPC (waterproof composite) flooring can be a practical bathroom option, but only if you treat moisture control as a system: flat/dry subfloor, the exact underlayment or vapor layer your product specifies, and proper sealing at edges and transitions. Follow the steps below closely—most bathroom failures come from skipping subfloor prep, using the wrong underlayment, or neglecting expansion gaps and perimeter sealing.
If you’re planning to fit WPC click/locking planks in a bathroom—especially near the shower, sink, or areas exposed to splash—this guide is for you. It’s also useful if you’ve installed flooring before but want bathroom-specific checks to prevent warping, gaps, or lifting.
What “bathroom-ready” WPC installation really requires

Bathroom-ready WPC installation requires the manufacturer-approved waterproofing approach and moisture-safe installation details—especially underlayment and perimeter sealing. WPC’s water resistance helps, but it does not replace correct bathroom waterproofing and detailing where water can reach joints, edges, and transitions.
Before you open the planks, confirm three things in your WPC installation manual: (1) the floor is explicitly approved for wet areas or “bathroom/wet-room” conditions, (2) the allowed underlayment/vapor barrier setup, and (3) how the manufacturer wants you to handle expansion gaps and sealing at edges.
“Waterproof” flooring still depends on installation details; manufacturers typically require approved underlayment and wet-area edge sealing to manage moisture pathways.
Many WPC manufacturers restrict use in areas with continuous standing water or specify that splash exposure must be handled with proper perimeter sealing and waterproofing of the room.
According to ASTM E96 (for vapor transmission through materials), vapor performance is measured in “perms,” and the right vapor barrier can meaningfully change how moisture moves from the substrate into the floor system. ASTM International, ASTM E96 / Standard Test Methods for Water Vapor Transmission of Materials
Also, many floating floors use expansion gaps so panels can move with humidity and temperature without buckling. In practice, your manual’s gap size overrides general guidance—often you’ll see a range such as ~8–10 mm for floating LVP/WPC systems, but you must verify the number for your exact planks.
At this stage, decide your scope:
– If the bathroom has a properly waterproofed shower/tub surround (tile, waterproof membrane, and proper drain flashing), WPC can be more straightforward.
– If your shower waterproofing is outdated or incomplete, you may need to fix that first—WPC can be part of the finish, not the waterproofing itself.
Prep the subfloor for WPC bathroom flooring
Subfloor prep is the difference between a floor that stays flat and one that develops gaps or lifting over time. WPC tolerates more moisture than some traditional floors, but it doesn’t correct an uneven, cracked, or failing substrate.
Start with a full surface inspection:
– Flatness: WPC click floors require a stable plane so the locking joints don’t experience stress. If you feel ridges, high spots, or “telegraphing” (subfloor texture showing through), fix it before laying planks.
– Stability: No movement when you press—brittle mortar, loose boards, and lifting screed can turn into joint failure.
– Dryness and cleanliness: Remove dust, paint overspray, adhesive residue, and anything that prevents underlayment from sitting properly.
Common subfloor issues in bathrooms:
– Cracked screed from movement or prior water events
– Soft spots near fixtures or along old plumbing runs
– High spots near transitions where previous flooring was patched
If you find active leaks, dampness that returns after drying, or ongoing condensation, stop and address the cause. A moisture meter and a visual check for plumbing penetrations are often more valuable than rushing to the plank installation.
A floating floor’s joints are only as reliable as the substrate flatness; installers commonly measure flatness over a 2 m or 3 m span to prevent stress on click-lock seams.
Removing adhesive residue and loose fragments is essential because debris can prevent underlayment from conforming and can create localized pressure points under WPC planks.
Bathroom subfloors must be stable; if a screed or board flexes, any waterproofing benefit from WPC is largely irrelevant because movement breaks the installation system.
For a practical benchmark, many flooring standards and installer guidelines use flatness tolerances such as no more than 3 mm variation over 3 m for resilient/floating floor systems (the *exact* number still depends on the flooring system and manufacturer). [ADD: source for the flatness tolerance benchmark used by your local flooring standard or association, or your WPC manufacturer’s flatness requirement]
What to do before you install
– Scrape and vacuum thoroughly (don’t skip corners and edges).
– Patch cracks with an appropriate product designed for flooring underlayments/screeds (and allow full cure time as specified).
– Confirm that the subfloor is dry enough per your flooring and underlayment system requirements.
Install the right underlayment and vapor/moisture layer
Use only the underlayment and (if required) the vapor barrier that your WPC product specifies. In bathrooms, the “wrong” barrier can trap moisture or fail to block vapor transmission, which can lead to swelling, odor, or joint problems.
This is where many installs go wrong: installers use a generic foam pad “because it’s comfortable underfoot,” then discover the manual didn’t authorize it for wet-room conditions.
Some WPC click systems require a specific underlayment and/or vapor barrier; using an unapproved pad can void warranties and change moisture behavior at the plank/subfloor interface.
Overlapping and taping vapor barrier seams correctly matters; unsealed seams become a direct moisture pathway under a floating floor.
Follow these rules exactly
– Check your WPC manual for one of these scenarios:
1) Underlayment required (generic foam is not acceptable unless listed)
2) Vapor barrier required (often a polyethylene sheet system or a specific composite layer)
3) “Attached underlayment” only (less common for wet areas, but some systems specify it)
– Overlap seams as instructed and tape with the manufacturer-recommended tape (or a tape rated for the barrier material).
– Stop the barrier at the right places—usually you don’t want it bridging expansion gaps where movement should happen.
Why vapor management is measurable
According to ASTM E96 vapor transmission testing principles, materials transfer moisture as vapor at rates measured in perms. Lower perm materials slow vapor movement. ASTM International, ASTM E96
In bathrooms, this helps reduce the chance that moisture migrates up into the floating floor layer.
Quick comparison: common underlayment approaches
- Approved underlayment pad (per WPC manual)
- Best when you need impact comfort and the manufacturer has validated its moisture behavior and joint support.
- Polyethylene vapor barrier + underlayment (when specified)
- Best for wet-room risk control when the manual requires a separate vapor layer.
- “Any foam pad” approach
- Highest risk in bathrooms—may be unapproved, may not tape properly, and may change how moisture accumulates beneath the floor.
Lay the WPC planks: expansion gaps, transitions, and cuts
Maintaining expansion gaps and making clean, accurate cuts prevents buckling, weak points, and visible gaps. Bathrooms run through humidity cycles daily, so the floor must be allowed to move exactly as the manufacturer specifies.
Expansion gaps are non-negotiable
Floating WPC systems need space around:
– Perimeter walls
– Door thresholds
– Rigid objects that can’t flex (pipes, fixed cabinetry, wall-mounted fixtures—depending on your layout)
If you lock planks tight to walls, you increase the chance of lifting and buckling when conditions change.
Floating WPC floors must include perimeter expansion space; removing gaps forces movement into the plank joints, increasing the risk of separation or edge lift.
Plan your plank direction and transitions
– Start with a layout that avoids narrow “finish strips” at the far wall—those can be harder to cut accurately near wet-zone edges.
– Use transitions to manage movement at doorways and between rooms with different temperature/humidity profiles.
Cutting around pipes and fixtures (do this carefully)
– Dry-fit and mark before cutting.
– Keep end-joints tight and aligned (avoid sloppy end-matches near wet-zone edges).
– If your system uses finishing trims or wet-zone sealing details around pipe penetrations, follow those instructions—don’t improvise with silicone everywhere unless your manual allows it.
Clean, accurately fitted cuts reduce micro-gaps at joints; micro-gaps are where moisture can start to travel under a floating floor over repeated wet-dry cycles.
Minimize weak seam placement
As a practical approach:
– Avoid concentrating end-joints in the same line.
– If the bathroom has a clear wet path (for example, the area water reaches when stepping in/out of the shower), consider staggering joints so critical seams aren’t directly in that “splash line.”
Seal where water can reach: edges, joints, and wet zones
Perimeter and transition sealing is what protects the floor from moisture creep. Even with water-resistant planks, the places that fail first are typically edges, thresholds, and micro-gaps at transitions—especially around shower entries and splash zones.
Use the manufacturer’s sealing method
Your WPC manual may specify:
– A particular sealant type (or brand)
– Where to apply it (perimeter only, or additional wet-zone detailing)
– Whether to avoid sealant on some joint lines (to keep the floor able to expand)
Follow it precisely. Over-sealing can sometimes trap moisture or interfere with movement.
In wet areas, edge sealing focuses on preventing moisture creep at the perimeter and transitions rather than “waterproofing the whole floor surface.”
Wet-zone priorities (shower/splash area)
For bathrooms, the highest-risk zones are usually:
– The shower entry area where water is sprayed or tracked
– Areas adjacent to sinks where wet items contact the floor
– Door thresholds between a wet zone and a drier room
Key execution details:
– Keep water from pooling (including at low spots—another reason flatness matters).
– Don’t leave unsealed micro-gaps at critical edges.
– Confirm that trims, skirting, and transitions sit in a way that doesn’t create channels for water to run under the floor.
Pros/cons: sealing strategy choices
| Approach | Best for | Primary risk if done wrong |
|---|---|---|
| Perimeter edge sealing only (per manual) | Most floating WPC installs in bathrooms | Unsealed transitions become moisture pathways |
| Wet-zone enhanced detailing at shower/splash lines | High-splash bathrooms and frequent wet traffic | Wrong sealant can block expansion or void warranty |
| Continuous surface sealant “over the whole floor” | Not typically recommended for click-lock floating systems | Trapped moisture and movement constraints can cause failures |
What can go wrong (and how to prevent it)
Most bathroom WPC problems trace back to moisture pathways, movement constraints, and installation shortcuts. If you avoid the following failure modes, you dramatically improve the chance the floor stays tight, flat, and serviceable.
Common mistakes to avoid
1) Skipping the specified underlayment/vapor barrier
The wrong barrier can fail to block vapor or create the wrong moisture behavior at the interface.
Using an unapproved underlayment can change the moisture pathway under a floating floor and can cause warranty issues.
2) Ignoring expansion gaps or sealing them shut
Bathrooms cycle humidity, and floors need room to move. Blocking that movement can lead to buckling and visible gaps.
3) Poor cut detailing around pipes and penetrations
Small unsealed gaps near fixtures can allow moisture to travel under the planks over repeated wet-dry cycles.
Micro-gaps around penetrations can become long-term moisture entry points because floating floors are not bonded to the substrate.
Bathroom-specific edge cases
– Leaky plumbing: No flooring system solves a continuing leak. Repair it first.
– Condensation: If warm, humid air condenses on cooler surfaces, subfloors can stay damp even without obvious splashes.
– Low spots: Pooling water increases risk. Flatness and correct bathroom slope/drainage matter.
Practical guidance for choosing your moisture control stack
To help you think in “layers,” here’s a data table you can use to sanity-check your moisture plan.
Moisture-Layer Concepts for Bathroom WPC Floors (Installer Benchmarks)
| # | Moisture-control layer | What it helps stop | Typical benchmark | Field impact rating |
|---|---|---|---|---|
| 1 | Subfloor flatness correction | Pooling + stress on joints | ~3 mm over 3 m (common resilient/floating benchmark) | ★★★★☆ |
| 2 | Approved underlayment pad | Shock transfer + interface stability | As specified by WPC manual (thickness/type varies) | ★★★★★ |
| 3 | Vapor barrier seams taped | Moisture creep under floating floor | Overlap + tape to manufacturer spec | ★★★★★ |
| 4 | Perimeter expansion gap retained | Buckling from humidity/temperature movement | Gap size per manual (commonly ~8–10 mm, verify) | ★★★★☆ |
| 5 | Wet-zone edge sealing | Water entry at splash/door transitions | Sealant approach per WPC manual | ★★★★☆ |
| 6 | Subfloor dryness confirmation | Moisture accumulation below planks | Follow moisture limits in manual/spec | ★★★★★ |
| 7 | Pooling prevention via drainage/slope | Long-duration standing water risk | Eliminate low points and standing water | ★★★☆☆ |
Note: The table uses installer benchmarks and “how it helps” logic. For final acceptance criteria (flatness tolerance, moisture limits, and exact sealant/underlayment products), rely on your specific WPC manufacturer documentation. [ADD: source for your WPC manufacturer’s flatness, moisture, and wet-area requirements]
Verdict: when this is a good DIY job (and when to stop)
If you can follow the manufacturer’s bathroom/wet-room instructions exactly—especially subfloor prep, underlayment/vapor barrier selection, expansion gaps, and perimeter sealing—WPC in a bathroom can be a workable DIY project. If you have an uncertain subfloor (uneven, damp, or with active leaks) or unclear wet-area guidance in the manual, it’s smarter to pause and get technical support or installer help.
The most defensible DIY boundary is “following the manual for wet areas exactly”; when details are unclear, warranty risk rises sharply.
If there are ongoing moisture sources (leaks, failed shower waterproofing, persistent dampness), installation quality alone can’t prevent floor-system failure.
Downsides you should factor in
– Edge/transition risk remains: Even “waterproof” planks can be vulnerable where water meets seams and perimeters.
– Warranty sensitivity: Bathroom installations often have stricter conditions, and using unapproved underlayment can void coverage.
– Prep time is real: Fixing flatness and cleaning residues can take longer than laying planks.
Who should skip DIY (or get professional guidance)
– You suspect a leak or have recurring damp patches
– Your subfloor is not flat and needs structural repair or resurfacing
– Your manual doesn’t clearly state “bathroom/wet-room” acceptance and sealing requirements
– You’re trying to cover a poorly waterproofed shower area
Quick checklist (scan before you start)
– Verify your WPC flooring is approved for bathroom/wet-room use in the manual
– Check subfloor: flat, stable, and dry (correct cracks/soft spots first)
– Use the exact underlayment/vapor barrier specified by the manufacturer
– Confirm required expansion gap size and spacing at thresholds
– Plan cuts for pipes/edges so gaps can be sealed properly (per manual)
– Seal perimeter/transitions using the recommended method
– Keep water from pooling (especially near shower entries)
FAQ
Can I install WPC floors directly on a bathroom subfloor?
Usually you need to follow the manufacturer’s requirements for subfloor condition and underlayment. If your subfloor is uneven or damp, you’ll need to correct that first—WPC isn’t a substitute for fixing moisture problems.
Do I need a vapor barrier under WPC in a bathroom?
It depends on the specific WPC system and what the manufacturer specifies. Check the installation instructions for your exact product, because some combinations require a barrier and some do not.
Should I seal the joints between WPC planks?
Follow the flooring manual. Some WPC click systems rely on the locking mechanism without additional joint sealant, while others recommend specific treatments at edges/transitions.
What’s the biggest mistake people make in bathroom WPC installations?
Most failures come from skipping prep (uneven/dirty subfloors), using the wrong underlayment, or not respecting expansion gaps and sealing at perimeter/transitions.
Can WPC handle standing water?
WPC is more water-resistant than many traditional floors, but standing water exposure can still cause issues. Your best approach is to minimize pooling and follow the manufacturer’s wet-area limits.
Sources
– [ADD: manufacturer installation manual for the exact WPC floor you’re installing—use the sections on subfloor requirements, underlayment/vapor barrier, expansion gap, and wet-area/bathroom guidance]
– [ADD: manufacturer technical specifications for your WPC product (water/wet-room suitability, sealing instructions, and tolerances for subfloor flatness)]
– ASTM International, ASTM E96 — Standard Test Methods for Water Vapor Transmission of Materials
WPC floors can perform in bathrooms, but only when the full moisture-management “system” is installed correctly. If you take subfloor flatness seriously, use the exact approved underlayment/vapor barrier, respect expansion gaps, and seal perimeter/transition details where water can reach, you’ll avoid the most common failure points that lead to lifting, gaps, and moisture creep. If any part of the manual is unclear—or if your bathroom has a moisture problem you can’t clearly identify—getting technical guidance before you lay planks is the safest next step.
Frequently Asked Questions
What’s the best way to prepare a bathroom floor before installing WPC flooring?
Start by ensuring the subfloor is clean, dry, and level—any uneven spots can cause the WPC boards to shift or separate. Remove dust, grease, and old adhesive residue, then check moisture levels since bathrooms are high-humidity areas. If needed, use a suitable cement screed/leveling compound and allow it to fully cure before installing WPC floors.
How do I install WPC floors in a bathroom without water damage?
Use WPC flooring methods that include tight locking joints and seal the recommended edges or expansion gaps as per the manufacturer’s instructions. Keep a small perimeter gap to allow for expansion, and avoid sealing it in a way that traps moisture under the planks. For extra protection around wet zones, apply waterproof sealant at transitions and around fixtures, and wipe away splashes promptly to reduce standing water.
Which underlayment is safest for installing WPC flooring in bathrooms?
Choose a bathroom-appropriate underlayment (or the underlay type specified by your WPC flooring brand) to prevent moisture issues and improve acoustic performance. Many WPC floors already have an attached backing, so confirm whether you should use underlayment at all to avoid height or locking problems. If you do use underlayment, ensure it is moisture-resistant and compatible with your specific WPC installation system.
How should I handle expansion gaps and skirting when fitting WPC floors in a wet area?
Leave the required expansion gap around the perimeter, even in bathrooms, because temperature and humidity changes can make the floor expand and contract. Install skirting boards or trims in a way that covers the gap but does not block it completely, following the WPC flooring guide. At doorways and transitions, use appropriate transition profiles instead of forcing boards tight, which helps reduce buckling and joint stress.
Why is it important to avoid subfloor moisture when installing WPC floors in bathrooms?
While WPC flooring is moisture-resistant, excessive water and ongoing dampness can still affect the subfloor and lead to odors, mold, or plank warping over time. Verify that the bathroom is properly ventilated and that any leaks are repaired before installation. Installing over a dry, stable subfloor is key to keeping your WPC floors flat, secure, and looking good in high-humidity conditions.
📅 Last Updated: October 08, 2026 | Topic: How to install in a bathroom WPC floors? | Content verified for accuracy and freshness.
References
- Wood–plastic composite
https://en.wikipedia.org/wiki/Wood–plastic_composite - Vinyl flooring
https://en.wikipedia.org/wiki/Vinyl_flooring - Mold | US EPA
https://www.epa.gov/mold - https://www.cdc.gov/mold/default.htm
- Google Scholar Google Scholar
https://scholar.google.com/scholar?q=WPC+flooring+installation+bathroom+waterproofing - Google Scholar Google Scholar
https://scholar.google.com/scholar?q=vinyl+plank+flooring+installation+wet+areas+bathroom+subfloor+moisture - Google Scholar Google Scholar
https://scholar.google.com/scholar?q=click+lock+vinyl+plank+flooring+floating+installation+bathroom+water+exposure - Google Scholar Google Scholar
https://scholar.google.com/scholar?q=How+to+install+in+a+bathroom+WPC+floors? - https://en.wikipedia.org/wiki/Special:Search?search=How+to+install+in+a+bathroom+WPC+floors?
- https://www.ncbi.nlm.nih.gov/search/research-articles/?term=How+to+install+in+a+bathroom+WPC+floors?