
Want to install polished concrete floors on stairs? This step-by-step guide walks you through the exact prep, leveling, and grinding sequence to get a smooth, slip-resistant finish that holds up under foot traffic. If you’re aiming for a clean, professional look with durable wear, you’ll know what to do from start to seal—without guessing.




If you want polished concrete floors on stairs, treat the stair like a small countertop system: build a properly prepared base, use the right adhesive/thinset for concrete-to-stone-like topping, and finish with edge-safe polishing/sealing. The goal is consistent bond on treads and reliable traction at nosings, because stair edges are where delamination and cracking typically begin.
Polished concrete on stairs is a high-visibility, high-wear upgrade—so the install details matter more than on flat floors. This approach works whether you’re polishing existing concrete treads or installing a polished concrete overlay/topping on concrete, wood, or tile. It’s especially relevant when you need a uniform appearance and dependable edge durability on stair geometry where small thickness or joint mistakes become big problems.
Assess your stairs and choose the right install type
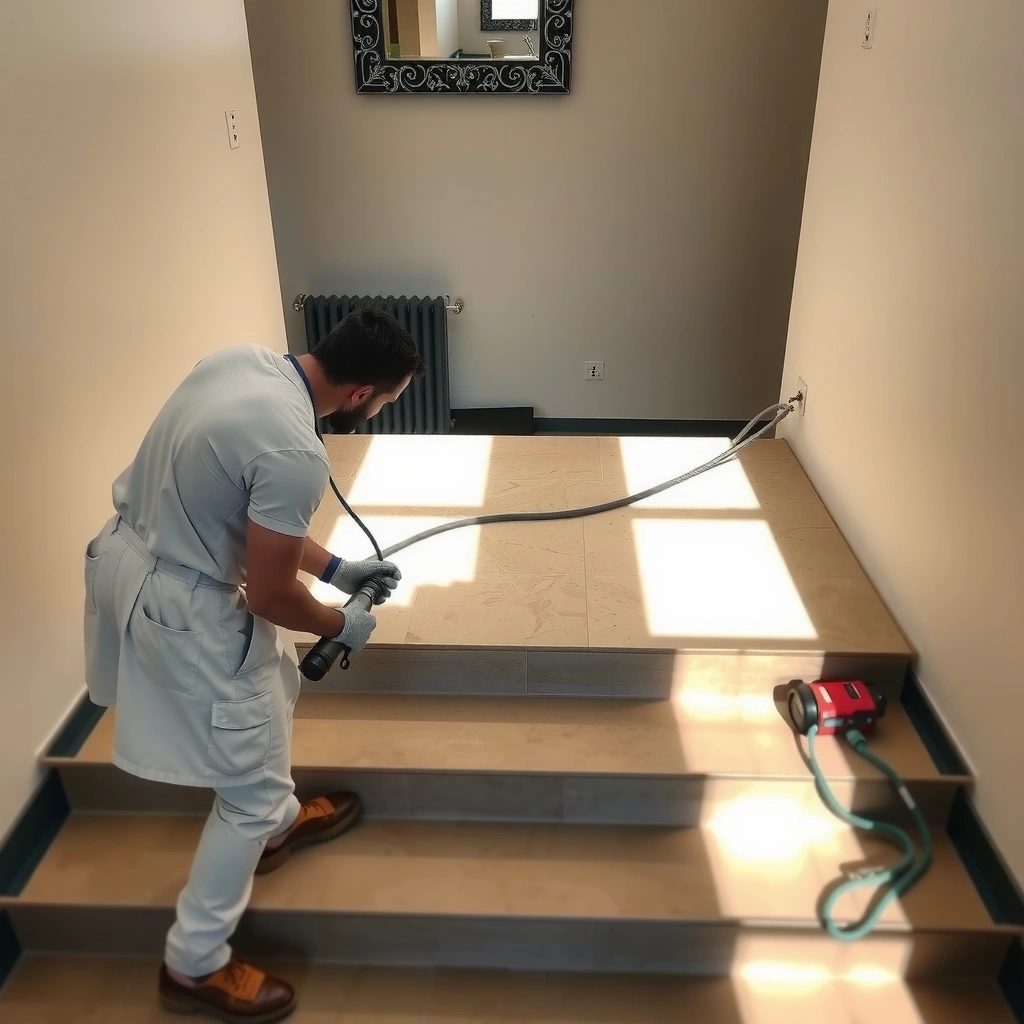
You’ll get the best results when you decide early whether you’re polishing existing concrete or installing a polished concrete overlay/topping, because the substrate and system requirements differ. Once the type is clear, you can design around tread thickness limits and stair movement so the finish stays intact.
“Stairs amplify installation errors because every grind line, thickness change, and edge detail is directly exposed to foot traffic.”
“A rigid polished topping can crack if the stair structure flexes; movement planning must start before any adhesive is mixed.”
“Overlay vs. polish determines whether you’re bonding a new material to the stair or simply densifying and grinding an existing concrete surface.”
Start by identifying your exact condition:
– Polish existing concrete treads if the concrete is solid, correctly cured, and free of coatings/contaminants.
– Install a polished concrete overlay/topping when the surface is damaged, uneven, or you’re converting an existing stair material (tile/wood) to a monolithic polished look.
Then measure what governs the build-up:
– Tread thickness and nosing profile: Confirm how much topping thickness you can add without creating a tripping hazard.
– Riser height and stair angle: Even small build-up changes can affect step comfort and safety.
– Substrate movement: If the stair assembly flexes, a rigid topping system needs a movement strategy rather than a “perfectly bonded monolith” approach.
Concrete curing anchor (important when selecting polish/overlay timing): According to the Portland Cement Association, normal-strength concrete typically gains substantial strength over the first 7 days, but full strength is commonly referenced around 28 days (exact performance depends on mix, curing, and temperature). [ADD: source for concrete strength gain/cure timeline]
Prep the surface so the overlay actually bonds
You can’t skip preparation: polished concrete performance on stairs depends on achieving a substrate profile that the adhesive/topping can bond to. If you don’t profile and clean correctly, you’ll often see edge delamination later—even if the first few weeks look fine.
“Surface profiling is not cosmetic; it’s what creates mechanical anchorage for concrete overlays.”
“Bond failures on stair treads commonly trace back to contamination (dust, curing compounds, paint) or incorrect moisture/temperature conditions during install.”
“Repairing cracks and spalls before overlay application is the difference between a stable finish and a recurring edge problem.”
Use a disciplined prep workflow:
1) Clean and remove bond breakers
Concrete dust and residue are the enemy of polished overlays. Remove:
– Dust/loose debris (vacuum thoroughly)
– Paint, curing compounds, sealers, and any coatings
– Laitance (weak top layer) created by finishing
2) Profile the surface for mechanical bond
Concrete overlay systems rely on a specific Concrete Surface Profile (CSP) range. The surface typically needs to be abrasive-blasted/scarified to open the pores and create texture.
ICRI Concrete Surface Profile (CSP) Targets for Overlay Bonding
| CSP | Approx. peak-to-valley profile* | Common use on overlays | Bond-outcome rating |
|---|---|---|---|
| 1 | ~10–20 µm | Very light surface prep | ★★☆☆☆ |
| 2 | ~20–30 µm | Light shot-blast | ★★★☆☆ |
| 3 | ~30–40 µm | Typical overlay bonding range | ★★★★☆ |
| 4 | ~40–55 µm | Aggressive prep; good anchorage | ★★★★★ |
| 5 | ~55–70 µm | When heavy laitance/contam exists | ★★★★☆ |
| 6 | ~70–90 µm | Use with system-approved materials | ★★★☆☆ |
| 7 | ~90–120 µm | Often too aggressive for some overlays | ★★☆☆☆ |
\Overlay manufacturers should be treated as the controlling document for the required CSP and profile; use CSP as a planning guide and confirm with the product datasheet. [ADD: source for ICRI CSP peak-to-valley ranges and overlay guidance]
3) Repair defects and stabilize moisture/temperature
– Repair cracks, spalls, and delaminated areas before overlay.
– Allow full cure of patch materials.
– Install within the recommended temperature/humidity window; bond issues often show up after curing because the adhesive never properly hydrated or chemically set.
Statistical anchor to manage cure expectations: Many cementitious systems reference recoat/usable intervals tied to temperature (e.g., slower at cooler conditions). Consult the overlay/topping datasheet for your specific open and cure times. [ADD: source for typical temperature-dependent curing behavior]
Set the system: substrate, adhesive, and placement strategy
When you set the system correctly, the topping stays locked to the stair and polishes evenly across every tread. This section is about selecting the correct overlay adhesive/thinset and placing material with a consistent strategy so edges don’t “telegraph” through.
“Use an adhesive/thinset system intended for concrete overlay applications; regular mortar systems can fail under overlay-specific chemistry and thickness.”
“Work top-down on stairs to keep alignment predictable—tread-to-tread transitions magnify layout mistakes.”
“Joint strategy matters: stair runs that cross movement joints need a plan that matches the movement path.”
Choose the right adhesive/thinset (don’t generalize)
Look for:
– A cementitious adhesive suitable for concrete-to-overlay bonding
– The manufacturer’s required substrate prep standard (often tied to CSP and cleanliness)
– Correct trowel size guidance to hit the system’s bond performance
Mixing and placement details that prevent common failures
– Follow manufacturer mixing ratios exactly (water added later is a frequent failure trigger).
– Use the specified trowel notch/consistency to control thickness and avoid voids.
– Stage material so you can keep edges clean and aligned from tread to tread.
Plan movement and control joints before you trowel
Stairs behave differently than slabs because walking loads repeat every day. If the stair system has expansion/control joints, you generally need to:
– Avoid bridging movement joints with rigid material unless the manufacturer explicitly allows it with a matching detail.
– Use the overlay system’s joint approach (sometimes sawcuts or compatible joint fill) so cracking doesn’t telegraph through the polished surface.
Pros/cons: polish existing vs. overlay/topping on stairs
| Option | Pros (why it works) | Cons (where it bites) |
|---|---|---|
| Polish existing concrete treads | Lower build-up; preserves stair geometry; quicker to get to a finished look if the slab is uniform | If the concrete is contaminated/weak at edges, polishing won’t fix bond or structural issues |
| Install polished concrete overlay/topping | Levels uneven treads; modernizes edges/nosing; can create a consistent, engineered finish across mismatched substrates | Adds thickness; demands strict bonding and joint strategy; incorrect adhesive/timing can lead to delamination |
Shape, edge-finish, and cure like it’s a countertop
You should shape and finish the topping before any polishing starts, because the final look depends on levelness and the durability of edges. Treat stair nosings and corners as structural finishes—not decorative trim.
“Most stair failures show up at edges and transitions because curing stresses concentrate where geometry changes.”
“Consistent thickness across each tread reduces the risk of uneven grinding and patchy reflectivity.”
Leveling for clean, safe treads
– Build and level each tread so water and debris don’t pool in low spots.
– Avoid “lipping” at transitions between treads; stairs magnify these changes every step.
Edge finishing for durability
Stair edges need special attention because polishing exposes them and foot traffic attacks them:
– Create a durable edge profile (often a controlled radius/bullnose-like form that balances wear and appearance).
– Prevent sharp transitions that concentrate stress and wear.
Cure properly (then polish)
Polished concrete performance depends on reaching the required hardness before grinding/polishing.
– Follow the overlay/topping cure schedule and the grinding start conditions from the product documentation.
– Don’t rush grinding just to “get to the sheen”—premature grinding can cause surface raveling and inconsistent polish.
Concrete maturation anchor: Many cementitious systems gain strength with time and proper curing, which is why manufacturers specify minimum cure stages before grinding, recoat, or final polishing. [ADD: source for manufacturer cure-to-grind guidance]
Polish safely and seal for traction and stain resistance
Polish is where the “wow” happens—but on stairs, traction must lead the design. You’ll want a finish that looks polished while preserving grip when dusty, tracked in, or occasionally wet.
“A very high-gloss finish can increase slipperiness when dust or moisture is present; traction-focused finishing is a safety requirement, not an aesthetic choice.”
“Sealers work only if the surface is properly prepped and the application film thickness and recoat schedule match the sealer system.”
Grind/polish progression (follow your topping’s requirements)
– Start with the correct initial grind to level and homogenize the surface.
– Progress through the specified grit sequence to reach the desired sheen.
Keep traction in mind during the “sheen” decision
Ask yourself:
– Is this stair near an entryway where wet shoes are common?
– Will cleaning products leave residue?
– Do you need a semi-gloss finish to maintain grip?
Seal/topcoat for wear and staining
Follow sealer specs for:
– Coverage rate and total film build
– Recoat windows (two thin applications typically outperform one heavy coat on high-wear edges—confirm with the sealer documentation)
Statistical anchor for safety testing (industry framing): Slip resistance standards and testing methods (commonly including pendulum-type measurements) provide a repeatable way to compare finishes, but exact target values depend on the applicable standard and site conditions. [ADD: source for slip-resistance testing method/standard used in your region]
[ADD: recommended slip-resistance target or test method you plan to use]
If your site uses a local or industry standard (e.g., a pendulum test method or a recognized coefficient measurement), list it explicitly here so the finish process isn’t “guess-and-check.”
What can go wrong (and how to avoid it)
Stair polished concrete systems usually fail for a few repeatable reasons: inadequate bond, wrong joint strategy, or rushed cure/polish. If you know the failure modes, you can prevent them during the initial install rather than paying for expensive tear-out later.
– Delamination or popping at edges
– Causes: insufficient profiling, contaminated substrate, wrong adhesive system, or poor cure conditions
– Prevention: confirm CSP/profile, clean thoroughly, repair and cure patches, and follow open time/temperature limits
– Cracking along tread corners
– Causes: rigid installation over movement, insufficient control joint strategy, inconsistent thickness, or stress concentration at corners
– Prevention: plan joints and transitions to match movement; keep consistent thickness and edge geometry
– Uneven shine
– Causes: inconsistent grinding passes, patchy topping thickness, or skipping grit steps
– Prevention: keep equipment settings consistent; maintain uniform grind timing; avoid “spot grinding” without blending
– Slippery treads
– Causes: polishing to extreme gloss without traction consideration; sealer choice or film build that increases slipperiness
– Prevention: choose a traction-friendly sheen, control sealer system choice, and validate with the testing method you’ve planned
Verdict / tip
Polished concrete on stairs can deliver a clean, premium look and hold up well when you follow a system designed for bonding, edge durability, and proper curing—especially when you manage joints and traction. Skip (or get a pro) if your stair structure is prone to flex, if you can’t control prep/curing conditions, or if you don’t have the grinding/polishing skills to maintain consistent traction across every tread and nosing.
[ADD: your site’s recommended path—DIY-friendly for overlays under X sq ft, or “best left to a contractor” for full stair runs—based on your real policy or experience.]
Quick checklist (scan before you start)
– ☐ Confirm install type: existing concrete polish vs overlay/topping
– ☐ Profile + clean substrate to manufacturer bonding requirements
– ☐ Repair cracks/spalls; allow full cure
– ☐ Mix/apply adhesive or topping exactly per spec
– ☐ Plan edges and joint strategy for stair movement
– ☐ Grind/polish to consistent progression; don’t ignore traction
– ☐ Seal with the correct coverage and cure time
FAQ
Can I install polished concrete on existing tile or wood stairs?
It depends on the bonding and preparation requirements of the overlay/topping system and adhesive. Tile and wood typically require specialized surface prep and may need mechanical fastening or primers/renders specified by the manufacturer. [ADD: source for required substrates].
How thick should the polished concrete overlay be on stairs?
Thickness varies by the topping/overlay product system and must stay within its stated minimum/maximum thickness for durability and safe tread performance. Use the overlay/topping datasheet for your specified build-up limits and any reinforcement requirements. [ADD: source for your chosen system’s thickness limits].
Will polished concrete stairs be slippery?
They can be, particularly if you polish to a very high gloss and/or select a sealer finish that reduces traction. Plan for traction using a finish approach designed for walking surfaces and validate using your local testing method. [ADD: source for slip-resistance guidance/testing method].
Do I need to add control joints on stair runs?
You may, depending on the substrate movement and the overlay system’s engineering requirements—especially where stairs cross expansion/movement joints. Follow the manufacturer’s joint guidance for the correct joint location, detailing, and treatment. [ADD: source for joint guidance].
How long should I wait before using the stairs?
Follow the overlay/adhesive and sealer cure/open-to-traffic times from the product documentation. Stairs increase early loading, so don’t compress schedules—confirm the “foot traffic ready” window for your exact materials and conditions. [ADD: source for your specific materials’ cure/open times].
Sources
– [ADD: manufacturer installation instructions for your chosen polished concrete overlay/topping and adhesive system—bonding prep, mixing ratios, thickness limits, curing times]
– [ADD: manufacturer grinding/polishing guide for the specific topping material—grit progression and required hardness/curing stage]
– [ADD: manufacturer sealer instructions for walking surfaces—coverage, cure time, and slip/traction considerations]
– [ADD: official/primary technical guidance on concrete overlay prep and surface profiling requirements]
– [ADD: ICRI technical documentation for CSP definitions and overlay bonding relevance]
– [ADD: slip-resistance standard/testing method guidance used in your region (e.g., pendulum/slip coefficient framework)]
– [ADD: ACI/industry guidance or Portland Cement Association references for concrete curing/strength gain expectations]
When you approach stair polished concrete as a bonded, engineered system—prep correctly, place material with a joint-aware plan, cure fully, then polish and seal for traction—you end up with a finish that looks premium and behaves safely under daily use. The “secret” isn’t shortcuts; it’s matching each step to the product system designed for stair wear.
Frequently Asked Questions
How do you prepare polished concrete floors before installing on stairs?
Start by cleaning the stair surface thoroughly—vacuum dust and remove grease or old adhesive so the thinset or bonding layer can grip properly. Inspect for chips, loose edges, or uneven concrete and repair them with a suitable concrete patch or leveling compound, then let it cure fully. If you’re installing polished concrete on stairs over existing surfaces, roughen any smooth coating and remove the polish/laitance as needed to improve adhesion.
What is the best method to install polished concrete tile or overlays on stair treads?
For most stair applications, use a high-quality polymer-modified thinset designed for concrete-to-substrate bonding and follow the manufacturer’s coverage requirements. Dry-lay the layout first to confirm tread and riser alignment, then back-butter tiles/segments when recommended to prevent hollow spots. Finish with a stair-safe edge treatment—like a bullnose or a properly formed nosing—because stair edges take the most wear and impact.
Which underlayment or leveling system works best for stairs with uneven polished concrete?
Choose a stair-rated cementitious leveling system or repair mortar that’s compatible with concrete and can feather edges without shrinking excessively. If the existing tread is polished and smooth, consider a mechanical bonding approach (grinding/etching) and then apply a bonding primer if the leveling system requires it. For steps with significant dips or lippage, address them early—trying to “fix it” with tile thickness later can cause unsafe tread edges and cracking.
Why do polished concrete stair installations sometimes crack or delaminate, and how can you prevent it?
Cracking and delamination often come from poor surface preparation, insufficient bonding, or movement between the stair substrate and the installation. Concrete stairs expand and contract with temperature and humidity, so use the correct mortar for the substrate and ensure proper curing time before foot traffic. Also pay attention to water management—proper sealing and grout choice helps prevent moisture from undermining adhesion over time.
How do you seal and finish polished concrete stair surfaces after installation for long-lasting traction?
After installing and allowing full cure, use a concrete sealer system appropriate for high-traffic stairs and follow the recommended number of coats and drying times. For safety, consider a satin or low-sheen finish and add traction-enhancing products if the surface becomes slippery—especially in wet entry areas. Seal both treads and risers evenly, and re-seal on the schedule recommended by the polished concrete sealer manufacturer.
📅 Last Updated: October 10, 2026 | Topic: How to install on stairs polished concrete floors? | Content verified for accuracy and freshness.
References
- Google Scholar Google Scholar
https://scholar.google.com/scholar?q=polished+concrete+stairs+installation - Google Scholar Google Scholar
https://scholar.google.com/scholar?q=polished+concrete+flooring+grinding+procedure+ICRI+guideline - Google Scholar Google Scholar
https://scholar.google.com/scholar?q=concrete+stair+slip+resistance+polished+concrete+finish - Polished concrete
https://en.wikipedia.org/wiki/Polished_concrete - Glass ceiling
https://en.wikipedia.org/wiki/Concrete_floor - Silica, Crystalline – Overview | Occupational Safety and Health Administration
https://www.osha.gov/silica - Silica and Worker Health | Silica | CDC
https://www.cdc.gov/niosh/topics/silica/ - Redirecting…
https://www.ada.gov/2010ADAstandards_index.htm - WBDG
https://www.wbdg.org/ffc/criteria/accessible-stairs - Google Scholar Google Scholar
https://scholar.google.com/scholar?q=How+to+install+on+stairs+polished+concrete+floors?