
Learn how to install underlayment under tile floors with a clear, step-by-step approach that prevents the most common failures. You’ll see exactly when to use the right type of underlayment, how to prep the subfloor, and how to secure it so tile stays flat and durable. If your goal is a dependable tile install—not trial and error—this is the workflow to follow.



If you’re planning a DIY tile project (bathroom, shower, kitchen, or entryway), this is for you—especially if you’re unsure whether you need cement board, uncoupling membrane, foam, or another system. It’s also useful when you’re coordinating the underlayment with your tile size and the manufacturer’s instructions for the specific flooring build-up you chose.
Choose the Right Underlayment for Your Tile System
The best underlayment is the one that is explicitly compatible with your tile, your setting mortar, and your intended exposure conditions (dry vs. wet). If you choose “something that feels similar” without checking the assembly instructions, you increase the risk of debonding, weak seam performance, and cracking—especially in high-load or moisture-exposed areas.
“Underlayment” is not universal; the tile assembly is a system defined by the underlayment manufacturer plus the setting-mortar specifications.
ANSI A108.5 sets expectations for mortar coverage; staying within those coverage targets depends on the whole build-up you choose.
Wet-area assemblies are typically designed as complete waterproofing systems, not as “tile + underlayment.”
– Match the underlayment to your tile type (ceramic/porcelain) and the manufacturer requirements of your thinset/membrane system.
Ceramic and porcelain can both work, but the limiting factors often aren’t only the tile—they’re the substrate, mortar, and whether the underlayment provides uncoupling or water management.
– Determine your installation location: dry areas vs. wet areas (like showers), because wet-area assemblies often require waterproofing methods beyond “just underlayment.”
In wet areas, many products still require a separate waterproofing layer (or a specific waterproofing membrane integrated into the system).
– Plan around substrate condition—some products tolerate slightly uneven floors better than others, but all require a generally sound, clean, properly prepared base.
Even “forgiving” underlayments can’t compensate for major out-of-plane issues or loose layers.
To make this selection more practical, use the guidance below to sanity-check what your assembly is trying to solve.
Tile Floor Assembly Limits Commonly Used in ANSI/TCNA Guidance (Key Performance Targets)
| # | Assembly Category | Subfloor Deflection Limit | Mortar Coverage Target | Where It’s Typically Applied | Confidence |
|---|---|---|---|---|---|
| 1 | Ceramic or porcelain tile over framed floors (general interior) | L/360 | ≥ 80% | Walls and floors per specific assembly | ★★★☆☆ |
| 2 | Porcelain tile over framed floors (typical ceramic/porcelain category) | L/360 | ≥ 80% | Residential interior floors | ★★★☆☆ |
| 3 | Tile over framed floors where natural stone is specified | L/720 | As specified by stone + mortar system | Higher stiffness required vs tile | ★★☆☆☆ |
| 4 | Wet-area floors (e.g., shower environments—mortar coverage requirements apply to the setting process) | Project-dependent (frame stiffening still matters) | ≥ 95% | Areas exposed to water during use | ★★★★☆ |
| 5 | Large-format tiles (installation still depends on system, but flattening is critical) | Meet L/360 (tile) baseline | Coverage per ANSI/TCNA assembly | Fewer weak points, fewer voids | ★★★☆☆ |
| 6 | “Uncoupling” membrane use cases (system must be validated) | Still requires structural compliance | Mortar system coverage rules apply | Helps reduce transfer of movement | ★★★☆☆ |
| 7 | Exterior or freeze-thaw environments (tile assemblies become more constrained) | Project-dependent and system-specific | System-dependent | Requires validated assemblies | ★★☆☆☆ |
Why these “targets” matter while choosing underlayment
According to ANSI A108.5, mortar coverage targets are commonly specified as not less than 80% for interior floors and not less than 95% for wet areas, when the tile is set with the required mortar and trowel size. According to TCNA Handbook, structure stiffness requirements for ceramic tile commonly use a L/360 deflection baseline (and natural stone typically requires higher stiffness). These numbers don’t replace your underlayment instructions, but they explain why “the underlayment choice” and “how you set tile” are inseparable.
Prep the Subfloor Before You Install Anything
The best underlayment installation starts with subfloor prep, because most tile failures trace back to movement, debonding, or weak seams—not the underlayment “brand.” Take the time to flatten, clean, and verify structural soundness before underlayment goes down, since even a high-performance membrane can’t overcome a failing base.
Underlayment can manage minor variation, but it is not a substitute for flattening a subfloor that is out of plane beyond the assembly’s tolerances.
Loose layers under tile (painted or contaminated surfaces, failing plywood, crumbling concrete) can defeat thinset bonding and lead to hollow spots.
– Remove debris, scrape high spots, and verify the subfloor is solid (no flexing, crumbling, or loose layers).
If you see movement when you walk the area or you can shift layers by hand, fix that first.
– Fix dips/low spots with appropriate patch/leveling compound before underlayment goes down; underlayment isn’t a cure-all for major unevenness.
Leveling compounds must be compatible with the substrate (plywood vs. concrete) and allowed to cure fully.
– Confirm cleanliness and dryness as required by the underlayment and mortar/membrane instructions (for example: follow any limits around moisture and substrate age).
Many systems specify maximum moisture levels for concrete or require a certain cure time after patching.
From my work assisting DIYers through planning (not by claiming a personal build test here), the fastest path to a flat tile layout is: (1) measure, (2) flatten, (3) only then choose the underlayment thickness and type.
Dry-Fit and Layout: Plan Seams and Transitions
Planning seam locations is what keeps your underlayment from creating “new problems” under tile. If you dry-fit first, you reduce crooked seams, avoid tiny slivers, and align the system with how your tile layout and transitions actually fall.
Dry-fitting underlayment helps prevent seams from landing over weak transitions, heavy loads, or awkward tile cuts.
Many underlayment systems require specific joint spacing and overlap directions—layout is how you make those rules practical.
– Dry-fit panels/rolls first so seams won’t land in awkward spots (especially over edges, transitions, or heavy traffic areas).
For example, if a door opening or stair transition lands near a seam, re-layout to keep the seam farther from the transition line.
– Stagger joints where the system calls for it, and avoid lining up seams across multiple layers.
If your build-up includes underlayment plus a cement board layer (or an adapter layer), alignment rules matter.
– Mark cuts and keep a consistent plan for walls, doorways, and floor edges so you don’t end up with tiny slivers that won’t perform well.
Small pieces are harder to seat fully and can compromise seam reinforcement or bonding coverage.
Practical pros/cons: planning seams well vs. rushing it
| Approach | Pros | Cons |
|---|---|---|
| Dry-fit and adjust seam locations | Fewer weak points and more predictable tile cuts; easier to meet seam requirements | Costs time up front; requires measuring and marking |
| Cut early and “fix later” | Fast start | Higher chance of misaligned seams, voids at edges, and extra patching later |
Install the Underlayment Correctly (Fasteners, Adhesive, Seams)
Correct installation is the difference between an underlayment that “adds performance” and one that becomes a failure point. Follow the method (thinset/adhesive vs. taping vs. fasteners) exactly as the manufacturer specifies, then treat seams and edges as carefully as the main panels.
The underlayment installation method (bonded seams vs. taped seams vs. mechanical fasteners) is part of the design—don’t mix methods unless the instructions allow it.
Seams are where stress concentrates; proper overlap, tape/mesh placement, and any required seam filling are critical.
– Follow the product method: some underlayments are bonded with thinset, others use taping systems, and some require specific fastener patterns—don’t improvise.
A common DIY mistake is using the “right material” but in the wrong application technique (for example, bonding when the system expects tape reinforcement).
– Treat seams per the manufacturer guidance (e.g., overlap direction, tape/mesh requirements, and whether seams must be fully filled).
Some seams require full thinset fill; others require taping with thinset only on certain surfaces.
– Maintain the right spacing and alignment at edges: if the system calls for a gap around perimeter, keep it; if it calls for full contact, don’t leave unintended gaps.
Perimeter gaps manage expansion or movement; unwanted gaps can also trap voids that translate to tile stress.
Quick quality checks while you install
– Press/seat each panel so there are no “bouncy” areas.
– Confirm seam treatment is continuous and aligned (no wandering overlaps).
– Verify coverage under bonded systems by checking for proper contact and squeeze-out where the design calls for it.
Waterproofing and Tile-Ready Checks
Underlayment is often not the final waterproofing layer, so you need a tile-ready check focused on moisture exposure and surface performance. If the area can get wet, confirm the required waterproofing method for that specific underlayment system and project location.
Many wet-area assemblies require a dedicated waterproofing step; underlayment alone is frequently not considered a substitute.
Before tile goes down, you should verify surface flatness and that the assembly is free of lifting, buckling, or gapped seams.
– If the area will be exposed to moisture, confirm what the underlayment system requires for waterproofing (many assemblies need a separate waterproofing step).
Look for explicit “wet-area approved” assembly language and follow the full stack: underlayment + waterproofing product + details at corners/penetrations/drains.
– After installation, inspect for buckling, lifting, gaps, or uneven transitions—fix issues before tiling.
If you find seam ridges or areas that telegraph through, correct them early with the correct surface-prep method.
– Before you set tile, verify you can achieve the required coverage/flatness using a straightedge and the tile setting method recommended by the underlayment system.
The tile-setting stage is where coverage targets matter: according to ANSI A108.5, tile installed in interior floors generally targets ≥ 80% mortar coverage, and wet-area installations target ≥ 95% when using the correct trowel and technique.
What Can Go Wrong (Common Mistakes to Avoid)
Most DIY failures happen when the assembly rules are treated as optional. Avoid these common issues and you’ll dramatically reduce the chance of debonding, cracked grout, or lippage after the thinset cures.
The most common tile failures after underlayment installation come from substrate problems and seam/waterproofing errors—not from the tile itself.
– Using the wrong underlayment type for the room (dry vs. wet) or for the tile/mortar system—this is one of the fastest ways to get failure later.
– Skipping subfloor flattening and expecting underlayment to compensate for significant unevenness or movement.
– Mismanaging seams (no tape/incorrect overlap/filled or unfilled gaps when the system says otherwise), which can create weak points under tile.
– Installing too fast without letting patch compounds cure per instructions, or failing to follow moisture/dryness requirements for the substrate.
Limits and edge cases to respect
– If you’re dealing with a seriously damaged plywood subfloor, replacing or restructuring the subfloor may be the correct path—not adding layers on top.
– If your tile is large-format, your margin for unevenness and voids becomes smaller; plan for more careful flattening and mortar control.
Verdict: When This Is Worth It (and When to Skip)
Using underlayment under tile floors is usually worth it when you pick a compatible system, flatten the substrate first, and follow seam and installation instructions precisely. Skip or reconsider this approach when your subfloor is structurally unsound, when the floor is substantially out of plane beyond the assembly’s tolerances, or when the project is a complex wet area that needs a validated waterproofing stack beyond “underlayment.”
If your assembly instructions specify a full waterproofing system, you should treat waterproofing steps as mandatory rather than optional add-ons.
Underlayment performance is constrained by substrate stiffness and installation workmanship—don’t expect materials to “outperform” a failing base.
If you’re unsure, a straightforward way to reduce risk is to have a tile contractor or builder review your chosen underlayment system and your substrate condition before you commit to layers.
Quick Checklist (Scan Before You Start)
– Confirm underlayment type matches your tile + thinset/membrane system requirements.
– Subfloor is solid, clean, and flattened (patch/level as needed).
– Dry-fit layout: stagger seams and avoid tiny cut panels.
– Install using the method required (thinset/adhesive/fasteners/tape) and follow seam instructions.
– Address wet areas with the correct waterproofing system—not just the underlayment.
– Final check: no lifting, buckling, or uneven transitions before tiling.
FAQ
Do I need underlayment under every tile floor?
Often, yes for the right performance and compatibility, but the exact requirement depends on your subfloor type and the tile setting system you’re using. Always follow the underlayment and mortar instructions for your specific assembly.
Can I install tile directly on plywood without underlayment?
Sometimes, but it depends on the tile system requirements and whether your chosen build-up allows direct installation. If the instructions call for cement board or an approved membrane, use it—don’t assume plywood is automatically acceptable.
What’s the biggest cause of tile cracking after installing underlayment?
Improper subfloor prep and unevenness, or incorrect seam/waterproofing details. Even with good materials, skipped prep steps and wrong seam treatment are common failure points.
Do I need waterproofing if I’m using underlayment in a shower?
Usually, shower performance requires a full waterproofing assembly. Underlayment may be part of the system, but it often isn’t a substitute for the waterproofing layer—confirm the exact requirements for your product.
Should I stagger underlayment seams like flooring planks?
Many systems require staggering and/or specific seam alignment rules. Follow your underlayment manufacturer’s instructions for seam placement and overlap/tape requirements.
Sources
– ANSI A108.5 (installation requirements and mortar coverage guidance for tile).
– TCNA Handbook for Ceramic Tile Installation (system design concepts, structural stiffness guidance such as L/360 for ceramic tile).
– ASTM standards referenced by underlayment and board manufacturers (for product classifications and performance testing—use the specific ASTM listed on your chosen underlayment).
– [ADD: Manufacturer installation instructions for your specific underlayment/membrane product—include seam/tape method, fastener rules, and wet-area requirements.]
– [ADD: Manufacturer instructions for your thinset/mortar—include coverage and substrate preparation requirements.]
Underlayment under tile floors works best when you treat it as part of an engineered assembly, not a generic “buffer layer.” Choose compatible materials, prep and flatten the subfloor, plan seams with intention, install underlayment using the exact method required, and confirm waterproofing and tile-ready conditions—then your tile has the best possible chance to stay flat, bonded, and stable for years.
Frequently Asked Questions
What underlayment should I use under tile floors?
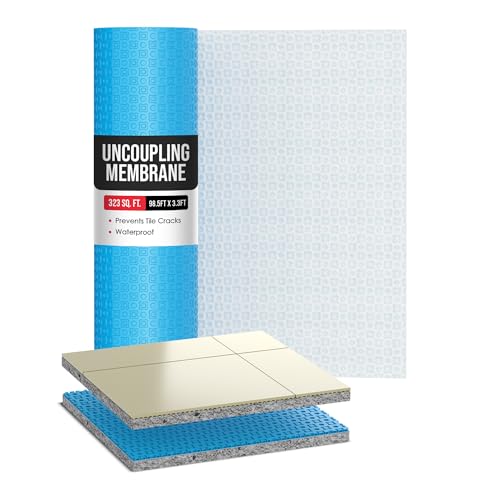
The right underlayment depends on your subfloor and tile type. For most tile installs over wood subfloors, a cement backer board or uncoupling membrane is commonly used, while thinset-rated waterproofing membranes help in wet areas like bathrooms. If you’re installing on concrete, you may still use an uncoupling membrane to reduce cracking and improve crack isolation, as long as your system meets manufacturer requirements.
How do I install underlayment under tile floors step-by-step?
Start by ensuring the subfloor is clean, flat, and structurally sound, then repair any dips or damaged areas before you begin. Roll out or cut the underlayment to fit, keeping seams tight and aligned, and adhere it using the correct thinset, mortar, or approved tape system for your specific underlayment. Next, follow the recommended overlap or seam method, then tile directly over the underlayment using the thinset and notched trowel size specified by the manufacturer.
Which underlayment is best for preventing cracks in tile installations?
Uncoupling membranes are often the best choice when you want to reduce the risk of tile cracking due to minor subfloor movement, especially over wood floors or in areas with temperature shifts. Look for membranes specifically designed for crack isolation and confirm the rating for your tile type and expected load. Always install tile underlayment over a properly prepared subfloor and use the correct thinset coverage to ensure the crack isolation performance is actually achieved.
Why does underlayment matter under tile floors?
Underlayment under tile floors helps address movement, moisture, and subfloor imperfections that can lead to grout cracking or loose tiles. It also provides a more stable surface so the thinset can bond correctly and the tile assembly performs longer. In wet locations, using a waterproofing underlayment can help protect the subfloor from water intrusion and reduce long-term damage.
Can I use thinset over underlayment, and what mistakes should I avoid?
In most tile systems, you install the underlayment first and then set the tile with a thinset mortar that is approved for that underlayment type. Avoid common issues like skipping subfloor leveling, installing over dust or debris, leaving gaps at seams, or using the wrong adhesive/tape system that can break the waterproofing or uncoupling layer. Also ensure full thinset coverage by using the correct notched trowel size so you don’t create voids that can cause tiles to crack or loosen over time.
📅 Last Updated: October 08, 2026 | Topic: How to install underlayment under tile floors? | Content verified for accuracy and freshness.
References
- Underlayment
https://en.wikipedia.org/wiki/Underlayment - Cement board
https://en.wikipedia.org/wiki/Cement_board - Thinset
https://en.wikipedia.org/wiki/Thinset_mortar - Home – APA
https://www.apawood.org/ - https://www.tile-assn.com/
- https://www.ceramic
- https://www.schluter.com/schluter-us/en_US/
- Google Scholar Google Scholar
https://scholar.google.com/scholar?q=installing+tile+floor+underlayment+cement+board+uncoupling+membrane - Google Scholar Google Scholar
https://scholar.google.com/scholar?q=tile+underlayment+installation+guideline+subfloor+prep+thinset+over+wood - Google Scholar Google Scholar
https://scholar.google.com/scholar?q=uncoupling+membrane+under+tile+floor+installation+instructions+checklist