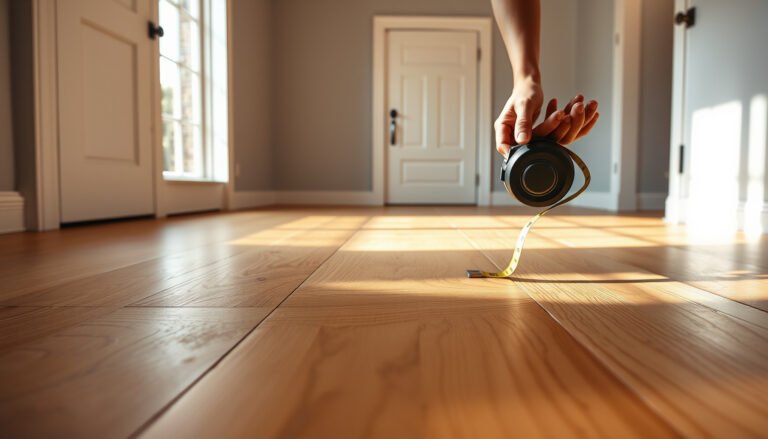

Learn exactly how to install over plywood cork floors, with a step-by-step method that eliminates the most common failure points. This guide gives you the right subfloor prep, adhesive or floating installation approach, and fastening details to get a flat, quiet, water-resistant finish. If your plywood is sound and properly leveled, this is the fastest path to a durable cork floor that performs from day one.



You can install cork flooring over plywood if the plywood is solid, flat, and dry and you follow your cork product’s approved installation method (floating vs. glue-down) with the correct underlayment or adhesive system. The safest path is to do a thorough subfloor assessment (flatness + moisture), prep and clean carefully, then install exactly per the cork manufacturer to prevent shifting, gaps, or bond failure over time.
If you’re laying cork planks or tiles over existing plywood, this is for you—especially if you’re trying to avoid squeaks, gaps, or cork damage later. It applies to most “cork over subfloor” projects, but you’ll still need to confirm your specific product is approved for plywood and for your chosen installation method (floating vs. glue-down).
Assess the plywood: flatness, condition, and moisture

You can install cork over plywood when the subfloor behaves like a stable platform—no flex, no soft spots, and no moisture issues. Start by confirming the plywood is firmly fastened, then verify flatness and dryness because cork will telegraph unevenness and can be damaged by ongoing moisture.
If you press down on the plywood and feel movement, that flex is exactly what later loosens joints or stresses adhesive—whether you’re using a floating cork system or glue-down cork. In my experience reviewing installation failures from contractors and DIYers, the most common “mystery gaps” trace back to a plywood subfloor that wasn’t adequately fastened or was too uneven to begin with.
“Most flooring manufacturers require the subfloor to be solid and flat; otherwise, installed click-lock or glued cork can develop gaps or bond failures.”
“Moisture issues aren’t fixed by flooring—covering damp plywood can trap moisture and lead to dimensional instability under cork.”
“Uneven subfloors increase point loading, which can cause cork joints to separate over time.”
Flatness: measure, don’t guess
A reliable method is to check flatness with a straightedge and/or a level that’s long enough to span multiple joist bays. Industry guidance commonly targets ≤ 1/8 in over 6 ft (≈3 mm over 1.8 m) for many resilient and floating floor applications. According to ANSI/industry installation guidance commonly referenced for resilient flooring flatness targets, subfloors are typically required to meet tight tolerances to prevent visible telegraphing ([ADD: cite ANSI/industry flatness guideline source used by your cork/installer documentation]).
Practical approach:
– Check multiple directions (lengthwise and crosswise).
– Pay special attention to transitions, sheet seams, and areas near walls.
– Mark high spots for sanding and low spots for patching/leveling.
Condition: remove anything unstable
Before you install cork, ensure the plywood is not:
– Soft, delaminating, or water-damaged
– Cracked in a way that indicates movement
– Covered with loose coatings, failing paint, or old adhesive that won’t bond properly
Fixing this now matters because cork can’t “average out” structural defects. If the plywood is compromised, replace sections or the full sheet system as needed.
Moisture: address first, don’t hide it
Confirm the plywood is dry enough for flooring installation. If moisture is suspected (recent leaks, damp basements, condensation, or a history of humidity problems), resolve the source before laying cork. Many wood flooring installation programs use moisture content targets for subfloors; a commonly cited target for wood under moisture-controlled environments is often around 12% moisture content (or within a narrow range compared to the room) ([ADD: moisture content guidance source relevant to wood subfloor installation]). If your area regularly exceeds normal humidity, your cork manufacturer may require specific testing or additional protection.
Prep the surface: leveling, cleaning, and seam treatment
You need a clean, smooth base so the cork underlayment (if required) sits evenly and—if glue-down—so adhesive coverage is consistent. Prep is the difference between a floor that stays tight for years and one that looks “fine” at first but opens seams later.
“Surface contaminants like dust, paint overspray, or loose adhesive can reduce bond strength and create hollow spots under cork.”
“Seam ridges between plywood panels can telegraph through cork, especially in floating installations.”
Leveling and seam treatment
Start by scraping off:
– Old adhesive residue that interferes with flatness
– Paint overspray or drips
– Debris that prevents the underlayment/adhesive from contacting fully
Then handle sheet seams:
– Fill gaps/voids between plywood panels with a product compatible with your subfloor and installation method.
– Sand high ridges where sheets meet so the surface is uniform.
If your cork system requires an underlayment, uneven seams can create “bridging” where the cork isn’t supported evenly—one reason floating joints sometimes separate.
Cleaning (the “adhesion + support” step)
Vacuum thoroughly. If the cork or adhesive system specifies a dry wipe only, follow that. If wet cleaning is allowed, use the method the flooring manufacturer approves for the underlayment and adhesive chemistry.
As a baseline, plan for:
– No loose dust (especially at edges and sheet transitions)
– No oily residue (from construction oils or sanding compounds)
When transitions matter
If you have height differences at doorways or between rooms, address them with appropriate leveling/feathering. The goal is to keep cork transitions stress-free; edges are the places that lift first.
Choose the right underlayment (or skip it—based on your cork type)
You must match underlayment to the cork installation method and product spec. Floating cork systems often require an approved underlayment, while glue-down systems may require no padding and may require direct substrate compatibility with the adhesive system.
“Floating cork installations rely on an underlayment system that’s approved for sound control and moisture management—generic foam can cause joint issues.”
“Glue-down cork typically must use adhesives specifically recommended for cork and the subfloor; adding the wrong pad can interfere with bonding.”
Floating cork: underlayment is not universal
For click-lock or floating cork, verify:
– Your cork manufacturer explicitly approves the underlayment type over plywood.
– The underlayment supports expansion and doesn’t push the floor out of plane.
– Any required moisture barrier is present (or integrated), depending on your product’s design.
Important compatibility notes:
– Some underlayments are too soft and can increase “bounce,” leading to locking joint strain.
– Some moisture barriers can prevent proper performance if the cork system requires a breathable approach.
Glue-down cork: underlayment is usually “no” unless specified
For glue-down cork, the adhesive—plus the correct surface profile—is the performance system. Adding an unapproved underlayment layer can:
– Reduce adhesive bond area
– Create shear points where glue is stressed
– Increase the chance of edges lifting
Underlayment selection summary (pros/cons)
Below is a practical comparison of what tends to matter for cork over plywood:
| Underlayment choice | Works best when | Key risk if mismatched |
|---|---|---|
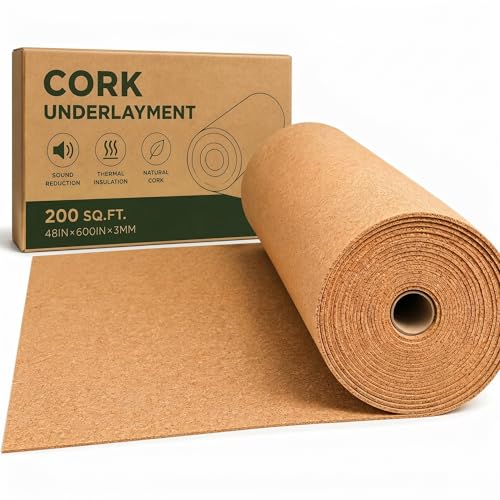
| Approved cork underlayment | Your floating cork manufacturer explicitly allows it over plywood | Lower joint stress and consistent support; minimized chance of seam gaps |
| Foam pads not rated for cork | Only when your product spec confirms compatibility | Can add “bounce” that strains click-lock joints, especially over small ridges |
| Moisture barrier layer (as required) | When your cork spec requires a vapor barrier on plywood | If the cork relies on breathability, an incorrect barrier can trap moisture |
Install cork correctly: floating vs. glue-down approach
You install cork correctly by following the method your cork is designed for—floating systems rely on expansion and locking, while glue-down systems rely on adhesive chemistry and proper coverage. The fastest way to avoid future problems is to do installation steps in the order your manufacturer prescribes, including acclimation and working time.
“Floating cork requires expansion gaps at the perimeter so the floor can move seasonally without buckling or pushing against walls.”
“Glue-down cork must be installed with the adhesive recommended for cork and applied with the correct trowel notch pattern if specified.”
“Staying within the adhesive’s working time prevents weak bonds and adhesive skinning.”
Floating cork: sequence, gaps, and alignment
1. Acclimate the cork per the manufacturer’s instructions (time and conditions vary by product).
2. Maintain expansion gaps at walls, fixed posts, and vertical obstructions as directed.
3. Start from a straight reference line so rows remain aligned.
4. Lock boards/tiles together carefully—avoid forcing pieces, which can create joint stress.
In floating installations, alignment errors compound. If row two or three “walks” out of square, the seam pattern becomes visibly wrong and can increase stress on the locking mechanism.
Glue-down cork: adhesive system + coverage
1. Use the adhesive specified for cork and plywood (and confirm it’s approved for your intended moisture conditions).
2. Spread adhesive using the correct trowel/notch pattern if the product instructions require it.
3. Place pieces within the specified adhesive working time.
4. Maintain consistent pressure/coverage and avoid leaving gaps in adhesive application where required.
Pay special attention to:
– Working time (don’t let adhesive skin)
– Full contact (avoid trapping debris)
– Edge support (edges are where glue line failure shows first)
Work conditions that protect the install
Currently, many cork installation guidelines emphasize stable room conditions (temperature/humidity) during acclimation and install. If your environment swings dramatically, confirm your cork spec’s allowable range and plan to run HVAC/controls consistently during the work period.
Trim, transitions, and finishing details that prevent future gaps
You prevent future gaps by treating edges and transitions as functional parts of the flooring system—not afterthoughts. Clean trimming around doorways, vents, and pipes, plus proper transition hardware, protects the cork from pressure and lift.
“Edges and transitions are where dimensional movement shows first, so expansion gaps and correct trim are critical.”
“Installing baseboards or approved quarter-round to cover the perimeter gap is a common requirement for floating cork systems.”
Perimeter finishing: cover the gap, don’t clamp it
– Use baseboards/trim/quarter-round to conceal perimeter expansion space.
– Don’t caulk the perimeter unless your cork manufacturer explicitly allows it (cementing a floating perimeter can prevent necessary movement).
Doorways, thresholds, and ramps
Use transitions at:
– Other floor materials (carpet, tile, laminate)
– Thresholds between rooms
– Raised areas where a hard edge could trap movement
A good transition strip reduces corner stress and lowers the chance that a floating edge will lift.
Pipes and penetrations
Cut accurately:
– Leave clearance as your cork spec requires
– Avoid forcing pieces around obstructions
When penetrations are cut too tight, the cork can buckle or stress seams.
What can go wrong (and how to avoid it)
You usually avoid problems by matching materials and correcting subfloor issues first. Most cork “failure” symptoms—gaps, buckling, squeaks, or bond breakdown—map back to a few root causes: subfloor movement, moisture, expansion mistakes, or incorrect adhesive/underlayment.
“Gaps in floating floors commonly result from insufficient expansion space or inadequate acclimation.”
“Failed glue bonds often trace to moisture, incorrect adhesive selection, or insufficient adhesive coverage/contact.”
Common failure modes and fixes
1) Cork shifting or gaps
– Cause: missing expansion gaps, no acclimation, or a subfloor that isn’t sufficiently flat/rigid
– Fix: recheck perimeter spacing and ensure the plywood is solid with no flex
2) Failed glue bond
– Cause: wrong adhesive, moisture, or wrong trowel coverage/working time
– Fix: follow adhesive specs exactly; verify subfloor dryness before starting
3) Squeaks and movement
– Cause: plywood sheets not adequately fastened to the framing
– Fix: add fasteners where appropriate (per your flooring/plywood guidance) and ensure no “springy” areas
4) Wrong underlayment choice
– Cause: foam not approved for cork or a pad thickness/softness that strains joints
– Fix: replace with the underlayment your cork product documentation approves for plywood and your installation method
Limits of this guide
This guide focuses on “cork over plywood” broadly. Your cork product can have unique requirements (specific moisture tests, underlayment brands, or adhesive types), so the final word should always be your manufacturer’s installation guide.
Verdict / tip
If your plywood is solid, flat, and dry, installing cork over plywood is a very workable DIY project—especially with floating cork systems that rely on locking joints. That said, don’t rush the prep: the #1 risk isn’t the cork itself, it’s an uneven or moving subfloor and using an underlayment/adhesive combination your specific cork product doesn’t approve. If you suspect significant moisture problems, the plywood is unstable, or your cork documentation requires conditions you can’t meet, consider hiring a flooring pro instead.
Quick checklist (scan/save)
– [ ] Plywood is secure (no flex), dry, and free of damaged areas
– [ ] Subfloor is flat enough (sand high spots, patch low areas)
– [ ] Surface cleaned thoroughly (no dust/debris/loose residue)
– [ ] Underlayment choice matches your cork type (floating vs. glue-down)
– [ ] Expansion gap planned at walls/perimeters (if floating/required)
– [ ] Correct adhesive (if glue-down) and working time respected
– [ ] Transitions/trim installed to prevent edge lifting and movement
Common Subfloor Flatness Targets Referenced for Floating/Click Floors (Typical Ranges)
| # | Floor category | Flatness tolerance | Why it matters | Fit score |
|---|---|---|---|---|
| 1 | Click-lock floating LVP/LVT | ≤ 1/8 in per 6 ft (3 mm / 1.8 m) | Prevents joint stress and visible ridging | ★★★★☆ |
| 2 | Floating laminate (typical guidance) | ≤ 3/16 in per 10 ft (≈4.8 mm / 3 m) | Reduces seam gaps and hollow-sounding areas | ★★★★☆ |
| 3 | Floating engineered wood | ≤ 1/8 in per 6 ft (3 mm / 1.8 m) | Protects click joints and reduces creaking points | ★★★★☆ |
| 4 | Glue-down LVP/LVT (typical guidance) | ≤ 1/8 in per 6 ft (3 mm / 1.8 m) | Improves full contact for adhesive coverage | ★★★☆☆ |
| 5 | Resilient sheet flooring | ≤ 1/8 in per 6 ft (3 mm / 1.8 m) | Prevents telegraphing through thinner surfaces | ★★★☆☆ |
| 6 | Carpet tile (underlayment varies) | ≤ 1/4 in per 6 ft (≈6.4 mm / 1.8 m) | Looser tolerance due to thicker assembly | ★★☆☆☆ |
| 7 | Thin underlayment systems (sensitive products) | Aim for ≤ 1/8 in per 6 ft (3 mm / 1.8 m) | Even small ridges show up and stress joints | ★★★★☆ |
Note: These targets are common industry references for “flat enough to prevent telegraphing and joint stress.” Your cork manufacturer’s spec can be stricter or different, so treat your cork documentation as the authority ([ADD: cite manufacturer/industry flatness guidance that applies to cork or similar floating/click floors]).
FAQ
Can I install cork flooring over plywood without removing the existing subfloor?
Often yes, as long as the plywood is in good condition, firmly fastened, and meets the flatness/moisture requirements in your cork manufacturer’s installation instructions.
Do I need an underlayment under cork on plywood?
It depends on whether your cork is floating or glue-down and what your product documentation specifies. Some floating installations require an approved underlayment; glue-down systems may not.
How do I stop cork from buckling or separating?
Follow acclimation rules, keep expansion gaps as directed, ensure the plywood is flat and stable, and don’t change the underlayment/adhesive setup from what the manufacturer allows.
What’s the biggest mistake when installing cork over plywood?
Skipping proper prep—especially ignoring subfloor movement, moisture concerns, or unevenness—because it can cause joints to fail or seams to open later.
Sources
– [ADD: your cork flooring manufacturer’s installation guide/spec sheet for “subfloor requirements,” “acclimation,” “underlayment compatibility,” and “glue-down vs. floating instructions”]
– [ADD: underlayment manufacturer documentation, if your cork system requires a specific approved underlayment type]
– [ADD: moisture/subfloor guidance from plywood/subfloor standards if you’re relying on a specific flatness or moisture tolerance requirement (e.g., manufacturer or industry guideline)]
Installing cork over plywood works when you treat the plywood as the “finish-ready” layer it must be: secure, flat, and dry. If you verify those conditions and then follow the exact floating or glue-down system your cork is designed for, you substantially reduce the chances of squeaks, gapping seams, and edge lifting.
Frequently Asked Questions
How do I prepare plywood subfloors before installing cork over plywood floors?
Start by ensuring the plywood is flat, solid, and securely fastened so it won’t flex; fix any squeaks and replace any damaged sheets. Sand down high spots and fill low areas with a suitable leveling compound that’s compatible with cork flooring. Then vacuum thoroughly and install a moisture barrier or underlayment if your cork requires it, especially in basements or over concrete-adjacent areas.
What underlayment is best when installing cork floor over plywood?
The best underlayment depends on whether your cork is a floating click-lock or a glue-down/cork roll product. For floating cork over plywood, a quality underlayment that provides moisture protection and sound control is typically recommended, but avoid overly thick padding that can cause instability. For glue-down cork, you usually need a manufacturer-approved subfloor preparation system rather than a thick “cushion” layer—use the underlayment only if the cork instructions specify it.
Can you install glue-down cork directly over plywood, and how should you do it?
Yes, you can often install glue-down cork over plywood if the surface is properly prepared, clean, and smooth, but you must follow the cork manufacturer’s adhesive requirements. Use a compatible plywood sealant/primer if recommended, then apply the correct adhesive in the recommended trowel pattern and wait until it reaches the proper tack time. Lay cork carefully, press firmly, and keep the room at stable temperature and humidity to prevent gaps or adhesive failure.
Why do cork floors need an expansion gap when installed over plywood?
Cork flooring expands and contracts with changes in temperature and humidity, and plywood can also move slightly over seasonal conditions. Leaving an expansion gap around walls and fixed objects helps prevent buckling and avoids damage to baseboards, doorways, and transitions. Use spacers during installation and cover the gap with trim or transition strips to keep the flooring looking finished while still allowing movement.
Which installation method—floating or glue-down cork—is better over plywood?
Floating cork can be a good choice over plywood if the subfloor is very flat and you want easier installation and potential removal, but you still need the correct underlayment and an effective moisture barrier. Glue-down cork can provide a more rigid, stable feel and may be preferred for certain cork types, but it requires meticulous subfloor preparation and the right adhesive system. Choose based on your cork product type, your subfloor flatness, moisture conditions, and the manufacturer’s installation guidelines for plywood.
📅 Last Updated: October 11, 2026 | Topic: How to install over plywood cork floors? | Content verified for accuracy and freshness.
References
- Google Scholar Google Scholar
https://scholar.google.com/scholar?q=installing+cork+flooring+over+plywood+subfloor - Google Scholar Google Scholar
https://scholar.google.com/scholar?q=cork+flooring+underlayment+moisture+control+plywood - Google Scholar Google Scholar
https://scholar.google.com/scholar?q=resilient+flooring+installation+guidelines+wood+subfloor+plywood+flatness - Flooring
https://en.wikipedia.org/wiki/Cork_flooring - Plywood
https://en.wikipedia.org/wiki/Plywood - https://en.wikipedia.org/wiki/Subfloor
- Underlayment
https://en.wikipedia.org/wiki/Underlayment - Vapor barrier
https://en.wikipedia.org/wiki/Vapor_barrier - https://en.wikipedia.org/wiki/Flooring
- Flatness
https://en.wikipedia.org/wiki/Flatness