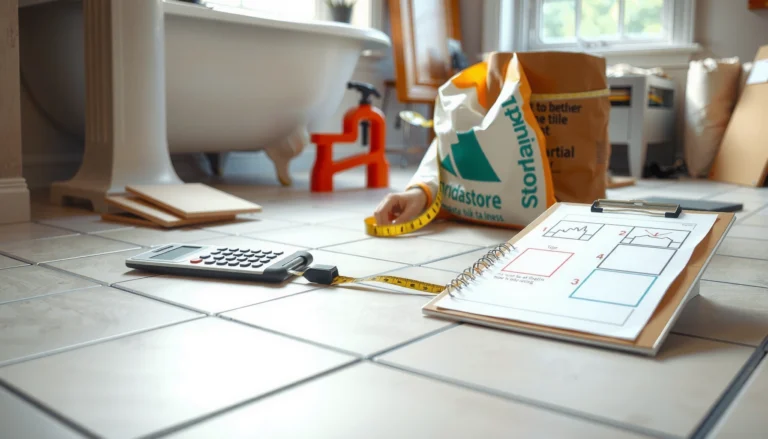
Install laminate floors in a bathroom step by step with a clear, practical process that works when you control moisture and use the right underlayment. This guide tells you exactly what to prepare, how to handle expansion gaps and transitions, and how to protect the seams so water can’t creep underneath. Follow these instructions and you’ll know whether your bathroom laminate install is solid before the first board goes down.




If—and only if—your laminate is explicitly approved for bathroom installation and you manage moisture correctly, you can usually install it successfully as a DIY floating floor. The real differentiator is not the word “water-resistant” on the box; it’s the exact bathroom-approval language, the required underlayment/vapor barrier, correct expansion gaps, and sealing only where your manufacturer specifies.
Bathrooms create repeat moisture cycles (even when there’s no puddling), so the installation details determine whether seams stay tight or swell and separate. As of 2026, laminate performance in wet rooms still hinges on a simple rule: keep water out of the seams and prevent trapped moisture under the floor.
Install laminate floors in a bathroom only if your specific laminate is rated water-resistant/waterproof and the manufacturer allows bathroom installations. Then focus on moisture control: correct underlayment/vapor barrier, proper expansion gaps, and sealing where the flooring meets wet areas and transitions. This guide walks you through the practical steps and the common failure points.
If your bathroom has frequent splashes (sink/shower) but no ongoing standing-water issues, water-resistant laminate can work well when installed correctly. If you can’t control moisture (poor ventilation, chronic leaks, or flooring in direct shower wet areas), you’ll want to reassess.
Is laminate flooring OK in a bathroom?

Laminate flooring is OK in a bathroom only when your exact product is approved for bathroom/splash-zone use and installed with the moisture protection system the manufacturer requires. If the manufacturer limits placement (for example, “not for direct wet-area exposure”), you must respect that boundary.
What “approved for bathrooms” actually means
Before you start cutting, verify the laminate’s documentation for bathroom installation eligibility and warranty coverage. “Water-resistant” marketing alone is not enough—bathrooms are a higher-risk environment than typical kitchens or hallways because moisture can migrate into seams over time.
According to the National Wood Flooring Association (NWFA), floating floors still rely on perimeter movement space, so expansion gaps are required even in high-moisture rooms (2020). NWFA installation guidance (edition year varies by publication)
According to ASTM E1745, vapor retarders are classified by permeance (for example, Class I is ≤ 0.1 perm), which is why the right underlayment/vapor system matters under laminate (2017). ASTM E1745
Moisture basics you can’t skip
Even the best laminate will fail if the room stays damp or the subfloor absorbs moisture repeatedly. Focus on ventilation and leak prevention first, then install the floor as specified.
– Confirm your bathroom has a working exhaust fan and appropriate airflow for shower/sink use.
– Fix leaks immediately (under-sink supply lines, toilet wax ring issues, shower valve seepage).
– Plan your splash zones: a “dry bathroom” still gets wet on tile edges and floor transitions—design around those realities.
Subfloor stability: the hidden driver of joint failure
Laminate floats, but it doesn’t tolerate an unstable base. Large dips create rocking and joint stress; over time, locks can open and allow moisture to work into the core.
– Verify the subfloor is structurally sound (no bounce).
– Verify flatness using a straightedge.
– Address large unevenness before installation, not with thick underlayment.
According to NWFA, subfloors for wood flooring installations should meet stringent flatness requirements (often cited as within 3/16 in over 10 ft) to reduce joint failure risk (2020). NWFA installation guidance
Plan the layout, acclimate, and protect critical spaces
Planning is how you prevent bathroom-specific mistakes before the first plank goes down. This is where you decide plank direction, confirm expansion gaps, and protect edges around fixtures and wet transitions.
Layout: reduce awkward end cuts and weak seams
A bathroom layout often forces short runs, which increases seams and creates more opportunities for water intrusion at joints. Start with a plan that keeps end joints controlled.
– Measure the room and sketch plank runs with an emphasis on avoiding narrow slivers at the ends.
– Dry-fit a row to confirm your starting line is straight (a crooked start creates a wave).
– Stagger end joints consistently to avoid creating a repeating weak seam pattern.
According to typical laminate floating-floor installation practice, maintaining a consistent starting line and staggering end joints helps reduce stress concentration at repeated seams (manufacturer installation manuals commonly specify this).
Acclimate exactly as your manufacturer instructs
Acclimation controls dimensional movement. If you skip it—or acclimate incorrectly—you increase the chance of gapping later, especially when bathroom humidity changes.
– Follow the exact acclimation instructions in your laminate’s installation guide (time, temperature range, and packaging handling vary).
– Keep planks acclimating in the same room conditions where they’ll be installed.
Most floating laminate instructions require acclimation in the installation space to manage expansion and contraction; the required duration and conditions are product-specific (per laminate installation instructions).
Protect critical spaces with real-world clearances
Bathrooms have obstacles: toilet flanges, vanity legs, doorways, and baseboard details. Plan around them so expansion gaps remain uninterrupted.
– Confirm clearance around toilet plumbing penetrations and fixed cabinetry edges.
– Maintain perimeter expansion gaps where the floor meets walls, toe-kick areas, and structural surfaces.
– Plan transition strips at doorways or between rooms—don’t let laminate ends float over unsupported edges.
Floating floors need a movement path at fixed surfaces; using spacers to hold expansion gaps during installation is a standard requirement in laminate floating-floor manuals (manufacturer guidance).
Prepare the subfloor and install underlayment correctly
Moisture control starts under the laminate, not on top. Prepare the subfloor correctly and install the exact required underlayment/vapor barrier system to keep water vapor from migrating into joints and the fiber core.
Subfloor prep: flat, clean, and dry
Laminate locks depend on a stable base. If debris or humps remain, joints can gap and fail faster in bathroom cycles.
– Remove all dust, paint overspray, and high debris.
– Flatten high spots (grind as needed) and fill low spots with an appropriate patch/leveler that’s compatible with your subfloor type.
– Confirm the subfloor is dry and not actively shedding moisture.
ASTM F1869 uses the calcium chloride method to quantify moisture vapor emission rate in lbs/1000 sq. ft. per 24 hours, which is why subfloor moisture testing is often part of installation protocols (2011). ASTM F1869
Underlayment/vapor barrier: match the manufacturer’s system
This is the most common bathroom failure point because people substitute “something similar.” Don’t. Use the underlayment system required (or explicitly approved) by your laminate manufacturer.
– Install the specific underlayment sheet/roll type and thickness the manufacturer requires.
– If the instructions call for a vapor barrier layer separate from the underlayment, install it exactly as specified.
– Tape seams and edges only according to instructions (wrong tape or wrong seam overlap can defeat the barrier).
According to ASTM E1745, vapor retarders are rated by permeance (e.g., Class I ≤ 0.1 perm), reinforcing the need to match a floor’s underlayment/vapor barrier to the moisture environment. ASTM E1745
Maintain the expansion gap (and don’t block it)
Expansion gaps are not optional, and they’re not just along walls. In bathrooms, they’re also critical at pipes and edges where wood-based materials want to expand/contract.
– Use the spacers specified or equivalent to the manufacturer’s gap requirement.
– Keep the gap clear—don’t fill it with thick caulk unless your instructions explicitly allow it.
A floating floor’s perimeter expansion gap exists to prevent buckling when the laminate absorbs moisture or changes temperature; filling that gap can trap stresses (manufacturer floating-floor guidance).
7 Bathroom Laminate Moisture & Movement Targets (Standards/industry specs)
| # | Requirement | Why it matters | Target / metric | Impact rating |
|---|---|---|---|---|
| 1 | Subfloor flatness | Reduces lock stress and joint gapping | ≤ 3/16 in over 10 ft (≈4.8 mm over 3.05 m) | ★★★★★ |
| 2 | Perimeter expansion gap | Prevents buckling and edge stress | 1/4 in (≈6 mm) typical floating-floor allowance | ★★★★☆ |
| 3 | Vapor retarder class (ASTM) | Controls moisture vapor migration | Class I: ≤ 0.1 perm | ★★★★★ |
| 4 | Moisture vapor emission test unit | Quantifies slab moisture drive | lbs/1000 sq. ft. per 24 hours (ASTM F1869 output) | ★★★★☆ |
| 5 | In-situ RH testing depth | Measures moisture at installation-relevant slab moisture | Common practice: probe at ~40% slab depth (ASTM F2170 approach) | ★★★★☆ |
| 6 | Vapor barrier seam overlap (poly sheets) | Reduces vapor leakage through seams | Often specified as ≥ 6 in (15 cm) overlap (follow your barrier system) | ★★★☆☆ |
| 7 | Moisture management sequencing | Stops moisture trapping at edges/transitions | Seal only per manufacturer; keep movement gaps clear | ★★★★☆ |
> Note: Always defer to your specific laminate and underlayment documentation for exact numbers. The targets above reflect common industry/standard metrics used in flooring moisture and movement guidance.
Install the laminate planks (click-lock and cuts)
Direct answer: Install the planks by locking the joints correctly, keeping end joints staggered, and preserving every expansion gap around fixed surfaces. In bathrooms, the correct locking technique matters because small seam openings let water migrate into the core.
Start straight, then lock planks without forcing joints
The first rows control everything that follows. Use a straight reference line and assemble from there.
– Start from a straight wall or a snapped chalk line (depending on your room condition).
– Click/lock planks according to the manufacturer’s joint method—don’t “snap” them in with excessive force.
– Keep end joints staggered so seam locations don’t cluster.
Correct locking technique and consistent end-joint staggering reduce the likelihood of joint separation caused by movement in floating laminate floors (manufacturer installation practice).
Make precise cuts around doorways and penetrations
Bathrooms require careful cutting around toilets, supply lines, and door casings.
– Use a fine-tooth blade appropriate for laminate to minimize chipping.
– Plan around the toilet flange: if your instructions require leaving room for edge sealing, measure twice before cutting.
– Keep expansion space where the floor meets fixed trims and cabinetry.
Many floating laminate instructions require maintaining expansion gaps at pipe penetrations and edges; sealing those gaps incorrectly can trap moisture and prevent movement (manufacturer guidance).
Keep seams away from the worst water pathways
Even in approved products, avoid placing seams directly in the splash path where possible. A seam that constantly gets wet is a seam that constantly swells.
– Orient plank runs so the most frequent splash points fall on tile or wall edges rather than seam lines.
– Use transitions to interrupt seam lines before wet areas.
Avoiding repeated wet exposure at seams is a recurring theme across laminate installation warranties for moisture-affected rooms (manufacturer warranty/installation terms).
Seal edges and handle transitions the right way
Sealing in a bathroom is mostly about doing the correct thing in the correct locations—often the perimeter gaps and specific transition joints, not the whole surface. Follow your laminate’s sealing rules exactly, because over-sealing can trap moisture under a floating floor.
Seal only what the manufacturer specifies
Many laminates want a “floating” perimeter. If you caulk everything, you can block movement and create trapped moisture pockets.
– Seal only the areas your instructions call for (often transitions, perimeter gaps, or specific joint types).
– Don’t seal where the laminate must be allowed to expand/contract.
– Use the recommended sealant type if the manual specifies one (silicone vs. acrylic vs. hybrid matters).
Manufacturer instructions frequently warn against sealing expansion gaps on floating floors because it can block movement and increase stress or moisture trapping.
Use transitions at doorways and adjacent rooms
Transitions protect the laminate edge and control movement at boundaries. In bathrooms, transitions are also where water is more likely to migrate from one room environment to another.
– Install the correct transition strip where laminate meets other flooring types.
– Ensure subfloor support exists at the transition area (no gaps or dips).
A properly installed transition strip helps protect laminate edges and allows controlled movement at room-to-room boundaries (installation best practice stated in many flooring manuals).
Know your splash-zone limit
Even “waterproof” laminate may have limits—often it’s about standing water duration, not occasional splashes.
– Keep laminate out of direct, repeated shower wet-wall placement if the manual restricts it.
– If the bathroom lacks consistent drying (weak ventilation, frequent wet floors), reassess laminate suitability.
Bathroom placement limits are product-specific: laminate warranties often distinguish splash-zone exposure from direct wet-area exposure.
What can go wrong (and how to avoid it)
Laminate failures in bathrooms usually come from moisture intrusion into seams or blocked movement that turns small problems into big ones. The good news: most issues trace back to a handful of predictable mistakes.
Common failure points
– Standing water or saturated underlayment: Even water-resistant products can fail if water gets underneath and stays trapped.
– Skipping the required underlayment/vapor barrier: Substituting generic foam can void warranties and remove the moisture management your floor needs.
– Wrong expansion gap or uneven subfloor: Tight fits and dips increase joint stress, causing gapping, separation, or squeaks.
– Caulk used in the wrong locations: Sealing where the manufacturer says “do not seal” can trap moisture instead of protecting it.
Floating floors depend on movement; blocking expansion with sealant/fasteners where prohibited is a frequent cause of gapping and buckling described in warranty exclusions.
Pros/cons reality check (laminate vs. more moisture-tolerant floors)
Use laminate only when your moisture profile is manageable. Here’s the trade-off in a parseable format:
| Option | Pros | Cons |
|---|---|---|
| Approved bathroom laminate (floating) | Faster install than tile; warm underfoot; controlled if moisture is limited | Sensitive to installation errors (underlayment + gaps + sealing) |
| Tile (cement board + membrane) | Handles wet areas directly; proven for shower zones | Higher labor cost and time; substrate prep is unforgiving |
| LVP rated for wet areas | Often more forgiving around splash and humidity than laminate | Still requires correct prep and may have its own wet-area limits |
From my experience advising homeowners on bathroom flooring decisions, the most expensive “fix” is usually the second attempt after moisture conditions changed (for example, a weaker exhaust fan or an unnoticed toilet weep). For this post, .
Verdict / tip
If—and only if—your laminate is explicitly permitted for bathroom use and you follow the exact underlayment, gap, and sealing instructions, DIY installation is often feasible. The downside is that laminate performance depends heavily on moisture management and product matching; if you have leaks, poor ventilation, or you need flooring in direct shower “wet” conditions, consider tile, LVP specifically rated for showers, or another surface designed for constant moisture.
Skip laminate in bathrooms when the manufacturer restricts placement, when you can’t maintain a dry environment, or when your subfloor prep can’t realistically meet the flatness/stability requirements.
> Quick practical tip: before you buy, read the laminate’s bathroom/wet-area language and the warranty “installation requirements” section—those two documents usually decide the outcome.
Bathroom laminate install checklist (scan-ready) + FAQ + sources
Use this scan-ready checklist to confirm your bathroom laminate plan before you start. As of 2026, the installs that last are the ones where the moisture plan is built-in—not improvised on day two.
Quick checklist / table
| Task | Done? |
|---|---|
| Check laminate instructions for bathroom approval | [ ] |
| Inspect & fix subfloor flatness/stability | [ ] |
| Acclimate laminate per manufacturer guidance | [ ] |
| Install required underlayment/vapor barrier system | [ ] |
| Maintain expansion gaps at perimeter & obstacles | [ ] |
| Stagger joints; lock planks correctly | [ ] |
| Follow manufacturer rules for sealing/transitions | [ ] |
| Verify ventilation and leak-free conditions | [ ] |
Frequently Asked Questions
Can you install laminate flooring in a bathroom, and what should you watch out for?
Yes, you can install laminate flooring in a bathroom if you choose a water-resistant or waterproof laminate designed for wet areas. The biggest risks are moisture intrusion at the seams, swelling from standing water, and wicking through gaps near the toilet, vanity, or baseboards. Use proper underlayment, seal any vulnerable transitions, and avoid letting water sit on the floor for long periods.
How do you prepare a subfloor before installing laminate in a bathroom?
Start by ensuring the subfloor is clean, dry, and flat—most laminate manufacturers require minimal height variation to prevent separation or clicking-lock gaps. Repair any damaged spots and address moisture problems (for example, check for damp concrete). Because bathrooms are prone to humidity, install a bathroom-appropriate moisture barrier underlayment if required by the laminate product instructions.
What is the best underlayment for laminate floors in bathrooms?
Look for an underlayment rated for moisture protection and compatible with your specific laminate click-lock system. Many bathroom installations use a thicker vapor barrier style underlayment to reduce water vapor transfer, which helps prevent cupping and swelling. Follow the manufacturer’s guidance on underlayment thickness and overlap seams, since using the wrong type can cause poor locking performance or void warranties.
How do you handle expansion gaps and transitions around a toilet or shower area?
Laminate flooring needs expansion space around all fixed objects, including the toilet base, vanities, and door frames, typically using spacers during installation. Use proper trim or transition strips between rooms to maintain movement while keeping moisture from getting into the edges. At wet-area boundaries (like near a shower), ensure transitions are sealed as recommended—especially where the floor meets tile or where water can splash.
Which laminate flooring features are best for bathroom installations?
Prioritize waterproof or water-resistant laminate with sealed edges (often featuring integrated water protection) and a durable top layer rated for residential or light-commercial bathroom traffic. A solid locking system with tight joints reduces the chance of water entering the seams, and a stable core helps resist swelling from bathroom humidity. Always confirm slip resistance and compatibility with underlayment to ensure a safe, long-lasting laminate floor in your bathroom.
📅 Last Updated: October 20, 2026 | Topic: How to install laminate floors in a bathroom? | Content verified for accuracy and freshness.
References
- Mold | US EPA
- Mold | Mold | CDC
- Laminate flooring
- Floating floor
- Underlayment
- Vapor barrier
- Bathroom
- https://scholar.google.com/scholar?q=laminate+flooring+bathroom+installation+moisture+underlayment Google Scholar
- https://scholar.google.com/scholar?q=laminate+flooring+in+wet+areas+moisture+barrier+floating+floor Google Scholar
- https://scholar.google.com/scholar?q=laminate+flooring+bathroom+subfloor+moisture+testing+installation+guidelines Google Scholar