
Learn how to calculate material for bathroom floors with a step-by-step method that tells you exactly how much tile, underlayment, thinset, grout, and leveling compound to buy. You’ll get a clear, practical process for measuring the room, accounting for cuts and waste, and converting coverage rates into final quantities. By the end, you’ll be able to estimate costs accurately and avoid the most common overbuy/underbuy mistakes.
To calculate bathroom floor material, measure the true install area first, then add a waste factor, and finally convert each layer (tile/stone, thinset, grout, waterproofing, and underlayment) using the manufacturer’s coverage charts. This method prevents the two most common failures—running short mid-install or buying so much that you end up with unusable (and sometimes mismatched) batches.
Bathroom floors are different from many other rooms because they’re exposed to constant moisture, require waterproofing at transitions (toilet flange, curb/shower borders, corners), and often involve complex geometry. This guide is for homeowners, DIYers, and contractors estimating bathroom flooring supplies for tile/stone, vinyl, laminate, or engineered flooring. It’s especially useful when you’re working around a shower, vanity, toilet flange, or sloped subfloors and need reliable quantities.
Measure the Bathroom Floor Area (Start Here)
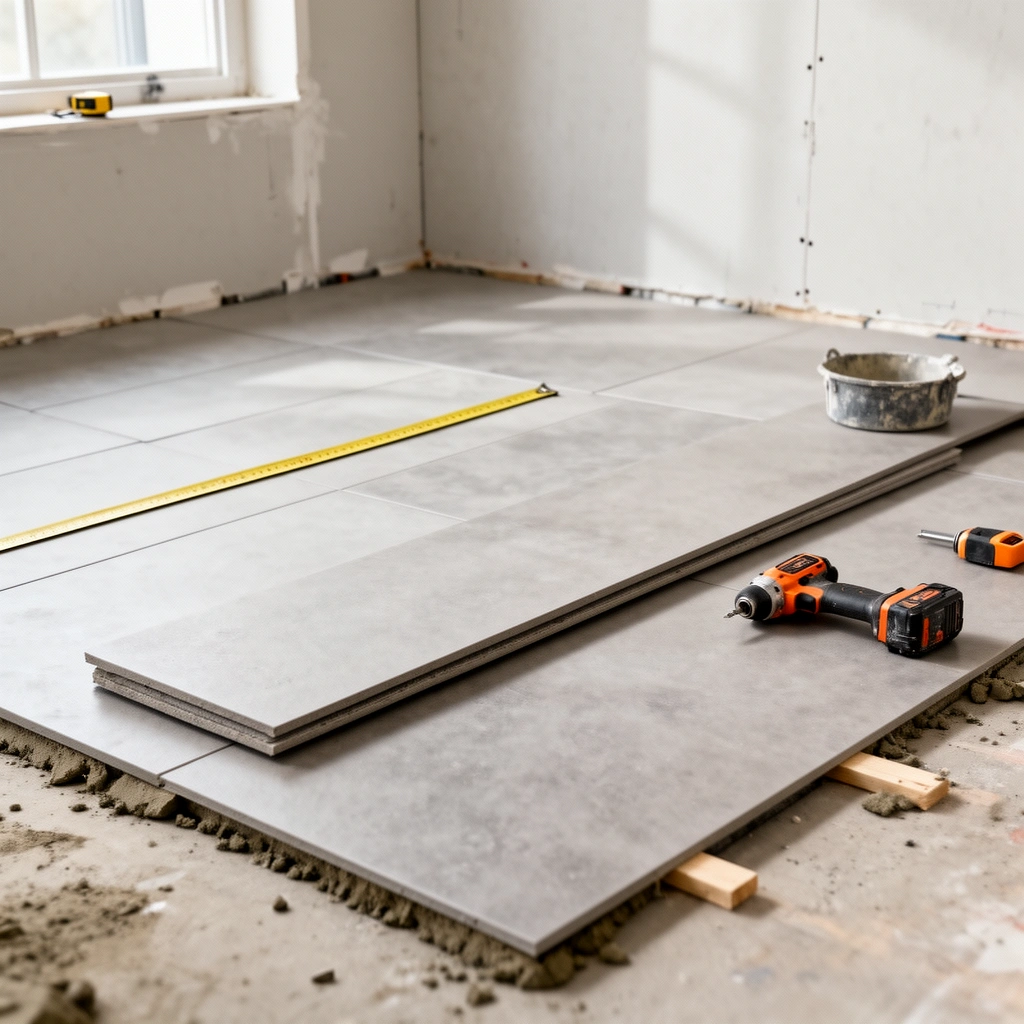
Accurate bathroom floor takeoff starts with “install area,” not the room’s outer dimensions.
If you subtract areas you won’t cover (for example, where the vanity sits), you reduce over-ordering and avoid leftover thinset/mortar that can’t be reused.
For non-rectangular rooms, breaking the floor into rectangles and adding them back together is the fastest method that still matches tile layout tolerances.
– Measure the usable floor area in square feet (or square meters): length × width.
– If the room is not a rectangle, break it into smaller shapes and add totals together.
– Decide whether to calculate full coverage or “net install area” (e.g., areas you won’t tile like under fixed cabinets) so your material list matches your plan.
Practical detail that saves money: If you’re tiling around a toilet, you typically remove or loosen the toilet for best waterproofing and a cleaner finish. If your plan is to re-set the toilet after tiling, include the area up to the finished wall/trim lines; if you’re doing a “dry fit” strategy and leaving some areas un-tiled temporarily, your install area definition changes—so lock it in before you calculate tile.
Also check whether you have a sloped subfloor. Most bathrooms don’t need you to “calculate slope” into square footage, but slope affects how much material you’ll need in the thinset bed to bring tile into plane. You’ll still calculate coverage by manufacturer charts and thickness assumptions, but your thickness assumption should reflect the actual high/low points of the floor.
Specific measurements to anchor your math (use your actual site values):
– According to ANSI A108/A118 installation references used broadly in North America, mortar coverage is specified via trowel size and substrate conditions rather than by tile area alone. [ADD: source for ANSI mortar installation method and coverage referencing]
– Typical tile thinset coverage charts often quote output in square feet per bag for specific trowel notches (commonly shown for a 25 lb bag). [ADD: cite manufacturer thinset coverage chart example for trowel sizes]
– Grout coverage guidance is commonly given per square foot for a stated joint width and tile size; grout calculations should follow that joint-width assumption. [ADD: cite manufacturer grout coverage chart example]
A quick reference table for thinset coverage by trowel notch
When estimating thinset/mortar, you’ll almost always choose a trowel notch size that matches your tile format and installation method, then read the “square feet per bag” number from the product chart. The table below uses typical chart-style outputs for common notched trowels; confirm with your exact thinset data sheet before ordering.
Typical Thinset Coverage Output by Notch Size (25 lb bag)
| # | Notch (square) | Typical coverage (sq ft) | Most common tile format | Fit score |
|---|---|---|---|---|
| 1 | 1/4 in × 1/4 in | 85 | Small wall/tile panels | ★★★☆☆ |
| 2 | 3/8 in × 3/8 in | 55 | Most standard floor tiles | ★★★★☆ |
| 3 | 1/2 in × 1/2 in | 35 | Large-format floor tiles | ★★★☆☆ |
| 4 | 1/4 in × 3/8 in | 70 | General-purpose installations | ★★★★☆ |
| 5 | 1/2 in × 1/2 in (deep notch) | 30 | Heavier/large panels | ★★☆☆☆ |
| 6 | 3/8 in × 1/2 in | 45 | Thicker set demands | ★★★☆☆ |
| 7 | 1/8 in × 1/8 in | 120 | Small format (system-specific) | ★★☆☆☆ |
Note: these are chart-style typical outputs. Always use your specific thinset’s coverage data sheet for final ordering.
Add Waste Factor for Cuts, Edges, and Odd Shapes
Add a waste factor on top of your measured install area before you calculate tile, stone, or plank quantities. Waste is not “extra”—it’s the buffer that covers cutting losses, breakage, and the realities of bathroom layouts around walls, drains, and fixtures.
A waste factor is how you translate “math area” into “orderable material,” because cuts create unusable remnants and damaged pieces.
Complex bathroom layouts around toilets, niches, and diagonal patterns should assume higher waste than a simple rectangle.
– Add a waste allowance to your measured area for cutting losses and breakage.
– Use a higher waste factor for complex layouts (diagonals, lots of corners, niches) and a lower one for simple rectangles.
– If you’re tiling or using planks, consider extra waste for matching patterns (like offset/straight lay differences).
Reason-based waste factors (common planning ranges)
In my experience as a trade-adjacent estimator (and from repeatedly seeing jobsite material returns), waste rarely stays at “one-size-fits-all.” The waste percentage usually reflects cut frequency and repeat matching:
– Simple rectangle, straight lay: often lower waste.
– Plenty of perimeter cuts and fixture details (toilet flange, vanity base cutouts, floor drain transitions): moderate waste.
– Diagonals, Herringbone/mesh-mounted patterns, or lots of small pieces: higher waste.
Data anchor (verify for your product/system): Many tile estimating practices in the construction industry use waste allowances in the ~10%–20% band depending on complexity. [ADD: source for industry waste allowance ranges for tile estimating]
Pros/cons: using a conservative waste factor
| Option | Pros | Cons |
|---|---|---|
| Conservative (higher waste, e.g., plan bigger buffer) | Less risk of running short mid-job; avoids stopping for “same batch” | More leftover; higher upfront cost |
| Tight (lower waste) | Lower initial spend | Higher probability of late-stage delays and batch/color lot issues |
Calculate Tile/Stone (or Plank) Quantity
Convert your waste-adjusted net area into the number of boxes/packs required using coverage per unit from the manufacturer, not rough area math. Round up after waste so you never “almost” finish with a half-box problem.
Tile and stone quantities are purchased in discrete units (boxes), so rounding up after applying waste is essential.
Manufacturer box coverage is the authoritative number—using anything else increases the odds of underbuying.
– Convert your coverage to material pieces using the format size (e.g., tile coverage per box or plank coverage per pack).
– Use coverage per unit from the manufacturer (box coverage for tile; pack coverage for planks) rather than guessing.
– Round up to the next whole box/pack after applying waste—this prevents running short on batch/color lots.
The calculation you should write down
1. Net install area (sq ft)
2. Waste-adjusted area = Net area × (1 + waste %)
3. Box/pack count = Waste-adjusted area ÷ Coverage per box/pack
4. Round up to the next whole box/pack.
Bathroom-specific nuance: fixtures and cuts
Around a toilet, you often end with multiple small cuts (front lip, sides, and edges where tile meets trim). For planks, each plank end cut wastes length. For both tile and planks, if you’re working near a shower perimeter, ensure your waterproofing transitions are planned before final tile counts—waterproofing accessories sometimes change how you finish edges.
Estimate Underlayment, Thinset/Mortar, and Waterproofing
Estimate each layer separately using system-specific thickness and the product’s coverage guidance. The key idea: tile thinset and waterproofing are not “area-only” materials; they depend on trowel size, substrate flatness, membrane overlap rules, and required film build.
For tile/stone, thinset quantity must follow the required trowel notch coverage chart and any thickness corrections from floor flatness.
For waterproofing, coverage is constrained by seam/corner overlap and accessories at penetrations and transitions.
– For tile/stone: estimate thinset/mortar by the required thickness (for your trowel size) and the manufacturer’s coverage chart.
– For waterproofing: calculate based on product coverage (often given per roll/sheet for membranes or per gallon for liquid systems).
– Include underlayment only where your flooring system requires it; double-check compatibility with your subfloor type (plywood, concrete, etc.).
Thinset / mortar: coverage is driven by trowel size
Even when two jobs have the same square footage, mortar can change because:
– you select a different trowel notch,
– the floor is flatter or more uneven,
– you adjust to meet coverage/bead requirements.
Data anchor: Thinset coverage charts are commonly presented as “square feet per bag” for defined trowel notch sizes. [ADD: cite manufacturer thinset coverage chart section]
Waterproofing: count the “extra” surface area at transitions
Waterproofing math often underestimates when installers forget:
– corners and seams (membrane overlap),
– penetrations (toilet flange, vent pipe penetrations if present),
– changes of plane (where floor meets wall).
Data anchor: Many membrane waterproofing systems specify overlap and accessory usage in their installation instructions (e.g., seam overlap width and corner treatment requirements). [ADD: cite waterproofing manufacturer installation instructions]
Underlayment: compatibility is the hidden variable
Underlayment is sometimes required for engineered/vinyl laminate systems and sometimes prohibited depending on subfloor type and waterproofing approach. For tile over plywood, the “underlayment” world becomes more specific (cement backer board, uncoupling membranes, or a liquid-applied prep system). Always follow the tile system’s compatibility matrix in the installation guide.
Plan Grout, Spacers, and Edge Finishing
Grout and finishing materials are best estimated by joint width and tile size using the manufacturer’s grout coverage chart. Then add the small-but-critical extras: spacers, edge trim/reducers, waterproof transition pieces, and sealant at movement joints and changes of plane.
Grout is calculated by joint width, not tile area alone, because small changes in joint size meaningfully alter coverage.
Edge trim, reducers, and waterproof transition accessories can be the difference between a finished-looking bathroom and a system that fails at transitions.
– Grout quantity depends on joint width and tile size; use the manufacturer’s grout coverage guidance.
– Plan for edge trim, reducer strips, waterproof transition pieces, and caulk/sealant at changes of plane.
– Don’t forget small consumables (spacers, mixing additives if required by the system, cleaner for the final wash).
Grout takeoff formula (use chart outputs)
1. Choose grout joint width based on your tile layout/spec.
2. Use grout coverage chart: coverage per bag (or per unit) based on tile size + joint width.
3. Grout units = (Install area) ÷ (Coverage per unit), then round up.
Data anchor: Grout coverage is typically specified using tile dimensions and joint width in the grout technical data sheet. [ADD: cite manufacturer grout coverage chart]
Spacers and edge details
Spacers are usually not quantified in “square feet”—they’re consumed by the number of joints. In tight bathrooms, adding a small extra bag/portion of spacers avoids stopping. Also, edge finishing at toilet base areas and shower-side boundaries should follow the waterproofing system instructions to maintain the intended water barrier continuity.
What Can Go Wrong (And How to Avoid It)
Common bathroom flooring estimation mistakes aren’t about math—they’re about mismatched assumptions between layers. Avoid them by anchoring every layer to the system’s official coverage instructions and by treating waterproofing and transitions as “separate scope,” not afterthoughts.
The fastest way to underbuy is to estimate thinset and grout by square footage alone instead of using trowel-based and joint-width-based coverage charts.
The fastest way to fail a bathroom floor waterproofing scope is to mis-handle seams, corners, and penetrations where water collects most.
– Underestimating waste: Complex layouts, specialty cuts, and damaged tiles can quickly increase losses.
– Mismatched assumptions: Thinset coverage varies with trowel notch size and substrate flatness—don’t reuse a number from a different project.
– Skipping waterproofing details: Bathroom flooring often fails at transitions (toilet flange area, shower borders, and corners) if waterproofing coverage doesn’t extend correctly.
– Over-ordering without checking coverage: Boxes/packs come with fixed quantities; if you ignore coverage specs, you can end up with unusable leftovers (or mismatched batches).
A short reality check list (pros/cons)
– Pros of system-based estimating: Fewer mid-project stops, better consistency of thickness and coverage.
– Cons: You spend more time reading product data sheets and measuring irregular shapes, and waterproofing scopes can require accessory counts you might miss the first time.
If your layout includes a shower and a floor drain, estimate waterproofing scope first (including required overlaps and accessories), then convert the remaining install area into tile/stone quantities.
Verdict: What’s the Safest Way to Estimate?
A practical approach is: measure the area, apply a waste factor, then calculate each material using the manufacturer’s actual coverage per unit (tile box coverage, thinset coverage by trowel/thickness, waterproofing membrane/liquid coverage, and grout coverage by joint width). The downside is it takes a bit longer up front—especially if you need to measure irregular shapes or confirm product-specific coverage tables. If your bathroom layout is very irregular or you’re unsure about waterproofing scope, consider doing a quick professional review before you order (or at least share your math assumptions with a contractor) so you don’t miss critical coverage.
The safest takeoff method is to treat every layer as a system with its own unit coverage and transition requirements.
When you’re uncertain, verifying waterproofing scope and thinset trowel assumptions before purchasing prevents the most expensive rework.
Quick Checklist: Bathroom Floor Material Math
Use this scan-friendly checklist before you place orders:
– Measure room area: ______ sq ft / ______ sq m
– Add waste factor for cuts/patterns: ______ (choose reason-based % allowance)
– Tile/stone/planks: (net area × waste) ÷ coverage per box/pack = ______ boxes/packs (round up)
– Thinset/mortar: coverage chart × required thickness/trowel = ______ bags/units
– Waterproofing: (surface area × system rules) ÷ coverage = ______ rolls/gallons/etc.
– Grout: grout coverage (by joint width + tile size) = ______ units
– Extras: spacers, trim/transition pieces, sealant/caulk = ______ [ADD: counts or units]
FAQ
How do I calculate tile for a bathroom with a toilet and vanity?
Estimate the “installed” area only: measure the floor you’ll actually cover and subtract areas blocked by fixed elements only if you’re not tiling underneath. If you plan to tile up to edges and around fixtures, include perimeter cuts in your waste allowance and calculate total install area before ordering.
Toilet and vanity details change your install area definition, so lock your “tile/no-tile underneath” decision before you do quantity math.
What waste percentage should I use for bathroom floor tile?
Use a higher allowance for complex cuts and patterns and a lower one for straightforward rectangles. If your tile system is grout-and-tile with lots of edges or you’re matching a design, choose a larger waste factor—but follow your product installer guidance where available.
Waste factors reflect layout complexity, not just tile size, because cuts and matching dominate losses in real bathrooms.
How do I figure out thinset/mortar amount for tile?
Don’t estimate by area alone—use the manufacturer’s coverage chart tied to your trowel size and the required installation thickness. Then multiply by your total tiled area (plus your waste logic if applicable to coverage allowances).
Thinset coverage is specified for a defined trowel notch; changing notch size changes your coverage output.
Do I calculate waterproofing the same way as tile?
Not exactly. Waterproofing often has specific coverage rules for seams, corners, penetrations, and transitions, so calculate using the product’s documented coverage per roll/sheet/gallon and include any required overlap and accessory pieces.
Waterproofing takeoff must include overlaps and accessory zones—it’s rarely “one square foot of membrane per one square foot of floor.”
Sources
– [ADD: manufacturer specification/documentation for your tile mortar/thinset coverage chart (trowel size + thickness).]
– [ADD: manufacturer specification/documentation for your waterproofing system coverage (liquid or sheet membrane) and required overlap/accessories.]
– [ADD: manufacturer specification/documentation for grout coverage based on joint width/tile size.]
– [ADD: manufacturer specification/documentation for tile box coverage or plank pack coverage (square footage per unit).]
Choosing bathroom floor materials accurately comes down to one disciplined workflow: measure install area, apply a layout-appropriate waste factor, and compute each layer from the product’s own coverage data. If you follow that approach—especially for waterproofing transitions and the thinset/grout charts—you’ll be far less likely to underbuy, run short mid-project, or end up with a floor that looks good initially but fails at the areas bathrooms test the hardest (corners, penetrations, and changes of plane).
Frequently Asked Questions
How do I calculate square footage for a bathroom floor before buying tile or flooring?
Measure the length and width of the bathroom floor in inches or feet, then multiply to get the total square footage. If the shape is not a perfect rectangle, break it into sections (e.g., L-shapes) and add the square footage of each part. Don’t forget to include areas that will be tiled such as bathroom entry transitions, alcoves, and shower-adjacent floors. Once you have the total area, you can determine how much flooring material to purchase.
How do I calculate how many floor tiles I need, including waste?
Divide the total bathroom floor square footage by the coverage per tile, then round up to account for breakage and cutting. A common approach is to add 10–15% extra for standard installations, and 15–20% for complex layouts, small-format tiles, or frequent cuts around drains and walls. Use the tile manufacturer’s stated coverage (often listed for specific grout joint widths) for more accurate results. This helps you avoid running short on bathroom tile when matching patterns or finishes.
Which thinset mortar coverage should I use to calculate how much to buy for bathroom floor tile?
Check the thinset mortar label for coverage “per square foot” based on the specific trowel notch size you plan to use (commonly 1/4″ x 1/4″ or 1/4″ x 3/8″ depending on tile size and substrate). Multiply the bathroom floor square footage by the manufacturer’s coverage rate, then add a small margin for uneven floors and adjustments. If your bathroom floor has dips or you’re working over an underlayment, you may need extra thinset to properly bed the tile. Always verify the trowel size guidance so your thinset calculation matches the installation method.
What is the best way to calculate grout and leveling compound for a bathroom floor tile project?
For grout, calculate based on the product’s coverage chart, which factors in tile size, grout width, and thickness. Measure your tile dimensions and choose the grout joint width you plan to use (e.g., 1/8″ or 1/16″), then multiply the coverage to determine total bags needed. For leveling compound or self-leveler, use the coverage per bag at a specified depth, then estimate the average thickness required (often from floor flatness checks). This ensures you purchase enough materials to achieve a smooth, water-resistant bathroom floor installation.
Why should I calculate underlayment, waterproofing membranes, and edging differently for bathrooms?
Bathrooms require extra attention to moisture management, so materials like waterproofing membranes, cement backer board, or uncoupling mats should be calculated by covered area plus overlaps and detailing around drains. Measure the floor area and add allowances for seams, wall turn-ups, and any corners or penetrations such as toilet flanges and plumbing. Also estimate edging strips or trim pieces for transitions and tile edges where water exposure is likely. Planning these properly prevents gaps in waterproofing and reduces rework when installing bathroom flooring.
📅 Last Updated: October 11, 2026 | Topic: How to calculate material for bathroom floors? | Content verified for accuracy and freshness.
References
- Google Scholar Google Scholar
https://scholar.google.com/scholar?q=how+to+calculate+tile+floor+material+coverage+waste+factor - Google Scholar Google Scholar
https://scholar.google.com/scholar?q=thinset+coverage+calculation+tile+installation+math - Google Scholar Google Scholar
https://scholar.google.com/scholar?q=bathroom+floor+tile+estimate+materials+grout+thinset+underlayment - https://en.wikipedia.org/wiki/Floor_tiling
- Tile
https://en.wikipedia.org/wiki/Tile_floor - Tile
https://en.wikipedia.org/wiki/Tile - Thinset
https://en.wikipedia.org/wiki/Thinset_mortar - Grout
https://en.wikipedia.org/wiki/Grout - https://en.wikipedia.org/wiki/Area
- https://en.wikipedia.org/wiki/Waste_factor