
Get a clear, step-by-step method for how to install industrial floors—from surface prep and layout to mixing, pouring, and curing—so the final system is flat, durable, and ready for heavy traffic. This guide answers the practical question of what to do in the right order, with the key decisions that prevent common failures like debonding, premature wear, and moisture problems. Follow it, and you’ll have a dependable installation process you can execute on the job without guesswork.




Industrial floors are installed by preparing the slab (cleaning, repairing, and profiling), choosing the right flooring system, and then applying and curing to the manufacturer’s specified thickness and mix ratios. If surface prep, moisture conditions, or mixing proportions are wrong, even a “good” epoxy, polyurethane, or cementitious topping can fail—so this guide focuses on what to verify before you pour, spread, or coat.
This is for facility managers, contractors, and DIY-capable readers planning to install industrial epoxy, polyurethane, concrete toppings, or similar systems in warehouses, workshops, and light-industrial spaces—especially when durability, chemical resistance, and downtime matter.
Site Prep and Floor Assessment
A durable industrial floor starts with a clear assessment of what your slab is already doing—before you ever open a pail of resin or dry-mix bag. The best system choice depends on slab integrity, contamination, and moisture behavior, not just on the warehouse “look.”
A flooring failure in industrial spaces is most often traced to substrate problems (cracks, weak concrete, contamination, or moisture) rather than the topcoat itself.
ASTM F2170 measures in-situ relative humidity at a specified drilling location/depth to evaluate whether the slab will support the coating system’s performance.
ICRI surface profile targets are expressed as CSP (Concrete Surface Profile) numbers (typically CSP 1–9), which are used to guide achievable adhesion conditions.
Before selecting an epoxy coating, polyurethane topcoat, cementitious overlay, or polymer-modified topping, inspect the concrete with a “system compatibility” lens. Here’s what to check in practical terms:
– Cracks and crack movement
– Identify whether cracks are static (not actively moving) or active (visible change over time, differential settlement, or ongoing thermal cycling).
– Many coating systems tolerate minor surface cracking, but active movement can “telegraph” cracks and break adhesion.
– Spalling, delamination, and weak surface strength
– Look for scaling, hollow-sounding areas, and loss of surface mortar.
– If the surface is weak, a coating can adhere temporarily and then fail later—especially under point loads from pallet jacks, forklifts, and rolling carts.
– Oil/grease/chemical contamination
– Industrial floors frequently have invisible residue (hydrocarbons, tire marks, release agents, curing compound residues).
– Even small contamination levels can prevent wetting and bonding of epoxy or cementitious binders.
– Moisture and hydrostatic pressure risk
– Moisture isn’t just “dampness.” It’s also vapor emission and possible hydrostatic pressure depending on slab design and subgrade drainage.
– If your selected system requires a specific moisture condition, you must meet it at install time—not after the system has been applied.
To anchor your planning with standard test methods:
– According to ASTM F2170, in-situ relative humidity testing uses drilled holes and probes to characterize moisture conditions at the installation-relevant depth (commonly the guidance is tied to placement and drilling location per the standard). (ASTM F2170, Standard Test Method for Field Determination of Relative Humidity in Concrete Floor Slabs Using In Situ Probes)
– According to ICRI guidance, CSP numbers range from CSP 1 to CSP 9 as a structured way to specify achievable profiles for bonding and coating performance. (ICRI, Concrete Surface Preparation—Performance Standards; CSP scale documentation)
– According to ASTM C642, water absorption is used to assess how concrete absorbs moisture—an indicator that can correlate with permeability and long-term moisture behavior. (ASTM C642, Standard Test Method for Density, Absorption, and Voids in Hardened Concrete)
Finally, confirm what the floor needs to handle:
– Traffic type: foot traffic vs. pallet trucks vs. forklifts (rubber tire vs. poly wheels changes impact and wear)
– Chemical exposure: fuels, oils, acids/alkalis, salts, cleaning chemicals
– Thermal cycling: freeze-thaw or heat exposure (important for cementitious overlays and polymer systems)
– Slip resistance: ramps, wet washdowns, oil mist areas, and specified coefficient targets (if your spec calls for them)
Surface Preparation (Cleaning, Repairs, Profiling)
Surface preparation is the difference between “a system that looks installed” and “a system that stays bonded for years.” Cleanliness, crack repair method, and the concrete profile specified by the manufacturer are the three gates you can’t skip.
The manufacturer’s specified surface prep (including removal of curing compounds, laitance, and contaminants) is required to achieve the designed adhesion and service life.
Profiling is typically achieved by mechanical methods (grinding, shot blasting, or scarifying) to reach a defined adhesion profile rather than relying on visual roughness.
Crack repair must match the system’s expected movement behavior—filling a moving crack with an incompatible repair material can lead to re-cracking.
Clean thoroughly—then verify
Industrial slabs often carry one or more “bond breakers”:
– curing compounds (membrane-forming types),
– residual dust from demolition,
– laitance (weak surface paste),
– release agents from formwork,
– oils/grease and tire marking compounds.
A common failure mode is “I cleaned it, but I didn’t remove the residue.” For epoxy and polyurethane systems, residue can stop proper wetting and compromise intercoat adhesion. For cementitious overlays, it can prevent mechanical keying and stable hydration at the interface.
Repair with approved methods
Repair cracks, spalls, and uneven areas using the methods and materials the flooring manufacturer approves (or at least those consistent with the system chemistry). Key considerations:
– Depth and geometry of repairs should be consistent with how the base/binder layer is designed to cover and bridge.
– Edge feathering matters—especially where toppings meet existing slab edges.
– If you’re using a cementitious topping, ensure repair materials won’t create incompatible stiffness or moisture pathways.
Profile to the adhesion standard (not “roughness”)
Manufacturers often specify either:
– a target CSP range (ICRI scale), or
– a profile achieved by mechanical blasting/grinding method and resulting surface condition.
– According to ICRI CSP guidance, CSP numbers provide a repeatable way to specify surface texture used for adhesion performance. (ICRI CSP scale documentation)
In practice:
– If you can still see polished/closed pores or burnished patches, you likely need more aggressive profiling.
– If you produce excessive dust and fail to vacuum, you’ve undone the cleaning step.
One common “handoff” mistake
Before you move from surface prep to priming/base layers, ensure:
– dust is removed (vacuum preferred over dry sweeping),
– the surface is not re-contaminated during staging,
– temperature and slab moisture conditions are within the system requirements.
Choosing the Right Industrial Flooring System
The right industrial flooring system is the one that matches your environment, loading, chemicals, and moisture conditions—plus the concrete substrate’s ability to support it. The fastest way to waste money is to pick “the most durable-looking product” without aligning chemistry and installation constraints.
Epoxy coatings are commonly selected for chemical resistance and durable finishes, but their performance depends on correct priming and substrate moisture/adhesion conditions.
Cementitious and polymer-modified overlays can provide build, impact resistance, and wear surfaces, but they require curing and moisture management compatible with the overlay chemistry.
Polyurethane topcoats are frequently chosen where abrasion resistance, color stability, and gloss/finish control are important—again contingent on proper substrate preparation.
Match system type to job realities
Below is a simplified decision view you can use to start the conversation with your spec and installer. (Your final selection must follow the manufacturer’s installation manual and datasheets.)
– Epoxy coatings (often 1–3+ component systems, sometimes with decorative chips)
– Best fit for chemical resistance in many warehouse environments
– Requires strict attention to mix ratios, induction/mixing time, and moisture conditions
– Epoxy mortar / terrazzo-style systems
– Best fit when you need thicker build and strong wear resistance over irregular slabs
– Polyurethane topcoats
– Common as a top finish layer over epoxy systems for abrasion resistance and aesthetics
– Cementitious or polymer-modified overlays
– Best fit for build, slope corrections, and wear surfaces—especially when specs require a cementitious approach
Confirm compatibility points (these are the “non-negotiables”)
When you review datasheets/specs, verify these in writing:
– Moisture tolerance: allowable moisture condition at application time
– Substrate compatibility: can the system bond to your existing concrete and repairs?
– Chemical resistance: exposure list and concentration ranges (cleaners matter)
– Thermal behavior: freeze-thaw, thermal cycling, and expected expansion/contraction
– Slip resistance needs: whether broadcast aggregate/grit is part of the spec
Quick system comparison (pros/cons)
The table below helps you think through typical tradeoffs; your project spec may invert these depending on your loading and chemicals.
Typical Industrial Floor Systems: Where They Usually Fit Best (Realistic Planning View)
| # | System type | Typical best-for | Key installation constraint | Fit rating |
|---|---|---|---|---|
| 1 | Epoxy coating (with primer) | Chemical-resistant finish over prepared slab | Moisture/adhesion requirements must be met at install | ★★★★★ |
| 2 | Epoxy mortar / overlay (terrazzo-like) | Heavier wear areas needing thickness and build | Correct mix and placement are critical to void-free compaction | ★★★★☆ |
| 3 | Polyurethane topcoat (on epoxy systems) | Abrasion resistance and finish durability | Intercoat recoat window must be respected | ★★★★☆ |
| 4 | Broadcast epoxy (decorative/traction) | Slip resistance through aggregate/grit broadcast | Broadcast rate and coverage must match the spec | ★★★★☆ |
| 5 | Cementitious overlay (repair + wear surface) | Build/leveling where cementitious approach is required | Curing and water management must follow overlay instructions | ★★★☆☆ |
| 6 | Polyurea/rapid polymer systems (where allowed) | Fast return-to-service in select industrial contexts | Temperature/window control is essential for short cure systems | ★★★☆☆ |
| 7 | Single-layer thin coating (epoxy/PMMA topcoats) | Lower build needs with controlled traffic | Thin systems still need correct profiles and recoat limits | ★★★☆☆ |
The decision process we recommend (contractor-friendly)
Use a simple workflow:
1. Write your exposure list (chemicals, frequency, concentrations if available).
2. Confirm moisture test method and target acceptance criteria from your system spec.
3. Define traffic loading (roller vs. forklift, point loads, wet cleaning).
4. Choose system + compatible primer/build layer/topcoat as a complete assembly.
5. Build an application plan around cure windows, labor staging, and containment.
Installation Steps (Mixing, Application, Curing)
Industrial floor success depends on executing the documented sequence and hitting the system’s “process windows” (mixing ratios, coverage rates, recoat timing, and curing conditions). Skipping steps or improvising with water, solvents, or partial batches is one of the most common failure causes.
Most coating and overlay systems require a specific installation sequence (primer → base/binder → broadcast/topcoat as applicable), and intercoat timing is part of the chemistry.
Incorrect mixing ratios and inadequate mixing time can prevent full polymerization or hydration, reducing adhesion and wear resistance.
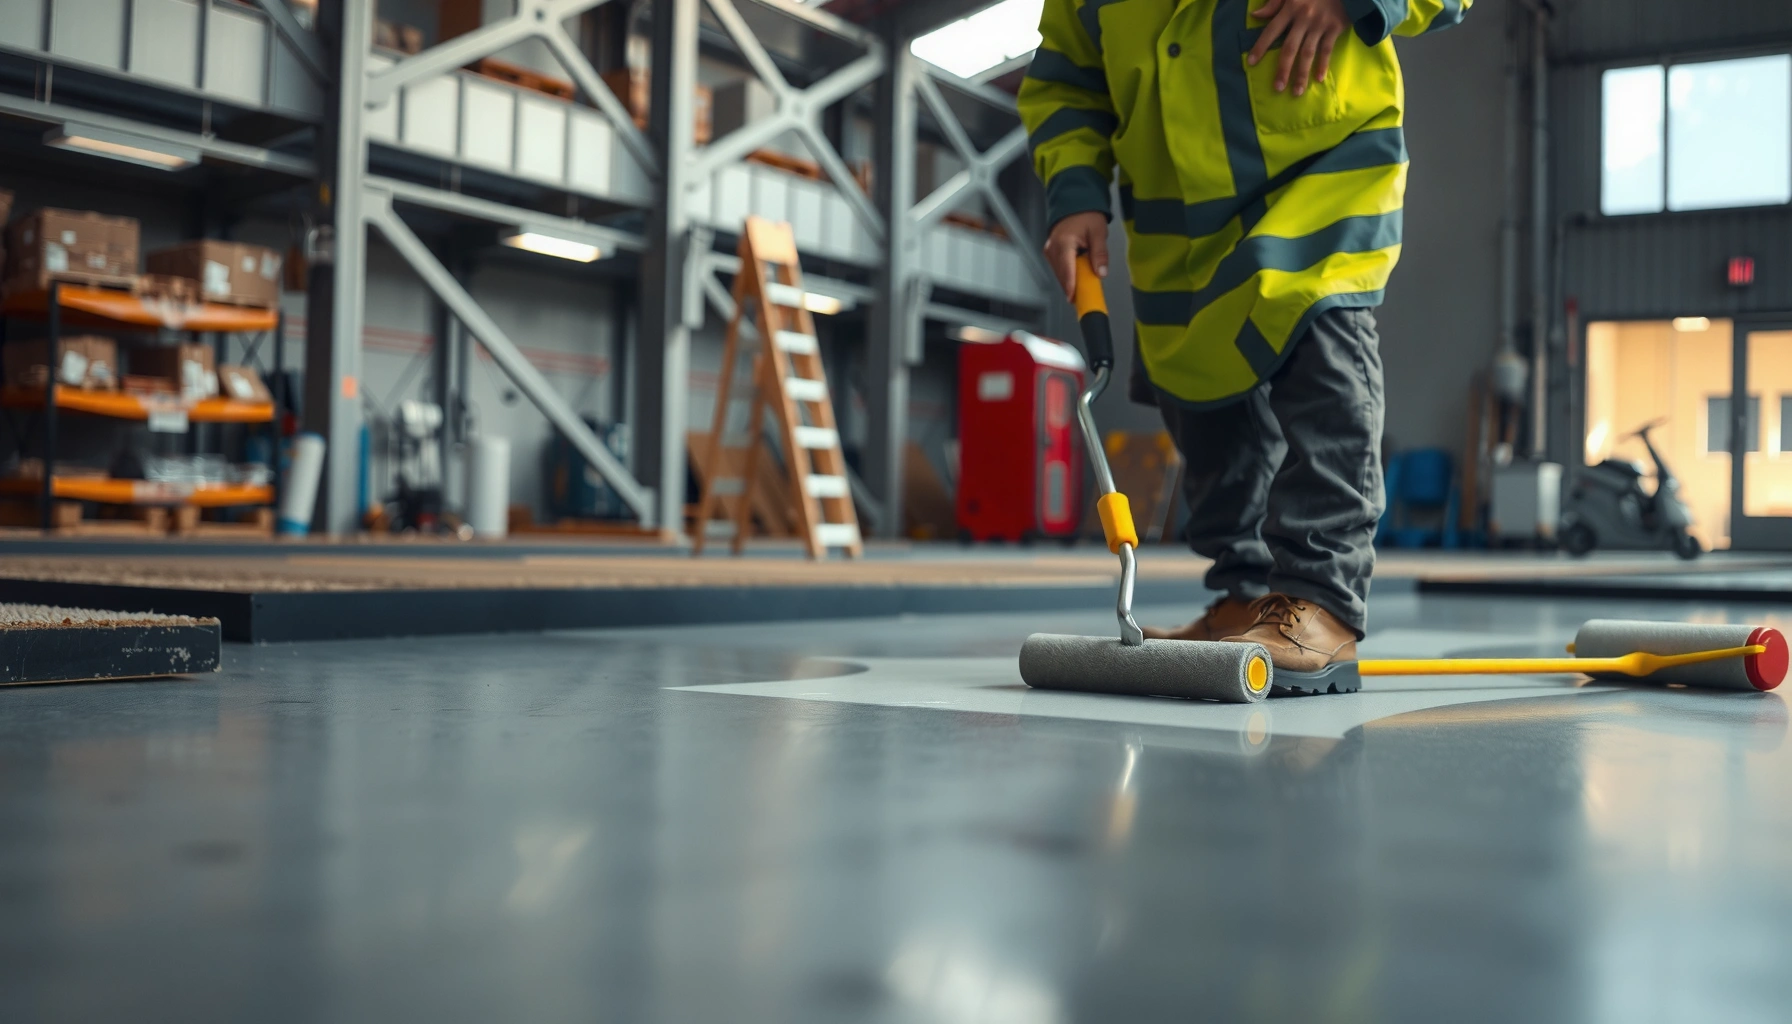
Cure conditions (temperature, humidity, and dust/water exposure) are not “nice-to-haves”; they directly affect final mechanical properties and chemical resistance.
Follow the sequence exactly (example structure)
Most multi-layer systems follow a similar pattern:
1. Priming (if required): improves bond and seals porous substrates
2. Base/binder layers: create the bulk performance layer
3. Broadcasts (if specified): aggregate/grit chips for traction and wear
4. Topcoat(s): chemical resistance, color, UV stability, and finish control
5. Controlled cure: protect the floor from premature exposure
Mixing: match component ratios and batch rules
For epoxy and polyurethane systems:
– Measure components by the manufacturer’s exact ratio (by weight/volume as specified).
– Respect mix time and mixing method requirements (for example, mixing with the correct paddle size and ensuring full side-wall scraping).
For cementitious overlays:
– Use the specified water content (if water is allowed), because too much water can weaken the matrix and increase permeability.
– Mix for the specified duration and use time limits (“pot life”) that prevent retempering or reuse.
Important process note: Don’t “tune” workability by adding water/solvent unless the manufacturer explicitly permits it.
Coverage and thickness: treat them like spec-driven engineering inputs
Even good product can fail if applied too thin or uneven:
– Apply at the specified coverage rate (square meters per kit) and specified thickness (if the system calls for it).
– Use consistent methods (squeegee/trowel/roller) appropriate for the system viscosity and desired profile.
Temperature/humidity during cure
Protect installed areas from:
– rapid temperature swings,
– condensation and high humidity (surface issues),
– washdown/standing water,
– foot traffic, forklift traffic, and point loads before cure milestones.
If your job site cannot maintain stable conditions, adjust your plan (containment, HVAC/heaters/fans where permitted, or schedule changes) rather than rushing recoat or release.
> [ADD: source for your specific system’s recoat window and curing conditions—use the manufacturer installation manual section “Application,” “Mixing,” and “Curing.”]
What Can Go Wrong (and How to Avoid It)
Industrial floors commonly fail due to substrate incompatibility or process-window violations, not because the selected product was inherently “wrong.” The good news is that most failures are preventable when you enforce pre-install checks and strict adherence to mixing, coverage, and cure instructions.
Adhesion failures often originate from contaminated or poorly profiled concrete surfaces, especially when dust or oils remain after cleaning.
Blistering and soft spots typically correlate with incorrect mixing, out-of-window recoat timing, or moisture conditions that prevent proper bonding and curing.
Premature wear or gloss loss usually links back to incorrect broadcast/grit steps, insufficient coverage/thickness, or traffic exposure before full cure.
Common failure modes and how to prevent them
1) Adhesion failure
– Cause: skipping surface prep, leaving oil/dust behind, or applying under unsuitable moisture conditions.
– Prevention: perform the specified cleaning and profiling, and run moisture tests if the manufacturer requires them.
– Reality check: don’t “guestimate” moisture tolerance.
2) Blistering/peeling
– Cause: moisture vapor issues, wrong mix ratio, or recoat/curing windows missed (intercoat chemistry doesn’t develop as designed).
– Prevention: follow batch rules and cure timelines; protect the slab during cure.
3) Soft surfaces
– Cause: incomplete cure due to incorrect mixing, cold/humid conditions, or overextended pot life.
– Prevention: control workspace temperature and use induction/mixing procedures per the datasheet.
4) Slip resistance problems
– Cause: missing broadcast/grit steps, applying broadcast at the wrong rate, or failing to seal or topcoat as specified.
– Prevention: treat traction as part of engineering, not decoration.
Pros/cons at-a-glance (how to choose faster)
If your decision feels stuck, use this parseable tradeoff view:
– Epoxy systems
– Pros: often strong chemical resistance and durable finishes when installed correctly
– Cons: moisture condition and surface profile requirements can be unforgiving; poor prep shows up as early failure
– Cementitious overlays
– Pros: can provide build and leveling; often align with repair and topping specs
– Cons: curing/water management is critical; adhesion can be sensitive to surface condition and primers (per overlay specs)
– Polyurethane topcoats
– Pros: can improve abrasion resistance and finish durability
– Cons: intercoat recoat timing and compatibility with the base layer must be respected
> [ADD: source for “over existing coatings” compatibility policy—quote your chosen manufacturer’s guidance from the installation manual.]
Verdict: A Practical Recommendation
Industrial floor installation is very doable when (1) you assess and profile the concrete properly and (2) you strictly follow the system manufacturer’s installation and cure requirements for mixing ratios, coverage, thickness, and recoat windows. If your site can’t control dust and curing exposure, or you can’t confirm moisture/adhesion requirements, hiring a qualified installer is the safer path—especially for chemically exposed areas, forklift traffic, and high-downtime-risk projects.
Who this advice is best for: facility managers and contractors who can schedule moisture testing (if required), control site conditions during cure, and enforce specification compliance.
Who should skip DIY (or get professional help):
– projects with uncertain moisture behavior,
– slabs with widespread contamination (oils/release agents),
– high-chemical exposure zones where the spec is strict,
– thin systems over questionable substrates.
Reader alignment (epoxy vs. cementitious): based on typical warehouse/workshop requests, many readers start with epoxy coating systems for chemical resistance and a hard wear finish. That said, if your site’s scope is dominated by build/patch/leveling and you have a spec requiring a cementitious approach, your selection likely shifts toward cementitious or polymer-modified overlays.
[ADD: confirm your site’s typical projects (e.g., “most of our past jobs were epoxy coatings” or “we mostly specify cementitious toppings in fleet service bays”) and tailor this paragraph accordingly.]
Quick Checklist (Scan Before You Start)
– [ ] Assess concrete condition: cracks, spalls, contamination, and surface strength
– [ ] Test/confirm moisture needs if the manufacturer requires it
– [ ] Remove old coatings/compounds and clean thoroughly
– [ ] Repair defects using approved methods
– [ ] Profile the slab to the manufacturer’s adhesion requirement
– [ ] Choose a system matched to traffic, chemicals, and slip needs
– [ ] Use exact mixing ratios and follow recoat/coverage/thickness limits
– [ ] Control temperature/humidity during application and cure
– [ ] Plan access/containment so the floor isn’t exposed too early
FAQ
Do I need to test for moisture before installing industrial floors?
Often, yes—many industrial floor systems require moisture checks or specific substrate conditions. [ADD: source for your specific system’s moisture requirement—link/point to the manufacturer spec sheet or installation manual section.]
How important is surface profiling?
Extremely. Adhesion depends on achieving the profile and cleanliness level the flooring manufacturer specifies, not just visual roughness. [ADD: source for required profile method/range.]
Can I install industrial floors over existing coatings?
Sometimes, but only if the existing coating is compatible, well-bonded, and prepared correctly (e.g., removal or profiling as required). If adhesion is uncertain, plan for removal or consult the manufacturer. [ADD: source for “over existing coatings” policy from your chosen manufacturer.]
What’s the biggest reason installations fail?
Most failures trace back to inadequate substrate prep, incorrect mixing ratios, or not meeting cure/recoat windows under the stated environmental conditions. If you’re unsure about any step, follow the system instructions exactly.
Sources
– ASTM F2170 (Standard Test Method for Field Determination of Relative Humidity in Concrete Floor Slabs Using In Situ Probes)
– ICRI Concrete Surface Preparation—Performance Standards (CSP scale guidance)
– ASTM C642 (Standard Test Method for Density, Absorption, and Voids in Hardened Concrete)
– [ADD: Manufacturer installation instructions/spec sheets for the specific industrial floor system you’re discussing—use the “Surface Preparation,” “Application,” “Mixing,” and “Curing” sections from the manufacturer’s manual.]
Industrial floor installations succeed when you treat the slab as part of the engineering system. Assess and prep correctly, select a complete compatible flooring assembly, and execute mixing, coverage, and curing exactly as documented—then you reduce the risk of adhesion failure, blistering, soft spots, and early wear before the floor ever sees real traffic.
Frequently Asked Questions
What is the best way to prepare the subfloor before installing industrial floors?
Start by inspecting the slab for cracks, soft spots, moisture, and flatness issues, then remove paint, dust, grease, and any failing coatings using grinding or shot blasting. Repair cracks and level high/low areas to meet the specified flatness tolerance so industrial flooring will bond correctly. If moisture is a concern, perform a moisture test and address it with an appropriate vapor barrier or primer system before you install the floor coating or system.
How do you choose the right industrial floor system for warehouses, factories, or garages?
Choose based on chemical exposure, impact resistance needs, temperature ranges, and whether the floor must be sanitary or slip-resistant. For heavy-duty traffic, consider concrete polishing, epoxy or polyurethane coatings, or industrial urethane systems depending on abrasion and chemical requirements. If your facility has frequent washdowns, oil exposure, or harsh cleaning chemicals, select a system rated for those conditions and follow the manufacturer’s preparation and thickness requirements.
How do you install epoxy industrial floors step-by-step?
First, grind the concrete to open the pores and remove contaminants, then vacuum thoroughly and apply the correct epoxy primer to achieve proper adhesion. After primer cure, mix and apply epoxy (or a multi-coat system) at the manufacturer’s recommended coverage rate and thickness, adding aggregate or flakes if a textured or non-slip finish is needed. Finally, allow full cure time before opening to traffic, and protect the surface from moisture, chemicals, and premature loads during early curing.
Which surface moisture test methods are used before installing industrial flooring?
Common options include ASTM F2170 (in-situ RH probe) and ASTM F1869 (calcium chloride test) to measure moisture vapor emission and ensure it’s within coating tolerances. These tests help prevent common failures like blistering, peeling, and delamination in epoxy or polyurethane industrial floors. Always follow the flooring system manufacturer’s maximum allowable moisture levels and plan any remediation—such as a vapor barrier primer—before installation.
Why do industrial floors fail, and how can you prevent delamination or cracking?
Most industrial flooring failures come from poor concrete surface prep, incorrect mixing ratios, applying at the wrong thickness, or skipping required primers and moisture mitigation. Cracking can also result from inadequate joint treatment or using a coating that isn’t compatible with thermal movement and substrate conditions. Prevent problems by following a documented installation plan—grind/shot blast, verify moisture and temperature conditions, use correct product sequencing, and respect cure times—so your industrial floor system performs reliably.
📅 Last Updated: October 12, 2026 | Topic: How to install industrial floors? | Content verified for accuracy and freshness.
References
- Google Scholar Google Scholar
https://scholar.google.com/scholar?q=industrial+floor+installation+epoxy+coating+surface+preparation - Google Scholar Google Scholar
https://scholar.google.com/scholar?q=concrete+slab+installation+subbase+vapor+barrier+and+finishing+guide - Google Scholar Google Scholar
https://scholar.google.com/scholar?q=industrial+flooring+installation+procedures+floor+flatness+and+moisture+testing - Concrete slab
https://en.wikipedia.org/wiki/Concrete_slab - https://en.wikipedia.org/wiki/Floor_screed
- Glass ceiling
https://en.wikipedia.org/wiki/Concrete_floor - https://en.wikipedia.org/wiki/Resin_flooring
- https://en.wikipedia.org/wiki/Epoxy_flooring
- https://en.wikipedia.org/wiki/Vapor_barrier
- Silica and Worker Health | Silica | CDC
https://www.cdc.gov/niosh/topics/silica/