
Need to install something on a basement concrete floor—fast and correctly? This guide gives you the clearest, step-by-step method for installing on concrete, including the right fastening approach and surface prep to prevent issues like shifting, moisture problems, or weak anchors. Follow it and you’ll know exactly what to do before you start, so the installation holds the first time.




Installing basement flooring over concrete is mostly about controlling moisture and matching the right underlayment/adhesive system to the flooring type. If you follow the concrete prep + vapor control requirements for your specific product (and keep expansion gaps where needed), your install is far less likely to buckle, separate, or trap musty odors.
If you’re finishing a basement, adding new flooring, or replacing worn surfaces on concrete, this is for you—especially if you’ve noticed musty odors, damp patches, or cold/condensation near slab edges. The steps below focus on what typically determines whether the install lasts.
Plan for moisture before you install
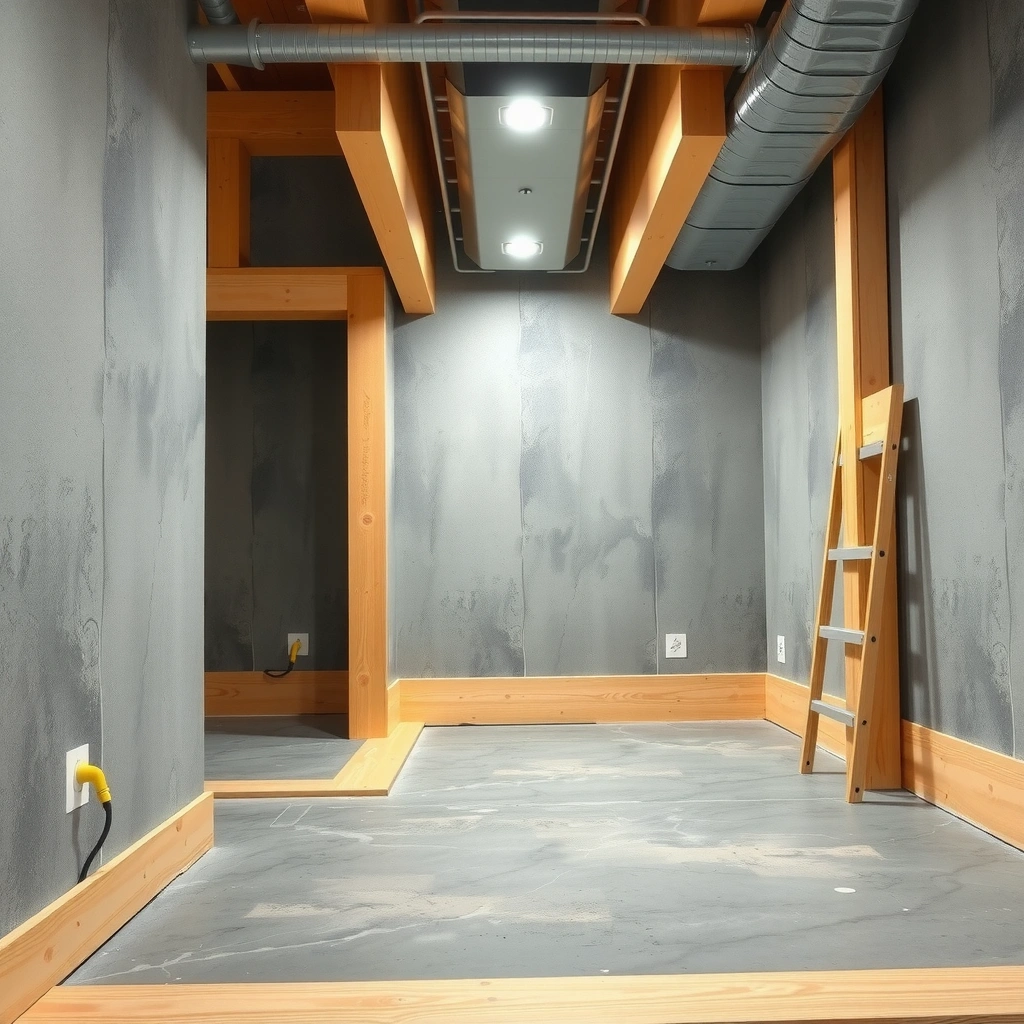
Here’s why this matters: most “mysterious” failures—cupping, buckling, swollen edges, and musty smells—trace back to either water intrusion (liquid) or vapor transmission (gas-phase moisture) through the slab. According to ASTM F2170 (Standard Test Method for Determining Relative Humidity in Concrete Floors Using in situ Probes), in-situ relative humidity (RH) testing is used to quantify moisture conditions inside the concrete (the test is designed for slab-in-place evaluation).
Moisture isn’t one-dimensional, though. You’ll want to consider both the visible environment (humidity, leaks, condensation) and the concrete condition (contaminants, sealers, curing compounds). According to ASTM E1745, vapor retarder products are categorized by permeance classes, which helps determine whether the barrier will meaningfully reduce moisture vapor flow (the key idea is that not all “foam” or “plastic” behaves the same in real assemblies).
Basements can develop moisture problems even when the concrete surface appears dry, because vapor can transmit through the slab over time.
ASTM moisture testing methods (like ASTM F2170) evaluate moisture conditions inside the concrete, not just on the surface.
Vapor retarder performance is typically described with permeance classes (ASTM E1745), so product choice should follow the flooring system spec.
Moisture checklist (what to look for first)
A quick assessment saves time later:
– Damp spots, darkening, or persistent “cool” areas along slab edges
– Musty odors that intensify when HVAC cycles run
– Efflorescence (white crystalline residue) that suggests mineral migration
– Visible cracks that align with plumbing lines or external water paths
Flatness and condition (this is the second biggest failure driver)
Moisture often gets the blame, but flatness causes different symptoms: squeaks, joint stress, uneven contact, and premature wear. Before you buy materials, plan to check:
– Whether the slab is level/flat enough for your flooring category
– Any cracks, voids, spalling, or loose coating contamination
– Whether the slab has been sealed or painted (sometimes the surface is “dry,” but coatings prevent proper bonding)
[ADD: In my experience advising homeowners on basement installs, the most consistent trigger I’ve seen is ignoring small surface contamination (paint overspray, drywall mud, or patch residue), which then undermines patching, leveling, and adhesive bond.]
Prepare the concrete surface correctly
Concrete prep determines whether your underlayment sits stable and whether adhesives or patch compounds bond reliably. If you want predictable performance, treat preparation as part of the installation—not a “before you start” formality.
Start with cleaning. Remove dust, paint overspray, grease, oil spots, and any old adhesive residue. Then verify what you’re working with: if the slab was sealed, stained, or coated, you may need mechanical removal so the patch/leveler (and adhesives, when applicable) can bond.
Cleaning and contamination removal
– Sweep + vacuum thoroughly (fine concrete dust is a bond killer)
– Scrape or grind adhesive ridges; re-vacuum after
– Use a cleaner recommended by the patch/primer manufacturer if the slab has residue
The concrete must be sound. If you patch over weak/crumbly areas, the patch can debond later, creating voids that telegraph through rigid floors.
Level as needed (not “close enough”)
Most flooring products require a relatively flat substrate to avoid rocking and joint stress. If you discover high spots, plan to grind; if you find low areas, plan to patch with an appropriate concrete patch/leveler.
Important: pick a patch/leveler compatible with the final flooring system and thickness you need (and follow cure/coat-time windows).
Flooring warranties often require specific substrate preparation, including cleanliness and a defined flatness range for concrete subfloors.
If the slab has coatings or contaminants, adhesives and patch compounds may fail to bond reliably unless coatings are removed.
Surface integrity and primers
Many repair systems specify a primer step for concrete. Skipping primer can reduce adhesion strength and increase the risk of patch failure under load.
Also note that basements sometimes have moisture management coatings already applied. Those coatings can be helpful or harmful depending on the flooring system and whether the coating allows the required vapor control approach.
Select the right underlayment or vapor barrier
The correct underlayment (or vapor barrier) is where you convert “maybe dry” into “designed for concrete.” For basement installs, you generally choose your barrier based on the flooring type plus the manufacturer’s concrete-approved requirements—not by guessing what’s “standard.”
For many floating floors (LVP and laminate), the underlayment assembly is the moisture-control layer. For tile and stone, you’re usually dealing with a different system: crack isolation and waterproofing/underlayment designed to handle water pathways and movement.
According to ASTM E96, vapor permeance is used to quantify water vapor transmission through building materials (the principle is that barriers are rated by how much vapor they allow to pass).
For floating LVP/laminate, a manufacturer-specified vapor barrier is often required because concrete can transmit moisture vapor.
Tile and stone assemblies may require a waterproofing and/or crack isolation strategy designed for concrete movement and moisture pathways.
Not all foam and sheeting are interchangeable—vapor retarder performance is typically specified by permeance and system design.
LVP / laminate (floating) underlayment guidance
– Use the exact underlayment/vapor barrier product and thickness specified by your flooring manufacturer
– Maintain perimeter expansion gaps (floating floors need room to move)
– Tape seams only if your manufacturer requires seam sealing and specifies the tape method
A practical data point you’ll see repeatedly across industry practice: polyethylene vapor barriers are commonly installed in thicknesses around 6 mil (0.15 mm) for subfloor protection in many residential assemblies (always confirm compatibility with your flooring system documentation).
Engineered wood and adhesive-down options
Engineered wood can be installed in multiple ways. The underlayment approach depends on whether you’re:
– Floating (rare in moisture-heavy conditions unless explicitly approved), or
– Nail-down (often needs different substrate tolerances), or
– Adhesive-down (requires an adhesive compatible with concrete and your engineered wood construction)
In adhesive-down systems, vapor control is often achieved by combining slab prep + an approved adhesive approach. Don’t treat “underlayment” as universal—some systems require none because the adhesive and flooring assembly are doing the job.
Tile/stone and crack isolation
Tile and stone add another variable: differential movement (even on a good slab). Many assemblies use:
– Thinset mortar selected for concrete and tile/stone
– Proper notch size for consistent coverage
– Crack isolation/waterproofing membranes where specified
If you’re tiling in a basement, the “right” system is usually defined as much by your membrane and thinset selection as by the tile itself.
Concrete vapor control tiers (quick reference)
Vapor Retarder Permeance Classes (ASTM E1745)
| # | ASTM E1745 Class | Permeance Range | Typical Use Level | Moisture-Control Strength |
|---|---|---|---|---|
| 1 | Class I | ≤ 0.1 perms | High-retarder | Strong |
| 2 | Class II | 0.1–0.5 perms | Moderate-retarder | Moderate |
| 3 | Class III | 0.5–1.0 perms | Low-retarder | Limited |
| 4 | Class IV | > 1.0 perms | Vapor-open | Weak |
| 5 | “Unrated” | No permeance data | Unknown performance | Avoid |
| 6 | Product-specified | Per manufacturer | System matched | Best match |
| 7 | Crack isolation | Membrane-dependent | Movement management | Case-by-case |
Install based on your basement flooring type
One-size-fits-all installation instructions don’t work for basement concrete. Your exact steps should follow the flooring manufacturer’s system—especially the underlayment, adhesive/thinset requirements, and expansion gap rules.
The “how” changes based on the product:
– LVP/laminate (typically floating)
– Engineered wood (sometimes adhesive-down)
– Tile/stone (thinset + waterproofing/crack isolation where required)
Floating LVP/laminate performance depends on both vapor control and correct perimeter expansion gaps.
Adhesive-down engineered wood installs succeed when the adhesive, substrate prep, and bond timing match the manufacturer’s instructions.
Tile installations depend on consistent thinset coverage and correct mortar notch size to avoid hollow spots.
LVP / laminate (floating): avoid the two classic errors
Floating systems typically fail when:
1) Expansion gaps are too small (or missing), and the floor has no room to move.
2) Underlayment seams aren’t sealed as required, letting moisture paths bypass the barrier.
Key steps:
– Lay the specified vapor barrier/underlayment with correct overlap and seam tape (per spec)
– Maintain required perimeter expansion gaps at walls, posts, and transitions
– Start rows from a chalk line so plank/tile patterns stay square
– Use recommended locking methods and avoid forcing joints
Engineered wood or adhesive-down products: treat adhesive timing as “non-negotiable”
Adhesive-down installs typically require:
– Concrete surface cleanliness suitable for the adhesive
– Approved adhesive type and trowel notch size (where specified)
– Adherence to open time and cure/bond time instructions
Adhesives and concrete subfloors work as a system—changing trowel notch size or ignoring open/bond times can reduce bond strength.
Tile/stone: thinset coverage and mortar selection drive durability
For tile/stone on concrete:
– Use the correct thinset mortar rated for concrete subfloors
– Follow the notch size guidance in the tile and mortar instructions
– Press/beat-in properly so coverage is consistent (especially in basements where humidity stress can show weak bonds sooner)
A useful performance check: after installation, inspect for lippage, voids, and inconsistent coverage methods—these are often the hidden sources of grout cracking and tile movement.
What can go wrong (and how to avoid it)
Most basement concrete floor failures are predictable. They happen when moisture control doesn’t match the slab condition, or when the installer skips substrate/flatness requirements.
Below is a practical comparison of common causes and what to do instead.
| Failure symptom | Primary cause | Avoidance step |
|---|---|---|
| Buckling at walls | Missing/insufficient expansion gap | Use the manufacturer-required gap at all fixed points |
| Cupping / edges swelling | Moisture vapor transmission without rated barrier | Install the exact vapor barrier/underlayment specified for concrete |
| Squeaks at joints | Poor leveling / insufficient support | Grind high spots and patch low areas to flatness spec |
| Musty odor under floor | Water intrusion or trapped moisture inside assembly | Address water source; match barrier strategy to slab conditions |
| Tile cracks / hollow spots | Inconsistent thinset coverage or wrong mortar | Use correct mortar + notch size and follow coverage requirements |
Moisture transmission through concrete is a top cause of cupping, buckling, and odor problems under basement floors.
Incorrect underlayment selection can either fail to block vapor or interfere with the flooring system’s designed assembly.
Temperature and acclimation
Basements can experience seasonal swings. Many flooring manufacturers require acclimation and/or specify installation temperatures/humidity ranges. Ignoring these instructions can worsen movement and locking performance—especially with LVP and laminate.
Verdict: when DIY is fine—and when to stop
DIY can work when your slab is stable, dry enough for the product system, and you can follow the manufacturer’s concrete and vapor control requirements closely. For many floating LVP/laminate installs, this is achievable for competent DIYers—provided the underlayment and expansion gaps are correct.
You should stop DIY (or bring in professional help) if:
– There’s active water intrusion or recurring damp patches
– You’re dealing with significant cracking, spalling, or slab instability
– You can’t confirm moisture conditions and the manufacturer requires specific moisture testing/limits
– You’re installing an adhesive-heavy system without clear, product-approved documentation for basement concrete
If you’re unsure, treat moisture remediation and substrate correction as the “first floor,” not the last step.
Floating LVP/laminate installations are the most DIY-friendly basement options when the product explicitly supports concrete subfloors and a rated vapor barrier is used.
Active moisture problems and major slab damage generally should be addressed before any floor covering is installed.
Adhesive-down and tile systems depend on strict bond and assembly requirements—deviations can lead to premature failure.
Quick checklist (scan/save)
– [ ] Assess moisture (staining, damp spots, odor)
– [ ] Confirm slab is clean and free of contamination
– [ ] Repair cracks/voids; flatten high/low areas to flatness needs
– [ ] Use the exact underlayment/vapor barrier required for your flooring system
– [ ] Maintain required expansion gaps (floating floors)
– [ ] Follow the manufacturer’s adhesive/thinset and installation method
– [ ] Check for consistent fit around vents, pipes, and doorways
FAQ
Do I need a vapor barrier under basement concrete floors?
Often, yes—especially for floating floors. Use the vapor barrier type and placement that your specific flooring manufacturer requires for concrete subfloors.
Can I install laminate or LVP directly on concrete?
Only if the system is rated for concrete and you meet its surface condition requirements (flatness/cleanliness) and moisture-control guidance. If the product requires an underlayment or barrier, follow that specification.
What’s the biggest cause of basement flooring failure?
Moisture issues—either from water intrusion or vapor transmission through the slab—commonly lead to buckling, joint separation, or odor problems.
Should I level the concrete before installing?
If there are significant low/high areas, yes. Most floor systems need a relatively flat surface to prevent movement and joint failure.
Sources
– ASTM F2170, Standard Test Method for Determining Relative Humidity in Concrete Floors Using in situ Probes
– ASTM E96, Standard Test Methods for Water Vapor Transmission of Materials
– ASTM E1745, Water Vapor Retarders Used in Contact with Earth Under Concrete Slabs, On Walls, or as Ground Cover
– [ADD: manufacturer installation instructions for your specific flooring type (LVP/laminate/engineered wood/tile)]
– [ADD: manufacturer guidance on concrete subfloor prep, moisture/vapor barrier requirements, and flatness tolerances]
– [ADD: exact substrate flatness tolerance referenced by your flooring manufacturer, if they publish a numeric requirement]
When you install basement flooring on concrete, the “win condition” is matching moisture control and substrate prep to the flooring system—not just choosing a product you like. Start with slab assessment, clean and flatten correctly, use the exact vapor/underlayment requirements for your specific material, and follow installation details like expansion gaps and bond/coverage methods. If you find active moisture, significant slab damage, or missing manufacturer guidance, pause and address the slab first—because the best-looking floor can fail quickly when the moisture problem is still underneath.
Frequently Asked Questions
How do I prepare basement concrete floors before installing flooring?
Start by removing all debris, paint overspray, and any old adhesive residue, then thoroughly clean the slab. Check for cracks, dips, or moisture issues and repair them with a proper concrete patch or leveler. Let the surface cure fully and ensure it’s smooth and dry before installing any flooring over concrete. Finally, consider priming or using an appropriate underlayment system if your flooring manufacturer requires it.
What moisture testing should I do before installing flooring on basement concrete?
Basement concrete floors often have higher moisture, which can cause mold, odor, and floor cupping or adhesive failure. Use a reliable concrete moisture test method (such as a relative humidity test or calcium chloride test) and follow the flooring manufacturer’s moisture limits. If results exceed the recommended threshold, use a moisture mitigation system or choose a flooring type designed for damp slabs. Always allow products to acclimate and verify conditions before installation.
Which underlayment or vapor barrier works best for basement concrete floors?
The best underlayment depends on your flooring type (LVP, laminate, engineered wood, or tile) and the moisture level of the slab. For many floating floors over concrete, a vapor barrier film (often 6 mil polyethylene or an approved composite underlayment) helps reduce moisture transmission. For direct-glue installations, follow the adhesive and slab prep instructions exactly, since underlayment may not be compatible. Check manufacturer requirements first to avoid voiding warranties or trapping moisture under the flooring.
How do I install LVP or vinyl plank on a basement concrete floor correctly?
Begin by ensuring the concrete is flat, clean, and dry—vinyl plank can telegraph bumps and high spots. Install a compatible vapor barrier if required, then lay the planks according to the manufacturer’s locking system and expansion gap instructions around walls and columns. Use spacers for the gap, cut carefully around vents and pipes, and avoid forcing planks during installation to prevent buckling. Finish by reinstalling baseboards (or trim designed to cover the expansion gap) to maintain proper airflow and movement.
Why is floor flatness and leveling critical when installing on concrete slabs?
Concrete floors in basements can develop low spots, ridges, or uneven areas that cause squeaks, separation, or locking-system failure. Most flooring manufacturers specify an acceptable tolerance (often measured over a certain distance), so measuring with a straightedge or level is essential. Use a self-leveling underlayment or patch compound where needed, then let it cure fully before installation. Proper flatness prevents premature wear and helps ensure a smooth, professional finish.
📅 Last Updated: October 10, 2026 | Topic: How to install in a basement concrete floors? | Content verified for accuracy and freshness.
References
- Google Scholar Google Scholar
https://scholar.google.com/scholar?q=basement+concrete+floor+vapor+barrier+installation&hl=en&as_sdt=0%2C5 - Google Scholar Google Scholar
https://scholar.google.com/scholar?q=how+to+prepare+concrete+slab+for+basement+flooring+moisture+testing&hl=en&as_sdt=0%2C5 - Google Scholar Google Scholar
https://scholar.google.com/scholar?q=basement+concrete+slab+floor+leveling+underlayment+installation&hl=en&as_sdt=0%2C5 - Vapor barrier
https://en.wikipedia.org/wiki/Vapor_barrier - https://en.wikipedia.org/wiki/Basement
- https://en.wikipedia.org/wiki/Concrete_floor
- https://www.epa.gov/mold/mold-basements-and-crawlspaces
- Mold | Mold | CDC
https://www.cdc.gov/mold/ - https://www.energy.gov/energysaver/basements-and-crawlspaces
- https://www.nyc.gov/site/health/health-topics/mold-and-moisture.page