
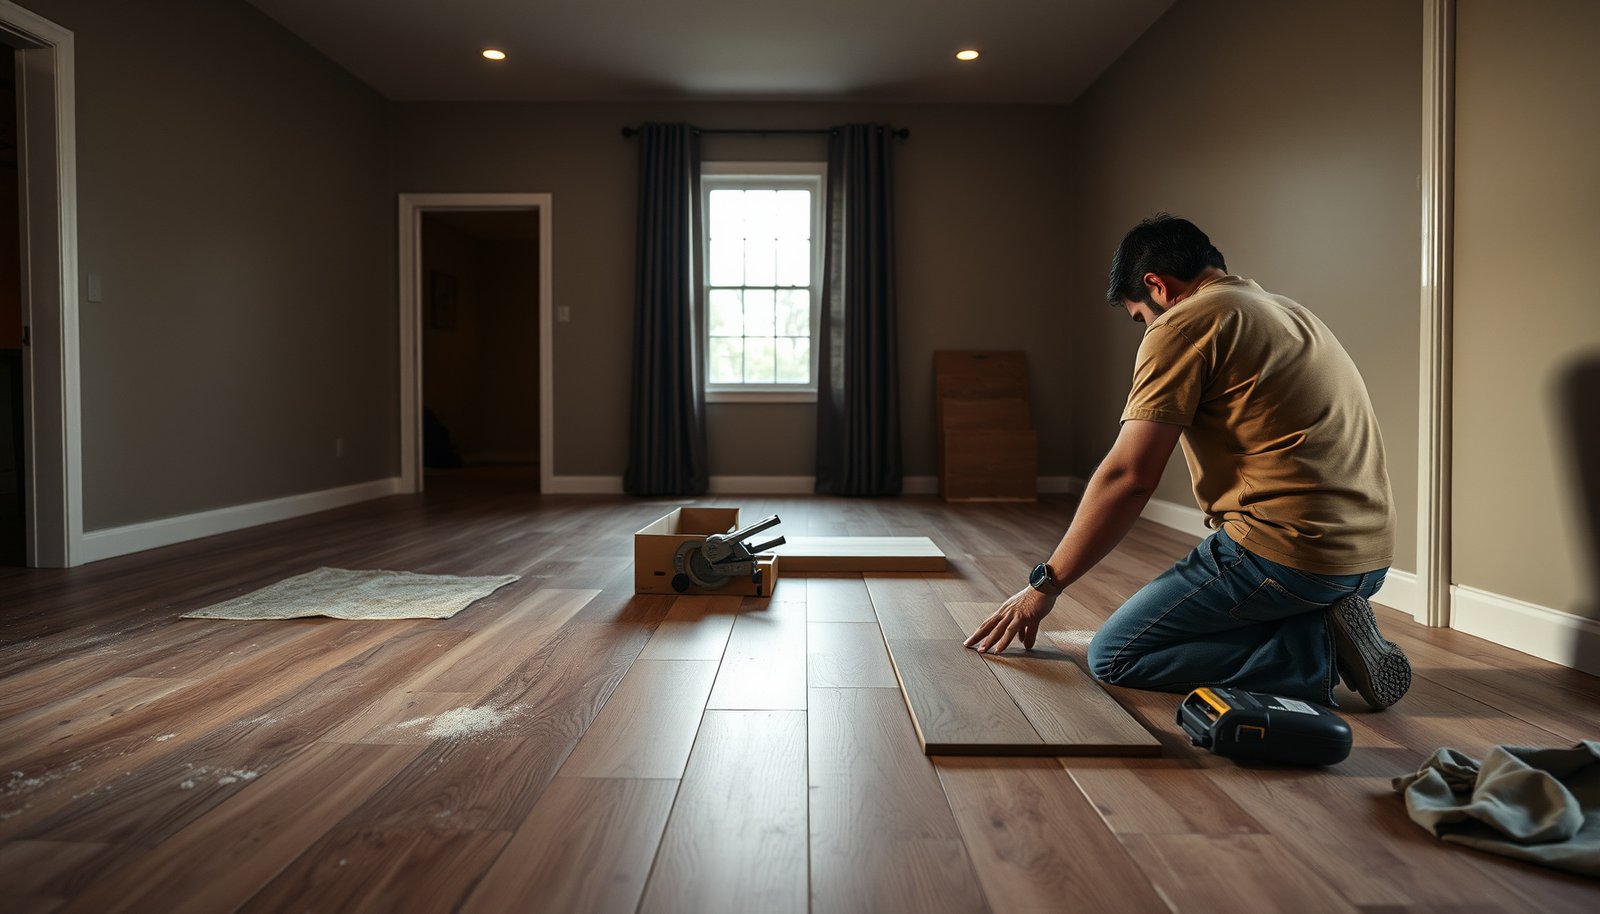

Follow these step-by-step instructions to install hardwood floors in a rental property with minimal downtime and maximum durability. You’ll get a clear, practical walkthrough—from checking subfloor and moisture levels to choosing the right underlayment and nailing or stapling boards—so the install holds up under real tenant use. By the end, you’ll know exactly what to do in the order that prevents the most common failures and costly rework.


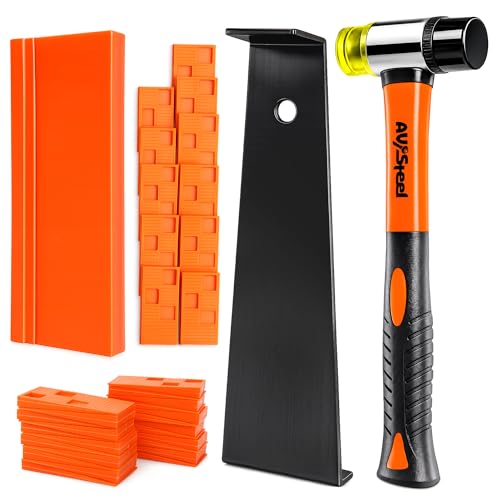

If you want hardwood floors that hold up in a rental, the best approach is to follow the flooring manufacturer’s installation instructions closely and focus hard on subfloor flatness and moisture control before you lay any planks. Plan for quick, clean installation (and easy maintenance expectations) so you don’t end up with gaps, squeaks, or finish damage after tenants move in. You’ll learn the exact order of operations—from prep to installing to protecting the floor—so you can do it right the first time.
If you’re a tenant-friendly DIYer, a landlord managing turnovers, or a property manager planning upgrades between leases, this guide is for you. It’s especially useful when you need a durable result, predictable timing, and fewer surprises during install and after move-in.
Plan the install for a rental (what’s different)
Planning is where rental installs succeed or fail because jobsite conditions and timelines don’t forgive shortcuts. Here’s the practical difference: you’re not just installing flooring—you’re building a predictable system that survives seasonal movement, turnover traffic, and landlord warranty requirements (as of 2026).
Most hardwood warranties require installation to the manufacturer’s specified moisture testing, underlayment/vapor barrier, and acclimation steps—skipping them can void coverage.
Wood floors perform best when indoor relative humidity is kept within a controlled range during and after installation.
Subfloor flatness is a leading driver of squeaks and finish failures in multi-tenant housing.
Choose the right “hardwood” type for rental realities: solid vs. engineered
For rentals, engineered hardwood is often favored because it’s typically more dimensionally stable than solid hardwood across normal seasonal swings. That stability matters in properties where tenants may run HVAC differently year-round, open windows, or use humidifiers/dehumidifiers inconsistently. Solid hardwood can still work, but you need tighter moisture/flatness control and a plan for what happens when tenants don’t cooperate.
What to confirm before you buy (not after):
– Whether the product is rated for your subfloor (plywood/OSB vs. concrete slab).
– Whether it’s approved for the room’s humidity pattern (basements, slab-on-grade, and sun-facing rooms are common problem zones).
– Whether the installation method you’re using matches the product’s warranty (nail-down/staple-down/glue-down/click-lock).
Align the flooring system with the lease/turnover timeline
Rental work is schedule-driven. Nail-down and staple-down installations can be fast, but only if demo, leveling, and underlayment prep are already planned. Glue-down systems require time for adhesive conditions and cure behavior; click-lock floats still require underlayment and careful edge/transition detailing.
Practical turnover planning tasks:
– Undercut door jambs before planks lock in place (so you don’t fight trim later).
– Remove or protect baseboards and reinstall later only if your plan accounts for hidden gaps and thickness changes.
– Decide early whether you’ll do transitions at doorways (best for visual alignment and stability).
Get the landlord/property approval upfront
If you’re a DIYer, get approval in writing for anything that affects longevity: repairs, underlayment choice, and finish plan. Manufacturers often tie warranty coverage to specific documented steps—especially moisture/vapor testing, floor acclimation, and the approved underlayment or vapor barrier system.
Gather materials and tools (and don’t skip specs)
Gathering the right materials is your speed multiplier—and avoiding the wrong underlayment/adhesive is your insurance against warranty problems. The goal is simple: match every component to the specific installation method your flooring product calls for.Installation method (nail-down, staple-down, glue-down, or click-lock) determines the required underlayment/vapor barrier approach and fastening pattern.
For wood flooring over concrete slabs, manufacturers typically require a vapor-control layer when their warranty is to be preserved.
Use the exact installation method for your product
Rental installs get expensive when someone “improvises” (for example, using a nail gun on a product that requires glue-down or a controlled vapor system). Use the product’s required method and fastening strategy exactly.
Tool readiness checklist (so you don’t pause mid-row):
– Measuring tools (tape, square, chalk line)
– Spacers/rip guides for expansion gaps
– Flooring saw (and correct blade for hardwood/engineered thickness)
– Flooring nailer or stapler (if required)
– Pull bar and tapping block (for click-lock or tongue-and-groove systems)
– PPE: eye and hearing protection, proper dust handling for cutting
Confirm what your product requires for underlayment and vapor management
Concrete and slab-on-grade setups are where “it looked fine during install” becomes “it failed after move-in.” For slab installations, vapor management is not optional unless the manufacturer explicitly states otherwise for that product.
Moisture testing and vapor control requirements over concrete slabs are commonly specified in flooring manufacturer instructions and can be tied directly to warranty eligibility.
Have essentials ready before you start
Rentals also add practical constraints: you may have tenants living nearby, limited access time, and a need to keep dust down. Plan for cleanup equipment (shop vac, dust bags, and a way to contain debris) so installation ends with a floor that’s safe to walk on and ready for turnover.
Prep the subfloor like your “durability insurance”
Subfloor preparation is the most reliable predictor of long-term performance in rental housing. If you get flatness and moisture wrong, the failure often shows up later as squeaks, ridging, and separation—problems that are hard to fix without major disruption after tenants move in.
Subfloor flatness and structural soundness are key to preventing squeaks and premature plank failure in hardwood flooring installations.
Moisture imbalance can drive cupping/bowing and finish and adhesive failures, so moisture assessment must happen before installing planks.
Make sure the subfloor is structurally sound and properly cleaned
A rental turnover often leaves surprises: old patch compounds, loose fasteners, debris, warped patches, and lingering adhesive residue. Scrape and clean thoroughly, then address any weak spots.
Also confirm flatness tolerances using a straightedge. NWFA guidance and manufacturer specs are typically aligned on the principle: if the subfloor isn’t flat enough, even a premium hardwood product can fail.
Hardwood Rental Install Compliance Targets (Commonly Cited in Industry Guidance)
| # | Compliance target | What you measure | Typical acceptance parameter | Installation impact |
|---|---|---|---|---|
| 1 | Indoor relative humidity range | RH% | 35%–55% | ★★★★★ |
| 2 | Wood moisture content equilibrium | Wood MC% | Within jobsite equilibrium (target set by manufacturer/NWFA method) | ★★★★★ |
| 3 | Subfloor flatness (rule-of-thumb) | Straightedge deviation | ≤ 3/16 in over 10 ft | ★★★★☆ |
| 4 | Slab vapor emission (test standard) | lb/1000 sq ft/24 hr | ≤ 3 (typical adhesive flooring threshold) | ★★★★★ |
| 5 | Slab RH reading (test standard) | % RH (in-situ) | ≤ 75% (common epoxy/adhesive-style threshold) | ★★★★☆ |
| 6 | Acclimation condition | Moisture content match | Until plank moisture stabilizes per manufacturer | ★★★★☆ |
| 7 | Expansion gap allowance | Edge clearance | As specified by the flooring manufacturer | ★★★★☆ |
Note: Always treat the flooring manufacturer’s numbers as controlling—use these as common industry targets when building a rental install plan. See NWFA wood flooring guidance and relevant ASTM moisture testing standards in the Sources section below.
Address moisture issues before install
In rentals, moisture failure often starts at the subfloor stage: water intrusion, high ambient humidity, or slab vapor emissions that aren’t managed with the correct vapor-control system. Fix it now, not after you’ve installed thousands of dollars in material.
If the space is on a concrete slab (especially slab-on-grade or below grade), moisture testing isn’t just a checklist item—it’s what determines whether you need a vapor barrier, an approved adhesive system, or a moisture-mitigation plan.
Remove what can interfere with the flooring thickness and expansion needs
To undercut trim and maintain expansion gaps, your prep should include removal of:
– Underlayment remnants that compress later
– Damaged layers or loose patch material
– Anything preventing proper undercutting/clearances around doorways and fixed cabinets
Install hardwood planks the right way (step order matters)
Installing in the correct order prevents the classic rental problems: crooked first rows, inconsistent spacing, and transitions that fail under seasonal movement. The best approach is to start clean, square, and fully aligned, then follow the product’s fastening/gluing rules exactly.
Acclimation is used to reduce the risk of shrinkage/expansion after installation, which can otherwise show up as gaps in service.
First-row straightness matters because subsequent rows “lock in” the alignment; correcting early errors later is difficult without teardown.
Expansion gaps at walls and fixed edges are intended to give wood flooring room to move with humidity changes.
Acclimate the flooring, then lay out the room to minimize waste
Start by acclimating planks per the manufacturer instructions. In rental conditions—where temperature and humidity may fluctuate—you want the wood to reach a jobsite moisture equilibrium before it becomes “part of the building.”
Next, do a dry layout:
– Estimate waste based on plank pattern and room complexity (angles, closets, and multiple doorways).
– Decide how you’ll blend color variation and which direction planks will run.
Start planning the “first rows” carefully
In my experience coordinating rental turnovers (limited-access rooms, fast approvals, and tight schedules), the earliest rows are where teams most often cut corners—then spend extra time later trying to hide crooked edges.
Plan before you start fastening:
– Confirm your starting line is square.
– Maintain consistent spacing for expansion.
– Pre-plan how you’ll transition at thresholds and doorways.
Follow the fastening/gluing method exactly
This is not a “close enough” step. Nail/staple placement, adhesive type, and adhesive coverage/flash rules must match the manufacturer instructions for that specific product.
– Nail-down/staple-down: Use the specified fastener type, length, and edge/field spacing.
– Glue-down: Use approved adhesive and follow trowel/coverage and cure expectations.
– Click-lock (floating): Ensure the subfloor flatness and underlayment system match the product’s requirements.
Maintain required expansion gaps and manage transitions
Rental floors see edge pressure: baseboards get hit, furniture gets dragged, and tenants notice squeaks and movement. Expansion and transitions prevent damage and maintain a clean look.
Transitions you should plan for:
– Doorways and thresholds (often need clearances and trim approaches)
– Vents and piping penetrations (use the manufacturer’s hole/fit guidance)
– Fixed cabinets or built-ins (don’t trap planks—follow system rules)
Solid vs. engineered vs. click-lock in rentals (quick decision)
If you want the fastest way to select the right system for your rental, here’s a practical comparison based on the typical requirements manufacturers place on moisture stability and installation method.
| Flooring system | Best rental fit when… | Common constraints |
|---|---|---|
| Solid hardwood | The subfloor is consistently dry/flat and you can manage humidity tightly | Movement risk increases if indoor RH swings; fastening typically requires wood subfloor conditions |
| Engineered hardwood | You need stability across typical indoor humidity changes | Must still follow underlayment/vapor and method-specific rules |
| Click-lock (often engineered) | You need low downtime between turnover windows | Requires very flat subfloor and correct underlayment; edge/transition detailing is critical |
What can go wrong in rentals (and how to avoid it)
Rental flooring issues usually come from predictable root causes, not random luck. If you track the failure back to moisture, flatness, or installation-method mismatch, you can avoid many of the problems before they ever reach tenants.
Gaps in wood flooring are commonly linked to moisture-related movement and missing or incorrect acclimation/expansion-gap practices.
Squeaks are often caused by insufficient subfloor prep and inadequate fastening into the correct substrate.
Gaps or movement
This typically happens when:
– The floor wasn’t acclimated properly.
– Jobsite humidity drifted beyond what the wood flooring system can handle.
– Expansion requirements were ignored, especially at edges under baseboards and at fixed objects.
Rental reality check: Even if you install correctly, tenants control humidity behavior through HVAC habits.
Squeaks and uneven feel
Squeaks commonly point to one or more of the following:
– Subfloor not within flatness tolerance
– Loose subfloor layers or inadequate fastener engagement
– Fasteners used in the wrong location (or not at the correct spacing)
Finish damage during turnovers
Finish damage shows up fast when:
– Debris and dust aren’t cleaned properly before protective products are applied
– Harsh cleaners are used during the first weeks
– Tenants walk on the floor before it’s ready per manufacturer instructions (particularly after adhesive or finish work)
Moisture-related problems
Moisture failures are the most expensive rental category because they can look “fine” during install and then degrade:
– Basements and slab-on-grade spaces require rigorous vapor control and testing.
– Concrete slabs can emit moisture that must be managed with the correct vapor-control approach for your flooring system.
Warranty surprises
Many warranties require strict adherence to installation and moisture testing procedures. A common rental mistake is using “the right general idea” while missing one required step—often the one that determines warranty validity.
Verdict: DIY is possible, but rentals add risk
DIY can work in rentals when the subfloor and moisture conditions are already favorable and the product instructions are truly DIY-friendly. The risk increases sharply when moisture/vapor control is uncertain, when leveling is required, or when warranty compliance is hard to document—especially between leases.
DIY installation is most successful when the installer can meet the manufacturer’s exact moisture, underlayment, and fastening/gluing requirements.
In rentals, the most costly DIY errors tend to appear after move-in, when humidity changes and heavy traffic expose installation weaknesses.
Worth doing yourself if
– The subfloor is already in good shape and clean.
– You’re installing a product with clear, step-by-step instructions that match your method and environment.
– You can control timing so the floor isn’t left exposed to uncontrolled humidity or rushed into tenant move-in.
Downsides / risks
– Moisture mistakes and flatness errors can turn into gaps, squeaks, and finish failures months later.
– Rental schedules can pressure shortcuts—especially around acclimation and cure times.
Skip DIY (hire a pro) if
– The subfloor needs major leveling/repairs.
– You suspect moisture issues, especially around slab edges, crawlspace boundaries, or below-grade rooms.
– You’re on a concrete slab without confident vapor control and documentation.
– You need help verifying warranty-compliant steps (including moisture test methods, acceptable conditions, and required underlayment/vapor systems).
Plan for maintenance realities
Even the best install needs a tenant-friendly maintenance plan:
– Provide a simple cleaning routine (what to use, what to avoid).
– Explain why floor protection matters during moves (felt pads, doormats, and controlled traffic).
– Don’t assume the floor is “forgiving”—hardwood will reflect poor handling.
Quick rental-floor checklist (scan/save)
| Step | Quick check |
|---|---|
| Product + method | Correct install type (nail/staple/glue/click) and required underlayment/vapor barrier |
| Subfloor | Clean, stable, and flat within the manufacturer’s tolerance |
| Moisture | Moisture conditions verified and corrected as needed |
| Acclimation | Floor acclimated per manufacturer instructions |
| Layout | First rows straight; plan transitions and waste |
| Install | Fastening/gluing done exactly per product specs |
| Expansion | Proper gap/edge clearance maintained |
| Turnover readiness | Clean-up done; floor ready for traffic and tenant move-in per instructions |
Sources:
– National Wood Flooring Association (NWFA) installation guidance for hardwood flooring—cite the specific page/section you’re following
– Flooring manufacturer installation instructions and warranty document for the exact product type you’re installing (solid nail-down / engineered / click-lock; include required underlayment and moisture guidance).
– ASTM standards referenced for wood flooring moisture testing/installation practices (use only if your project notes specifically call them out).
Bottom line: successful hardwood installs in rentals depend on three fundamentals—accurate planning for the turnover timeline, strict moisture/flatness preparation, and installation that matches the exact manufacturer method. If you treat those as non-negotiable and protect the finished floor during move-in, you’ll dramatically reduce the chance of gaps, squeaks, and warranty headaches after tenants take over.
Frequently Asked Questions
What should I know before installing hardwood floors in a rental property?
Start by confirming your lease terms and getting written permission from the landlord, since many rentals require specific floor types, finishes, and installation methods. Measure the space, check the subfloor condition, and confirm whether moisture levels are suitable for hardwood flooring installation. Also plan for furniture removal, noise, and debris so you can complete the project with minimal tenant disruption.
How do I choose the right hardwood flooring for a rental?
For rentals, consider more resilient options like engineered hardwood or prefinished hardwood because they handle seasonal changes better and speed up installation. Look for durable finishes (like aluminum oxide coatings) and wear layers that resist dents and scratches from daily use. If the property sees pets or high traffic, prioritize thicker wear layers and flooring that can be refinished or repaired later with less hassle.
How do I install hardwood floors over a concrete slab in a rental?
Use a moisture barrier designed for slab installations and verify the concrete meets the manufacturer’s moisture requirements. Many systems require an adhesive or a specific underlayment/adhesive combination—always follow the hardwood flooring installation instructions. Proper acclimation is crucial, and you should address any uneven spots with leveling compounds before you begin laying hardwood planks.
What’s the best way to minimize damage and security deposit risk?
Use a method that preserves the subfloor and reduces the chance of adhesive failure or permanent damage, such as nail-down with the correct underlayment (when allowed) or a floating engineered hardwood approach. Install expansion gaps around walls and fixtures, and use protective pads and recommended cleaners to prevent scratches and finish wear. Keep thorough documentation, including photos during installation and any maintenance tips, to help with a smoother move-out inspection.
Which installation method is best for rental properties: nail-down, glue-down, or floating?
Nail-down can provide a solid, long-lasting hardwood flooring installation when the subfloor is suitable and the landlord permits it. Glue-down is often used for stability on certain subfloors but can be harder to remove and may risk damage if future repairs or floor replacement are needed. Floating engineered hardwood is commonly favored in rentals because it can be less invasive and offers easier future replacement, as long as the subfloor is properly prepared and flat.
📅 Last Updated: October 17, 2026 | Topic: How to install hardwood floors in a rental property? | Content verified for accuracy and freshness.
References
- Wood flooring
- Lead Renovation, Repair and Painting Program | US EPA
- https://www.hud.gov/program_offices/healthy_homes/lead
- https://www.cdc.gov/nceh/lead/default.htm
- Lead – Overview | Occupational Safety and Health Administration
- Silica, Crystalline – Overview | Occupational Safety and Health Administration
- https://scholar.google.com/scholar?q=how+to+install+hardwood+floors+subfloor+moisture+acclimation Google Scholar
- https://scholar.google.com/scholar?q=nail-down+engineered+hardwood+floor+installation+guidelines Google Scholar
- https://scholar.google.com/scholar?q=hardwood+floor+installation+lead+safe+work+practices+rental+property Google Scholar


